Corsair H115I Schnellstartanleitung
Vorschau ausblenden
Andere Handbücher für H115I:
- Bedienungsanleitung (136 Seiten) ,
- Bedienungsanleitung (134 Seiten) ,
- Bedienungsanleitung (18 Seiten)
Quicklinks
corsair.com
support@corsair.com
EMAIL:
facebook.com/corsairmemory
FACEBOOK:
BLOG:
corsair.com/blog/
USA and CANADA: (510) 657-8747 | INTERNATIONAL: (888) 222-4346 | FAX: (510) 657-8748
47100 Bayside Parkway • Fremont • California • 94538 • USA
© 2015 Corsair Components, Inc. All rights reserved. Corsair and the sails logo are registered trademarks, and Corsair is a trademark
in the United States and/or other countries. All other trademarks are the property of their respective owners. Product may vary slightly from those pictured.
Document Number: 49-001428 rev AA
forum.corsair.com
FORUM:
twitter.com/corsairmemory
TWITTER:
H110i GTX PAGE:
corsair.com/H110iGTX
QUICK START GUIDE
GUIDE DE DÉMARRAGE RAPIDE
SCHNELLSTARTANLEITUNG
GUÍA BREVE DE INICIO
快速入门指南
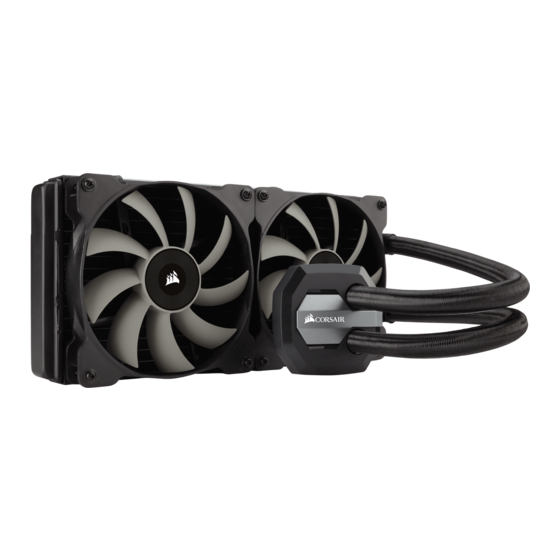
EXTREME PERFORMANCE LIQUID CPU COOLER
H115i
TM

Verwandte Anleitungen für Corsair H115I


Inhaltszusammenfassung für Corsair H115I
- Seite 1 EXTREME PERFORMANCE LIQUID CPU COOLER © 2015 Corsair Components, Inc. All rights reserved. Corsair and the sails logo are registered trademarks, and Corsair is a trademark in the United States and/or other countries. All other trademarks are the property of their respective owners. Product may vary slightly from those pictured.
- Seite 2 Note: The H115i comes with Intel mounting bracket pre-installed on the pump for quick installation. Remarque : pour une installation plus rapide, le support de fixation Intel est déjà monté sur la pompe du dissipateur H115i. Hinweis: Beim Hochleistungsprozessorkühler H115i ist die Intel-Montagehalterung bereits auf der Pumpe vorinstalliert und ermöglicht so eine besonders schnelle Montage.
- Seite 3 Installing the Intel Backplate Installation de la plaque arrière Intel • Installation der Intel-Rückwand Instalación de la placa de soporte para Intel • Intel 安装Intel背板 LGA 1366 • For LGA 115X installation, slide the backplate • Para instalación en LGA 115X, deslice la placa de soporte pins inside (figure 1).
- Seite 4 Installing the Intel Stando Screws Install the Fans and Radiator Installation des vis d'entretoise Intel • Installation der Intel-Abstandhalter Installation des ventilateurs et du radiateur • Lüfter und Kühler einbauen Instalación de los tornillos del separador para Intel • Intel Instale los ventiladores y el radiador •...
- Seite 5 Installing the Pump Unit Connect Power to the Fans and Pump Installation de la pompe • Montage der Pumpe • Instalación de la unidad de bomba Branchement des ventilateurs et de la pompe à l'alimentation • Lüfter und Pumpe anschließen •...
- Seite 6 将泵机连接至USB接头 Using the included Corsair Link USB cable, ™ attach pump unit to a motherboard USB header. Utilisez le câble USB Corsair Link ™ inclus pour brancher x8 LONG FAN SCREWS x4 LGA 115X / 1366 STANDOFF x4 LGA 2011/2011-3 STANDOFF la pompe à...
- Seite 7 Installing the AMD Stando Screws Installation des vis d'entretoises AMD • Installation der AMD-Abstandhalter Instalación de los tornillos del separador para AMD • 安装AMD隔架螺丝 • Remove the stock AMD top mounting • Retire los soportes de montaje superiores de AMD de bracket(s) shown.
- Seite 8 Installing the AMD Mounting Bracket Installation du support de fixation AMD • Installation der AMD-Montagehalterung Instalación del soporte de montaje para AMD • 安装AMD安装支架 Note: It is important that the AMD retention bracket be Nota: Es importante que el soporte de retención evenly secured on all sides before installation! AMD esté...
- Seite 9 Installing the Pump Unit Install the Fans and Radiator Installation de la pompe • Montage der Pumpe • Instalación de la unidad de bomba Installation des ventilateurs et du radiateur • Lüfter und Kühler einbauen • 安装泵机装置 Instale los ventiladores y el radiador • 安装风扇和散热器...
- Seite 10 CPU_FAN de la placa base. attach pump unit to a motherboard USB header. • Connect the fans to the two connectors • Conecte los ventiladores a los dos conectores Utilisez le câble USB Corsair Link ™ inclus pour brancher coming o the pump.
- Seite 11 Re-installation of the H115i cooler will require you clean o the pre-applied thermal paste and apply an aftermarket paste. Para volver a instalar el refrigerador H115i es preciso limpiar a fondo la pasta térmica que venía aplicada de fábrica y aplicar una capa de pasta nueva, adquirida a tal efecto.
- Seite 12 Thank you for purchasing the Corsair Hydro Series H115i Extreme Performance Liquid CPU Cooler. Please visit: corsair.com to download a detailed user guide or to obtain technical support. Merci d'avoir acheté le dissipateur à liquide pour processeur hautes performances Corsair Hydro Series H115i.