
Verwandte Anleitungen für Sonnenkönig SECCO 200


Inhaltszusammenfassung für Sonnenkönig SECCO 200
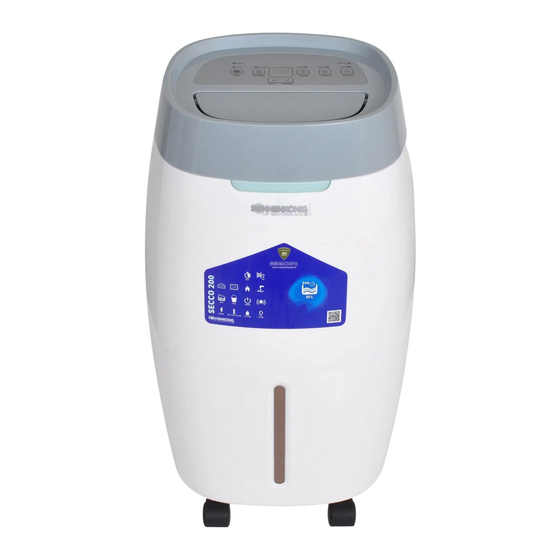
- Seite 1 All manuals and user guides at all-guides.com SECCO 200-300-400 Luftentfeuchter Bedienungsanleitung...
-
Seite 2: Inhaltsverzeichnis
All manuals and user guides at all-guides.com Inhaltsverzeichnis 1 Sicherheitshinweise ���������������������������������������������������������������������������������3 2 Eigenschaften �������������������������������������������������������������������������������������������5 3 Schematische Darstellung ������������������������������������������������������������������� 6 4 Operating instructions ���������������������������������������������������������������������������7 5 In Betriebnahme ������������������������������������������������������������������������������������10 6 Instandhaltung� �������������������������������������������������������������������������������������12 7 Fehlerbehebung �������������������������������������������������������������������������������������15 8 Technische Daten ����������������������������������������������������������������������������������16 9 Garantie / Entsorgung / Technische Änderungen �������������������������� 17... -
Seite 3: Sicherheitshinweise
All manuals and user guides at all-guides.com Bitte bewahren Sie die Gebrauchsanweisung auf� Vielen Dank das Sie sich für eine Produkt von Sonnenkönig entschieden ha- ben� Diese Gebrauchsanweisung gibt ihnen Informationen zur Wartung und Pflege Ihres neuen Luftentfeuchters� Bitte lesen Sie die Gebrauchsanwei- sung sorgfältig durch, um sich mit den Funktionen des Gerätes vertraut zu machen�... - Seite 4 All manuals and user guides at all-guides.com leitungeinheit� 5. Leeren Sie regelmässig den Wasserbehälter� 6. Setzen Sie den Entfeuchter nicht in einem kleinen geschlossenen Raum wie Kleiderschränke ein� Dies kann zu Brand führen� 7. Platzeren Sie das Gerät nicht in der nähe von Kunstgegenstände, Esswa- ren oder wissenschaftliche Materialien�...
-
Seite 5: Eigenschaften
All manuals and user guides at all-guides.com 2 Eigenschaften Leistungsstarkes Entfeuchten Dank Kältetechnik entfernt das Gerät kraftvoll die unerwünschte Feuchtig- keit aus dem Raum und erzielt somit eine angenehme und komfortable Luft� Leicht zu tragen Der Entfeuchter ist leicht und kompakt gebaut� Dank der Laufrollen an der Unterseite ist es einfach das Gerät von Raum zu Raum zu bewegen�... -
Seite 6: Schematische Darstellung
All manuals and user guides at all-guides.com 3 Schematische Darstellung 1. Wassertank 6. PU-Filter (Optional) 2. Frontblende 7. Rahmen 3. Traggriff 8. Netzkabel 4. Luftauslass Luftklappe 9. Rollen 5. Schalttafel 10. Rückwand... -
Seite 7: Operating Instructions
All manuals and user guides at all-guides.com 4 Operating Instructions 1. Ein/Aus Grün Power LED 2. Wasser voll Wasser voll LED 3. Klappe Grün Swing LED 4. Zeitschaltuhr Grün Schaltur LED 5. Einstellung Grün Einstellung LED 6. Hoch Hohe Ventialtion LED 7. - Seite 8 All manuals and user guides at all-guides.com 1� Kontrolllampe Die Kontrolllampe leuchtet grün, wenn das Gerät eingesteckt ist, unabhän- gig davon, ob das Gerät in Betrieb ist oder nicht� 2� Wassertank-Vollanzeige-Licht Anzeige leuchtet rot, wenn die Entwässerungstank voll ist� Leeren Sie den Wassertank und stellen Sie sicher, dass der Tank richtig positioniert ist�...
- Seite 9 All manuals and user guides at all-guides.com Tastenfunktionen An/Aus Taste Drücken Sie einmal auf die Taste um das Gerät ein zu schalten� Die Voreinstellung beträgt 60% Feuchtigkeit� Drücken Sie die Taste ein zweites mal um das Gerät aus zu schalten� Taste für Schwenkung der Klappe Drücken Sie einmal die Taste um die Schwenkung der in Betrieb zu nehmen und ein weiteres mal um diese Funktion aus zu schalten�...
-
Seite 10: In Betriebnahme
All manuals and user guides at all-guides.com 5 In Betriebnahme 1� Gerät einschalten: Wenn das Gerät am Stromnetz angeschlossen ist, piept er kurz und zeigt die Standart-Luftfeuchtigkeit von 60% an� Drücken die Einschalt-Taste das Gerät started� 2� den Luftauslass manuell öffnen Bevor Sie das Gerät in Betrieb nehmen, versichern Sie, dass die Luftklappe geöffnet ist�... - Seite 11 All manuals and user guides at all-guides.com Wichtig 1� Der Schwimmer nicht aus dem Wassertank entfernen� Ohne Schwimmer kann der Sensor den Wasserstand nicht messen und das Wasser kann überlaufen� 2� Wenn der Wassertank verschmutzt ist, mit lauwarmen oder kaltem Was- ser waschen�...
-
Seite 12: Instandhaltung
All manuals and user guides at all-guides.com 6 Instandhaltung Reinigung des Raumentfeuchter - Reinigung des Gehäuse Wischen Sie ihn mit einem weichen, feuchten Tuch ab� Reinigung des Luftfilters 1� Entfernen Sie zuerst den Rahmen und ziehen Sie dann den Filter heraus� 2�... - Seite 13 All manuals and user guides at all-guides.com 3� Anbringen des Luftfilters Setzen Sie den Filter in das Gerät� Lagerung des Entfeuchters Wenn Gerät über eine längere Zeit nicht braucht wird beachten folgende Schritte zur korrekten Lagerung� 1� Wassertank leeren 2� Entfernen Sie das Gerät vom Stromnetz und verstauen Sie das Kabel in der Vorrichtung auf der Rückseite des Gerätes�...
- Seite 14 All manuals and user guides at all-guides.com Abstand Halten Sie bei Betrieb den Mindestabstand von 20 cm rund um das Gerät ein�...
-
Seite 15: Fehlerbehebung
All manuals and user guides at all-guides.com 7 Fehlerbehebung Wenn ein Unten aufgeführtes Problem auftritt überprüfen Sie bitte folgeden Punkte bevor Sie den Kundendienst anrufen� Problem Mögliche Ursache Lösung Das Gerät ist nicht Schliessen Sie das Ge- am Stromnetz ange- rät ans Strometz an schlossen Die Tankanzeige blinkt... -
Seite 16: Technische Daten
All manuals and user guides at all-guides.com 8 Technische Daten MODEL SECCO 200/300/400 LEISTUNG 220V ˜ ,50Hz WASSERTANK KAPAZITÄT 4l / 8l / 8l Die Entfeuchtungsleistung wird bei einer Raumtemperatur von 35 °C bei ei- ner relativen Luftfeuchtigkeit von 95% gemessen� Die Betriebstemperatur liegt im Bereich von 5 °C bis 35 °C �... -
Seite 17: Garantie / Entsorgung / Technische Änderungen
All manuals and user guides at all-guides.com 9 Garantie / Entsorgung / Technische Änderungen Garantie: Die Geräte werden vor der Auslieferung genau kontrolliert� Sollte trotzdem einmal ein Mangel an Ihrem Gerät auftreten, wenden Sie sich vertrauensvoll an Ihren Verkäufer� Bitte bringen Sie den Kaufbeleg mit, denn dieser ist für jede Garantieleistung vorzulegen�... - Seite 18 All manuals and user guides at all-guides.com Firma Armin Schmid Olensbachstrasse 9-15 CH-9631 Ulisbach Tel� Int� +41 71 987 60 60 Tel� Nat� 0848870850 www�sonnenkoenig�ch Firma Armin Schmid Peter-Henlein-Strasse 5 D-89331 Burgau Tel: 0180 500 64 35 info@ sonnenkoenig�ch www�sonnenkoenig�ch 0.14 Cent/Minute...
- Seite 19 All manuals and user guides at all-guides.com SECCO 200-300-400 Déshumidificateur Manuel de l‘utilisateur...
- Seite 20 All manuals and user guides at all-guides.com Sommaire 1 Consignes de sécurité ������������������������������������������������������������������������������21 2 Caractéristiques �������������������������������������������������������������������������������������� 23 3 Schéma ����������������������������������������������������������������������������������������������������� 24 4 Instructions pour la mise en fonctionnement ����������������������������������� 25 5 Mise en service ���������������������������������������������������������������������������������������� 28 6 Maintenance� ������������������������������������������������������������������������������������������� 30 7 Résolution des problèmes���������������������������������������������������������������������...
-
Seite 21: Consignes De Sécurité
All manuals and user guides at all-guides.com Veuillez conserver cette notice d‘utilisation� Merci d‘avoir choisi Sonnenkönig pour votre achat� Cette notice d‘utilisation vous informe sur la maintenance et l‘entretien de votre nouveau déshumi- dificateur� Veuillez lire attentivement cette notice d‘utilisation afin de vous familiariser avec les fonctions de l‘appareil�... - Seite 22 All manuals and user guides at all-guides.com piration ou d‘évacuation de l‘air� 5. Videz régulièrement le réservoir d‘eau� 6. Ne placez pas le déshumidificateur dans un petit espace fermé, tel qu‘une armoire à vêtements� Cela pourrait causer un incendie� 7. L‘appareil ne doit pas être placé à proximité d‘objets d‘art, de nourriture ou d‘équipements scientifiques�...
-
Seite 23: Caractéristiques
All manuals and user guides at all-guides.com 2 Caractéristiques Déshumidification puissante Grâce à la technique de la réfrigération, ce puissant appareil absorbe l‘hu- midité indésirable de la pièce pour vous permettre de respirer plus confor- tablement un air agréable� Transport facile Ce déshumidificateur est léger et compact�... -
Seite 24: Schéma
All manuals and user guides at all-guides.com 3 Schéma 1. Réservoir d‘eau 6. Filtre PU (en option) 2. Partie frontale 7. Cadre 3. Poignée de transport 8. Câble d‘alimentation 4. Clapet de sortie d‘air 9. Roulettes 5. Panneau de commande 10. -
Seite 25: Instructions Pour La Mise En Fonctionnement
All manuals and user guides at all-guides.com 4 Instructions pour la mise en fonctionnement 1. Marche/arrêt Vert DEL alimentation 2. Réservoir d‘eau plein Rouge DEL réservoir d‘eau plein 3. Clapet Vert DEL clapet 4. Minuterie Vert DEL minuterie 5. Réglages Vert DEL réglages 6. - Seite 26 All manuals and user guides at all-guides.com 1� Voyant de contrôle Le voyant de contrôle s‘allume en vert lorsque l‘appareil est branché, que l‘appareil soit ou non en fonctionnement� 2� Voyant indiquant que le réservoir d‘eau est plein Le voyant s‘allume en rouge lorsque le réservoir recueillant l‘eau est plein� Videz le réservoir d‘eau et assurez-vous qu‘il est positionné...
- Seite 27 All manuals and user guides at all-guides.com Fonctions des touches Touche marche / arrêt Appuyez une fois sur la touche pour mettre l‘appareil en marche� Le taux d‘humidité préprogrammé est de 60 %� Appuyez une seconde fois sur la touche pour éteindre l‘appareil� Touche basculement du clapet Appuyez une fois sur la touche pour faire basculer le clapet de sortie d‘air�...
-
Seite 28: Mise En Service
All manuals and user guides at all-guides.com 5 Mise en service 5 Mise en service 1� Mettre l‘appareil en marche Lorsque l‘appareil est branché à la prise électrique, il émet un bref bip so- nore et indique un taux d‘humidité de l‘air standard de 60 %� Appuyez sur la touche de mise en marche de l‘appareil�... - Seite 29 All manuals and user guides at all-guides.com Important 1� Ne pas enlever le flotteur du réservoir� Sans le flot- teur, le capteur ne peut pas mesurer le niveau de l‘eau et l‘eau peut déborder� 2� Lorsque le réservoir d‘eau est sale, veuillez le nettoyer avec de l‘eau tiède ou froide�...
-
Seite 30: Maintenance
All manuals and user guides at all-guides.com 6 Maintenance Nettoyage du déshumidificateur - Nettoyage du boîtier Nettoyez-le à l‘aide d‘un tissu doux humide� Nettoyage du filtre à air 1� Enlevez tout d‘abord le cadre et retirez ensuite le filtre� 2� Nettoyer le filtre à air Passez légèrement l‘aspirateur sur la surface du filtre à... - Seite 31 All manuals and user guides at all-guides.com 3� Replacement du filtre à air Replacez le filtre dans l‘appareil� Stockage du déshumidificateur En cas de non-utilisation de l‘appareil pendant une longue période de temps, veuillez suivre les étapes suivantes pour un stockage correct� 1�...
- Seite 32 All manuals and user guides at all-guides.com Espace autour de l‘appareil Lorsque l‘appareil est en marche, veillez à ce que rien ne se trouve dans un espace de 20 cm autour de l‘appareil�...
-
Seite 33: Résolution Des Problèmes
All manuals and user guides at all-guides.com 7 Résolution des problèmes Si l‘un des problèmes indiqués ci-dessous se produit, merci de vérifier les points suivants avant d‘appeler le service client� Problème Origine possible Solution L‘appareil n‘est pas Branchez l‘appareil à branché... -
Seite 34: Données Techniques
All manuals and user guides at all-guides.com 8 Données techniques MODÈLE SECCO 200/300/400 ALIMENTATION ÉLECTRIQUE 220V ˜ ,50Hz CAPACITÉ DU RÉSERVOIR D‘EAU 4l / 8l / 8l La puissance de déshumidification est mesurée pour une pièce à une température de 35 °C ayant un taux d‘humidité de l‘air relative de 95 %� La température de fonctionnement est située entre 5 °C et 35 °C�... -
Seite 35: Garantie / Mise Au Rebut / Modifications Techniques
All manuals and user guides at all-guides.com 9 Garantie / Mise au rebut / Modifications techniques Garantie L‘appareil sont contrôlés de manière précise avant la livraison� Si malgré tout un vice devait être constaté sur votre appareil, adressez-vous en toute confiance à... - Seite 36 All manuals and user guides at all-guides.com Maison Armin Schmid Olensbachstrasse 9-15 CH-9631 Ulisbach Tel� Int� +41 71 987 60 60 Tel� Nat� 0848870850 www�sonnenkoenig�ch Maison Armin Schmid Peter-Henlein-Strasse 5 D-89331 Burgau Tel: 0180 500 64 35 info@ sonnenkoenig�ch www�sonnenkoenig�ch 0.14 Cent/Minute...
- Seite 37 All manuals and user guides at all-guides.com SECCO 200-300-400 Deumidificatore Manuale dell‘utente...
- Seite 38 All manuals and user guides at all-guides.com Indice 1 Avvertenze di sicurezza ����������������������������������������������������������������������� 39 2 Caratteristiche ���������������������������������������������������������������������������������������41 3 Rappresentazione schematica delle parti ��������������������������������������� 42 4 Istruzioni per la messa in funzione ��������������������������������������������������� 43 5 Messa in funzione ��������������������������������������������������������������������������������� 46 6 Manutenzione� �������������������������������������������������������������������������������������� 48 7 Risoluzione dei problemi ����������������������������������������������������������������������51 8 Dati tecnici ���������������������������������������������������������������������������������������������...
-
Seite 39: Avvertenze Di Sicurezza
All manuals and user guides at all-guides.com Si prega di tenere questo manuale utente per eventuali future consultazioni� La ringraziamo di aver scelto un deumidificatore Sonnenkönig per soddisfare le esigenze di comfort vostre e della vostra famiglia� Questo manuale di is- truzioni vi darà... - Seite 40 All manuals and user guides at all-guides.com 4. Non mettere le dita o oggetti nella presa e/o nell‘uscita dell‘aria� 5. Vuotare regolarmente la vaschetta d‘acqua� 6. Non utilizzare il deumidificatore in una zona chiusa, come ad esempio all‘interno di un armadio, in quanto potrebbe causare un incendio� 7.
-
Seite 41: Caratteristiche
All manuals and user guides at all-guides.com 2 Caratteristiche Capacità di deumidificazione Grazie alla tecnica di refrigerazione, questo potente dispositivo assorbe l‘umidità indesiderata nella stanza e permettere di respirare più piacevol- mente l‘aria� I I T Trasporto facilitato Questo deumidificatore è leggero e compatto� Grazie alle sue ruote, è facile da spostare da una stanza all‘altra�... -
Seite 42: Rappresentazione Schematica Delle Parti
All manuals and user guides at all-guides.com 3 Rappresentazione schematica delle parti I IT 1. Contenitore dell‘acqua 6. Filtro PU (Opzionale) 2. Parte frontale 7. Griglia del filtro 3. Manici 8. Cavo elettrico 4. Lunetta di fuoriscita dell‘aria 9. Ruote 5.Pannello di controllo 10. -
Seite 43: Istruzioni Per La Messa In Funzione
All manuals and user guides at all-guides.com 4 Istruzioni per la messa in funzione I I T 1. ON/OFF Verde LED di alimentazione 2. Contenitore dell‘acqua pieno Rosso LED del serbatorio dell‘acqua 3. Lunetta Verde LED della lunetta 4. Timer Verde LED del Timer 5. - Seite 44 All manuals and user guides at all-guides.com 1� LED di controllo La spia diventa verde quando il dispositivo è collegato, indipendentemente dal fatto che l‘unità è in funzione o meno� 2� LED delllo stato della vaschetta di controllo È rosso quando il la vaschetta dell‘acqua è piena� Vuotare la vaschetta de- ll‘acqua e assicurarsi che il contenitore venga riposizionato in modo corretto�...
- Seite 45 All manuals and user guides at all-guides.com Funzioni dei tasti Tasto ON/OFF Premere una volta per accendere il dispositivo� L‘impostazione pre- definita è il 60% di umidità� Premere il tasto una seconda volta per spegnere il dispositivo� Tasto per il basculamento della lunetta di ventilazione I I T Premere una volta per attivare l‘oscillazine�...
-
Seite 46: Messa In Funzione
All manuals and user guides at all-guides.com 5 Messa in funzione 1� Accendere l‘apparecchio: Quando l‘unità è collegata alla rete di alimentazione, esso emette un suono e viene visualizzato lo standard-umidità del 60%� Premere il pulsante di ac- censione per avviare il dispositivo� 2�... - Seite 47 All manuals and user guides at all-guides.com Importante 1� Non rimuovere il galleggiante del serbatoio dell‘ac- qua� Senza galleggiante, il sensore non può misurare il livello dell‘acqua e l‘acqua può traboccare� 2� Quando il serbatoio è sporco, lavare con acqua calda o fredda� Non utiliz- zare detergenti, spugne abrasive, panno per la polvere imbevuto di sostanze chimiche, la benzina, acquaragia o altri solventi che possono graffiare o dan- neggiare il serbatoio e causare danni�...
-
Seite 48: Manutenzione
All manuals and user guides at all-guides.com 6 Manutenzione Pulizia del deumidificatore e del corpo del prodotto Pulire con un panno morbido e umido� Pulizia del filtro d‘aria 1� Smontare la griglia esterna di protezione e prelevare il filtro� 2� Pulire il filtro d‘aria Passare delicatamente l‘aspirapolvere sulla superfice del filtro al fine di eli- minare la sporcizia�... - Seite 49 All manuals and user guides at all-guides.com 3� Riposizionare il filtro d‘aria Riposizionare il filtro d‘aria nell‘apposito spazio nel prodotto� Stoccaggio del deumidificatore Se non si usa l‘apparecchio per un lungo periodo di tempo, si prega di seguire i seguenti passi per una corretta conservazione� 1�...
- Seite 50 All manuals and user guides at all-guides.com Distanza Mantenere una distanza libera minima di 20 cm attorno al prodotto�...
-
Seite 51: Risoluzione Dei Problemi
All manuals and user guides at all-guides.com 7 Risoluzione dei problemi Quando non si riesce a risolvere il problema con la tabella qui di sotto ripor- tata, si prega di contattare il servizio clienti� Problema Possibile causa Soluzione Il prodotto non è Collegare l‘appa- collegato alla rpesa di recchio alla presa... -
Seite 52: Dati Tecnici
All manuals and user guides at all-guides.com 8 Dati tecnici MODELLO SECCO 200/300/400 POTENZA 220V ˜ ,50Hz CAPACITÀ DELLA TANICA 4l / 8l / 8l Le prestazioni di deumidificazione sono misurate ad una temperatura am- biente di 35 °C con umidità relativa del 95%� La temperatura operativa è... -
Seite 53: Garanzia / Smaltimento / Modifiche Tecniche
All manuals and user guides at all-guides.com 9 Garanzia / Smaltimento / Modifiche tecniche Garanzia I prodotti vengono controllati attentamente prima della spedizione� Se do- vesse comunque presentarsi un vizio sul vostro apparecchio, vi invitiamo a rivolgervi in tutta tranquillità al vostro rivenditore� Vi rammentiamo di portare appresso la ricevuta d’acquisto, che deve essere presentata per ogni prestazione in garanzia�... - Seite 54 All manuals and user guides at all-guides.com Ditta Armin Schmid Olensbachstrasse 9-15 CH-9631 Ulisbach Tel� Int� +41 71 987 60 60 Tel� Nat� 0848870850 www�sonnenkoenig�ch Ditta Armin Schmid Peter-Henlein-Strasse 5 D-89331 Burgau Tel: 0180 500 64 35 info@ sonnenkoenig�ch www�sonnenkoenig�ch 0.14 Cent/Minute...
- Seite 55 All manuals and user guides at all-guides.com SECCO 200-300-400 Deuhumidifier User‘s manual...
- Seite 56 All manuals and user guides at all-guides.com Index 1 Safety instructions ������������������������������������������������������������������������������� 57 2 Features ������������������������������������������������������������������������������������������������� 59 3 Product diagram����������������������������������������������������������������������������������� 60 4 Operating instructions �������������������������������������������������������������������������61 5 Operation ����������������������������������������������������������������������������������������������� 64 6 Maintenance ������������������������������������������������������������������������������������������ 66 7 Troubleshooting ������������������������������������������������������������������������������������ 69 8 Technical data ��������������������������������������������������������������������������������������� 70 9 Warranty / Disposal / Technical change �����������������������������������������71...
-
Seite 57: Safety Instructions
All manuals and user guides at all-guides.com Keep these instructions for future reference� Thank you for choosing a Sonnenkönig Dehumidifier to provide you and your family with your home comfort needs� This owner’s manual will give you valuable information necessary for the proper care and maintenance of your new dehumidifier�... - Seite 58 All manuals and user guides at all-guides.com 4. Never put your fingers or objects into the air intake or the air outlet� 5. Discard water that has collected in the tank as required� 6. Do not operate the dehumidifier in a closed area, such as inside a closet, as it may cause a fire�...
-
Seite 59: Features
All manuals and user guides at all-guides.com 2 Features Powerful Dehumidifying Capability Using refrigeration technology, the dehumidifier powerfully removes mois- ture from the air to decrease the humidity level of the room and keep the indoor air dry and comfortable� Lightweight Portable Design The dehumidifier is built to be compact and lightweight�... -
Seite 60: Product Diagram
All manuals and user guides at all-guides.com 3 Product diagram 1. Water tank 6. PU filter (Optional) 2. Front panel 7. Frame 3. Handle 8. Power cord 4. Air outlet louver 9. Caster 5. Control panel 10. Rear panel... -
Seite 61: Operating Instructions
All manuals and user guides at all-guides.com 4 Operating instructions 1. Power Green Power LED 2. Water full Water full LED 3. Swing Green Swing LED 4. Time Green Timer LED 5. Setting Green Set LED 6. High High-fan LED 7. - Seite 62 All manuals and user guides at all-guides.com 1� Power indicator light The power indicator light will light up in green when the unit is plugged in, regardless of whether the unit is operating or not� 2� Water full indicator light The water full indicator light will turn on in red when the drainage tank is full�...
- Seite 63 All manuals and user guides at all-guides.com Push Button Functions Power Push Button Press the button once to start operation, the default humidity level is 60%� Press it again to stop operation� Swing push button Press the button once to swing the air outlet louver, iIt will stop when you press the button again�...
-
Seite 64: Operation
All manuals and user guides at all-guides.com 5 Operation 1� Turning the Unit On: When the unit is plugged in, a buzzer will beep and the humidity indicator will show the default humidity level at 60% with a low fan speed� Press the POWER button to start operation�... - Seite 65 All manuals and user guides at all-guides.com Note 1� DO not remove the float from the water tank� The wa- ter full sensor will no longer be able to detect the wa- ter level correctly without the float and water may leak from the water tank�...
-
Seite 66: Maintenance
All manuals and user guides at all-guides.com 6 Maintenance Cleaning the Dehumidifier Wipe it with a soft damp cloth� To Clean the Air Filter 1� Remove the frame first and then pull out the filter� 2� Cleaning the air filter Lightly run a vacuum cleaner over the surface of the air filter to remove dirt�... - Seite 67 All manuals and user guides at all-guides.com 3� Reattaching the air filter Smoothly insert the filter into the unit� Storing the Dehumidifier When the unit is not being used for a long period of time and you want to store it, note the following steps: 1�...
- Seite 68 All manuals and user guides at all-guides.com Clearance Maintain the minimum clearance around the dehumidifier when the unit is operating as shown in the drawing�...
-
Seite 69: Troubleshooting
All manuals and user guides at all-guides.com 7 Troubleshooting If you experience any of the problems listed below, please check the follo- wing points before calling customer service� Problem Possibile cause Solution Has the power cord Plug the power cord been into the outlet�... -
Seite 70: Technical Data
All manuals and user guides at all-guides.com 8 Technical Data MODEL SECCO 200/300/400 POWER SUPPLY 220V ˜ ,50Hz WATER TANK CAPACITY 4l / 8l / 8l The dehumidification capacity is rated at a room temperature of 35°C with a relative humidity of 95%� If specifications are improved after this printing, the product nameplate will reflect the new specifications�... -
Seite 71: Warranty / Disposal / Technical Change
All manuals and user guides at all-guides.com 9 Warranty / Disposal / Technical change Warranty The Products are controlled just before delivery� If despite a lack of your product, try trustfully your seller� Please bring your receipt, as this is to be submitted for each warranty�... - Seite 72 All manuals and user guides at all-guides.com Firma Armin Schmid Olensbachstrasse 9-15 CH-9631 Ulisbach Tel� Int� +41 71 987 60 60 Tel� Nat� 0848870850 www�sonnenkoenig�ch Firma Armin Schmid Peter-Henlein-Strasse 5 D-89331 Burgau Tel: 0180 500 64 35 info@ sonnenkoenig�ch www�sonnenkoenig�ch 0.14 Cent/Minute...