Omnimount ULPC-M Benutzerhandbuch
Quicklinks
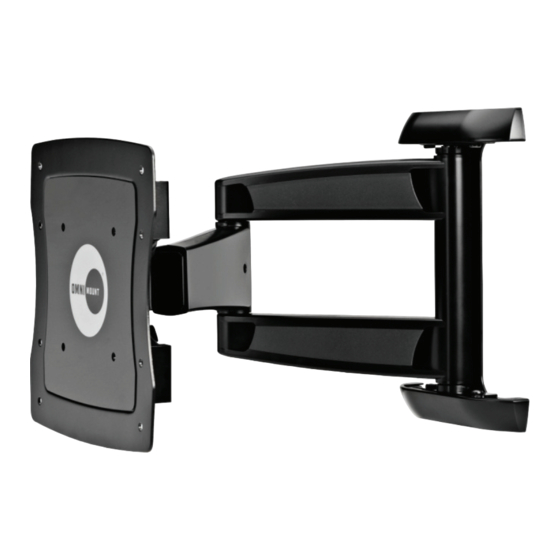
ULPC-M
Ultra Low Profile Cantilever Wall Mount
EN
Instruction Manual
ES
Manual De Instrucciones
FR
Manuel D'instructions
DE
Benutzerhandbuch
NL
Instructiehandleiding
IT
Manuale Di Istruzioni
PL
Instrukcja Obsługi
CZ
Návod K Obsluze
HU
Kezelési Kézikönyv
GK
Εγχειριδιο Οδηγιων
PT
Manual De Instruções
DA
Brugervejledning
FI
Asennusopas
SV
Monteringsanvisning
RO
Manual Cu Instrucţiuni
BL
Ръководство За Работа
ET
Juhend
LV
Lietošanas Pamācība
LT
Naudojimo Instrukcija
SL
Navodila
SK
Návod Na Obsluhu
RU
Руководство По Эксплуатации
TR
Talimat Kilavuzu
NO
Bruksanvisning
AR
آﺘﻴﺐ اﻟﺘﻌﻠﻴﻤﺎت
CN
说明手册
JP
取扱説明書
EN
Images may differ from actual product
El producto real puede variar respecto a la
ES
imagen mostrada.
FR
Le produit réel peut différer de l'illustration.
Abbildung weicht möglicherweise von
DE
tatsächlichem Produkt ab.
De afbeelding kan verschillend zijn van het
NL
eigenlijke product.
L'immagine può non corrispondere al prodotto
IT
effettivo.
Rzeczywisty produkt może się różnić od
PL
przedstawionego na ilustracji.
CZ
Obrázek se může od skutečného produktu lišit.
HU
A kép eltérhet a tényleges terméktől.
Η εικόνα μπορεί να διαφέρει από το προϊόν που
GK
έχετε.
PT
As imagens poderão divergir do produto real
DA
Billederne kan variere fra det faktiske produkt
OM1004283
ULN #
ULPC-M = L27-OM1004283-CON-120211vF
PN #
Maximum screen size: 42"
Maximum weight 100 lbs – 45.4 KG
CAUTION: DO NOT EXCEED MAXIMUM LISTED WEIGHT
CAPACITY. SERIOUS INJURY OR PROPERTY DAMAGE
MAY OCCUR!
FI
Kuvat voivat erota itse tuotteesta
SV
Bilder kan skilja sig från befintlig produkt
RO
Este posibil ca imaginile să difere faţă de produsul real
Възможно е изображенията да се различават от
BL
продукта в действителност
ET
Pildid võivad tegelikust tootest erineda
LV
Attēli var atšķirties no pašreizējā izstrādājuma
LT
Paveikslėliai gali skirtis nuo tikrojo produkto
SL
Slike se lahko razlikujejo od dejanskega izdelka
SK
Obrázky sa môžu od skutočného produktu odlišovať.
Изображение товара, представленное в этом
RU
документе, может отличаться от реального внешнего
вида товара.
TR
Resimler, gerçek ürünle farklılık gösterebilir
NO
Bildene kan variere i forhold til det faktiske produktet
AR
ﻗﺪ ﺗﺨﺘﻠﻒ اﻟﺼﻮر ﻋﻦ اﻟﻤﻨﺘﺞ اﻟﻔﻌﻠﻲ
CN
示图可能与实际产品不同
JP
画像は実際の製品とは異なる場合があります。
VERSION
F

Verwandte Anleitungen für Omnimount ULPC-M


Inhaltszusammenfassung für Omnimount ULPC-M
- Seite 1 ULPC-M OM1004283 ULN # ULPC-M = L27-OM1004283-CON-120211vF PN # Ultra Low Profile Cantilever Wall Mount VERSION Instruction Manual Manual De Instrucciones Manuel D’instructions Benutzerhandbuch Instructiehandleiding Manuale Di Istruzioni Instrukcja Obsługi Návod K Obsluze Kezelési Kézikönyv Εγχειριδιο Οδηγιων Manual De Instruções...
- Seite 2 OmniMount customer service at 800.668.6848 or info@omnimount.com. Do not install or assemble if the product or hardware is damaged or missing. If you require replacement parts, contact OmniMount Customer Service at 800.668.6848 or Info@omnimount.com. International customers need to contact a local distributor for assistance.
- Seite 3 OF ZELFS DE DOOD. LEES VOLGENDE WAARSCHUWINGEN VOOR U MET DE INSTALLATIE BEGINT. Als u deze instructies niet volledig begrijpt of als u twijfels heeft, dient u contact op te nemen met een erkende installateur. Klanten in Noord-Amerika kunnen contact opnemen met de OmniMount-klantendienst op het nummer 800.668.6848 of via e-mail op info@omnimount.com.
- Seite 4 800.668.6848 ou do endereço info@omnimount.com. Não instalar ou montar se o produto ou o equipamento estiver danificado ou em falta. Se necessitar de peças de substituição, contacte o Serviço de Assistência ao Cliente da OmniMOunt através do 800.668.6848 ou do endereço info@omnimount.com.
- Seite 5 Nu începeţi instalarea sau asamblarea dacă produsul sau structura hardware sunt deteriorate sau au părţi lipsă. Dacă aveţi nevoie de piese de schimb, contactaţi serviciul pentru clienţi OmniMount la 800.668.6848 sau la info@omnimount.com. Clienţii din străinătate trebuie să contacteze un distribuitor local pentru asistenţă.
- Seite 6 Ако част от хардуера е увредена или липсва, не инсталирайте и не сглобявайте продукта. Ако се нуждаете от резервни части, свържете се с отдела за обслужване на клиенти към OmniMount на тел. 800.668.6848 или имейл info@omnimount.com. Ако се нуждаят от помощ, международните клиенти трябва да се свържат с...
- Seite 7 WEIGHT CAPACITY MAXIMUM WEIGHT CAPACITY POUNDS (LBS) / KILOGRAMS (KG) MAXIMUM SCREEN SIZE MÁXIMA CAPACIDAD DE PESO LIBRAS (LB) / KILOGRAMOS (KG) TAMAÑO DE PANTALLA MÁXIMO CAPACITE DE CHARGE MAXIMALE LIVRES (LB) / KILOGRAMMERS (KG) TAILLE D’ÉCRAN MAXIMALE COMPLETE UNIT 100 (LBS) / 45.4 (KG) 42 in. (107 cm) CAUTION! 42”...
- Seite 8 SYMBOL KEY Drill Level Caution Hammer Optional Agujerear Nivel Precaución Martillo Opcional Percer Niveau Attention Marteau Optionnel Bohren Wasserwaage Vorsicht Hammer Optional Boor Waterpas Voorzichtig Hamer Optioneel Forare Livellare Attenzione Martello Opzionale Wywierć Poziomnica Przestroga Młotek Opcjonalne Vrtat Vodováha Pozor Kladivo Volitelné...
- Seite 9 SYMBOL KEY Socket Wrench Cable Management Find Center Position Adjust Encuentre la posición del centro Llave española Sistema de organización de cables Ajuste Repérez la position centrale Clé ouverte Gestion des câbles Ajustez Finden Sie die mittige Position Gabelschlüssel Kabelführung justieren Sie Midden bepalen Open sleutel...
-
Seite 10: Tools Needed
TOOLS NEEDED Wood Pilot Concrete Pilot Pilot Hole Size Pilot Drill Depth Pilot Hole Size Pilot Drill Depth 9/32” inch 3 ¾” inch 9/16” inch 3 ¾” inch 7.1 mm 93 mm 14-14.3 mm 93 mm CONTENTS Screw/Hardware Pack for TV (Monitor Kit L-U-vD) Pouch # Part # Qty Description Philips screws M4 x 15mm... - Seite 11 CONTENTS Contents Pouch # Part # Qty Description 1 Monitor Plate 1 Cantilever Arm 2 Wall Rails 2 Wall Rail Covers 2 Tilt Adjustment Screw 1 Vertical Adjustment Screw 2 Tension Adjustment Screw 4 Wing Adapters 3 Cable Covers 4 M6 Nylon Lock Nut 4 Square Washer 4 M6 Metal Washer 4 M6 Allen Head Screw...
-
Seite 12: Wood Stud Installation
WOOD STUD INSTALLATION Find stud(s) and mark edge and center locations. Ubique el panel y marque las ubicaciones de los bordes y el centro. Repérez l'emplacement d'une poutre, puis marquez l'emplacement des bords et du centre de cette poutre. Suchen Sie den Balken und markieren Sie Ränder und Mitte. Zoek de drager en markeer de rand- en middenlocaties. - Seite 13 WOOD STUD INSTALLATION Use wall plate or wall template to mark mounting locations Use la guía o placa de la pared para marcar el lugar donde se realizará la instalación Utilisez la plaque ou le gabarit mural pour marquer les emplacements de montage Verwenden Sie die Wandplatte oder die Wandschablone, um die Montagestellen zu markieren Wandplaat of wandsjabloon gebruiken om de montageplaatsen af te tekenen Utilizzare la piastra a muro o la guida per segnare le posizioni di montaggio...
- Seite 14 WOOD STUD INSTALLATION Wood Pilot Pilot Hole Size Pilot Drill Depth 9/32” inch 3 ¾” inch 7.1 mm 93 mm Wood Stud Wall Installation Drill pilot hole Instalación en pared con paneles de madera Realice el agujero piloto Installation murale sur poteau de cloison en bois Percez le trou de guidage Montage an Holzbalken an der Wand Bohren Sie die Vorbohrung...
- Seite 15 CONCRETE INSTALLATION Solid Concrete Only Do Not Drill Into Mortar Use wall plate or wall template to mark mounting locations Use la guía o placa de la pared para marcar el lugar donde se realizará la instalación Utilisez la plaque ou le gabarit mural pour marquer les emplacements de montage Verwenden Sie die Wandplatte oder die Wandschablone, um die Montagestellen zu markieren Wandplaat of wandsjabloon gebruiken om de montageplaatsen af te tekenen Utilizzare la piastra a muro o la guida per segnare le posizioni di montaggio...
- Seite 16 CONCRETE INSTALLATION Concrete Pilot Pilot Hole Size Pilot Drill Depth 9/16” inch 3 ¾” inch 14-14.3 mm 93 mm Concrete Wall Installation Drill pilot hole Solid Concrete Instalación en pared de hormigón Realice el agujero guía Concreto sólido Installation sur mur en béton Percez le trou de guidage Béton massif Montage an Betonwand...
- Seite 17 STEP 1...
- Seite 18 MOUNTING OPTION A 200mm 100mm OPTION A for VESA hole patterns of: 100x100mm – 100x200mm – 200x200mm...
- Seite 19 MOUNTING OPTION B 400mm 300mm OPTION B for VESA hole patterns of: 400x400mm – 300x300mm – 200x300mm – 300x400mm MOUNTING OPTION C 400mm 300mm OPTION C for VESA hole patterns of: 200x400mm – 100x300mm...
- Seite 20 OPTION B/C...
- Seite 21 ATTENTION: DO NOT RETURN TO STORE OPTIONAL M8M5KIT BUSHINGS AVAILABLE 1-800-MOUNT-IT (668-6848) STOP STOP BEFORE YOU RETURN THIS PRODUCT, PLEASE LET US HELP YOU. YOU CAN REACH US BY PHONE NOTE: Some of the more popular TV brands have recently changed their mounting holes to require 8mm screws.
- Seite 22 STEP 2 M-A – - M-L Spacers Spacers Washers Washers Attach monitor using monitor hardware, M-A, M-B, etc… Coloque la pantalla utilizando los materiales de instalación de la pantalla, M-A, M-B, etc… Installer le moniteur avec les fixations de moniteur, M-A, M-B, etc… Bringen Sie den Bildschirm mit den Bildschirm-Befestigungsteilen M-A, M-B usw.
- Seite 23 SPACERS 10mm 15mm 20mm 25mm 30mm Spacers Spacers Washers Washers Use spacers for recessed mounting holes or to access A/V inputs Use los espaciadores para agujeros de montaje empotrados o para acceder a las entradas de A/V Utilisez les entretoises sur les trous de montage encastrés ou pour accéder aux entrées A/V Verwenden Sie Abstandhalter für zurückversetzte Montagebohrungen oder um A/V-Eingänge zu erreichen Gebruik afstandshouders voor verzonken montageopeningen of voor toegang tot A/V-ingangen Usare distanziatori per i fori di montaggio incassati o per accedere a componenti A/V...
- Seite 24 STEP 3 This step may require two people Hang with monitor attached Este paso podría requerir de dos personas. Cuelgue con el monitor adherido. Il est possible que deux personnes soient nécessaires pour cette étape Accrochez avec le moniteur installé. Für diesen Schritt sind eventuell zwei Personen erforderlich Mit dem befestigten Monitor aufhängen.
- Seite 25 STEP 9 STEP 4 Security Screw Saugos varžtas Κοχλίας ασφαλείας Tornillo de seguridad Parafuso de segurança Varnostni vijak Vis de sécurité Sikkerhedsskrue Bezpečnostná skrutka Sicherheitsschraube Varmistusruuvi Предохранительный винт Veiligheidsschroef Säkerhetsskruv Güvenlik Vidası Vite di sicurezza Şurub de securitate Sikkerhetsskrue Śruba zabezpieczająca Обезопасен...
- Seite 26 STEP 5 - OPTIONAL STEP 3 - OPTIONAL Gali reikėti reguliuoti Μπορεί να χρειάζεται ρύθμιση Adjustment May Be Needed Morda je potrebna prilagoditev Pode ser necessário um ajuste Puede necesitarse ajuste Možno bude potrebné nastavenie Justering kan være nødvendig Des réglages peuvent être nécessaires Может...
- Seite 27 TILT ADJUSTMENT – OPTIONAL VERTICAL ADJUSTMENT - OPTIONAL...
- Seite 28 TENSION ADJUSTMENT - OPTIONAL...
- Seite 29 CABLE MANAGEMENT - OPTIONAL CAUTION! Avoid pinch points. Leave slack in cables to allow cantilever arm adjustment. Route Cables Δρομολόγηση καλωδίων Kabelių išvedžiojimas Tienda los cables Dispor os cabos Napeljava kablov Installez les câbles Føringskabler Natiahnite káble Verlegen Sie die Kabel Reititä...
- Seite 30 (800.668.6848) o escríbanos a info@omnimount.com. Deberá proporcionar el recibo original. Si fuera necesario enviar el producto a OmniMount para revisarlo, los gastos de envío correrán por su cuenta. El producto de reemplazo que se le envíe se le devolverá con los gastos de envío pagos.
- Seite 31 LEVERANCIER TERECHT VOOR DE VOOR UW LAND GELDENDE GARANTIE. AVVERTENZA PER GLI UTENTI RESIDENTI AL DI FUORI DEGLI STATI UNITI: LA GARANZIA PER I PRODOTTI OMNIMOUNT È VALIDA SOLO PER I PRODOTTI ACQUISTATI NEGLI STATI UNITI. PER ACQUISTI AL DI FUORI DEGLI STATI UNITI, CONTATTARE IL DISTRIBUTORE PER IL VOSTRO PAESE PER RICHIEDERE INFORMAZIONI RELATIVE ALLA GARANZIA DISPONIBILE NEL VOSTRO PAESE.
- Seite 32 感谢您购买 OMNIMOUNT 产品 (CN) Chinese OmniMount 製品をご購入いただきまして、ありがとうございます (JP) Japanese OmniMount Systems, Inc. 8201 South 48th Street Phoenix, AZ 85044-5355 1-800-MOUNT-IT (1-800-668-6848) www.omnimount.com All trademarks are the property of their respective companies. OmniMount is a registered mark of Ergotron, Inc. © 2006...