Silvercrest SRR 3.7 D5 Bedienungsanleitung
Vorschau ausblenden
Andere Handbücher für SRR 3.7 D5:
- Bedienungsanleitung (142 Seiten) ,
- Bedienungsanleitung (76 Seiten) ,
- Bedienungsanleitung (124 Seiten)
Kapitel
Inhaltsverzeichnis

Verwandte Anleitungen für Silvercrest SRR 3.7 D5


Inhaltszusammenfassung für Silvercrest SRR 3.7 D5
- Seite 1 ROTATIONSRASIERER SRR 3.7 D5 ROTATIONSRASIERER RASOIR À TÊTES ROTATIVES Bedienungsanleitung Mode d'emploi ROTARY SHAVER RASOIO A LAMINA ROTANTE Operating instructions Istruzioni per l'uso IAN 277761...
- Seite 2 Klappen Sie vor dem Lesen die beiden Seiten mit den Abbildungen aus und machen Sie sich anschließend mit allen Funktionen des Gerätes vertraut. Avant de lire le mode d'emploi, ouvrez les deux pages contenant les illustra- tions et familiarisez-vous ensuite avec toutes les fonctions de l'appareil. Prima di leggere aprire le due pagine con le immagini e prendere confidenza con le diverse funzioni dell'apparecchio.
-
Seite 5: Inhaltsverzeichnis
Importeur ..........23 DE │ AT │ CH │ 1 ■ SRR 3.7 D5... -
Seite 6: Einleitung
Jede andere Verwendung gilt als nicht bestimmungsgemäß und kann zu Sachschäden oder sogar zu Personenschäden führen. Lieferumfang ▯ Rasierer mit Schereinheit ▯ Netzadapter ▯ Trimmereinheit ▯ Schutzkappe ▯ Pinsel ▯ Ladestation ▯ Bestellkarte ▯ Bedienungsanleitung │ DE │ AT │ CH ■ 2 SRR 3.7 D5... -
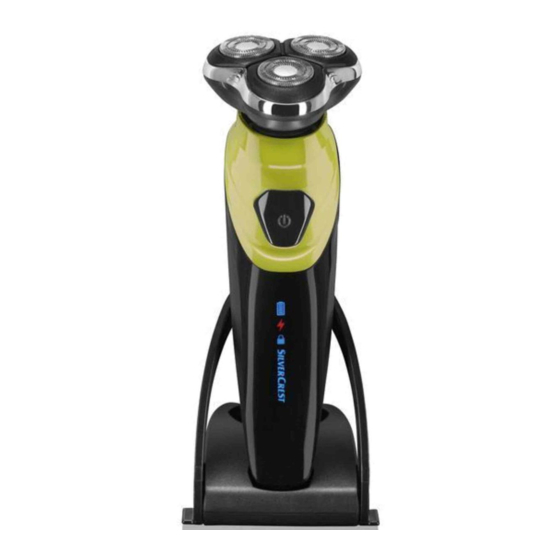
Seite 7: Gerätebeschreibung
(Akku-Ladestandsanzeige) 9 Symbol (Laden) 0 Symbol (Sperrung) q Ladebuchse Abbildung B (hintere Ausklappseite): w Verbindungsstecker e Netzadapter r Pinsel t Schutzkappe z Ladestation u Verbindungsstecker (Ladestation) i Ladebuchse (Ladestation) DE │ AT │ CH │ 3 ■ SRR 3.7 D5... -
Seite 8: Technische Daten
Schutzart: IPX 4 Netzadapter (Typ PTB-050100EU) Eingangsspannung: 100 - 240 V ∼, 50/60 Hz Ausgangsspannung: 5 V Eingangsstrom: 0,2 A Ausgangsstrom: 1000 mA Schutzart: IP 20 Schutzklasse: II / │ DE │ AT │ CH ■ 4 SRR 3.7 D5... -
Seite 9: Sicherheitshinweise
— Ziehen Sie dabei am Netzadapter direkt und nicht am Kabel. Tauchen Sie das Gerät sowie das Kabel mit ► Netzadapter niemals in Wasser oder eine andere Flüssigkeit. DE │ AT │ CH │ 5 ■ SRR 3.7 D5... - Seite 10 Der Einbau einer Fehlerstromschutzeinrich- ► tung mit einem Bemessungsauslösestrom von nicht mehr als 30 mA bietet weiteren Schutz vor einem elektrischen Schlag. Las- sen Sie den Einbau ausschließlich von einer Elektro-Fachkraft durchführen. │ DE │ AT │ CH ■ 6 SRR 3.7 D5...
-
Seite 11: Warnung - Verletzungsgefahr
Gebrauchs des Gerätes unterwie- sen wurden und die daraus resultierenden Gefahren verstehen. Kinder dürfen nicht mit dem Gerät spielen. ► Reinigung und Benutzer-Wartung dürfen ► nicht von Kindern ohne Beaufsichtigung durchgeführt werden. DE │ AT │ CH │ 7 ■ SRR 3.7 D5... - Seite 12 Teilen ist gewährleistet, dass sie die Sicherheitsanforderungen erfüllen werden. Schließen Sie den Netzadapter nur an eine ► gut erreichbare Steckdose an, damit im Störungsfall der Netzadapter schnell aus der Steckdose gezogen werden kann. │ DE │ AT │ CH ■ 8 SRR 3.7 D5...
- Seite 13 Verwenden Sie für den Netzbetrieb nur ► den mitgelieferten Netzadapter (Typ PTB- 050100EU). Decken Sie den Netzadapter nicht ab, um ► eine unzulässige Erwärmung zu vermeiden. Verwenden Sie den Netzadapter nur in Innenräumen. DE │ AT │ CH │ 9 ■ SRR 3.7 D5...
-
Seite 14: Aufl Aden Des Akkus Mit Ladestation
Steckdose. 4) Stellen Sie das Gerät in die Ladestation z. Das Gerät wird von dem Haltebügel der Ladestation z gehalten. Die Akkuladung wird durch das rot blinkende Symbol angezeigt. │ DE │ AT │ CH ■ 10 SRR 3.7 D5... -
Seite 15: Aufl Aden Des Akkus Ohne Ladestation
Mit voll geladenem Akku können Sie das Gerät bis zu ca. 60 Minuten ohne Anschluss an das Stromnetz betreiben. ■ Ist der Akku fast leer, blinkt das rote Symbol DE │ AT │ CH │ 11 ■ SRR 3.7 D5... -
Seite 16: Kabelloses Rasieren
Sie die Ein-/Aus-Taste 5. Das Gerät stoppt und das Display erlischt. 7) Reinigen Sie den Rasierer nach jeder Rasur mit dem mitgeliefer- ten Pinsel r. Für eine gründliche Reinigung lesen Sie das Kapitel „Reinigung und Pfl ege“. │ DE │ AT │ CH ■ 12 SRR 3.7 D5... -
Seite 17: Rasieren Mit Netzadapter
Sie die Trimmereinheit 6. 1) Ziehen Sie die Schereinheit 2, falls aufgesetzt, vom Handgerät ab. 2) Stecken Sie die Trimmereinheit 6 auf die Antriebswelle 1 (siehe Abbildung). DE │ AT │ CH │ 13 ■ SRR 3.7 D5... -
Seite 18: Reisesicherung
Sie die Ein-/Aus-Taste 5: 0 erscheint und fängt für ca. 5 Sekunden an das Symbol – zu blinken. Danach erlischt das Display und das Gerät lässt sich nun wieder einschalten. │ DE │ AT │ CH ■ 14 SRR 3.7 D5... -
Seite 19: Reinigung Und Pfl Ege
3) Benutzen Sie den Pinsel r, um verbliebene Haarteilchen zu entfernen. Trimmeinheit Reinigen Sie die Trimmeinheit nach jeder Rasur mit dem Pinsel r. ■ Ölen Sie die Langhaarschneider 7 ca. alle 6 Monate mit einem ■ Tropfen Nähmaschinenöl. DE │ AT │ CH │ 15 ■ SRR 3.7 D5... -
Seite 20: Reinigung Unter Fl Ießendem Wasser
Das Handteil des Rasierers ist nur gegen Spritzwasser geschützt und kann irreparabel beschädigt werden, wenn es unter fl ießendes Wasser gehalten wird. 3) Lassen Sie die Schereinheit 2 trocknen, bevor Sie den Rasierer wieder benutzen. │ DE │ AT │ CH ■ 16 SRR 3.7 D5... -
Seite 21: Gründliche Reinigung
3) Reinigen Sie alle Teile unter fl ießendem Wasser und lassen Sie sie vollständig trocknen. 4) Bauen Sie die Schereinheit 2 wieder zusammen. Achten Sie darauf, dass alle Teile wieder korrekt ineinander greifen: DE │ AT │ CH │ 17 ■ SRR 3.7 D5... -
Seite 22: Aufbewahrung
Aufbewahrung Stecken Sie immer die Schutzkappe t auf die Schereinheit 2, ■ wenn Sie das Gerät nicht benutzen. ■ Lagern Sie alles an einem sauberen, staubfreien und trockenen Ort. │ DE │ AT │ CH ■ 18 SRR 3.7 D5... -
Seite 23: Entsorgung
Halterungen abbrechen oder nach außen biegen. Benutzen Sie dafür am besten einen Schlitz- schraubendreher. 4) Wenn Sie das Innengehäuse herausgenommen haben: Brechen Sie die Halterungen der durchsichtigen Plastikabdeckung an den Seiten ab. DE │ AT │ CH │ 19 ■ SRR 3.7 D5... -
Seite 24: Garantie Der Kompernaß Handels Gmbh
Drei-Jahres-Frist das defekte Gerät und der Kaufbeleg (Kassenbon) vorgelegt und schriftlich kurz beschrieben wird, worin der Mangel besteht und wann er aufgetreten ist. │ DE │ AT │ CH ■ 20 SRR 3.7 D5... - Seite 25 Das Produkt ist nur für den privaten und nicht für den gewerblichen Ge- brauch bestimmt. Bei missbräuchlicher und unsachgemäßer Behandlung, Gewaltanwendung und bei Eingriff en, die nicht von unserer autorisier- ten Service-Niederlassung vorgenommen wurden, erlischt die Garantie. DE │ AT │ CH │ 21 ■ SRR 3.7 D5...
- Seite 26 Mangel besteht und wann er aufgetreten ist, für Sie portofrei an die Ihnen mitgeteilte Service Anschrift übersenden. Auf www.lidl-service.com können Sie diese und viele weitere Handbücher, Produktvideos und Software herunterladen. │ DE │ AT │ CH ■ 22 SRR 3.7 D5...
-
Seite 27: Service
E-Mail: kompernass@lidl.ch IAN 277761 Importeur Bitte beachten Sie, dass die folgende Anschrift keine Serviceanschrift ist. Kontaktieren Sie zunächst die benannte Servicestelle. KOMPERNASS HANDELS GMBH BURGSTRASSE 21 44867 BOCHUM GERMANY www.kompernass.com DE │ AT │ CH │ 23 ■ SRR 3.7 D5... - Seite 28 │ DE │ AT │ CH ■ 24 SRR 3.7 D5...
- Seite 29 Importateur ......... . .47 FR │ CH │ 25 ■ SRR 3.7 D5...
-
Seite 30: Introduction
Matériel livré ▯ Rasoir avec unité de coupe ▯ Adaptateur secteur ▯ Trimmer ▯ Coiff e de protection ▯ Pinceau ▯ Chargeur ▯ Carte de commande ▯ Mode d'emploi │ FR │ CH ■ 26 SRR 3.7 D5... -
Seite 31: Description De L'appareil
Figure B (volet dépliant arrière) : w Fiche de connexion e Adaptateur secteur r Pinceau t Coiff e de protection z Chargeur u Fiche de connexion (chargeur) i Douille de chargement (chargeur) FR │ CH │ 27 ■ SRR 3.7 D5... -
Seite 32: Caractéristiques Techniques
100 - 240 V ∼, 50/60 Hz Tension de sortie : Courant d’entrée : 0,2 A Intensité de sortie : 1000 mA Indice de protection IP 20 Classe de protection : II / │ FR │ CH ■ 28 SRR 3.7 D5... -
Seite 33: Consignes De Sécurité
— Retirez directement l'adaptateur secteur sans tirer sur le fi l électrique. Ne plongez jamais l'appareil ou le fi l élec- ► trique avec l'adaptateur secteur dans l'eau ou d'autres liquides. FR │ CH │ 29 ■ SRR 3.7 D5... - Seite 34 30 mA off re une protection supplémentaire contre les chocs électriques. Confi ez le montage exclusivement à un électricien qualifi é. │ FR │ CH ■ 30 SRR 3.7 D5...
- Seite 35 Ne pas laisser les enfants jouer avec ► l'appareil. Il est interdit aux enfants de nettoyer ou ► d'entretenir l'appareil sans surveillance. FR │ CH │ 31 ■ SRR 3.7 D5...
- Seite 36 Ne raccordez l'adaptateur secteur qu'à une ► prise secteur facile d'accès afi n qu'en cas de panne il soit possible de débrancher rapidement l'adaptateur secteur de la prise. │ FR │ CH ■ 32 SRR 3.7 D5...
- Seite 37 Utilisez l'adaptateur secteur livré pour ► le fonctionnement sur secteur (type PTB- 050100EU). Ne pas couvrir l'adaptateur secteur, afi n ► d'éviter un échauff ement excessif. Utilisez l'adaptateur secteur uniquement à l'intérieur. FR │ CH │ 33 ■ SRR 3.7 D5...
-
Seite 38: Chargement De L'accu Avec Le Chargeur
4) Placez l'appareil dans le chargeur z. L'appareil est maintenu par l'étrier de maintien du chargeur z. 9 clignotant Le chargement de l'accu est indiqué par l'icône en rouge. │ FR │ CH ■ 34 SRR 3.7 D5... -
Seite 39: Chargement De L'accu Sans Chargeur
8 s'allume. ■ Avec un accu complètement chargé, vous pouvez utiliser l'appareil pendant 60 minutes sans raccordement au réseau électrique. 9 clignote. ■ Une fois l'accu presque vide, l'icône rouge FR │ CH │ 35 ■ SRR 3.7 D5... -
Seite 40: Rasage Sans Fi L
Marche/Arrêt 5. L'appareil s'arrête. L'affi chage s'éteint. 7) Nettoyez le rasoir après chaque rasage en vous servant du pinceau r livré d'origine. Pour un nettoyage soigneux, veuillez lire le chapitre «Nettoyage et entretien». │ FR │ CH ■ 36 SRR 3.7 D5... -
Seite 41: Rasage Avec L'adaptateur Secteur
6. 1) Retirez l'unité de coupe 2, de l'appareil, si elle est mise en place. 2) Insérez le trimmer 6 sur l'arbre d'entraînement 1 (voir la fi gure) FR │ CH │ 37 ■ SRR 3.7 D5... -
Seite 42: Sécurité De Voyage
Si vous souhaitez annuler le verrouillage, appuyez et maintenez appuyé le bouton Marche/Arrêt 5: 0 apparait et commence à clignoter pendant env. l'icône – 5 secondes. L'écran s'éteint ensuite et l'appareil peut mainte- nant être à nouveau allumé. │ FR │ CH ■ 38 SRR 3.7 D5... -
Seite 43: Nettoyage Et Entretien
Nettoyez le trimmer après chaque rasage en vous servant du pinceau r. Huilez la tondeuse poils longs 7 environ tous les 6 mois avec ■ une goutte d'huile de machine à coudre. FR │ CH │ 39 ■ SRR 3.7 D5... -
Seite 44: Nettoyage À L'eau Courante
! Le corps du rasoir est uniquement protégé contre les projections d’eau et peut être endommagé de manière irréparable s’il est maintenu sous l’eau courante. 3) Laissez sécher l'unité de coupe 2 avant de continuer à utiliser le rasoir. │ FR │ CH ■ 40 SRR 3.7 D5... -
Seite 45: Nettoyage Approfondi
3) Nettoyez toutes les pièces sous l’eau courante et faites-les entière- ment sécher. 4) Remontez l’unité de coupe 2. Veillez à ce que toutes les pièces s’emboîtent correctement les unes dans les autres : FR │ CH │ 41 ■ SRR 3.7 D5... -
Seite 46: Entreposage
■ Lorsque vous n'utilisez plus l'appareil, remettez toujours la coiff e de protection t sur l'unité de coupe 2. ■ Rangez le tout dans un endroit propre, sans poussière et sec. │ FR │ CH ■ 42 SRR 3.7 D5... -
Seite 47: Mise Au Rebut
Utilisez ici de préférence un tournevis cruciforme. 4) Une fois le boîtier intérieur retiré : cassez les supports du cache plastique transparent sur les côtés. FR │ CH │ 43 ■ SRR 3.7 D5... -
Seite 48: Garantie De Kompernass Handels Gmbh
Si dans un délai de trois ans suivant la date d’achat de ce produit, un vice de matériel ou de fabrication venait à apparaître, le produit sera réparé ou remplacé gratuitement par nos soins, selon notre choix. │ FR │ CH ■ 44 SRR 3.7 D5... - Seite 49 à un usage professionnel. La garantie est annulée en cas d’entretien incorrect et inapproprié, d’usage de la force et en cas d’intervention non réalisée par notre centre de service après-vente agréé. FR │ CH │ 45 ■ SRR 3.7 D5...
- Seite 50 à l’adresse de service après-vente communiquée. Sur www.lidl-service.com, vous pouvez télécharger ce manuel ainsi que beaucoup d’autres, des vidéos produit et logiciels. │ FR │ CH ■ 46 SRR 3.7 D5...
-
Seite 51: Service Après-Vente
Importateur Veuillez tenir compte du fait que l’adresse suivante n’est pas une adresse de service après-vente. Veuillez d’abord contacter le service mentionné. KOMPERNASS HANDELS GMBH BURGSTRASSE 21 44867 BOCHUM GERMANY www.kompernass.com FR │ CH │ 47 ■ SRR 3.7 D5... - Seite 52 │ FR │ CH ■ 48 SRR 3.7 D5...
- Seite 53 Importatore ......... . .71 IT │ CH │ 49 ■ SRR 3.7 D5...
-
Seite 54: Introduzione
Rasoio con unità di taglio ▯ Adattatore di rete ▯ Unità di rifi nitura ▯ Cappuccio di protezione ▯ Pennello ▯ Base di carica ▯ Scheda di ordinazione ▯ Manuale di istruzioni │ IT │ CH ■ 50 SRR 3.7 D5... -
Seite 55: Descrizione Dell'apparecchio
Figura B (lato apribile posteriore): w Spina di connessione e Adattatore di rete r Pennello t Cappuccio di protezione z Base di carica u Connettore (base di carica) i Presa di carica (base di carica) IT │ CH │ 51 ■ SRR 3.7 D5... -
Seite 56: Dati Tecnici
Tensione di alimentazione: 100 - 240 V ∼, 50/60 Hz Tensione in uscita: Corrente in ingresso: 0,2 A Corrente di uscita: 1000 mA Grado di protezione: IP 20 Classe di protezione: II / │ IT │ CH ■ 52 SRR 3.7 D5... -
Seite 57: Indicazioni Di Sicurezza
— Staccare l'adattatore di rete tenendolo ben saldo e non tirando dal cavo. Non immergere mai l'apparecchio o il cavo ► con l'adattatore di rete in acqua o altri liquidi. IT │ CH │ 53 ■ SRR 3.7 D5... - Seite 58 L'installazione di un salvavita con una corrente ► di apertura di misurazione non superiore a 30 mA off re un'ulteriore protezione da una scossa elettrica. Fare eseguire l'installazione esclusivamente da un elettricista specializzato. │ IT │ CH ■ 54 SRR 3.7 D5...
- Seite 59 I bambini non devono giocare con l'appa- ► recchio. La pulizia e la manutenzione a cura ► dell'utente non devono essere eseguite da bambini, a meno che non siano sorvegliati. IT │ CH │ 55 ■ SRR 3.7 D5...
- Seite 60 è garantita la conformità ai requisiti di sicurezza. Collegare l'adattatore di rete solo ad una ► presa ben raggiungibile, in modo che in caso di guasto sia possibile staccare rapi- damente l'adattatore di rete dalla presa. │ IT │ CH ■ 56 SRR 3.7 D5...
- Seite 61 (tipo PTB- 050100EU). Al fi ne di evitare un surriscaldamento non ► ammesso, non coprire l'adattatore di rete. Utilizzare l'adattatore di rete solo al chiuso. IT │ CH │ 57 ■ SRR 3.7 D5...
-
Seite 62: Ricarica Della Batteria Con Base Di Carica
4) Inserire l’apparecchio nella base di carica z. L’apparecchio viene sostenuto dalla staff a di sostegno della base di carica z. Il caricamento della batteria viene segnalato dal simbolo rosso lampeggiante │ IT │ CH ■ 58 SRR 3.7 D5... -
Seite 63: Ricarica Della Batteria Senza Base Di Carica
■ Con la batteria completamente carica l’apparecchio può essere tenuto in funzione per circa 60 minuti senza collegamento alla rete. ■ Quando la batteria è quasi scarica, il simbolo rosso lampeggia. IT │ CH │ 59 ■ SRR 3.7 D5... -
Seite 64: Rasatura Senza Fi Lo
5. L’apparecchio si arresta. Il display si spegne. 7) Pulire il rasoio dopo ogni rasatura con il pennello in dotazione r. Per una pulizia approfondita, leggere il capitolo “Pulizia e manutenzione”. │ IT │ CH ■ 60 SRR 3.7 D5... -
Seite 65: Rasatura Con Adattatore Di Rete
Per dare forma alla barba o alle basette o per radere le sopracciglia, utilizzare l’unità di rifi nitura 6. 1) Se inserita, sfi lare l’unità di taglio 2 dall’impugnatura. 2) Infi lare l’unità di rifi nitura 6 sull’albero motore 1 (vedi illustra- zione). IT │ CH │ 61 ■ SRR 3.7 D5... -
Seite 66: Blocco Da Viaggio
♦ e tenerlo premuto: 0 compare sul display e lampeggia per circa il simbolo – 5 secondi. Dopo di ciò il display si spegne ed è di nuovo possibile accendere l’apparecchio. │ IT │ CH ■ 62 SRR 3.7 D5... -
Seite 67: Pulizia E Manutenzione
Pulire l’unità di rifi nitura dopo ogni rasatura con il pennello in dotazione r. Ungere la lama per la regolazione dei peli lunghi 7 all’incirca ■ ogni 6 mesi con una goccia di olio per macchine da cucire. IT │ CH │ 63 ■ SRR 3.7 D5... -
Seite 68: Pulizia Sotto L'acqua Corrente
La parte manuale del rasoio è protetta solo dagli spruzzi d’acqua, potrebbe dunque venire danneggiata irreparabil- mente se viene tenuta sotto l’acqua corrente. 3) Lasciar asciugare l’unità di taglio 2 prima di riutilizzare il rasoio. │ IT │ CH ■ 64 SRR 3.7 D5... -
Seite 69: Pulizia A Fondo
3 3) Pulire tutte le parti sotto l’acqua corrente e farle asciugare completamente. 4) Riassemblare l’unità di taglio 2. Badare che tutti i componenti si innestino correttamente l’uno dentro l’altro: IT │ CH │ 65 ■ SRR 3.7 D5... -
Seite 70: Conservazione
Applicare sempre il cappuccio di protezione t sull’unità di ■ taglio 2 quando l’apparecchio non è in uso. ■ Sistemare il tutto in un luogo pulito, privo di polvere e asciutto. │ IT │ CH ■ 66 SRR 3.7 D5... -
Seite 71: Smaltimento
Si consiglia di utilizzare a tale scopo un cacciavite. 4) Dopo aver estratto l'involucro interno: spezzare i sostegni del coperchio di plastica trasparente sui lati. IT │ CH │ 67 ■ SRR 3.7 D5... -
Seite 72: Garanzia Della Kompernass Handels Gmbh
(scontrino di cassa) vengano presentati entro il termine di tre anni e che si descriva per iscritto in cosa consiste il vizio e quando si è presentato. │ IT │ CH ■ 68 SRR 3.7 D5... - Seite 73 Il prodotto è destinato esclusivamente all’uso domestico e non a quello commerciale. La garanzia decade in caso di impiego improprio o ma- nomissione, uso della forza e interventi non eseguiti dalla nostra fi liale di assistenza autorizzata. IT │ CH │ 69 ■ SRR 3.7 D5...
- Seite 74 è presentato, all’indirizzo del servizio di assistenza clienti che Le è stato comunicato. Al sito www.lidl-service.com si possono scaricare questo e molti altri manuali di istruzioni per l’uso, fi lmati sui prodotti e software. │ IT │ CH ■ 70 SRR 3.7 D5...
-
Seite 75: Assistenza
Importatore Badi che il seguente indirizzo non è quello del servizio di assistenza clienti. Contatti innanzitutto il servizio di assistenza clienti indicato. KOMPERNASS HANDELS GMBH BURGSTRASSE 21 44867 BOCHUM GERMANY www.kompernass.com IT │ CH │ 71 ■ SRR 3.7 D5... - Seite 76 │ IT │ CH ■ 72 SRR 3.7 D5...
- Seite 77 Importer ..........95 │ GB 73 ■ SRR 3.7 D5...
-
Seite 78: Introduction
All other uses are deemed to be improper and may result in property damage or even in personal injury. Package contents ▯ Shaver with cutting unit ▯ Mains adapter ▯ Trimmer unit ▯ Protective cap ▯ Brush ▯ Charger ▯ Order card ▯ Operating instructions │ ■ 74 GB SRR 3.7 D5... -
Seite 79: Description Of The Appliance
9 Symbol (charging) 0 Symbol (locked) q Charging socket Figure B (rear fold-out page): w Connector e Mains adapter r Brush t Protective cap z Charger u Connector (charger) i Charging socket (charger) │ GB 75 ■ SRR 3.7 D5... -
Seite 80: Technical Data
IPX 4 Mains adapter (type PTB-050100EU) Input voltage: 100 - 240 V ∼, 50/60 Hz Output voltage: Input current: 0,2 A Output current: 1000 mA Protection rating: IP 20 Protection class: II / │ ■ 76 GB SRR 3.7 D5... -
Seite 81: Safety Instructions
— When doing so, pull the mains adapter itself and not the cable. Never submerge the appliance or the cable ► with mains adapter in water or other liquids. │ GB 77 ■ SRR 3.7 D5... -
Seite 82: Risk Of Electric Shock
The installation of a residual current circuit ► breaker with a rated tripping current of no more than 30 mA off ers further protection from electric shocks. Have the installation carried out only by a qualifi ed electrician. │ ■ 78 GB SRR 3.7 D5... -
Seite 83: Warning - Risk Of Injury
Children must not play with the device. ► Cleaning and user maintenance tasks may ► not be carried out by children unless they are supervised. │ GB 79 ■ SRR 3.7 D5... - Seite 84 Only plug the mains adapter into an easily ► accessible power socket so that you can pull it out of the power socket quickly in an emergency. │ ■ 80 GB SRR 3.7 D5...
- Seite 85 For mains operation, use only the supplied ► mains adapter (type PTB-050100EU). To avoid improper warming, do not cover ► the mains adapter. The mains adapter is for indoor use only. │ GB 81 ■ SRR 3.7 D5...
-
Seite 86: Charging The Rechargeable Battery With The Charger
4) Place the appliance in the charger z. The bracket holds the appliance in place in the charger z. The charging of the battery is indicated by the red fl ashing symbol │ ■ 82 GB SRR 3.7 D5... -
Seite 87: Charging The Rechargeable Battery Without The Charger
Once the battery is fully charged, you can use the appliance for around 60 minutes without connecting it to the power supply. 9 fl ashes. ■ If the battery is nearly empty, the red symbol │ GB 83 ■ SRR 3.7 D5... -
Seite 88: Cordless Shaving
ON/OFF button 5. The appliance stops. The display disappears at once. 7) Clean the shaver after every use with the supplied brush r. For a more thorough cleaning, read the section “Cleaning and care”. │ ■ 84 GB SRR 3.7 D5... -
Seite 89: Shaving Using The Mains Adapter
To shape your beard, form sideburns or shave eyebrows, use the trimmer unit 6. 1) Pull the cutting unit 2, if attached, off the handset. 2) Fit the trimmer unit 6 onto the drive shaft 1 (see fi gure). │ GB 85 ■ SRR 3.7 D5... -
Seite 90: Travel Lock
If you want to unlock your appliance again, press and hold down the ON/OFF button 5: 0 appears and starts to fl ash for approx. the symbol – 5 seconds. The display then disappears and the appliance can now be switched on again. │ ■ 86 GB SRR 3.7 D5... -
Seite 91: Cleaning And Care
Trimmer unit Clean the trimmer unit after every shave using the supplied brush r. ■ Oil the long hair trimmer 7 around every 6 months with a drop ■ of sewing machine oil. │ GB 87 ■ SRR 3.7 D5... -
Seite 92: Cleaning Under Running Water
The shaver handset is only protected against water splashes and can be irreparably damaged if it is held under running water. 3) Allow the cutting unit 2 to dry out completely before using the shaver again. │ ■ 88 GB SRR 3.7 D5... -
Seite 93: Thorough Cleaning
3 3) Clean all parts under running water and then allow them to dry fully. 4) Replace the cutting unit 2. Ensure that all of the parts grip into each other correctly: │ GB 89 ■ SRR 3.7 D5... -
Seite 94: Storage
3. Storage Always replace the protective cap t onto the cutting unit 2 ■ when you are not using the appliance. ■ Store the everything in a clean, dust-free and dry place. │ ■ 90 GB SRR 3.7 D5... -
Seite 95: Disposal
Preferably use a fl at-head screwdriver to do this. 4) After you have removed the internal housing: Snap the mountings of the clear plastic cover off on the sides. │ GB 91 ■ SRR 3.7 D5... -
Seite 96: Kompernass Handels Gmbh Warranty
This warranty service is dependent on you presenting the defective appliance and the proof of purchase (receipt) and a short written description of the fault and its time of occurrence. │ ■ 92 GB SRR 3.7 D5... - Seite 97 The warranty shall be deemed void in cases of misuse or improper handling, use of force and modifi cations/repairs which have not been carried out by one of our authorised Service centres. │ GB 93 ■ SRR 3.7 D5...
-
Seite 98: Service
You can download these instructions along with many other manuals, product videos and software on www.lidl-service.com. Service Service Great Britain Tel.: 0871 5000 720 (£ 0.10/Min.) E-Mail: kompernass@lidl.co.uk IAN 277761 │ ■ 94 GB SRR 3.7 D5... -
Seite 99: Importer
Importer Please note that the following address is not the service address. Please use the service address provided in the operating instructions. KOMPERNASS HANDELS GMBH BURGSTRASSE 21 44867 BOCHUM GERMANY www.kompernass.com │ GB 95 ■ SRR 3.7 D5... - Seite 100 KOMPERNASS HANDELS GMBH BURGSTRASSE 21 44867 BOCHUM DEUTSCHLAND / GERMANY www.kompernass.com Stand der Informationen · Version des informations Versione delle informazioni · Last Information Update: 06 / 2016 · Ident.-No.: SRR3.7D5-052016-1 IAN 277761...