Olympus PT-043 Handbücher
Anleitungen und Benutzerhandbücher für Olympus PT-043. Wir haben 1 Olympus PT-043 Anleitung zum kostenlosen PDF-Download zur Verfügung: Bedienungsanleitung
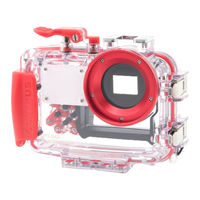
Olympus PT-043 Bedienungsanleitung (268 Seiten)
Marke: Olympus
|
Kategorie: Kamera- und Fotozubehör
| Dateigröße: 14 MB
Inhaltsverzeichnis
-
はじめに2
-
ご使用の前に必ずお読みください2
-
安全にお使いいただくために3
-
電池について4
-
カメラモードの設定について5
-
お取り扱いについて6
-
Inhaltsverzeichnis8
-
準備をしましょう10
-
箱の中を確認します10
-
各部名称11
-
ストラップを取り付けます12
-
基本操作をマスターします12
-
プロテクターの構え方12
-
シャッターレバーの押し方13
-
撮影モードの切り換え方13
-
ズームボタンの使い方13
-
プロテクターの事前チェックをしましょう15
-
使用前の事前テスト15
-
事前テスト15
-
デジタルカメラを装填しましょう16
-
デジタルカメラをチェックします16
-
電池の確認16
-
撮影可能枚数の確認16
-
デジタルカメラのストラップをはずしましょう16
-
カメラを準備します16
-
装填できるデジタルカメラは16
-
カメラの電源を入れます16
-
カメラの動作チェックをします17
-
プロテクターを開けます17
-
デジタルカメラを装填します17
-
シリカゲルを装填します18
-
装填状態のチェックをします18
-
プロテクターを密閉します19
-
装填後の動作チェック19
-
撮影シーン/撮影モードの確認20
-
レンズキャップの取り付け方、取りはずし方20
-
液晶フードの取り付け方、取りはずし方21
-
取りはずし方21
-
最終チェックをします21
-
目視検査21
-
水中での撮影方法23
-
ストラップの使い方23
-
撮影しましょう23
-
液晶モニタで撮影画面を確認します23
-
シャッターレバーを静かに押します23
-
フラッシュ撮影時のご注意23
-
水中撮影シーンに合わせた撮影24
-
水中撮影シーンの種類24
-
K水中ワイド124
-
L水中ワイド224
-
H水中マクロ24
-
撮影シーンの選択方法25
-
水中撮影シーン時のAfロックについて25
-
撮影終了後の取り扱い方法26
-
水滴を拭き取りましょう26
-
デジタルカメラを取り出します27
-
プロテクターを真水で洗います28
-
プロテクターを乾燥させましょう28
-
防水機能のメンテナンスをしましょう29
-
Oリングを取りはずします29
-
Oリングの取りはずしかた29
-
Oリングを取り付けます31
-
Oリングへのグリス塗布方法31
-
消耗品は取り替えましょう32
-
Pt-043ご使用上のQ&A33
-
Introduction40
-
Please Read the Following Items before Use40
-
For Safe Use41
-
Batteries42
-
Setting the Underwater Shooting Scene Mode43
-
For Prevention of Water Leakage Accidents43
-
Handling the Product44
-
Preparations48
-
Check the Contents of the Package48
-
Names of the Parts49
-
Install the Strap50
-
Master the Basic Operation50
-
Holding the Case50
-
How to Press the Shutter Lever51
-
How to Switch the Shooting Mode51
-
How to Use the Zoom Buttons51
-
How to Use the POWER Button52
-
Advance Check of the Case53
-
Advance Test before Use53
-
Advance Test53
-
Install the Digital Camera54
-
Check the Digital Camera54
-
Battery Confirmation54
-
Confirmation of the Remaining Number of Pictures to be Taken54
-
Remove the Hand Strap from the Digital Camera54
-
Prepare the Camera54
-
Applicable Digital Cameras54
-
Turn on the Digital Camera54
-
Check the Camera's Operation55
-
Open the Case55
-
Load the Digital Camera55
-
Insertion of Silica Gel56
-
Make Sure the Camera Is Loaded Properly56
-
Seal the Case57
-
Check the Operation of the Loaded Camera57
-
Confirm the Shooting Scene and Shooting Mode58
-
Mounting and Removing the Lens Cap58
-
Installation and Removal of the LCD Hood59
-
Installation59
-
Removal59
-
Perform the Final Checks59
-
Visual Inspection59
-
Final Test (Water Leakage Test)60
-
Taking Pictures under Water61
-
How to Use the Hand Strap61
-
Taking Pictures61
-
Confirm the Picture on the LCD Monitor61
-
Press the Shutter Lever Gently61
-
Cautions When Using the Flash61
-
Underwater Shooting According to the Scene Type62
-
Underwater Shooting Modes62
-
Kunderwater Wide-Angle 162
-
Hunderwater Macro62
-
How to Select the Shooting Scene63
-
Locking AF During Underwater Shooting63
-
Handling after Shooting64
-
Wipe off any Waterdrop64
-
Take out the Digital Camera65
-
Wash the Case with Pure Water66
-
Dry the Case66
-
Maintaining the Waterproof Function67
-
Remove the O-Ring67
-
Removal of the O-Ring67
-
Remove any Sand, Dirt, Etc68
-
Install the O-Ring69
-
How to Apply Grease to the O-Ring69
-
Replace Consumable Parts70
-
Appendix71
-
Q & a on the Use of the PT-04371
-
Specifications76
-
Limitation de Garantie78
-
Pour une Utilisation Sûre79
-
Manipulation du Produit82
-
Préparatifs86
-
Contrôle du Contenu de L'emballage86
-
Nomenclature des Pièces87
-
Mise en Place de la Courroie88
-
Maîtriser le Fonctionnement de Base88
-
Tenue du Caisson88
-
Comment Appuyer Sur le Levier du Déclencheur89
-
Comment Changer le Mode de Prise de Vue89
-
Comment Utiliser les Touches de Zoom89
-
Utilisation de la Touche POWER90
-
Contrôle Préliminaire du Caisson91
-
Test Préliminaire Avant Utilisation91
-
Test Préliminaire91
-
Mise en Place de L'appareil Photo Numérique92
-
Contrôle de L'appareil Photo Numérique92
-
Contrôle de Batterie92
-
Confirmation du Nombre de Vues Restant à Prendre92
-
Retirer la Courroie de L'appareil Photo Numérique92
-
Préparer L'appareil Photo92
-
Appareils Photo Numériques Applicables92
-
Mettre en Marche L'appareil Numérique92
-
Vérifier le Fonctionnement de L'appareil Photo93
-
Ouvrir le Caisson93
-
Insérer L'appareil Photo Numérique93
-
Introduction du Gel de Silice94
-
Vérifier après Insertion94
-
Sceller le Caisson95
-
Vérifier le Fonctionnement de L'appareil Photo Installé95
-
Vérifier le Mode de Prise de Vue et de Scène de Prise de Vue96
-
Montage et Retrait du Bouchon D'objectif96
-
Mise en Place et Retrait de la Coiffe de L'écran ACL97
-
Mise en Place97
-
Retrait97
-
Effectuer les Contrôles Finaux97
-
Inspection Visuelle97
-
Test Final (Test de Fuite D'eau)98
-
Prise de Vues Sous L'eau99
-
Utilisation de la Dragonne99
-
Prise de Vues99
-
Confirmer la Vue Sur L'écran ACL99
-
Appuyer Doucement Sur le Déclencheur99
-
Précaution en Utilisant le Flash99
-
Prise de Vue Sous-Marine Selon le Type de Scène100
-
Types de Scènes Sous-Marines100
-
Kgrand Angle Sous-Marin 1100
-
Lgrand Angle Sous-Marin 2100
-
Hgros Plan Sous-Marin100
-
Comment Sélectionner le Mode de Scène de Prise de Vue101
-
Mémorisation AF pendant la Prise de Vue Sous-Marine101
-
Manipulation après la Prise de Vue102
-
Essuyer Toute Goutte D'eau102
-
Sortir L'appareil Photo Numérique103
-
Laver le Caisson Avec de L'eau Pure104
-
Sécher le Caisson104
-
Maintien de la Fonction D'étanchéité105
-
Retirer le Joint105
-
Retrait du Joint105
-
Retirer Tout Grain de Sable, Poussière, Etc106
-
Installer le Joint107
-
Comment Appliquer la Graisse Sur le Joint107
-
Remplacer les Pièces Consommables108
-
Annexe109
-
Q & R Sur L'utilisation du PT-043109
-
Fiche Technique114
-
Einführung116
-
Batterieleistung130
-
Anbringen135
-
Entfernen135
-
Aufnahmen machen137
-
Anhang147
-
Technische Daten152
-
Para un Uso Seguro155
-
Manipulación del Producto158
-
Preparaciones162
-
Compruebe el Contenido del Paquete162
-
Nombres de las Piezas163
-
Coloque la Correa164
-
Conozca la Operación Básica164
-
Sostener la Caja164
-
Cómo Presionar la Palanca del Disparador165
-
Cómo Seleccionar el Modo de Toma Fotográfica165
-
Cómo Usar Los Botones de Zoom165
-
Cómo Utilizar el Botón POWER166
-
Verificación Anticipada de la Caja167
-
Prueba Anticipada Antes de Su Uso167
-
Prueba Anticipada167
-
Instale la Cámara Digital168
-
Compruebe la Cámara Digital168
-
Confirmación de Pila168
-
Confirmación del Número de Fotos que Se Pueden Hacer168
-
Retire la Correa de Mano de la Cámara Digital168
-
Prepare la Cámara168
-
Cámaras Digitales Compatibles168
-
Encender la Cámara Digital168
-
Compruebe el Funcionamiento de la Cámara169
-
Abra la Caja169
-
Colocación de la Cámara Digital169
-
Inserción de Silicagel170
-
Compruebe la Condición de Colocación de la Cámara170
-
Selle la Caja171
-
Compruebe la Operación de la Cámara Colocada171
-
Confirme el Modo de Escena de Toma Fotográfica y Toma Fotográfica172
-
Colocar y Retirar la Tapa del Objetivo172
-
Instalación y Retiro del Visera de LCD173
-
Instalación173
-
Extracción173
-
Realice las Verificaciones Finales173
-
Inspección Visual173
-
Prueba Final (Prueba de Filtración de Agua)174
-
Tomando Fotos Debajo del Agua175
-
Cómo Usar la Correa de Mano175
-
Hacer Fotos175
-
Confirme la Foto en el Monitor LCD175
-
Pulse Suavemente la Palanca del Disparador175
-
Precaución al Usar el Flash175
-
Toma Fotográfica Debajo del Agua de Acuerdo al Tipo de Escena176
-
Tipos de Escenas de Toma Fotográficas Submarinas176
-
Kgran Angular Submarino 1176
-
Lgran Angular Submarino 2176
-
Hmacro Submarino176
-
Cómo Seleccionar el Modo de Toma Fotográfica177
-
Bloqueando el Enfoque Automático (AF) Durante la Toma Fotográfica Debajo del Agua177
-
Manipulación Después de la Toma Fotográfica178
-
Limpie Secando todo Vestigio de Agua178
-
Retire la Cámara Digital179
-
Lave la Caja con Agua Pura180
-
Seque la Caja180
-
Manteniendo la Función de Hermeticidad al Agua181
-
Retire la Junta Tórica181
-
Quite toda Arena, Suciedad, Etc182
-
Coloque la Junta Tórica183
-
Cómo Aplicar Grasa a la Junta Tórica183
-
Reemplace las Piezas Consumibles184
-
Apéndice185
-
Especificaciones190
-
检查包装盒中的内容200
-
部件名称201
-
安装手带202
-
掌握基本操作202
-
把持防水机壳的姿势202
-
怎样按快门杆203
-
怎样转换拍摄模式203
-
怎样使用调焦按钮203
-
怎样使用Power按钮204
-
防水机壳的预先检查205
-
使用前的预先检查205
-
预先检查205
-
装入数码照相机206
-
检查数码照相机206
-
确认电池206
-
确认可拍摄图像数量206
-
取下数码照相机上的手带206
-
照相机的准备工作206
-
可装入哪些型号的数码照相机206
-
打开数码相机的电源206
-
检查照相机的操作情况206
-
打开防水机壳207
-
装入数码照相机207
-
插入硅胶208
-
检查装入状况208
-
密封防水机壳209
-
装入后的操作检测209
-
拍摄场景/拍摄模式的确认210
-
镜头盖的安装和取下方法210
-
最终检查 (漏水实验212
-
水中的拍摄方法213
-
怎样使用手带213
-
拍摄照片213
-
用液晶显示屏确认拍摄画面213
-
轻轻按快门杆213
-
使用闪光灯拍摄时的注意事项213
-
与水中拍摄场景相吻合的拍摄214
-
水中拍摄场景的种类214
-
K水中广角1214
-
H水中近拍214
-
拍摄场景的选择方法215
-
拍摄后的处理方法216
-
擦干水滴216
-
取出数码照相机217
-
用清水清洗防水机壳218
-
晾干防水机壳218
-
防水功能的维护219
-
取下O-环219
-
取下O-环的方法219
-
安装O-环221
-
如何使用O-环软膏221
-
更换消耗性零件222
-
使用问答223
-
사용에 앞서 다음 사항을 꼭 숙지하시기 바랍니다230
-
시작하기238
-
구성품 확인238
-
부품 명칭239
-
스트랩 연결하기240
-
기본 조작 익히기240
-
케이스 잡기240
-
셔터 레버 누르는 법241
-
촬영 모드의 전환 방법241
-
줌 버튼 사용법241
-
Power 버튼 사용법242
-
케이스 사전 점검243
-
사용 전 사전 검사243
-
사전 검사243
-
디지털 카메라 장착244
-
디지털 카메라 확인244
-
배터리 확인244
-
남은 촬영 가능회수 확인244
-
디지털 카메라에서 핸드 스트랩 제거244
-
카메라를 준비합니다244
-
장착 가능한 디지털 카메라244
-
카메라의 전원을 켭니다244
-
카메라의 조작상태 점검245
-
케이스 열기245
-
디지털 카메라 장착245
-
실리카겔 삽입246
-
장착 상태 점검246
-
케이스 밀봉247
-
촬영 신/촬영 모드의 확인247
-
렌즈 뚜껑의 장착, 분리248
-
Lcd 후드의 장착과 분리249
-
최종 점검 수행249
-
육안 검사249
-
최종 점검250
-
수중 촬영251
-
핸드 스트랩 사용법251
-
사진 촬영251
-
Lcd 모니터에서 사진을 확인합니다251
-
셔터 레버를 부드럽게 누룹니다251
-
플래시 사용시 주의 사항251
-
수중 촬영 신에 맞추어 촬영252
-
수중 촬영 신의 종류252
-
H 수중 접사252
-
촬영 신의 선택 방법253
-
수중 촬영 신일때 Af 잠금에 관해서253
-
촬영 후 취급 방법254
-
물기 제거254
-
디지털 카메라를 꺼냅니다255
-
케이스는 물을 이용해 충분히 세척할 수 있습니다256
-
케이스 건조256
-
방수기능 유지관리257
-
O-링 제거257
-
O-링 제거 방법257
-
이물질 제거258
-
O-링 설치하기259
-
O-링에 윤활제 바르기259
-
소모품 교체260
-
사용 관련 질의 및 답변261
-
제품 규격266
