Werbung
Quicklinks
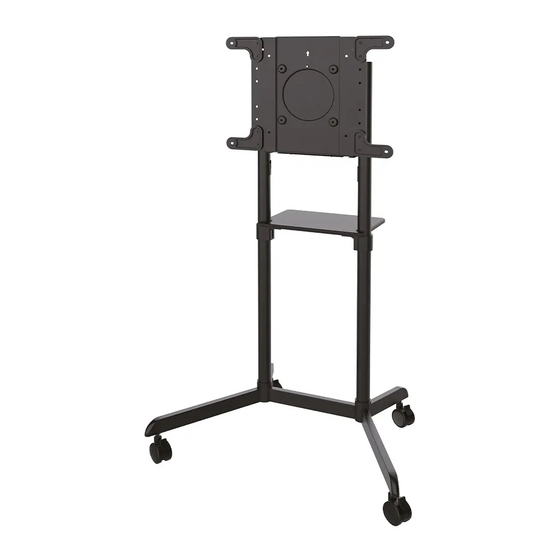
NS-M1250BLACK
EN
Floor stand
NL
Vloersteun
DE
Bodenständer
FR
Support au sol
IT
Supporto da pavimento
ES
Soporte de suelo
PT
Suporte de chão
DK
Gulvstander
INSTRUCTION MANUAL
Measuring unit: mm
NO
Gulv stativ
SE
Golvstativ
FI
Lattiateline
PL
Stojak podłogowy
CS
Podlahový stojan
SK
Podlahový stojan
RO
Stativ pentru podea
WWW.NEOMOUNTS.COM
Werbung

Verwandte Anleitungen für NeoMounts NS-M1250BLACK


Inhaltszusammenfassung für NeoMounts NS-M1250BLACK
- Seite 1 INSTRUCTION MANUAL Measuring unit: mm NS-M1250BLACK Floor stand Gulv stativ Vloersteun Golvstativ Bodenständer Lattiateline Support au sol Stojak podłogowy Supporto da pavimento Podlahový stojan Soporte de suelo Podlahový stojan Suporte de chão Stativ pentru podea Gulvstander WWW.NEOMOUNTS.COM...
- Seite 2 Tool NS-M1250BLACK 0-70 kg 200x200 - 600x400 mm PARTS A. (x1) B. (x4) C. (x2) D. (x2) E. (x1) F. (x2) G. (x1) H. (x1) I. (x1) J. (x2) K. (x2) L. (x4) M. M8x20 N. M6x8 O. M6x12 P. M6x18 Q.
- Seite 3 STEP 2 Attach the upright supports to the chassis. Screw tightly Bevestig de staanders aan het onderstel. Draai stevig aan Bringen Sie die aufrechten Stützen am Fahrgestell an. Fest anschrauben Fixer les supports verticaux au châssis. Visser fermement Fissare i supporti del montante al telaio. Avvitare salda- mente Fije los soportes verticales al chasis.
- Seite 4 STEP 4 Attach the crossbar and shelf to the supports Bevestig de crossbar en het plateau aan de staanders Befestigen Sie die Querstange und den Regalboden an den Stützen Fixer la barre transversale et l'étagère aux supports Fissare la traversa e il ripiano ai supporti Fije el travesaño y la balda a los soportes Fixar a travessa e a prateleira aos suportes Przymocować...
- Seite 5 STEP 5 Attach the VESA plate to the screen VESA 200x200mm Bevestig de VESA plaat aan het scherm 300x300mm Befestigen Sie die VESA-Platte am Bildschirm 350x350mm Fixez la plaque VESA à l'écran 400x200mm Fissare la piastra VESA allo schermo 400x400mm * Not Included Coloque la placa VESA a la pantalla Fixar a placa VESA ao ecrã...
- Seite 6 STEP 5 VESA 600x200mm Install the adapter brackets Bevestig de adapter steunen Montage die Halterungsschienen Installation des adaptateurs sur l'écran Montare il supporto del adattatore * Not Included Instalación de brazos adaptadores Instalação de braços adaptadores Zainstaluj ramiona uchwytu VESA 600x400mm STEP 5 Attach the VESA plate to the screen Bevestig de VESA plaat aan het scherm...
- Seite 7 STEP 6 Attach the screen to the bracket and secure it Bevestig het scherm op de beugel en zet vast Befestigen Sie den Bildschirm an der Halterung und sichern Sie ihn Attachez l'écran au support et fixez-le Fissare lo schermo alla staffa e fissarlo Coloque la pantalla en el soporte y fíjela Fixar o ecrã...
- Seite 8 OPTION To disable the rotation function, turn the screw (P) into the corresponding screw hole Om de rotatiefunctie te blokkeren, draai de schroef (P) in het daarvoor bestemde schroefgat Um die Drehfunktion zu deaktivieren, drehen Sie die Schraube (P) in das dazugehörige Schraubenloch Pour désactiver la fonction de rotation, tourner la vis (P) dans le trou fileté...
- Seite 9 STEP 10 Attach self-adhesive pads and tie rips and route the cables Bevestig de zelfklevende pads en tie rips en geleid de kabels Befestigen Sie selbstklebende Pads und Bänder und verlegen Sie die Kabel Fixer des pastilles autocollantes, attacher les déchirures et acheminer les câbles Applicare i cuscinetti autoadesivi, legare gli strappi e instradare i cavi...
- Seite 10 STEP 11 Route the cables Geleid de kabels Verlegen Sie die Kabel Guidez les câbles Guidare i cavi Guíe los cables Guiar os cabos Poprowadzić kable...
- Seite 11 STEP 12 Place the cover and adjust the mount to the desired position Plaats de afdekkap en stel de steun in op de gewenste positie Abdeckung montieren und positionieren die Halterung in der gewünschten Position Placez les capuchons de protection et ajustez le support à...