Herunterladen Inhalt Inhalt Diese Seite drucken

Werbung

Verfügbare Sprachen
  • DE

Verfügbare Sprachen

USE AND
CARE
MANUAL
Auto 2.0
Electric Can Opener

Werbung

Inhaltsverzeichnis
loading

Inhaltszusammenfassung für Kitchen Mama Auto 2.0

  • Seite 1 USE AND CARE MANUAL Auto 2.0 Electric Can Opener...
  • Seite 2 English BECOME ONE OF OUR MONTHLY WINNERS! Get the chance to win one of these awesome kitchen gadgets!
  • Seite 3: Important Safeguards

    English IMPORTANT SAFEGUARDS Children should be supervised to ensure that they do not When using electrical appliances, basic safety precautions play with the appliance. should always be followed including the following: Avoid contacting moving parts. Read all instructions. The use of attachments not recommended or sold by the Do not put this portable appliance in water or any other manufacturer may cause fire, electrical shock, or injury.
  • Seite 4 English PARTS To watch a quick instructional video on how to use the can opener, scan this QR Code! 1 Blade 4 Lid Remover 2 Metal Gear 5 ON/OFF Switch 3 Magnet 6 Battery Compartment...
  • Seite 5 English USING THE OPENER: 3 EASY STEPS STEP 1 STEP 2 Slide the battery cover down and insert the batteries. Make sure Place the can opener on top of the can, making sure that the that the batteries are facing with the right polarity and that the can edge is between the blade and the metal gear.
  • Seite 6 English STEP 3 If the lid does not adhere to the magnet well, use the lid remover indentation at the back of the opener. After one rotation around the can, press the button again to stop. The can opener automatically disengages from the edge of the can.
  • Seite 7: User Maintenance

    English USER MAINTENANCE TROUBLESHOOTING 1. The can opener is not working. What do I do? Use AA alkaline batteries only. Check the battery compartment. Make sure the batteries are in the right Don’t mix old and new batteries together. Do not mix alkaline, standard polarity and that the cover is securely in place.
  • Seite 8 Spanish PARTES 1 Cuchilla 4 Removedor de Tapa 2 Engranaje 5 Interruptor ON/OFF 3 Imán 6 Compartimiento para Pilas...
  • Seite 9 Spanish UTILIZACIÓN: 3 SIMPLES PASOS PASO 1 PASO 2 Deslice la tapa protectora de las pilas e inserte las baterías en Coloque el abrelatas sobre la lata asegurándote que el borde de el compartimiento. Asegúrese que estén insertadas según la la lata esté...
  • Seite 10 Spanish PASO 3 Si la tapa no se adhiere bien al imán, use la muesca para quitar la tapa que se halla en la parte posterior del abrelatas. Después de una vuelta alrededor de la lata, presione el botón nuevamente para apagar.
  • Seite 11: Mantenimiento Del Usuario

    Spanish MANTENIMIENTO DEL USUARIO RESOLUCIÓN DE PROBLEMAS 1. El abrelatas no funciona. ¿Qué hacer? Usar solo pilas alcalinas AA. Controle el compartimiento de las pilas. Asegúrese que las pilas estén en la No usar pilas viejas y nuevas simultáneamente. No mezclar pilas alcalinas, correcta polaridad y que la tapa protectora de las baterías esté...
  • Seite 12 Italian COMPONENTI 4 Rimozione del coperchio 1 Lama 5 Interruttore ON/OFF 2 Ingranaggio 6 Vano batterie 3 Magnete...
  • Seite 13 Italian UTILIZZO: 3 SEMPLICI PASSI FASE 1 FASE 2 Aprire il vano batterie e inserire le batterie. Assicuratevi che Posizionare l'apriscatole sul barattolo accertandosi che il bordo siano inserite correttamente e che il coperchio del vano del barattolo si trovi tra lama e ingranaggio. Premere il pulsante batterie sia saldamente chiuso.
  • Seite 14 Italian FASE 3 Se il coperchio non aderisce bene al magnete, usate l'incavo per rimuovere il coperchio che si trova sul retro dell'apriscatola. Dopo che l'apriscatole ha girato intorno alla lattina, premi di nuovo il pulsante per fermarlo. L'apriscatole si stacca automaticamente dal bordo della lattina.
  • Seite 15: Manutenzione Da Parte Dell'utente

    Italian MANUTENZIONE DA PARTE RISOLUZIONE PROBLEMI DELL'UTENTE 1. L'apriscatole non funziona. Che cosa fare? Controllare il vano batterie. Assicuratevi che le batterie siano inserite Usare solo batterie alcaline AA. correttamente e che il coperchio sia chiuso saldamente. Non usare batterie vecchie e nuove contemporaneamente. Non mescolare 2.
  • Seite 16 French PARTIE 1 Lame 4 Dissolvant de couvercle 2 Engrenage métallique 5 Interrupteur marche/arrêt 6 compartiment à piles 3 Aimant...
  • Seite 17 French UTILISATION: 3 ÉTAPES SIMPLES ETAPE 1 ETAPE 2 Retirez le couvercle du compartiment des piles et placez les Placez l'ouvre-boîte sur la boîte. Assurez-vous que le bord de piles à l'intérieur. Assurez-vous que la polarité est correctement la boîte se trouve entre la lame et l'engrenage. Appuyez sur le réglée et que le couvercle se remet bien en place.
  • Seite 18 French ETAPE 3 Si le couvercle n’adhère pas bien à l’aimant, utilisez l’indentation du dissolvant de couvercle à l’arrière de l’ouvre-porte. Lorsque l'ouvre-boîte a fini le tour de la boîte, appuyez à nouveau sur le bouton pour l'arrêter. L'ouvre-boîte se détache automatiquement du bord de la boîte.
  • Seite 19 French MAINTENANCE DE L'UTILISATEUR DÉPANNAGE 1. L'ouvre-boîte ne fonctionne pas, que faire? Utilisez uniquement des piles alcalines AA. Vérifiez le compartiment des piles. Assurez-vous que les piles sont dans la bonne Ne mélangez pas des piles neuves et usagées. Ne mélangez pas les piles polarité...
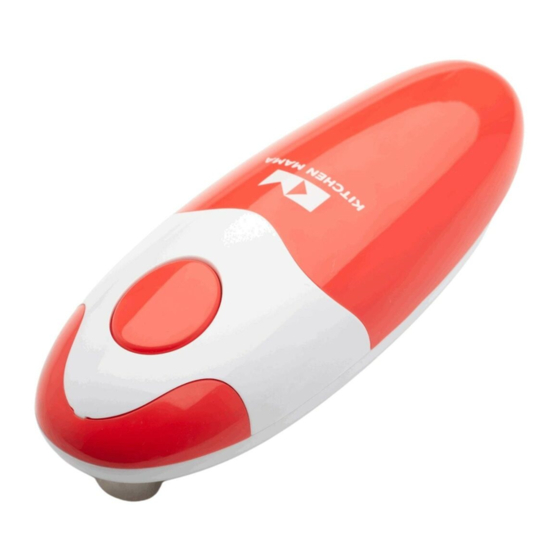
  • Seite 20 Deutsch KOMPONENTEN 1 Schneide 4 Deckelentferner 5 EIN/AUS-Schalter 2 Metallgetriebe 6 Batteriefach 3 Magnet...
  • Seite 21 Deutsch BEDIENUNGSANLEITUNG: 3 EINFACHEN SCHRITTEN SCHRITT 1 SCHRITT 2 Schieben Sie den Deckel des Batteriefachs nach unten und Setzen Sie den Dosenöffner auf die Dose und achten Sie legen Sie die Batterien ein. Vergewissern Sie sich, dass die darauf, dass der Dosenrand zwischen der Klinge und dem Batterien korrekt eingelegt sind und dass die Abdeckung Metallzahnrad liegt.
  • Seite 22 Deutsch Wenn der Deckel nicht gut am Magneten haftet, verwenden Sie SCHRITT 3 die Vertiefung zum Entfernen des Deckels. Sie befindet sich auf der Rückseite des Öffners. Nachdem der Dosenöffner die Dose einmal umrundet hat, drücken Sie den Knopf erneut, um ihn anzuhalten. Der Dosenöffner löst sich automatisch vom Rand der Dose.
  • Seite 23: Wartung Durch Den Benutzer

    Deutsch WARTUNG DURCH DEN BENUTZER FEHLERBEHEBUNG Verwenden Sie nur AA Alkaline Batterien. 1. Der Dosenöffner funktioniert nicht. Was kann ich tun? Verwenden Sie keine alten und neuen Batterien gemeinsam. Überprüfen Sie das Batteriefach. Stellen Sie sicher, dass die Batterien korrekt eingelegt sind Kombinieren Sie keine Alkaline, Standard (Karbon-Zink) oder und der Deckel fest eingerastet ist.
  • Seite 24 FOLLOW US ON OUR SOCIALS kitchenmamaus kitchenmamaus KitchenMama support@shopkitchenmama.com...

Diese Anleitung auch für:

Auto

Inhaltsverzeichnis