iCartech Aurora V7 Benutzerhandbuch

Verwandte Anleitungen für iCartech Aurora V7

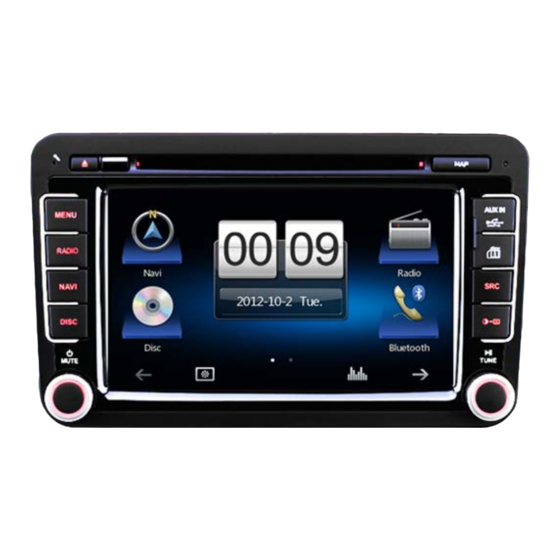
Inhaltszusammenfassung für iCartech Aurora V7
- Seite 1 Deutsch • English AURORA GX735 1-DIN DVD MULTIMEDIA STATION Benutzerhandbuch AURORA V7 DE Bedienungsanleitung BUILT-IN NAVIGATION/BLUETOOTH EN User manual...
-
Seite 2: Sicherheitshinweise
Sicherheitshinweise Vielen Dank für den Kauf dieses Bitte wechseln Sie die Sicherung der Produkts. Bitte lesen diese Stromzuleitung niemals ohne Bedienungsanleitung damit professionelle Hilfe, falsche Gerät richtig bedienen können. Nach Sicherungen können Schäden am Gerät Bedienungsanleitung und sogar ein Feuer verursachen. gelesen haben heben sie diese, zu Ihrer Referenz an einem sicheren Ort auf. -
Seite 3: Inhaltsverzeichnis
Inhaltsverzeichnis Sicherheitshinweise ........1 Vorherige/Nächste .........14 Suche nach einem Ordner ....14 Vor Gebrauch ..........3 Wiederholen...........15 Bedienpanel ..........3 Wiederholung A-B........15 Fernbedienung ..........4 Zufallswiedergabe.........15 Batterie entfernen ........5 Audiomodus...........15 Batterie einlegen ........5 Untertitelsprache........15 Ändern des Betrachtungswinkels ..15 Video Einstellungen .......16 Grundfunktionen .........6 Wiedergabeinformationen ......16 Videofreischaltung ........6 direkte Titeleingabe ........16 Stummschaltung... -
Seite 4: Vor Gebrauch
Vor Gebrauch Bedienpanel DISC Hinweis: Die grafische Darstellung des Geräts in dieser Anleitung dient zu Referenzzwecken und kann sich vom eigentlichen Gerät unterscheiden. 1. internes Mikrofon 8. [BT] Taste: Bluetooth Funktion internes Mikrofon für Anrufe öffnen 2. [MENU] Taste: Drücken, um ] T a s t e : Bildschirmhelligkeit 9. -
Seite 5: Fernbedienung
Vor Gebrauch Fernbedienung 1. MODE - Wählen Sie den Modus 2. SRC - zwischen der Funktion und dem Hauptmenü wechseln. EJECT 3. Menü (DVD) 4. Titel (DVD) 5. Bild vergrößern/verkleinern 6. Radio Band 7. Equalizer Einstellung 8. DIM - Dimmer Einstellung 9. -
Seite 6: Batterie Entfernen
Vor Gebrauch Hinweise zur Fernbedienung 1. Richten Sie die Fernbedienung auf den Sensor am Gerät. 2. Entfernen Sie die Batterie aus der Fernbedienung oder setzen Sie einen Batterieisolator ein, wenn die Batterie für einen Monat oder länger nicht benutzt wurde. 3. -
Seite 7: Grundfunktionen
Grundfunktionen Videofreischaltung Wiedergabequelle auswählen • Sofern das "Brake" Kabel an die Masse der Drücken Sie die MODE oder SRC Taste, Handbremse angeschlossen ist, erfolgt die um zwischen den Funktionen zu wechseln. Videofreischaltung nur bei angezogener Handbremse. • Die Videofreischaltung wird bei der Rückfahrkamera nicht berücksichtigt. -
Seite 8: Eq Voreinstellung Auswählen
Grundfunktionen EQ Voreinstellung auswählen Fader/Balance einstellen 1. Öffnen Sie die EQ Einstellungen Sie können Sie Verteilung der Ausgangsleistung Drücken Sie[ ] im Hauptmenü, um die EQ der Lautsprecher für den Fahrzeuginnenraum Einstellungen zu öffnen. anpassen. 2. EQ Auswahl 1. Öffnen Sie die EQ Einstellungen ∙... -
Seite 9: Datum/Zeit Einstellen
Grundfunktionen Datum/Zeit einstellen Standby-Timer einstellen 1. Berühren Sie [ Power Off Timer ] (Standby- 1. Drücken Sie [ Timer). 2. Wählen Sie "Time" aus. 2. Berühren Sie [ On ] (An) oder [ Off ] (Aus), um die Standby Uhranzeige an-/ auszuschalten. -
Seite 10: Radio-Modus
Radio-Modus Anzeige Radio als Abspielquelle Öffnen Sie das Hauptmenü, berühren Sie [Radio]. Wählen Sie ein Frequenzband Drücken Sie die [BAND] Taste auf der Fernbedienung oder berühren Sie das [ Symbol auf der Benutzeroberfläche um zwischen den Frequenzbändern FM1, FM2, FM3, AM1 und AM2 zu wählen. Frquenz einstellen Automatischer Sendersuchlauf Drücken und halten Sie die [... -
Seite 11: Senderspeicher
Radio-Modus Senderspeicher RDS-Grundlagen Das Gerät verfügt über 5 Frequenzbänder. RDS-Dienste stehen nicht in allen Diese sind FM1, FM2, FM3, AM1, AM2, für Gebieten zur Verfügung. Sollten RDS- jedes Band können 6 Sender gespeichert Dienste in Ihrer Nähe nicht zur Verfügung werden, daher können Sie insgesamt 30 stehen, dann haben Sie bitte Verständnis, Sender speichern. -
Seite 12: Eon (Enhanced Other Networks)
Radio-Modus CT (Clock Time) Berühren Sie [AF] auf dem Bildschirm um die AF-Funktion ein- oder auszuschalten. Zeitsynchronisierung AF ist Rot: Die AF-Funktion ist aktiviert. Einige Sender übertragen mit der RDS Funktion AF ist Grau: Die AF-Funktion ist deaktiviert. die aktuelle Uhrzeit. Schalten Sie die CT Funktion ein, um die Uhrzeit von der Radiofunktion zu beziehen. -
Seite 13: Dab Modus (Optional)
DAB Modus (optional) DAB als Wiedergabequelle auswählen DAB Frequenzband auswählen Verbinden Sie die DAB Box mit dem Gerät Drücken Sie [BAND], um zwischen und schalten Sie diese ein. DAB1, DAB2 und DAB3 zu Wählen Sie [DAB] im Hauptmenü aus. wechseln. Sollte die DAB Funktion nicht aufzufinden sein, drücken Sie oder... -
Seite 14: Wiedergabe
Wiedergabe DAB Modus (otional) manueller Senderspeicher Disk laden 1. Drücken Sie , um die Liste zu öffnen. Sie können Video, Audio oder Bilder von folgenden Disks abspielen: 2. Drücken Sie[ ], um die Senderliste zu öffnen. • DVD Video, DVD-R, DVD-RW 3. -
Seite 15: Wiedergabebedienung
Wiedergabe 2. Nach leichtem Hineindrücken der Karte Wiedergabebedienung hören sie ein Klickgeräusch. Berühren Sie den Bildschirm an einer 3. SD Karte entfernen. beliebigen Stelle, um die Abspielen/Pause Wiedergabesteuerung anzuzeigen. Drücken für weitere Einstellungen. Sobald eine Disk, ein USB-Gerät oder eine SD-Karte eingeschoben oder angeschlossen wird, startet die Wiedergabe automatisch. -
Seite 16: Wiederholen
Wiedergabe Wiederholung A-: Beginn der Für Bild-Dateien Wiederholung 1. Berühren Sie um alle verfügbaren Wiederholung A-B: Ende der Bild-Ordner anzuzeigen. 2. Berühren Sie einen Ordner und wählen Wiederholung Sie die gewünschte Datei aus. Der ausgewählte Abschnitt wird abgespielt. 3. Wählen Sie die Datei erneut aus, um die 4. -
Seite 17: Video Einstellungen
Wiedergabe Video Einstellungen direkte Titeleingabe Berühren Sie ,um das Nummerfeld zu Berühren Sie , um die Videoeinstellungen öffnen. Geben Sie anschließend die zu öffnen. Mit den Tasten oder können die Werte angepasst werden. Titelnummer ein und Bestätigen mit OK. Stellen Sie die Werte von 0-16 für die Helligkeit, Kontrast und Sättigung ein. -
Seite 18: Bluetooth-Modus
Bluetooth Modus Mit Bluetooth fähigen Telefonen können Sie Anrufe über das Gerät annehmen oder tätigen. Sie können auch Musik von einem Bluetooth fähigen Gerät hören. Koppeln Sie Bluetooth fähige Geräte Um Ihr Bluetooth-Gerät mit dem Gerät zu verbinden, müssen Sie diese koppeln. -
Seite 19: Anruf Annehmen
Bluetooth Modus Anruf annehmen Eingehende Anrufe werden standardmäßig automatisch angenommen. 1. Bei eingehendem Anruf wird "Incoming Call" angezeigt. 2. Wählen Sie aus zwischen [Answer] (annehmen) oder [Hang Up] (auflegen). ∙ [ ]: Drücken, um das Mikrofon stummzuschalten. Erneut drücken, um die Stummschaltung auszuschalten. ∙... -
Seite 20: Ipod & Iphone Modus
iPod & iPhone Modus Verbinden Sie Ihren iPod oder Ihr iPhone mit dem mitgelieferten Kabel am Gerät. Die Wiedergabe startet automatisch. 11. weiteres Menü verbergen 12. zufällige Wiedergabe 13. Wiedergabe wiederholen 14. Titel auswählen iPod Funktion öffnen Ordnerfunktion Drücken Sie die [ menu ] Taste zum 1. - Seite 21 iPod & iPhone Modus Wiedergabe wiederholen Diese Funktion ermöglicht Titel wiederholt abzuspielen Berühren Sie , um die Wiederholung zu aktivieren (einzeln / alle). zufällige Wiedergabe Diese Funktion ermöglicht die TItel in zufälliger Reihenfolge abzuspielen. Berühren Sie , um die zufällige Wiedergabe an-/auszuschalten.
-
Seite 22: Einstellungen
Einstellungen Einstellungen öffnen 1. Berühren Sie die linke obere Ecke um das Hauptmenü anzuzeigen. 2. Berühren Sie [ Settings ] (Einstellungen). 3. Berühren Sie , um zum Hauptmenü zurückzukehren. Allgemeine Einstellungen 1. Berühren Sie [General](Allgemein). 2. Berühren Sie ein Einstellungsmenü 3. -
Seite 23: Toneinstellungen
Einstellungen Toneinstellungen 1. Berühren Sie [Sound] (Ton). 2. Wählen Sie den einzustellenden Wert aus. Toneinstellung Option Beschreibung Flat 80Hz Sub Woofer Filter Wählen Sie eine Frequenz für den Subwoofer aus 120Hz 160Hz Schalten Sie die LOUD-Funktion an oder aus. LOUD On/Off Reverse Mute On/Off... -
Seite 24: Lautstärkeeinstellungen
Einstellungen Lautstärkeeinstellungen Sie können unterschiedliche Lautstärken für verschiedene Modi eingestellen. 1. Berühren Sie [Volume] (Lautstärke). Das Lautstärke-Untermenü wird angezeigt. 2. Berühren Sie eine Abspielquelle. ∙ [Media] ∙ [Radio] ∙ [Bluetooth] ∙ [AV-IN1] ∙ [AV-IN2] ∙ [DVBT] 3. Berühren Sie oder , um die Werte von 0-12 einzustellen. -
Seite 25: Av Funktion
Andere Modi AV Funktion Sie können externe Audio / Video Geräte an das Gerät anschließen. 1. Schließen Sie das externe Gerät mit dem mitgelieferten AV-Kabel an das Radio an. 2. Berühren Sie die linke obere Ecke um das Hauptmenü anzuzeigen. 3. -
Seite 26: Technische Daten
Technische Daten Allgemein Versorgungsspannung................12V(DC) Betriebsspannungsbereich ............10.5 - 15.8V(DC) Max. Stromaufnahme ..................15A Maximale Ausgangsleistung ............45W x 4 Kanäle RMS Ausgangsleistung ............25W x 4 Kanäle Erdungssystem ..............Autobatterie Minuspol Abmessungen (BxHxT) ............246 x 137x 172 mm Gewicht (Hauptgerät) ................2.26kg Rauschverhältnis ..................≥55dB Geräuschpegel Empfindlichkeit (S/N=30dB) .......... -
Seite 27: Unterstützte Videoformate
Technische Daten Unterstützte Formate: ·USB-Speicher oder Dateiformat: FAT32 ·MP3-Datenübertragungsrate:32-320 Kbps und variable Datenübertragungsrate ·WMA Version 9 oder früher ·Verzeichnis Verschachtelung bis zu maximal 8 Ebenen ·Anzahl von Alben / Ordnern: maximal 99 ·Anzahl von Tracks / Titeln: maximal 999 · ID3 Tag v2.0 oder höher Dateiname in Unicode UTF8(maximale Länge:128 bytes) Nicht unterstützte Formate: ·Leere Alben: Ein leeres Album ist ein Album, das keine MP3/WMA Dateien enthält und die nicht im... -
Seite 28: Fehlersuche
Fehlersuche Versuchen Sie niemals das Gerät selbst zu reparieren, da sonst die Garantie erlischt. Sollten Probleme mit dem Gerät auftreten, überprüfen Sie erst die folgenden Punkte. Können Sie das Problem nicht lösen, wenden Sie sich bitte an Ihren Händler. Fehler Grund Lösungsansatz Allgemein... -
Seite 29: Handbremskabel - Videofreischaltung
Kabeldiagramm Handbremskabel - Videofreischaltung Pink Wire Pink Wire Rückfahrsignal - Reverse DE-28... -
Seite 30: Kabeldiagramm
Kabeldiagramm DE-29... -
Seite 31: Class 1 Laser Product
CLASS 1 LASER PRODUCT P.N.: 127075005506... -
Seite 32: Din Dvd Multimedia Station Built-In Navigation/Bluetooth
Deutsch • English AURORA GX735 1-DIN DVD MULTIMEDIA STATION user manual AURORA V7 DE Bedienungsanleitung BUILT-IN NAVIGATION/BLUETOOTH EN User manual... - Seite 63 CLASS 1 LASER PRODUCT P.N.: 127075005506...