Herunterladen Inhalt Inhalt Diese Seite drucken
Inhaltsverzeichnis

Werbung

Verfügbare Sprachen
  • DE

Verfügbare Sprachen

  • DEUTSCH, seite 41
realme TechLife Robot Vacuum
User Manual
Read this user manual carefully before using the product, and store it in a safe place.

Werbung

Inhaltsverzeichnis
loading

Inhaltszusammenfassung für realme TechLife RMH2101

  • Seite 1 TechLife Robot Vacuum User Manual Read this user manual carefully before using the product, and store it in a safe place.
  • Seite 2 Contents English..............................1-22 čeština ..............................23-44 Deutsche............................. 45-66 Español..............................67-88 Français.............................. 89-110 Italiano..............................111-132 Nederlands............................133-154 Polski..............................155-176...
  • Seite 3: Safety Information

    Safety Information Usage Limitations • The product is used for floor cleaning in a home environment only and cannot be used for outdoor (such as open terrace), non-ground (such as sofa) and commercial or industrial environment. • Please do not use the product in midair areas (such as penthouse, open terrace and furniture top) without protective fence. •...
  • Seite 4: Battery And Charging

    Safety Information 1. The appliance is only to be used with the power supply unit provided with the appliance. 2. The adapter must be removed from the socket-outlet before cleaning or maintaining the appliance. 3. This appliance contains batteries that are only replaceable by skilled persons. 4.
  • Seite 5 Safety Information Disposal lnstructions • The following information is only applicable to the disposal of this product, not its daily use. • The chemical substances contained in the battery in the robot will pollute the environment. Before disposing of the product, remove the battery from the robot and take it to a professional recycling station.
  • Seite 6: Battery Warning

    Warning This symbol means that according to local laws and regulations your product and/or its battery shall be disposed of separately from household waste. When this product reaches its end of life, user has the choice to give his product to a competent recycling organization. Proper recycling of your product will protect human health and the environment.
  • Seite 7: Product Introduction

    Product Introduction Scope of Delivery Charging Base x1 Adapter x1 L Side Brush x1 R Side Brush x1 Cleaning Brush x1 Washable Mop Pad x 2 (Optional) Detachable 2-in-1 Water Tank (Optional) Disposable Mop Pad x 10 (Optional)
  • Seite 8 Product Introduction Robot Filter Cover TOF Wall Sensor Dust Bin Button Cli Sensor LiDAR Charging Contact LiDAR Collision Omni Wheel Detection Sensor Side Brush Recharge Sensor Primary Wheel Main Brush Main Brush Cover Obstacle Detection Bumper Sensor Buckle Sensor...
  • Seite 9 Product Introduction Robot On/O /Clean/Pause Indicator • Press to start/pause cleaning • White: Connected to Wi-Fi • Press and hold for 3 seconds to turn the • Orange: Not connected to Wi-Fi device on/o • Red: Error or low battery •...
  • Seite 10 Installation 3. Install the side brushes 1. Connect the power cable, and then place any excess cable in the cable compartment. Align the left and right brushes with the corresponding markings on the bottom cover. Press down until you hear a click, which indicates successful installation.
  • Seite 11: Install The Detachable 2-In-1 Water Tank

    Mopping Kit 1. Install the detachable 2-in-1 2. Remove the detachable 2-in-1 water tank water tank When the device has finished cleaning, press and hold the button on ③ Install the water tank. ① Install the cleaning mop: A x the mop smoothly the middle of the water tank, remove the tank by pulling it backwards, across the bottom of the water tank.
  • Seite 12: Download App

    Connect to realme Link Download App Firmware Upgrade Method 1: Open your app store and download the realme Link app. Open the mobile app and navigate to the upgrade firmware Method 2: Scan the QR code below. page, wait for the app to detect the new firmware, and then follow the instructions.
  • Seite 13: Automatic Cleaning

    Usage On/O Automatic Cleaning When the cleaning process begins, the device scans the area, generates a Press and hold the button for 3 seconds. The indicator should light up map, and then intelligently partitions the map into zones. The device first to indicate that it is turned on.
  • Seite 14: Spot Cleaning

    Usage Spot Cleaning Custom Area Use the mobile app to set the size and location of the area(s) that you If you wish to deep clean a certain area, specify its location on the wish to clean. mobile app. The device will center itself in and clean the 1.5 m x 1.5 m area around itself two times.
  • Seite 15: Routine Maintenance

    Routine Maintenance Main Brush Side Brush 1. Flip the device over and press the buckle on the main brush cover to 1. Flip the device over and pull out the side brush vertically. take out the main brush. 2. Reinstall the brush after removing any entangled hair and dirt. 2.
  • Seite 16 Routine Maintenance Dust Bin Filter 1. After a long period of use, remove the filter net, filter foam, and 1. Press and hold the dust bin button, and then pull back on the HEPA filter. dust bin to take it out. 2.
  • Seite 17 Routine Maintenance Detachable 2-in-1 Water Tank (Clean After Each Use) 1. Remove the cleaning mop and pour out all remaining water from the tank. Dust Bin Components HEPA Filter Filter Foam 2. Wash the cleaning mop, and then dry the water tank and the mop to prepare for the next use.
  • Seite 18 Use a soft, dry cloth to wipe all the sensors on the device, including the following: Product Name realme TechLife Robot Vacuum 1. The TOF wall sensor on the right of the robot 2. The cli sensor on the bottom of the robot...
  • Seite 19: Error Message

    Troubleshooting Error Message Solution The device was started without a dust bin. Reattach the dust bin. Error 1: The dust bin seems to be missing. The top radar has been covered or placed in an open area. Error 2: The top radar seems to be obstructed or stuck. Remove the top radar cover or move the device indoors.
  • Seite 20 Troubleshooting Error Message Solution Error 12: Please place me upright! The device is on an incline. Move the device to a level surface, then restart. The primary wheel has become entangled or stuck. Error 13: The tires seem to be stuck. Check the primary wheel and remove any foreign objects.
  • Seite 21: Common Problems

    Common Problems Problem Type Solution • The battery is low. Place the product on the charging base and align it with the wireless power receiver. The device should Cannot be started automatically turn on. If the device was out of power, it may take some time to turn on. •...
  • Seite 22: Bezpečnostní Informace

    Bezpečnostní informace Omezení používání • Výrobek je určený pouze pro úklid podlah v prostředí domácností a nelze ho používat venku (jako např. na terase), mimo zem (jako např. na gauči) ani v komerčních nebo průmyslových prostorech. • Výrobek nepoužívejte v oblastech ve vzduchu (jako např. v přístřešku, na otevřené terase nebo na nábytku) bez ochranného plotu. •...
  • Seite 23 Bezpečnostní informace 1. Zařízení lze používat pouze s napájecím zdrojem dodávaným se zařízením. 2. Před čištěním nebo údržbou zařízení musíte adaptér vytáhnout z elektrické zásuvky. 3. Toto zařízení obsahuje baterie, které může vyměnit pouze školený technik. 4. Před likvidací zařízení je nutné ze zařízení vyjmout baterii. 5.
  • Seite 24 Bezpečnostní informace Pokyny pro likvidaci • Následující informace platí pouze pro likvidaci výrobku, ne pro jeho běžné používání. • Chemické látky obsažené v baterii robota znečistí životní prostředí. Předtím, než výrobek vyhodíte, vyjměte z robota baterii a odneste ji do profesionálního recyklačního centra. Baterie by měla být vyjmuta až poté, co je úplně opotřebovaná. Za žádných okolností nedovolte, aby baterie přišla do styku s kovovými předměty.
  • Seite 25 Upozornění Tento symbol značí, že výrobek a/nebo jeho baterii musíte podle místních zákonů a nařízení likvidovat odděleně od směsného odpadu. Uživatel může po skončení životnosti tohoto výrobku výrobek předat způsobilé recyklační společnosti. Správná recyklace pomůže chránit zdraví lidí a životní prostředí.
  • Seite 26: Představení Výrobku

    Představení výrobku Rozsah doručení Nabíjecí základna x1 Adaptér x1 Levý boční kartáč x1 Pravý boční kartáč x1 Úklidový kartáč x1 Omyvatelná destička mopu x 2 (volitelné) Odnímatelná nádržka na Jednorázová destička mopu x 10 (volitelné) vodu typu dva v jednom (volitelné)
  • Seite 27 Představení výrobku Robot Kryt filtru TOF senzor zdí Tlačítko nádoby na prach Senzor srázu LiDAR Kontakt pro nabíjení LiDAR detekční senzor Všesměrové kolo kolizí Boční kartáč Senzor dobíjení Hlavní kolo Hlavní kartáč Přezka krytu Detekční senzor Senzor nárazů hlavního kartáče překážek...
  • Seite 28 Představení výrobku Robot Zapnutí/Vypnutí/Úklid/Pozastavení Kontrolka • Stisknutím spustíte/pozastavíte úklid • Bílá: Připojeno k Wi-Fi • Stiskněte a držte po dobu 3 sekund pro • Oranžová: Nepřipojeno k Wi-Fi zapnutí/vypnutí zařízení • Červená: Chyba nebo nízká úroveň • Pokud dojde k chybě, stisknutím a podržením nabití...
  • Seite 29: Instalace

    Instalace 1. Připojte síťový kabel a přebytečný kabel vložte do 3. Instalace bočních kartáčů přihrádky na kabely. Zarovnejte levé a pravé kartáče s příslušnými značkami na dolním krytu. Zatlačte dolů, dokud neuslyšíte zacvaknutí, což znamená, že instalace byla úspěšná. 2. Umístěte nabíjecí základnu na rovný povrch proti zdi a poté...
  • Seite 30 Sada pro mopování 1. Montáž odnímatelné nádržky na 2. Vyjmutí odnímatelné nádržky na vodu vodu typu dva v jednom typu dva v jednom ① Vložení úklidového mopu do zařízení: Mop upevněte Jakmile zařízení dokončí úklid, stiskněte tlačítko uprostřed nádržky na ③...
  • Seite 31: Stažení Aplikace

    Připojení k aplikaci realme Link Stažení aplikace Aktualizace firmwaru Metoda č. 1: Otevřete obchod s aplikacemi a stáhněte si aplikaci realme Link. Otevřete mobilní aplikaci, přejděte na stránku pro aktualizaci Metoda č. 2: Naskenujte níže uvedený QR kód. firmwaru, počkejte, než aplikace detekuje nový firmware a poté postupujte podle pokynů.
  • Seite 32 Používání Zapnutí/Vypnutí Automatický úklid Zařízení po zahájení procesu úklidu zahájí skenování oblasti, vygeneruje mapu Stiskněte tlačítko a držte ho po dobu 3 sekund. Rozsvítí se kontrolka, a poté inteligentně rozdělí mapy na zóny. Zařízení nejprve každou zónu uklidí která značí, že je zařízení zapnuté. podél zdí...
  • Seite 33 Používání Úklid skvrn Vlastní oblast Pomocí mobilní aplikace nastavte velikost a místo oblastí, které chcete Pokud v určité oblasti chcete provést hloubkový úklid, zadejte v uklidit. mobilní aplikaci její polohu. Zařízení se samo vycentruje a dvakrát uklidí oblast v okolí 1,5 m x 1,5 m. Zakázaná...
  • Seite 34: Běžná Údržba

    Běžná údržba Hlavní kartáč Boční kartáč 1. Zařízení otočte vzhůru nohama a stisknutím přezky na krytu hlavního 1. Zařízení obraťte vzhůru nohama a svisle vytáhněte boční kartáč. kartáče vytáhněte hlavní kartáč. 2. Odstraňte všechny zamotané vlasy a nečistoty a kartáč znovu vložte 2.
  • Seite 35 Běžná údržba Nádoba na prach Filtr 1. Po dlouhodobém používání vyjměte filtrační síť, filtrační pěnu a 1. Stiskněte tlačítko nádoby na prach a podržte ho, poté nádobu HEPA filtr. na prach zatlačením dozadu vyjměte. 2. Vyjmutou filtrační síť, pěnu, HEPA filtr a nádobu na prach vypláchněte pod vodovodním kohoutkem.
  • Seite 36 Běžná údržba Odnímatelná nádržka na vodu typu dva v jednom (Po každém použití vyčistěte.) 1. Vyjměte čisticí mop a z nádržky na vodu vylijte všechnu zbývající vodu. Součásti nádoby na prach HEPA filtr Filtrační pěna 2. Umyjte čisticí mop a poté vysušte nádobu na vodu a mop, abyste je připravili na příští...
  • Seite 37 Specifikace Senzory Robot (Pravidelně čistěte) Pomocí suchého měkkého hadříku očistěte všechny senzory na zařízení, včetně Název produktu realme TechLife Robot Vacuum následujících: 1. TOF senzor zdí v pravé části robota 2. Senzor srázu v dolní části robota Model RMH2101 3. Detekční senzor překážek v přední části robota 4.
  • Seite 38: Řešení Problémů

    Řešení problémů Chybová zpráva Řešení Zařízení bylo spuštěno bez nádoby na prach. Nádobu na prach znovu připojte. Chyba 1: Vypadá to, že nádoba na prach chybí. Horní radar je zakrytý nebo umístěný v otevřené oblasti. Chyba 2: Vypadá to, že hornímu radaru něco překáží Odstraňte kryt horního radaru nebo zařízení...
  • Seite 39 Řešení problémů Chybová zpráva Řešení Chyba 12: Dejte mě prosím do vzpřímené polohy! Zařízení je ve sklonu. Zařízení přesuňte na rovný povrch a poté ho restartujte. Hlavní kolo se zamotalo nebo zaseklo. Chyba 13: Vypadá to, že se zasekla kola. Zkontrolujte hlavní...
  • Seite 40 Běžné problémy Typ problému Řešení • Baterie má nízkou úroveň nabití. Výrobek umístěte na nabíjecí základnu a zarovnejte ho s bezdrátovým přijímačem napájení. Nelze spustit Zařízení by se mělo automaticky zapnout. Pokud bylo zařízení vypnuté, může nějakou dobu trvat, než se zapne. •...
  • Seite 41: Sicherheitsinformationen

    Sicherheitsinformationen Nutzungseinschränkungen • Das Produkt ist nur für die Bodenreinigung in häuslicher Umgebung bestimmt und kann nicht für den Außenbereich (z. B. o ene Terrasse), nicht bodennahen Bereich (z. B. Sofa) und gewerbliche oder industrielle Umgebungen verwendet werden. • Das Produkt nicht in Bereichen in der Luft (z. B. Penthouse, o ene Terrasse und auf Möbeln) ohne Schutzzaun verwenden. •...
  • Seite 42 Sicherheitsinformationen 1. Das Gerät darf nur mit dem mitgelieferten Netzteil verwendet werden. 2. Das Netzteil muss vor der Reinigung oder Wartung des Geräts aus der Steckdose entfernt werden. 3. Dieses Gerät enthält Akkus, die nur von Fachkräften ausgetauscht werden dürfen. 4.
  • Seite 43 Sicherheitsinformationen Entsorgungsanweisungen • Die folgenden Informationen gelten nur für die Entsorgung dieses Produkts, nicht für dessen täglichen Gebrauch. • Die im Akku des Roboters enthaltenen chemischen Substanzen belasten die Umwelt. Vor der Entsorgung des Produkts den Akku aus dem Roboter entfernen und ihn zu einem professionellen Recycling-Betrieb bringen. Der Akku sollte erst dann entfernt werden, wenn er vollständig entleert ist.
  • Seite 44: Akkuwarnung

    Warnung Dieses Symbol bedeutet, dass Ihr Produkt und/oder sein Akku gemäß den örtlichen Gesetzen und Vorschriften getrennt vom Hausmüll entsorgt werden muss. Wenn dieses Produkt sein Lebensende erreicht, hat der Benutzer die Möglichkeit, sein Produkt an ein sachkundiges Recycling-Unternehmen zu übergeben. Das ordnungsgemäße Recycling Ihres Produkts schützt die Gesundheit und die Umwelt.
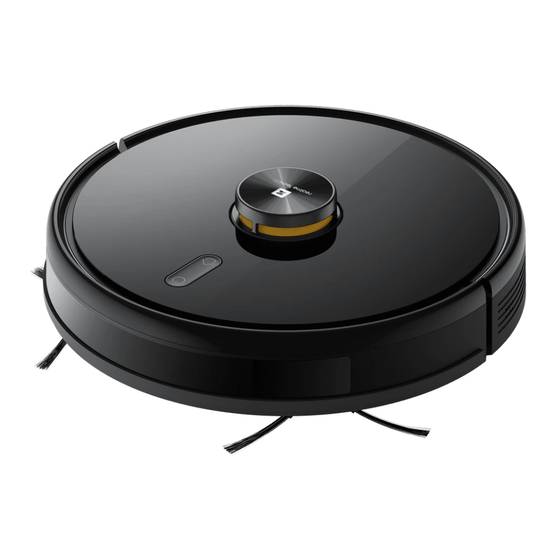
  • Seite 45: Produkteinführung

    Produkteinführung Lieferumfang Ladestation x1 Adapter x1 L Seitenbürste x1 R Seitenbürste x1 Reinigungsbürste x1 Waschbares Mopp-Pad x 2 (optional) Abnehmbarer 2-in-1-Wassertank (optional) Wegwerf-Mopp-Pad x 10 (optional)
  • Seite 46 Produkteinführung Roboter Filterabdeckung TOF Wandsensor Staubbehälter-Taste Klippensensor LiDAR Ladekontakt LiDAR Kollisions- Omnidirektionalrad Erkennungssensor Seitenbürste Ladesensor Primärrad Hauptbürste Hauptbürsten- Hindernis- Stoßleistensensor abdeckungs- Erkennungssensor Verriegelung...
  • Seite 47 Produkteinführung Roboter An/Aus/Reinigen/Pause Anzeige • Drücken, um die Reinigung zu starten/pausieren • Weiß: Mit WLAN verbunden • Drücken und 3 Sekunden lang gedrückt halten, • Orange: Nicht mit WLAN verbunden um das Gerät ein-/auszuschalten • Rot: Fehler oder niedriger Akkustand •...
  • Seite 48: Die Seitenbürsten Installieren

    Installation 1. Das Stromversorgungskabel anschließen und dann das 3. Die Seitenbürsten installieren übrige Kabel im Kabelfach verstauen. Die linke und rechte Bürste an den entsprechenden Markierungen auf der unteren Abdeckung ausrichten. Nach unten drücken, bis ein Klicken zu hören ist, das die erfolgreiche Installation anzeigt. 2.
  • Seite 49: Den Abnehmbaren 2-In-1-Wassertank Montieren

    Mopp-Satz 1. Den abnehmbaren 2. Den abnehmbaren 2-in-1-Wassertank entfernen 2-in-1-Wassertank montieren Wenn das Gerät mit der Reinigung fertig ist, die Taste in der Mitte des ① Den Wischmopp installieren: Den Mopp gleichmäßig Wassertanks drücken und gedrückt halten, den Tank nach hinten ③...
  • Seite 50: Mit Realme Link Verbinden

    Mit realme Link verbinden App herunterladen Firmware-Aktualisierung Methode 1: Den App Store ö nen und die realme Link App herunterladen. Die mobile App ö nen und zur Seite Firmware aktualisieren Methode 2: Den QR-Code unten scannen. navigieren, warten bis die App die neue Firmware erkennt und dann den Anweisungen folgen.
  • Seite 51: Verwendung

    Verwendung Ein/Aus Automatische Reinigung Wenn der Reinigungsvorgang beginnt, scannt das Gerät den Bereich, erstellt Die Taste 3 Sekunden lang gedrückt halten. Die Anzeige sollte eine Karte und teilt diese dann intelligent in Zonen ein. Das Gerät reinigt zuerst aufleuchten, um anzuzeigen, dass er eingeschaltet ist. jede Zone entlang der Wände und dann den Rest der Zone in einer Bogenform.
  • Seite 52 Verwendung Punktreinigung Benutzerdefinierter Bereich Die mobile App verwenden, um Größe und Ort des Bereichs oder der Wenn ein bestimmter Bereich tief gereinigt werden soll, dessen Ort in Bereiche einzustellen, die gereinigt werden sollen. der mobilen App angeben. Das Gerät zentriert sich selbst und reinigt den Bereich von 1,5 m x 1,5 m um sich selbst herum zweimal.
  • Seite 53: Routinewartung

    Routinewartung Hauptbürste Seitenbürste 1. Das Gerät umdrehen und die Verriegelung an der Abdeckung der 1. Das Gerät umdrehen und die Seitenbürste vertikal herausziehen. Hauptbürste drücken, um die Hauptbürste herauszunehmen. 2. Die Bürste nach dem Entfernen von aufgewickelten Haaren oder 2. Das entsprechende Werkzeug verwenden, um die Hauptbürste, Schmutz wieder einsetzen.
  • Seite 54 Routinewartung Staubbehälter Filter 1. Nach einer längeren Verwendungszeit Filternetz, Filterschaum und 1. Die Taste am Staubbehälter drücken und gedrückt halten und HEPA-Filter entfernen. dann am Staubbehälter ziehen, um in herauszunehmen. 2. Entfernte Filternetz, Filterschaum, HEPA-Filter und Staubbehälter unter dem Wasserhahn spülen. 3.
  • Seite 55: Abnehmbarer 2-In-1-Wassertank

    Routinewartung Abnehmbarer 2-in-1-Wassertank (nach jeder Verwendung reinigen) 1. Den Wischmopp entfernen und das restliche Wasser aus dem Tank ausgießen. Staubbehälter-Komponenten HEPA-Filter Filterschaum 2. Den Wischmopp waschen und dann den Wassertank und den Mopp trocknen, um ihn für den nächsten Einsatz vorzubereiten.
  • Seite 56: Technische Daten

    Technische Daten Sensoren Roboter (regelmäßig reinigen) Mit einem weichen, trockenen Tuch alle Sensoren des Geräts abwischen, realme TechLife Robot Vacuum Produktname einschließlich der folgenden: 1. Der TOF Wandsensor rechts am Roboter RMH2101 2. Der Klippensensor an der Unterseite des Roboters Modell 3.
  • Seite 57: Fehlermeldung

    Fehlerbehebung Fehlermeldung Lösung Das Gerät wurde ohne Staubbehälter gestartet. Den Staubbehälter wieder anbringen. Fehler 1: Der Staubbehälter fehlt vermutlich. Das obere Radar wurde verdeckt oder in einem o enen Bereich platziert. Fehler 2: Das obere Radar ist vermutlich blockiert Die Abdeckung des oberen Radars entfernen oder das Gerät in den Innenbereich bewegen. oder steckt fest.
  • Seite 58 Fehlerbehebung Fehlermeldung Lösung Das Gerät befindet sich auf einer Neigung. Das Gerät auf eine ebene Fläche bewegen und Fehler 12: Bitte stelle mich aufrecht! dann neu starten. Das Primärrad hat sich verwickelt oder steckt fest. Fehler 13: Die Räder scheinen festzustecken. Das Primärrad prüfen und sämtliche Fremdkörper entfernen.
  • Seite 59: Allgemeine Probleme

    Allgemeine Probleme Problemtyp Lösung • Der Akkustand ist niedrig. Das Produkt an der Ladestation platzieren und es auf den drahtlosen Stromabnehmer ausrichten. Das Gerät sollte sich automatisch einschalten. Wenn das Gerät nicht mit Strom versorgt wurde, kann es einige Zeit dauern, bis es sich Kann nicht gestartet werden einschaltet.
  • Seite 60: Información De Seguridad

    Información de seguridad Limitaciones de uso • El dispositivo se utiliza para la limpieza de suelos en un entorno doméstico únicamente. No se puede utilizar en exteriores (como una terraza abierta), lugares sin suelo (como un sofá) ni en entornos comerciales o industriales. •...
  • Seite 61 Información de seguridad 1. El dispositivo solo debe utilizarse con la fuente de alimentación suministrada. 2. El adaptador debe retirarse de la toma de corriente antes de realizar tareas de limpieza o mantenimiento en el dispositivo. 3. Este dispositivo contiene una batería que solo puede ser reemplazada por personal cualificado. 4.
  • Seite 62 Información de seguridad Instrucciones de eliminación • La siguiente información solo se aplica a la eliminación de este producto, no a su uso diario. • Las sustancias químicas contenidas en la batería del robot contaminarán el medioambiente. Antes de desechar el producto, extraiga la batería del robot y llévela a una estación de reciclaje profesional.
  • Seite 63 Advertencia Este símbolo significa que, de acuerdo con las leyes y normativas locales, este dispositivo o su batería tendrán que desecharse de forma separada al resto de residuos de su hogar. Cuando este dispositivo llegue al final de su vida útil, el usuario puede optar por llevarlo a la empresa encargada de su correspondiente reciclaje.
  • Seite 64: Introducción Del Producto

    Introducción del producto Paquete de entrega 1 base de carga 1 adaptador 1 cepillo lateral izquierdo 1 cepillo lateral derecho 1 cepillo de limpieza 2 paños lavables (opcional) Depósito de agua extraíble 2 en 1 (opcional) 10 paños desechables (opcional)
  • Seite 65 Introducción del producto Robot Cubierta del filtro Sensor de pared TOF Botón del depósito de suciedad Sensor de desnivel LiDAR Contactos de carga Sensor de detección de Rueda omnidireccional golpes LiDAR Cepillo lateral Sensor de recarga Rueda principal Cepillo principal Cierre de la Sensor de detección de Sensor de...
  • Seite 66 Introducción del producto Robot Encender/Apagar/Limpiar/Pausar Indicador • Pulse para iniciar/pausar la limpieza • Blanco: conectado al wifi • Mantenga pulsado durante 3 segundos • Naranja: no conectado al wifi para encender/apagar el dispositivo • Rojo: error o batería baja • Cuando se produzca un error, mantenga pulsado durante 15 segundos para forzar Restablecer wifi...
  • Seite 67 Colocación 1. Conecte el cable de alimentación y coloque el cable que 3. Coloque los cepillos laterales sobre en el compartimento de cables. Alinee los cepillos izquierdo y derecho con las marcas correspondientes en la cubierta inferior. Presione hacia abajo hasta que escuche un clic, lo que indicará...
  • Seite 68 Kit de fregado 1. Coloque el depósito de agua 2. Coloque el depósito de agua extraíble 2 en 1 extraíble 2 en 1 Cuando el dispositivo haya terminado de limpiar, mantenga pulsado ① Coloque el paño de fregado: coloque el paño con el botón que está...
  • Seite 69 Conectarse a realme Link Descargar la aplicación Actualización de firmware Método 1: abra la tienda de aplicaciones y descargue la aplicación realme Link. Abra la aplicación móvil y vaya a la página de actualización del Método 2: escanee el código QR a continuación. firmware, espere a que la aplicación detecte el nuevo firmware y siga las instrucciones.
  • Seite 70: Limpieza Automática

    Encender/Apagar Limpieza automática Cuando comienza el proceso de limpieza, el dispositivo escanea el área, genera Mantenga pulsado el botón durante 3 segundos. El indicador se un mapa y divide inteligentemente el mapa en zonas. El dispositivo primero iluminará para indicar que el dispositivo está encendido. limpia cada zona a lo largo de las paredes y luego limpia el resto de la zona en forma de arco.
  • Seite 71 Limpieza localizada Área personalizada Utilice la aplicación móvil para establecer el tamaño y la ubicación de las Si desea realizar una limpieza profunda en un área determinada, áreas que desea limpiar. especifique la ubicación en la aplicación móvil. El dispositivo se centrará...
  • Seite 72: Mantenimiento De Rutina

    Mantenimiento de rutina Cepillo principal Cepillo lateral 1. Gire el dispositivo y presione en el cierre de la cubierta del cepillo 1. Gire el dispositivo y extraiga el cepillo lateral verticalmente. principal para sacarlo. 2. Vuelva a colocar el cepillo después de quitar el pelo enredado y la 2.
  • Seite 73 Mantenimiento de rutina Depósito de suciedad Filtro 1. Después de un largo periodo de uso, retire la red del filtro, la espuma 1. Mantenga pulsado el botón del depósito de suciedad y tire del del filtro y el filtro HEPA. depósito para sacarlo.
  • Seite 74 Mantenimiento de rutina Depósito de agua extraíble 2 en 1 (limpiar después de cada uso) 1. Retire el paño de fregado y vierta el agua restante del depósito. Componentes del depósito de suciedad Filtro HEPA Espuma del filtro 2. Lave el paño de fregado y seque el depósito de agua y el paño para prepararlos para el próximo uso.
  • Seite 75 Utilice un paño suave y seco para limpiar todos los sensores del dispositivo, Nombre del incluidos los siguientes: realme TechLife Robot Vacuum producto 1. El sensor de pared TOF a la derecha del robot 2. Senzor srázu v dolní části robota...
  • Seite 76: Solución De Problemas

    Solución de problemas Mensaje de error Solución El dispositivo se inició sin depósito de suciedad. Vuelva a colocar el depósito de suciedad. Error 1: parece que falta el depósito de suciedad. El radar superior se ha cubierto o colocado en un área abierta. Error 2: parece que el radar superior está...
  • Seite 77 Solución de problemas Mensaje de error Solución Error 12: coloque el dispositivo en posición vertical. El dispositivo está inclinado. Mueva el dispositivo a una superficie nivelada y reinícielo. La rueda principal se ha enredado o atascado. Error 13: parece que las ruedas están atascadas. Compruebe la rueda principal y retire cualquier objeto extraño.
  • Seite 78 Problemas habituales Tipo de problema Solución • El nivel de batería es bajo. Coloque el dispositivo en la base de carga y alinéelo con el receptor eléctrico inalámbrico. El dispositivo No se puede iniciar debería encenderse automáticamente. Si el dispositivo se quedó sin batería, es posible que tarde un poco en encenderse. •...
  • Seite 79: Informations De Sécurité

    Informations de sécurité Restrictions d’utilisation • Le produit sert à nettoyer le sol d’un domicile uniquement et ne saurait être utilisé en extérieur (par exemple sur une terrasse), ailleurs qu’au sol (comme sur un sofa) ou dans un environnement commercial ou industriel. •...
  • Seite 80 Informations de sécurité 1. L’appareil ne doit être utilisé qu’avec l’unité d’alimentation fournie. 2. L’adaptateur secteur doit être retiré de la prise avant d’entreprendre un nettoyage ou une maintenance de l’appareil. 3. Cet appareil contient une batterie dont le remplacement demande un certain talent. 4.
  • Seite 81 Informations de sécurité lnstructions pour la mise au rebut • Les informations suivantes ne s’appliquent qu’en cas de mise au rebut de ce produit et non pour son utilisation au quotidien. • Les substances chimiques contenues dans la batterie du robot sont polluantes. Avant de jeter le produit, retirez la batterie du robot et emmenez-la à...
  • Seite 82 Avertissement Ce symbole signifie que conformément aux lois et réglementations locales, votre produit ou sa batterie doivent être éliminés séparément des déchets ménagers. Lorsque ce produit arrive en fin de vie, l'utilisateur a le choix de donner son produit à un organisme de recyclage compétent. Le recyclage approprié...
  • Seite 83: Présentation Du Produit

    Présentation du produit Contenu de l’emballage 1 socle de charge 1 adaptateur secteur 1 brosse latérale L 1 brosse latérale R 1 brosse de nettoyage 2 serpillères lavables (facultatives) Réservoir d’eau 10 serpillères jetables (facultatives) détachable 2 en 1 (facultatif)
  • Seite 84 Présentation du produit Robot Protection du filtre Capteur mural TOF Bouton du bac à poussière Capteur de vide Contact pour le LiDAR rechargement Capteur de détection Roue omnidirectionnelle de collision LiDAR Brosse latérale Capteur de recharge Roue principale Brosse principale Attache de la Capteur du Capteur de détection...
  • Seite 85 Présentation du produit Robot Allumage/extinction/nettoyage/pause Témoin • Appuyez sur ce bouton pour démarrer/mettre • Blanc : Wi-Fi connecté en pause le nettoyage • Orange : Wi-Fi non connecté • Maintenez ce bouton appuyé durant • Rouge : batterie faible ou erreur 3 secondes pour allumer/éteindre l’appareil •...
  • Seite 86 Installation 1. Branchez le câble d’alimentation puis rangez tous les 3. Installation des brosses latérales câbles superflus dans le compartiment à câbles. Alignez les brosses droite et gauche avec les marques correspondantes sur la protection du bas. Appuyez dessus jusqu’à entendre un clic, qui indiquera que l’installation a réussi. 2.
  • Seite 87 Kit serpillère 1. Installez le réservoir d’eau 2. Retirez le réservoir d’eau détachable 2 en 1 détachable 2 en 1 À la fin du processus de nettoyage, maintenez le bouton situé au milieu ① Installation de la serpillère : fixez la serpillère de du réservoir d’eau appuyé...
  • Seite 88: Téléchargement De L'application

    Connexion à realme Link Téléchargement de l’application Mise à jour du firmware Méthode 1 : ouvrez votre magasin d’applications et téléchargez Ouvrez l’appli mobile et naviguez jusqu’à la page de mise à jour du l’application realme Link. firmware, attendez que l’appli détecte le dernier firmware en date Méthode 2 : scannez le code QR ci-dessous.
  • Seite 89: Nettoyage Automatique

    Usage Allumage/extinction Nettoyage automatique Au début du processus de nettoyage, l’appareil scanne la zone, génère une Maintenez le bouton appuyé durant 3 secondes. Le témoin carte et divise intelligemment la carte en plusieurs secteurs. L’appareil s’illuminera pour indiquer que l’appareil est en tension. commence par nettoyer chaque secteur situé...
  • Seite 90 Usage Détachage Zone personnalisée Utilisez l’appli mobile pour définir la taille et la position de la ou des zones Si vous souhaitez nettoyer en profondeur une certaine zone, précisez à nettoyer. son emplacement sur l’appli mobile. L’appareil se centrera et nettoiera deux fois la zone de 1,5 m²...
  • Seite 91: Maintenance De Routine

    Maintenance de routine Brosse principale Brosse latérale 1. Retournez l’appareil et appuyez sur l’attache de la protection de la brosse 1. Retournez l’appareil et retirez la brosse latérale à la verticale. principale pour retirer la brosse principale. 2. Enlevez les cheveux et la poussière dessus puis remettez la brosse en 2.
  • Seite 92: Bac À Poussière

    Maintenance de routine Bac à poussière Filtre 1. Après une longue période d’utilisation, retirez la grille du filtre, la 1. Maintenez le bouton du bac à poussière appuyé et tirez sur le mousse du filtre et le filtre HEPA. bac à poussière pour le sortir. 2.
  • Seite 93 Maintenance de routine Réservoir d’eau détachable 2 en 1 (à nettoyer après chaque utilisation) 1. Retirez la serpillère et videz l’eau qui reste dans le réservoir. Éléments du bac à poussière Filtre HEPA Mousse du filtre 2. Lavez la serpillère puis séchez le réservoir d’eau et la serpillère en vue de la prochaine utilisation.
  • Seite 94: Caractéristiques Techniques

    Utilisez un chi on sec et doux pour essuyer tous les capteurs de l’appareil, parmi lesquels : Nom du produit realme TechLife Robot Vacuum 1. Le capteur mural TOF sur la droite du robot 2. Les trois capteurs de prévention de chute situés en-dessous du robot Modèle...
  • Seite 95: Résolution Des Problèmes

    Résolution des problèmes Message d’erreur Solution L’appareil a été démarré sans bac à poussière. Rattachez le bac à poussière. Erreur 1 : le bac à poussière semble absent. Le radar supérieur est couvert ou placé dans un lieu ouvert. Erreur 2 : le radar supérieur semble être obstrué ou coincé. Retirez ce qui recouvre le radar supérieur ou replacez l’appareil à...
  • Seite 96 Résolution des problèmes Message d’erreur Solution Erreur 12 : merci de me remettre à plat ! L’appareil est sur un pan incliné. Placez l’appareil sur une surface plane puis redémarrez-le. La roue principale est coincée ou emmêlée. Erreur 13 : les pneus semblent être coincés. Vérifiez la roue principale et retirez tout corps étranger.
  • Seite 97 Problèmes courants Type de problème Solution • La batterie est faible. Placez le produit sur le socle de charge, en alignant bien ses connecteurs avec ceux du réceptacle d’alimentation sans fil. L’appareil devrait s’allumer automatiquement. Si la batterie était à plat, il est possible que l’allumage Impossible de démarrer prenne un peu de temps.
  • Seite 98: Informazioni Sulla Sicurezza

    Informazioni sulla sicurezza Limiti d’utilizzo • Questo prodotto viene utilizzato esclusivamente per la pulizia dei pavimenti in un ambiente domestico. Pertanto, non può essere utilizzato in ambienti esterni (ad esempio una terrazza all’aperto), sopraelevati da terra (ad esempio un divano), commerciali o industriali. •...
  • Seite 99 Informazioni sulla sicurezza 1. Il dispositivo deve essere utilizzato esclusivamente con l’alimentatore fornito in dotazione. 2. L’adattatore deve essere scollegato dalla presa di corrente prima di procedere alla pulizia o alla manutenzione del dispositivo. 3. Questo apparecchio contiene batterie che possono essere sostituite esclusivamente da personale qualificato. 4.
  • Seite 100 Informazioni sulla sicurezza Istruzioni per lo smaltimento • Le informazioni riportate di seguito si applicano solo allo smaltimento del dispositivo, non al suo utilizzo giornaliero. • Le sostanze chimiche contenute all’interno della batteria del robot inquinano l’ambiente. Prima di provvedere allo smaltimento del prodotto, rimuovere la batteria dal robot e consegnarla presso un centro preposto al riciclaggio professionale.
  • Seite 101: Avvertenze Sulla Batteria

    Avvertenza Questo simbolo indica che, in ottemperanza alle leggi e ai regolamenti locali, il prodotto e/o la sua batteria devono essere smaltiti separatamente dai comuni rifiuti domestici. Al termine del ciclo di vita del prodotto, l’utente può scegliere di consegnare il prodotto presso un ente preposto alle operazioni di riciclaggio.
  • Seite 102: Presentazione Del Prodotto

    Presentazione del prodotto Contenuto della confezione Base di ricarica x 1 Adattatore x 1 Spazzola laterale L x 1 Spazzola laterale R x 1 Scovolino di pulizia x 1 Panno lavabile x 2 (opzionale) Serbatoio dell’acqua Panno monouso x 10 (opzionale) 2 in 1 estraibile (opzionale)
  • Seite 103 Presentazione del prodotto Robot Coperchio del filtro Sensore di prossimità ToF Pulsante della vaschetta raccoglipolvere Sensore di dislivello LiDAR Contatto di ricarica Sensore di rilevamento Ruota omnidirezionale collisione LiDAR Spazzola laterale Sensore di ricarica Ruota principale Spazzola principale Fermo del coperchio Sensore di Sensore del della spazzola...
  • Seite 104 Presentazione del prodotto Robot On/O /Pulizia/Sospensione Indicatore • Premere per avviare/sospendere il ciclo di pulizia • Spia bianca: connesso alla rete Wi-Fi • Tenere premuto per 3 secondi per • Spia arancione: non connesso alla rete Wi-Fi accendere/spegnere il dispositivo •...
  • Seite 105 Installazione 1. Collegare il cavo di alimentazione e mettere la parte in 3. Installare le spazzole laterali eccesso nell’apposito alloggiamento cavi. Allineare la spazzola destra e sinistra ai contrassegni corrispondenti sul coperchio inferiore. Premere fino a sentire un clic, il che indica che l’installazione è riuscita. 2.
  • Seite 106 Kit per il lavaggio 1. Installare il serbatoio dell’acqua 2. Rimuovere il serbatoio dell’acqua 2 in 1 estraibile 2 in 1 estraibile Quando il dispositivo termina la pulizia, tenere premuto il pulsante al ① Installare il panno: fissare il panno uniformemente centro del serbatoio dell’acqua, rimuovere quest’ultimo tirandolo ③...
  • Seite 107: Aggiornamento Del Firmware

    Connessione a realme Link Download dell’app Aggiornamento del firmware Metodo 1: aprire l’App Store e scaricare l’app realme Link. Aprire l’app per dispositivi mobili e andare alla pagina di Metodo 2: scansionare il codice QR in basso. aggiornamento del firmware, attendere che l’app rilevi il nuovo firmware e seguire le istruzioni.
  • Seite 108: Pulizia Automatica

    Utilizzo On/O Pulizia automatica All’avvio del ciclo di pulizia, il dispositivo scansiona l’area, genera una mappa e Tenere premuto il pulsante per 3 secondi. L’indicatore dovrebbe la divide in maniera intelligente in diverse zone. Il dispositivo pulisce ciascuna illuminarsi per indicare che il robot è acceso. zona dapprima lungo le pareti, poi le parti restanti formando una sorta di arco.
  • Seite 109 Utilizzo Smacchiatura Area personalizzata Utilizzare l’app per dispositivi mobili per impostare la superficie e la Se si desidera pulire a fondo una certa area, specificarne la posizione posizione delle aree da pulire. sull’app per dispositivi mobili. Il dispositivo si centrerà e pulirà un’area pari a 1,5 m per 1,5 m intorno a se stesso due volte.
  • Seite 110: Manutenzione Ordinaria

    Manutenzione ordinaria Spazzola principale Spazzola laterale 1. Capovolgere il dispositivo e premere il fermo sul coperchio della 1. Capovolgere il dispositivo ed estrarre verticalmente la spazzola spazzola principale per estrarla. laterale. 2. Utilizzare l’apposito strumento per pulire la spazzola principale, 2.
  • Seite 111 Manutenzione ordinaria Vaschetta raccoglipolvere Filtro 1. Dopo un prolungato periodo di utilizzo, rimuovere la rete filtrante, la 1. Tenere premuto il pulsante della vaschetta raccoglipolvere, schiuma filtrante e il filtro HEPA. quindi tirarla indietro ed estrarla. 2. Risciacquare la rete e la schiuma filtrante, il filtro HEPA e la vaschetta raccoglipolvere appena rimossi sotto l’acqua corrente.
  • Seite 112 Manutenzione ordinaria Serbatoio dell’acqua 2 in 1 estraibile (pulire dopo ogni utilizzo) 1. Rimuovere il panno e tutta l’acqua in eccesso dal serbatoio. Componenti della vaschetta raccoglipolvere Filtro HEPA Schiuma filtrante 2. Lavare il panno e farlo asciugare assieme al serbatoio dell’acqua così...
  • Seite 113 Usare un panno morbido e asciutto per pulire tutti i sensori sul dispositivo, inclusi i Nome del seguenti: realme TechLife Robot Vacuum prodotto 1. Il sensore di prossimità ToF sul lato destro del robot 2. Il sensore anticaduta sulla parte inferiore del robot...
  • Seite 114: Risoluzione Dei Problemi

    Risoluzione dei problemi Messaggio d’errore Soluzione Errore 1: Sembra che la vaschetta raccoglipolvere Il dispositivo è stato avviato senza la vaschetta raccoglipolvere inserita. Reinserire la vaschetta non sia stata inserita. raccoglipolvere. Il radar superiore è stato coperto o si trova in un’area all’aperto. Errore 2: Sembra che il radar superiore sia ostruito Rimuovere la copertura dal radar superiore o spostare il dispositivo al chiuso.
  • Seite 115 Risoluzione dei problemi Messaggio d’errore Soluzione Errore 12: Raddrizzami. Il dispositivo è in pendenza. Spostare il dispositivo su una superficie piana e riavviarlo. La ruota principale si è impigliata o è bloccata. Errore 13: Sembra che le gomme siano bloccate. Controllare la ruota principale e rimuovere eventuali corpi estranei.
  • Seite 116: Problemi Comuni

    Problemi comuni Tipo di problema Soluzione • La batteria è scarica. Posizionare il prodotto sulla base di ricarica e allinearlo al ricevitore di alimentazione wireless. Il dispositivo Impossibile avviare il dispositivo dovrebbe accendersi automaticamente. Se il dispositivo era scarico, potrebbe richiedere un po’ di tempo per accendersi. •...
  • Seite 117 Veiligheidsinformatie Gebruiksbeperkingen • Dit product wordt alleen gebruikt voor het schoonmaken van de vloer in een huiselijke omgeving en kan niet buiten worden gebruikt (zoals op een open terras), voor andere oppervlakken (zoals een sofa) en in een commerciële of industriële omgeving. •...
  • Seite 118 Veiligheidsinformatie 1. Het apparaat mag alleen worden gebruikt met de voeding die bij het apparaat werd geleverd. 2. De adapter moet uit het stopcontact worden gehaald vóór het schoonmaken of onderhouden van het apparaat. 3. Dit apparaat bevat batterijen die alleen door opgeleide personen vervangen mogen worden. 4.
  • Seite 119: Instructies Voor Verwijdering

    Veiligheidsinformatie Instructies voor verwijdering • De volgende informatie geldt alleen voor het verwijderen van het product, niet voor het dagelijks gebruik. • De chemische sto en die in de batterij van de robot zitten, vervuilen het milieu. Haal de batterij uit de robot vóór het verwijderen van het product en breng het naar een professioneel inzamelpunt.
  • Seite 120 Waarschuwing Dit symbool betekent dat uw product en/of de batterij, overeenkomstig de lokale wetten en regelgeving, gescheiden van huishoudelijk afval verwijderd moet worden. Wanneer dit product aan het einde van zijn levensduur is gekomen, heeft de gebruiker de keuze om dit product bij een competent recyclingbedrijf binnen te brengen.
  • Seite 121: Inleiding Tot Het Product

    Inleiding tot het product Omvang van levering Laadstation x1 Adapter x1 L Zijborstel x1 R Zijborstel x1 Schoonmaakborstel x1 Afwasbaar dweilpad x 2 (Optioneel) Verwijderbare 2-in-1 watertank (Optioneel) Wegwerpbaar dweilpad x 10 (Optioneel)
  • Seite 122 Inleiding tot het product Robot Filterdeksel TOF-muursensor Knop stofbak Afgrondsensor LiDAR Laadcontact LiDAR Collision Omni-wiel Detection-sensor Zijborstel Laadsensor Primair wiel Hoofdborstel Gesp deksel Sensor voor Bumpersensor hoofdborstel obstakeldetectie...
  • Seite 123 Inleiding tot het product Robot Aan/Uit/Schoonmaken/Pauzeren Indicatielampje • Druk om het schoonmaken te starten/pauzeren • Wit: Verboden met Wi-Fi • Houd de knop 3 seconden ingedrukt om het • Oranje: Niet verbonden met Wi-Fi apparaat aan/uit te schakelen • Rood: Fout of batterijniveau laag •...
  • Seite 124 Installatie 1. Sluit het netsnoer aan en berg de overschot van het 3. De zijborstels installeren snoer op in het kabelcompartiment. Lijn de linker en rechter borstels uit met de overeenstemmende markeringen op het onderste deksel. Druk tot u een klik hoort, die aangeeft dat het plaatsen gelukt is.
  • Seite 125 Dweilset 1. Installeer de verwijderbare 2-in-1 2. Verwijder de verwijderbare 2-in-1 watertank watertank Als het apparaat klaar is met schoonmaken, houd de knop op het ① De dweil installeren: Bevestig de dweil moeiteloos midden van de watertank dan ingedrukt, verwijder de tank door deze ③...
  • Seite 126: App Downloaden

    Maak verbinding met realme Link App downloaden Firmware-upgrade Methode 1: Open uw app store en download de realme Link-app. Open de mobiele app en ga naar de pagina om de firmware te Methode 2: Scan de onderstaande QR-code. upgraden, wacht tot de app de nieuwe firmware detecteert en volg de aanwijzingen.
  • Seite 127: Automatisch Schoonmaken

    Gebruik Aan/Uit Automatisch schoonmaken Als het schoonmaakproces begint, scant het apparaat het gebied, maakt het een Houd de knop gedurende 3 seconden ingedrukt. Het indicatielampje zou kaart aan en verdeelt het de kaart daarna op een intelligente manier in zones. Het moeten gaan branden om aan te geven dat het apparaat is ingeschakeld.
  • Seite 128 Gebruik Grondig schoonmaken Speciaal gebied Gebruik de mobiele app om de omvang en de locaties in te stellen van Als u een bepaald gebied grondiger wilt schoonmaken, geef de het gebied(en) dat u wilt schoonmaken. locatie dan op in de mobiele app. Het apparaat zal zichzelf centreren en het gebied van 1,5 m x 1,5 m twee keer schoonmaken.
  • Seite 129: Routine-Onderhoud

    Routine-onderhoud Hoofdborstel Zijborstel 1. Draai het apparaat om en druk op de gesp op het deksel van de 1. Draai het apparaat om en trek de zijborstel verticaal uit het apparaat. hoofdborstel om de hoofdborstel uit het apparaat te halen. 2.
  • Seite 130 Routine-onderhoud Stofbak Filter 1. Verwijder het filtergaas, het filterschuim en het HEPA-filter na een 1. Houd de knop van de stofbak ingedrukt en trek aan de stofbak lange periode van inactiviteit. om deze uit het apparaat te halen. 2. Spoel het verwijderde filtergaas, filterschuim, HEPA-filter en de stofbak onder stromend water.
  • Seite 131: Verwijderbare 2-In-1 Watertank

    Routine-onderhoud Verwijderbare 2-in-1 watertank (Schoonmaken na elk gebruik) 1. Verwijder de dweil en giet al het resterende water uit de tank. Onderdelen van de stofbak HEPA-filter Filterschuim 2. Maak de dweil schoon en droog daarna de watertank en de dweil voor een volgend gebruik. Filtergaas Onderdelen van de watertank Batterij...
  • Seite 132: Specificaties

    Robot (Regelmatig schoonmaken) Gebruik een zachte, droge doek op alle sensoren op het apparaat schoon te vegen, Naam van het realme TechLife Robot Vacuum met inbegrip van de volgende: product 1. De TOF-muursensor op de rechterkant van de robot RMH2101 2.
  • Seite 133: Probleemoplossing

    Probleemoplossing Foutmelding Oplossing Het apparaat werd gestart zonder een stofbak. Bevestig de stofbak opnieuw. Fout 1: Het lijkt er op dat de stofbak ontbreekt. De bovenste radar is bedekt of is op een open gebied geplaatst. Fout 2: Het lijkt er op dat de bovenste radar wordt Verwijder het deksel van de bovenste radar of zet het apparaat binnen.
  • Seite 134 Probleemoplossing Foutmelding Oplossing Fout 12: Zet me rechtop! Het apparaat staat op een helling. Zet het apparaat op een vlak oppervlak en start het opnieuw op. Het primaire wiel is verstrengeld geraakt of zit vast. Fout 13: Het lijkt er op dat de banden vast zitten. Controleer het primaire wiel en verwijder vreemde voorwerpen.
  • Seite 135 Gebruikelijke problemen Soort van probleem Oplossing • Het batterijniveau is laag. Plaats het product op het laadstation en lijn het uit met de draadloze voedingsontvanger. Het apparaat Kan niet worden gestart zou automatisch moeten aanschakelen. Als het apparaat zonder voeding is gevallen, kan het enige tijd duren om aan te schakelen. •...
  • Seite 136: Wskazówki Dotyczące Bezpieczeństwa

    Wskazówki dotyczące bezpieczeństwa Ograniczenia użytkowania • Urządzenie służy wyłącznie do czyszczenia podłóg w gospodarstwach domowych. Nie jest ono przeznaczone do sprzątania powierzchni na wolnym powietrzu (otwarte tarasy itd.), niebędących podłożem (tapczany itd.) i w obiektach użytkowych lub przemysłowych. • Nie używać produktu na nieogrodzonych obszarach wyniesionych (daszki, otwarte tarasy, górne powierzchnie mebli). •...
  • Seite 137 Wskazówki dotyczące bezpieczeństwa 1. Użytkować urządzenie wyłącznie z dołączonym do niego zasilaczem. 2. Przed przystąpieniem do czyszczenia lub konserwacji urządzenia odłączyć zasilacz z gniazdka. 3. Urządzenie jest wyposażone w akumulator, który może być wymieniany wyłącznie przez wykwalifikowane osoby. 4. Przed zutylizowaniem urządzenia należy wymontować z niego akumulator. 5.
  • Seite 138 Wskazówki dotyczące bezpieczeństwa Wskazówki utylizacji • Poniższe informacje dotyczą wyłączne utylizacji produktu. Nie mają one zastosowania w przypadku codziennego użytkowania. • Substancje chemiczne obecne w akumulatorze robota powodują zanieczyszczenie środowiska. Przed zutylizowaniem produktu zdemontuj akumulator i przekaż go do odpowiedniego punktu zbiórki odpadów. Akumulator należy zdemontować dopiero po jego całkowitym rozładowaniu.
  • Seite 139 Ostrzeżenie Ten symbol oznacza, że – zgodnie z lokalnymi regulacjami i przepisami – tego produktu i/lub jego akumulatorów nie należy wyrzucać razem z odpadami z gospodarstwa domowego. W momencie zakończenia eksploatacji produktu użytkownik może go przekazać do odpowiedniej placówki recyklingu. Odpowiednia utylizacja produktu pomaga chronić...
  • Seite 140: Podstawowe Informacje O Produkcie

    Podstawowe informacje o produkcie Zakres dostawy Podstawka ładująca x 1 Zasilacz x 1 Lewa szczotka boczna (L) x 1 Prawa szczotka boczna (R) x 1 Szczotka do czyszczenia x 1 Podkładka pod mop nadająca się do Zdejmowany zbiornik na wodę mycia x 2 (opcjonalna) 2-w-1 (opcjonalny) Jednorazowa podkładka pod...
  • Seite 141 Podstawowe informacje o produkcie Robot Pokrywa filtra Czujnik ToF ściany Przycisk pojemnika na kurz Czujnik spadku LiDAR Styk ładujący Czujnik kolizji LiDAR Koło Omni Szczotka boczna Czujnik ładowania Koło główne Szczotka główna Klamra pokrywy Czujnik wykrywania Czujnik zderzaka szczotki głównej przeszkód...
  • Seite 142 Podstawowe informacje o produkcie Robot Włączanie/wyłączanie/sprzątanie/ Wskaźnik wstrzymanie • Biały: połączono z siecią Wi-Fi • Pomarańczowy: nie połączono z siecią Wi-Fi • Naciśnij, aby rozpocząć/wstrzymać sprzątanie • Czerwony: błąd albo niski poziom naładowania • Naciśnij i przytrzymaj przez 3 sekundy, aby akumulatora włączyć/wyłączyć...
  • Seite 143 Montaż 1. Podłącz przewód zasilania i schowaj zbędną część kabla 3. Montaż szczotek bocznych w schowku na kabel. Wyrównaj lewą i prawą szczotkę z oznaczeniami na pokrywie spodu. Dociskaj, aż usłyszysz zatrzaśnięcie, wskazujące, że szczotki zostały założone pomyślnie. 2. Umieść podstawkę ładującą na płaskiej powierzchni przy ścianie i podłącz ją...
  • Seite 144 Zestaw mopa 1. Montaż zdejmowanego zbiornika 2. Demontaż zdejmowanego zbiornika na na wodę 2-w-1 wodę 2-w-1 Gdy urządzenie skończy sprzątać, naciśnij i przytrzymaj przycisk na ① Zakładanie mopa: płynnym ruchem przymocuj mop ③ Zakładanie zbiornika na wodę. środku zbiornika na wodę, wyjmij zbiornik, pociągając go, wylej wodę do spodu zbiornika na wodę.
  • Seite 145: Dodawanie Urządzenia

    Łączenie z realme Link Pobieranie aplikacji Aktualizowanie oprogramowania sprzętowego Sposób 1: Otwórz odpowiedni sklep z aplikacjami i pobierz aplikację realme Link. Otwórz aplikację mobilną i przejdź do strony aktualizowania Sposób 2: Zeskanuj poniższy kod QR. oprogramowania sprzętowego. Poczekaj na wykrycie oprogramowania przez aplikację, a następnie postępuj zgodnie z instrukcjami.
  • Seite 146 Użytkowanie Włączanie/wyłączanie Sprzątanie automatyczne Rozpoczynając sprzątanie, urządzenie przeskanuje obszar, wygeneruje jego Naciśnij przycisk i przytrzymaj przez 3 sekundy. Wskaźnik mapę i inteligentnie podzieli ją na strefy. Najpierw urządzenie odkurza strefę informujący, że urządzenie jest włączone, powinien się zaświecić. wzdłuż ścian, a następnie jej pozostałą część, podążając po drodze złożonej z łuków.
  • Seite 147 Użytkowanie Sprzątanie miejscowe Obszar niestandardowy W aplikacji mobilnej możesz ustawić lokalizację i wielkość obszaru/ Aby gruntownie posprzątać obszar, wskaż jego położenie w aplikacji obszarów do sprzątania. mobilnej. Urządzenie wypośrodkuje się i dwukrotnie posprząta obszar 1,5 m x 1,5 m wokół siebie. Niedozwolony obszar W aplikacji mobilnej możesz ustawić...
  • Seite 148: Rutynowa Konserwacja

    Rutynowa konserwacja Szczotka główna Szczotka boczna 1. Obróć urządzenie i naciśnij klamrę na szczotce głównej, aby ją wyjąć. 1. Odwróć urządzenie i pionowym ruchem wyciągnij szczotkę boczną. 2. Odpowiednim narzędziem wyczyść szczotkę główną, usuwając 2. Usuń zaplątane włosy i zabrudzenia i ponownie załóż szczotkę. ewentualne zanieczyszczenia w jej wgłębieniach i wszelkie zaplątane 3.
  • Seite 149 Rutynowa konserwacja Pojemnik na kurz Filtr 1. Po dłuższym okresie użytkowania wyjmij siatkę filtra, piankę filtra i 1. Naciśnij i przytrzymaj przycisk pojemnika na kurz, a następnie filtr HEPA. pociągnij go, aby wyjąć. 2. Przepłucz siatkę filtra, piankę filtra i filtr HEPA wodą z kranu. 3.
  • Seite 150 Rutynowa konserwacja Zdejmowany zbiornik na wodę 2-w-1 (wyczyścić po każdym użyciu) 1. Wyjmij mop czyszczący i wylej pozostałą wodę ze zbiornika. Elementy pojemnika na kurz Filtr HEPA Pianka filtra 2. Umyj mop czyszczący, a następnie wysusz zbiornik na wodę i mop, aby były gotowe do kolejnego użycia. Siatka filtra Elementy zbiornika na wodę...
  • Seite 151: Dane Techniczne

    Dane techniczne Czujniki Robot (regularnie czyścić) Nazwa Suchą, miękką ściereczką przetrzyj wszystkie czujniki urządzenia, w tym: realme TechLife Robot Vacuum produktu 1. Czujnik ToF ściany po prawej stronie robota 2. Czujnik spadku na spodniej stronie robota Model RMH2101 3. Czujnik wykrywania przeszkód z przodu robota 4.
  • Seite 152: Rozwiązywanie Problemów

    Rozwiązywanie problemów Komunikat o błędzie Rozwiązanie Urządzenie włączono z wyjętym pojemnikiem na kurz. Załóż pojemnik na kurz. Błąd 1: Brak pojemnika na kurz. Górny radar został zasłonięty albo umieszczony na otwartej przestrzeni. Błąd 2: Górny radar się zablokował lub jest zasłonięty. Zdejmij pokrywę...
  • Seite 153 Rozwiązywanie problemów Komunikat o błędzie Rozwiązanie Urządzenie znajduje się na pochyłości. Przenieś urządzenie na równą powierzchnię i uruchom Błąd 12: Postaw mnie równo! ponownie. Koło główne zaplątało się lub zablokowało. Błąd 13: Opony się zablokowały. Sprawdź koło główne i usuń ewentualne ciała obce. Szczotka główna zaplątała się...
  • Seite 154 Najczęstsze problemy Rodzaj problemu Rozwiązanie • Niski poziom naładowania akumulatora. Umieść urządzenie na podstawce ładującej równo z bezprzewodowym odbiornikiem zasilania. Urządzenie powinno włączyć się automatycznie. Jeśli urządzenie było rozładowane, może włączyć się dopiero po Nie można włączyć urządzenia pewnym czasie. •...
  • Seite 155 Realme Chongqing Mobile Telecommunications Corp., Ltd. No.178 Yulong Avenue, Yufengshan, Yubei District, Chongqing, China Representative in Europe: Baradine Invest, S.L.U. c/ Príncipe de Vergara, 112, 4, 28002 Madrid, Spain...

Inhaltsverzeichnis