Herunterladen Inhalt Inhalt Diese Seite drucken
Inhaltsverzeichnis

Werbung

Verfügbare Sprachen
  • DE

Verfügbare Sprachen

  • DEUTSCH, seite 47
MANUAL DE USUARIO Y GARANTÍA
USER'S MANUAL AND WARRANTY
GUIA DO UTILIZADOR E GARANTIA
GUIDE DE L'UTILIZATEUR ET GARANTIE
BENUTZERHANDBUCH UND GARANTIE

Werbung

Inhaltsverzeichnis
loading

Inhaltszusammenfassung für Olsson Fresh Advanced

  • Seite 1 MANUAL DE USUARIO Y GARANTÍA USER’S MANUAL AND WARRANTY GUIA DO UTILIZADOR E GARANTIA GUIDE DE L’UTILIZATEUR ET GARANTIE BENUTZERHANDBUCH UND GARANTIE...
  • Seite 2 ÍNDICE INDEX INHALTSVERZEICHNIS 03 | Español 14 | English 25 | Português 36 | Français 47 | Deutsch...
  • Seite 3: Inhaltsverzeichnis

    9. Como plegar el patinete eléctrico ............8 10. Indicaciones para el manejo del patinete ......... 9 11. Ajuste del disco de freno ..................9 12. App Olsson Stroot ......................9 13. Prestaciones equipos ....................11 14. Más información y soporte ................12...
  • Seite 4: Contenido De La Caja

    › Asegúrate de que tu patinete eléctrico › Utiliza sólo accesorios originales de la funciona bien antes de cada viaje. marca OLSSON&BROTHERS. › Conserva el manual de instrucciones › Cuanto mayor sea la velocidad del impresas para su posterior consulta.
  • Seite 5: Carga Y Mantenimiento De La Batería

    0 grados, el rendimiento del patinete disminuirá. Advertencia: Las baterías de los patinetes Olsson&Brothers incorporan un chip inteligente que almacena información sobre su carga-descar- ga.
  • Seite 6: Componentes Del Patinete Eléctrico

    5. COMPONENTES DEL PATINETE ELÉCTRICO Luz delantera Panel de control Botón encendido Acelerador Maneta de freno Hebilla cierre plegado Plegado Luz freno Disco freno Rueda motor Soporte Puerto carga alimentación Compartimento batería 6. PASOS PARA ENCENDER TU PATINETE ELÉCTRICO ¡ATENCIÓN! SIGUE ESTOS PASOS ANTES DE ENCENDER EL PATINETE Mientras aceleras al máximo aprieta la Enciende el patinete...
  • Seite 7: Panel De Control Del Display Multifunción

    7. PANEL DE CONTROL DEL DISPLAY MULTIFUNCIÓN Indicador de Indicador modo velocidad velocidad Indicador Indicador Bluetooth encendido Luces Indicador Averia Indiciador de nivel de batería Botón de encendido/apagado Botón de encendido/apagado: Para encender el scooter, pulse el botón de la parte superior y para apagarlo, mantenga pulsado el botón durante varios segundos.
  • Seite 8: Montaje Del Patinete Eléctrico

    8. MONTAJE DEL PATINETE ELÉCTRICO Despliega Instala el la barra cabezal del vertical y manillar asegúrala en la barra con el cierre vertical y Smart asegúrate de Security que los cables quedan por dentro Coloca los 4 tornillos incluidos para fijar el manillar a la barra ADVERTENCIA: Enrosca todos los tornillos suavemente para asegurar que están bien colocados y una vez...
  • Seite 9: Indicaciones Para El Manejo Del Patinete

    Si la maneta de freno está muy floja o notas que el patinete frena poco, utiliza la llave Allen para aflojar el tornillo que hay en la pinza de freno y acorta un poco la longitud del cable del freno. Vuelve a apretar el tornillo. 12. APP OLSSON STROOT ¡Descárgate la app “Olsson Stroot’’!
  • Seite 10 CONFIGURA TU PATINETE: BLOQUEA TU PATINETE: Cambia el modo de velo- Pulsa el icono de bloqueo cidad o la velocidad, con- para mantener tu patinete sulta el nivel de batería seguro en todo momento. y enciende o apaga las El icono del candado se ilu- luces.
  • Seite 11: Prestaciones Equipos

    13. PRESTACIONES EQUIPOS CLASE 10” RUEDA PULGADAS ANTI PINCHAZOS TIPO RUEDA ALUMINIO REFORZADO MATERIAL CUADRO SISTEMA DOBLE SEGURIDAD PLEGADO FRENO DISCO FRENO ELÉCTRICO 14,6KG PESO BLUETOOTH 120KG PESO MAX SOPORTADO LUZ DELANTERA/TRASERA DISPLAY ALTO 1150MM X ANCHO SIN PLEGAR 435MM X 1180MM DE LARGO ALTO 520MM X ANCHO 435MM PLEGADO X 1180MM DE LARGO...
  • Seite 12: Más Información Y Soporte

    La empresa Rider Division SL, ubicada en polígono industrial de Barros nº 29, 39408 Barros, Cantabria con número de teléfono 942812900 y cif 39856463. Declaramos bajo nuestra exclusiva responsabilidad la conformidad de los productos: FRESH ADVANCED EN 17128:2020 (CLASE 2) Con las disposiciones de la directiva 2014/30/EU Estándares: EN17128:2020, EN 55014-...
  • Seite 13: Certificado De Garantía

    CERTIFICADO DE GARANTÍA Modelo: Nº serie: (Incluido en el equipo) Fecha de compra: Rider División S.L., concede a través de este certificado el periodo de garantía aplica- ble según la normativa legal en el país de compra. Esta garantía se dará tanto para el producto como para las piezas a las que pueda imputarse un defecto de fabricación.
  • Seite 14 9. Como plegar el patinete eléctrico ................19 10. Indications for the operation of the scooter ..........20 11. Brake disc adjustment ......................... 20 12. App olsson stroot ..........................20 13. Prestaciones equipos ........................22 14. Más información y soporte ....................23...
  • Seite 15: Contents Of The Box

    › Make sure your electric scooter is in your local legislation. good working order before each trip. › Use only original OLSSON&BROTHERS › For future reference, keep the printed brand accessories. instruction manual. ›...
  • Seite 16: Battery Charging And Maintenance

    0 degrees, the performance of the vehicle will decrease. Warning: Olsson&Brothers scooter batteries incorporate a smart chip that stores information about their charge-discharge. If you do not char- ge the battery for a long time, you may cause serious damage not inclu- ded in the free warranty service.
  • Seite 17: Electric Scooter Components

    5. ELECTRIC SCOOTER COMPONENTS Front LED Control Panel Power Button Throttle Handbrake Buckle Folding Sop light Disc Brake Motor Wheel Parking Charging Port Battery 6. STEP-BY-STEP GUIDE TO GETTING STARTED WITH AN ELECTRIC SCOOTER ATTENTION! FOLLOW THESE STEPS BEFORE STARTING THE SCOOTER While accelerating at full Hold the accelerator at full Turn on the scooter by...
  • Seite 18: Multifunction Display Control Panel

    7. MULTIFUNCTION DISPLAY CONTROL PANEL Speed Speed mode Indicator indicator Bluetooth Lights ON Indicator Indicator Fault Indicator Battery level indicator Power button On/Off button: To turn the scooter on, press the button on the top of the scooter and to turn it off, press and hold the button for several seconds. Light on/off button: Press once quickly.
  • Seite 19: Assembly Of The Electric Scooter

    8. ASSEMBLY OF THE ELECTRIC SCOOTER Install the Unfold the handlebar vertical bar head on the and secure vertical bar it with the and make Smart sure that the Security lock wires are on the inside Place the 4 screws included to attach the handlebar to the bar WARNING: Screw in all crews softly to ensure that they are properly positioned and once secured, tighten them with...
  • Seite 20: Indications For The Operation Of The Scooter

    If the brake lever is too loose or you notice that the scooter brakes too Little, use the Allen key to loosen the screw on the disc brake and shorten the length of the brake cable a Little. Retighten the screw. 12. OLSSON STROOT APP Download the ‘’OLSSON STROOT’’ App!
  • Seite 21 CONFIGURE YOUR SCOOTER! LOCK YOUR SCOOTER! Change the speed mode or Press the lock icon to keep speed, check the battery le- your scooter secure at all vel and turn the lights on or times. The lock icon will li- off.
  • Seite 22: Equipment Features

    13. EQUIPMENT FEATURES CLASS 10” WHEEL INCHES ANTI-PUNCTUTE WHEEL TYPE REINFORCED ALUMIMIUM MATERIAL FRAME REINFORCED DOUBLE SYSTEM FOLDING DISC BRAKE ELECTRIC BRAKE 14,6KG WEIGHT BLUETOOTH 120KG MAX SUPPORTED WEIGHT FRONT/REAR LIGHT DISPLAY HEIGHT 1150MM X WIDTH UNFOLDED 435MM X LENGTH 1180MM HEIGHT 520MM X WIDTH FOLDED 435MM X 1180MM LONG...
  • Seite 23: Declaration Of Conformity

    Barros, Cantabria Spain with telephone number +34 942 812 900 with VAT Nº ES- B39856463. We declare under our sole responsibility the conformity of the scooter: FRESH ADVANCED EN 17128:2020 (CLASS 2) Directiva 2014/30/EU Estándares: EN17128:2020, EN 55014-1:2017, EN 55014-2:2015, EN 61000-...
  • Seite 24: Certificate Of Guarantee

    CERTIFICATE OF GUARANTEE Model: Serial Number: (the one that appears on the device) Purchase Date: Rider División S.L., grants through this certificate the applicable warranty period accor- ding to the legal regulations in the country of purchase. This guarantee will be given both for the product and for the parts to which a manufacturing defect can be attributed.
  • Seite 25 9. Como dobrar o skate elétrico................30 10. Indicações para manusear o skate ............. 31 11. Ajustando o disco de freio..................31 12. App olsson stroot ......................31 13. Prestaciones equipos ....................33 14. Mais informações e suporte ................33...
  • Seite 26: Conteúdo Da Caixa

    › Certifique-se de que sua scooter elé- › Use apenas acessórios originais da trica funciona bem antes de cada marca OLSSON & BROTHERS. viagem. › › Guarde o manual de instruções im- Quanto maior for a velocidade da scooter elétrica, maior será a distân- presso para referência futura.
  • Seite 27: Carregamento E Manutenção Da Bateria

    0 graus, o desempenho do veículo diminuirá. Aviso: As baterias das scooters Olsson & Brothers incorporam um chip inteligente que armazena informações sobre sua carga-descarga. Se você...
  • Seite 28: Componentes Do Skate Elétrico

    5. COMPONENTES DO SKATE ELÉTRICO Luz Dianteira Palnel de controlo Botão Ligar Acelerador Guidão Fermoir à Boucle Plié Dobragem Luz Freio Disco de freio Pneu Motor Suporte Porto de carga e alimentação Compartimento Batería 6. PASSOS PARA LIGAR A SUA SCOOTER ELÉCTRICA ATENÇÃO! SEGUE ESTES PASSOS ANTES DE LIGAR A SCOOTER Enquanto aceleras ao Liga a scooter premindo...
  • Seite 29: Painel De Controle De Exibição Multifunções

    7. PAINEL DE CONTROLE DO DISPLAY DE MULTIFUNÇÕES Indicador de velocidade Indicador de modo de velocidade Indicador de bluetooth Indicador aceso Indicador de falha Indicador de nível de bateria Botão de Ligar Botão liga / desliga: Para ligar a scooter, prima o botão no topo da scooter e para a desligar, prima e mantenha premido o botão durante vários segundos.
  • Seite 30: Montagem Do Skate Elétrico

    8. MONTAGEM DO SKATE ELÉTRICO Desdobre a Instale a barra vertical cabeça do e prenda-o guiador a com a trava barra vertical do sistema e certifique- de segurança se de que os Smart Security cabos estão dentro Instale os 4 parafusos incluídos para prender o guiador à...
  • Seite 31: Indicações Para Manusear O Skate

    Se a alavanca do freio estiver muito solta ou você notar que a scooter freia pouco, use a chave Allen para afrouxar o parafuso do freio a disco e encurtar um pouco o comprimento do cabo do freio. Reaperte o parafuso. 12. OLSSON STROOT APP Baixe o App “OLSSON STROOT”!
  • Seite 32 CONFIGURE SUA SCOOTER! TRAVE SUA SCOOTER! Altere o modo de velocida- Pressione o ícone de ca- de ou velocidade, verifique deado para manter sua o nível da bateria e ligue ou scooter sempre segura. O desligue as luzes ícone de cadeado acen- derá...
  • Seite 33: Prestaciones Equipos

    13. PRESTACIONES EQUIPOS CLASSE 10” POLEGADAS DA RODA ANTI PUNÇÃO TIPO RODA ALUMINIO REFORÇADO MATERIAL CUADRO SISTEMA REFORÇADO DOBRAGEM FRENO DISCO FREIO ELÉCTRICO 14,6KG PESO BLUETOOTH 120KG PESO MAX SOPORTADO LUZ DIANTEIRA/TRASEIRA DISPLAY ALTURA 1150MM X LARGURA DESDOBRADO 435MM X COMPRIDO 1180MM ALTURA 520MM X LARGURA DOBRADO 435MM X COMPRIDO 1180MM...
  • Seite 34: Mais Informações E Suporte

    Barros, Cantabria Espanha com o número de telefone +34 942 812 900 com VAT Nº ES- B39856463. Declaramos sob nossa exclusiva responsabilidade a conformidade dos produtos: FRESH ADVANCED EN 17128:2020 (CLASSE 2) Con las disposiciones de la directiva 2014/30/EU Estándares: EN17128:2020, EN 55014-...
  • Seite 35: Informações Do Proprietário

    CERTIFICADO DE GARANTIA Modelo: Número de serie: (Incluído no equipamento) Data de compra: Rider División S.L., concede através deste certificado o período de garantia aplicável de acordo com as normas legais do país de compra. Esta garantia será dada tanto para o produto como para as peças às quais possa ser atribuído um defeito de fabricação.
  • Seite 36 9. Comment plier la trottinette électrique ............. 41 10. Indications d’utilisation ......................42 11. Réglage du disque de frein ....................42 12. Application olsson stroot ......................42 13. Avantages de l’équipement ....................44 14. Plus d’informations et d’assistance ................ 45...
  • Seite 37: Contenu De La Boîte

    électrique fonctionne bien avant cha- que trajet. › Utilisez uniquement des accessoires d’ o rigine de marque OLSSON & BROTHERS. › Conservez le manuel d’instructions imprimé pour toute consultation ulté- › Plus la vitesse est élevée, plus la dis- rieure.
  • Seite 38: Charge Et Entretien De La Batterie

    à des températures inférieures à 0 degré, les performances de la trottinette diminueront. Avertissement : Les batteries des trottinettes Olsson & Brothers intè- grent une puce intelligente qui stocke des informations sur leur char- ge-décharge.
  • Seite 39: Composants De La Trottinette Électrique

    5. COMPOSANTS DE LA TROTTINETTE ÉLECTRIQUE Lumière Avant Panel de control Bouton d’allumage Accélérateur Frein Fermoir à Boucle Plié Pliant Lumière de Frein Disque de frein Roue Moteur Soutien Port de charge Compartiment à Piles 6. ÉTAPES POUR DÉMARRER VOTRE SCOOTER ÉLECTRIQUE ATTENTION.
  • Seite 40: Panneau De Commande De L'écran Multifonction

    7. PANNEAU DE COMMANDE DE L’ÉCRAN MULTIFONCTION Indicateur de Indicateur de vitesse mode de vitesse Indicateur Indicateur sur Bluetooth les lumières Indicateur de défaut Indicateur de niveau de batterie Bouton d’allumage Bouton marche/arrêt : Pour allumer le scooter, appuyez sur le bouton situé sur le dessus du scooter et pour l’éteindre, appuyez sur le bouton et maintenez-le enfon- cé...
  • Seite 41: Montage De La Trottinette Électrique

    8. MONTAGE DE LA TROTTINETTE ÉLECTRIQUE Dépliez Installez la la barre tête de guidon verticale et sur la barre fixez-le avec verticale le verrou et assurez- du Smart vous que les Security câbles sont à l’intérieur Installez les 4 vis fournies pour fixer le guidon au guidon ATTENTION : Vissez toutes les vis doucement pour vous assurer qu’elles sont bien placées et une fois fixées,...
  • Seite 42: Indications D'utilisation

    Si le levier de frein est très lâche ou si vous constatez que la trottinette freine peu, utilisez la clé Allen pour desserrer la vis du frein à disque et raccourcissez un peu la longueur du câble de frein. Après, resserrez la vis. 12. APPLICATION OLSSON STROOT Téléchargez l’App “OLSSON STROOT’’ !
  • Seite 43 CONFIGUREZ VOTRE SCOOTER ! VERROUILLEZ VOTRE TROTTINETTE ! Modifiez le mode de vitesse ou Appuyez sur l’icône de verrouilla- la vitesse, vérifiez le niveau de la ge pour garder votre trottinette en batterie et allumez ou éteignez sécurité à tout moment. L’icône de les lumières.
  • Seite 44: Avantages De L'équipement

    13. AVANTAGES DE L’ÉQUIPEMENT CLASSE 10” POUCES DE ROUES ANTI-PUNCTUTE TYPE DE ROUE EN ALUMINIUM RENFORCÉ MATÉRIAU DE PANNEAU SYSTEME DE SECURITE RENFORCE PLIANT AFFICHER FREIN ÉLECTRIQUE 14,6KG POIDS BLUETOOTH 120KG POIDS MAXIMUM SUPPORTÉ FEU AVANT / ARRIÈRE DISPLAY HATEUR 1150MM X LARGUEUR DÉPLIÉ...
  • Seite 45: Plus D'informations Et D'assistance

    L’entreprise Rider Division SLU, située à Polígono Industrial de Barros nº 29, 39408 Barros, Cantabrie avec le numéro de téléphone +34 942 812 900 avec Cif 39856463 Nous déclarons sous notre seule responsabilité la conformité des produits: FRESH ADVANCED EN 17128:2020 (CLASSE 2) Directiva 2014/30/EU Estándares: EN17128:2020, EN 55014-1:2017, EN 55014-2:2015, EN 61000-...
  • Seite 46: Certificat De Garantie

    CERTIFICAT DE GARANTIE Modele: Nº série: (Inclue dans l’équipe) Date d’achat: Rider División S.L., accorde à travers ce certificat la période de garantie applicable selon les réglementations légales du pays d’achat. Cette garantie sera accordée tant pour le produit que pour les pièces auxquelles un défaut de fabrication pourra être attribué. Consultez la législation en vigueur de votre pays pour plus d’informations.
  • Seite 47: Willkommen In Der Familie Olsson&Brothers

    8. Montage des e-scooters ..................52 9. Zusammenklappen des e-scooters ............52 10. Anweisungen für den betrieb des scooters ......53 11. Bremsscheibeneinstellung................... 53 12. App olsson stroot ......................53 13. Geräteleistung ........................55 14. Mehr informationen und unterstützung ......... 56...
  • Seite 48: Inhalt Der Verpackung

    › Vergewissern Sie sich vor jeder Fahrt, dass Ihr E-Scooter in einwandfreiem › Verwenden Sie nur Originalzubehör Zustand ist. der Marke OLSSON&BROTHERS. › Bewahren Sie die gedruckte Be- › Je höher die Geschwindigkeit des dienungsanleitung zum späteren Na- E-Scooters ist, desto länger ist der Bre- chschlagen auf.
  • Seite 49: Batterieladung Und -Wartung

    Strecke zurücklegen und die Leistung ist besser, aber wenn Sie den Roller bei Temperaturen unter 0 Grad verwenden, nimmt die Leistung des Fahrzeugs ab. Warnung: Die Batterien in den Olsson&Brothers Scootern sind mit einem intelligenten Chip ausgestattet, der Informationen über die Ladung/Ent- ladung der Batterie speichert.
  • Seite 50: E-Scooter Komponenten

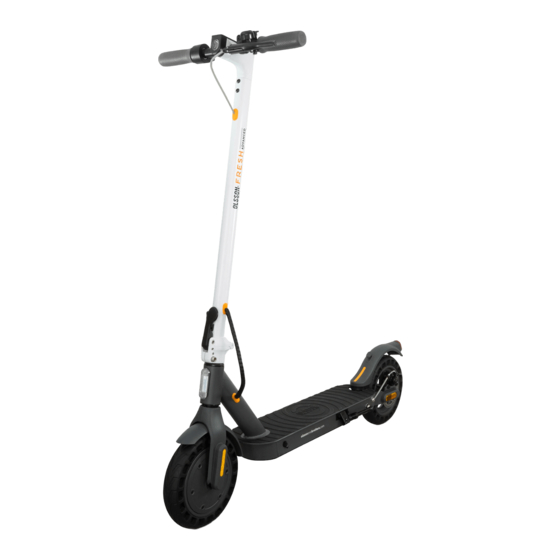
    5. E-SCOOTER KOMPONENTEN Vorderlicht Kontrollpanel Einschalttaste Gashebel Vorderlicht Faltverschluss Falthebel Rücklicht Bremsscheibe Reifen motor Seitenständer Netzanschluss Batteriekompartment 6. SCHRITTE ZUM EINSCHALTEN IHRES E-SCOOTER AUFMERKSAMKEIT! BEFOLGEN SIE DIESE SCHRITTE, BEVOR SIE DEN SCOOTER STARTEN Während Sie bis zum Maximum beschleunigen, ziehen Sie den Schalten Sie den Scooter Vollgas geben und Bremshebel ganz durch.
  • Seite 51: Bedienfeld Der Multifunktionsanzeige

    7. BEDIENFELD DER MULTIFUNKTIONSANZEIGE Geschwindigkeitsmodus Geschwindigkeitsanzeiger Anzeiger Bluetooth Anzeiger Licht Anzeiger Pannenanzeiger Batteriestand Anzeiger Anschaltknopf Ein/Aus-Taste: Um den Roller einzuschalten, drücken Sie den Knopf auf der Oberseite des Rollers und um ihn auszuschalten, halten Sie den Knopf mehrere Sekunden lang gedrückt. Taste Licht ein/aus: Einmal schnell drücken, um das Licht ein- und auszuschalten.
  • Seite 52: Montage Des E-Scooters

    8. MONTAGE DES E-SCOOTERS Klappen Sie DER Montieren VERTIKALE STAB aus Sie den und sichern Sie es Lenkerkopf mit dem Schloss auf der Stange des Smart Security und achten Sie darauf, dass die Kabel in der Stange liegen Montieren Sie mit Vorsicht die 4 mitgelieferten Schrauben, um den Lenker an der Stange zu befestigen WARNUNG: Ziehen Sie alle Schrauben fest, um sicherzustellen, dass sie sicher sitzen, und ziehen Sie sie dann mit dem Inbusschlüssel...
  • Seite 53: Anweisungen Für Den Betrieb Des Scooters

    Wenn der Bremshebel zu locker sitzt oder Sie feststellen, dass der Scooter zu wenig bremst, lösen Sie mit dem Inbusschlüssel die Schraube an der Scheibenbremse und verkürzen Sie das Bremsseil etwas. Ziehen Sie die Schraube wieder an. 12. APP OLSSON STROOT ¡ Laden Sie die “OLSSON STROOT’’ App herunter!
  • Seite 54 ¡ KONFIGURIEREN SIE ¡ SPERREN SIE IHREN SCOOTER! IHREN SCOOTER! Drücken Sie das Schloss-Sym- Ändern Sie den Ges- bol, um Ihren Scooter jederzeit chwindigkeitsmodus zu sichern. Das Schloss-Sym- oder die Geschwindigkeit, bol leuchtet auf, wenn diese prüfen Sie den Batteries- Funktion aktiviert ist.
  • Seite 55: Geräteleistung

    13. GERÄTELEISTUNG KLASSE 10” ZOLL DES RADES PANNENSCHUTZRAD RADTYP VERSTÄRKTE ALUMINIUM MATERIAL DOPPEL-SICHERHEITSSYSTEM ZUSAMMENKLAPUNG VERSTÄRKT BREMSCHEIBE ELEKTRISCHSE BREMSE 14,6KG GEWICHT BLUETOOTH 120KG MAXIMALES FAHRERGEWICHT VODERLICHT/RUCKLICHT DISPLAY HÖHE 1150MM X BREITE 435MM AUFGEKLAPPT X LÄNGE 1180MM HÖHE 520MM X BREITE 435MM GEFALTET X LÄNGE 1180MM MAXIMALER MOTOR W...
  • Seite 56: Mehr Informationen Und Unterstützung

    Kantabrien - Spanien mit der Telefonnummer +34 942 812 900 und VATNr: ES- B39856463. Wir erklären unter unserer alleinigen Verantwortung die Konformität der Produkte: FRESH ADVANCED EN 17128:2020 (KLASSE 2) Directiva, 2014/30/EU Estándares: EN17128:2020, EN 55014-1:2017, EN 55014-2:2015, EN 61000-...
  • Seite 57 GARANTIESCHEIN Modell: Seriennummer: (In der Ausstattung enthalten) Datum des Kaufs: Rider División S.L., gewährt durch dieses Zertifikat die geltende Garantiezeit gemäß den gesetzlichen Bestimmungen im Land des Kaufs. Diese Garantie wird sowohl für das Pro- dukt als auch für die Teile gewährt, die auf einen Herstellungsfehler zurückzuführen sind. Weitere Informationen finden Sie in den geltenden Gesetzen Ihres Landes.
  • Seite 60 olssonandbrothers.com RIDER DIVISION S.L. Pol. Ind. Barros nº 29. 39408 Barros. Cantabria - España // MADE IN P.R.C.

Inhaltsverzeichnis