Herunterladen Inhalt Inhalt Diese Seite drucken

Werbung

Verfügbare Sprachen
  • DE

Verfügbare Sprachen

  • DEUTSCH, seite 23
EN
User manual .........................................................
BG
Ръководство за употреба .............................
DE
Benutzerhandbuch ..............................................
ES
Manual de usuario ...............................................
FR
Manuel utilisateur ...............................................
HU
Használati utasítás ..............................................
IT
Manuale utente ..................................................
NL
Handleiding ........................................................
PL
Instrukcja obsługi ...............................................
RO
Manual de utilizare .............................................
2
12
22
32
42
52
62
72
82
92

Werbung

Inhaltsverzeichnis
loading

Inhaltszusammenfassung für PNI CS101

  • Seite 1: Inhaltsverzeichnis

    PNI CS101/PNI CS202 User manual ............Ръководство за употреба ......Benutzerhandbuch ..........Manual de usuario ..........Manuel utilisateur ..........Használati utasítás ..........Manuale utente ..........Handleiding ............Instrukcja obsługi ..........Manual de utilizare ..........
  • Seite 2: Pni Cs101/Pni Cs202

    PNI CS101/PNI CS202 2-way/4-way touch switch User manual...
  • Seite 3: Main Features

    Main features • Capacitive front panel with quick touch response. • Transparent safety glass panel. It can be touched even with a wet hand safely. Fireproof PC back cover. • It can replace the old switch. No additional wires are required. Follow the connection diagrams carefully.
  • Seite 4 PNI CS101 connection diagram A: 2-way connection 2W L3 L2 L1 2W L3 L2 L1 B: 4-way connection L2 L1 2W L3 L2 L1 2W L3 L2 L1...
  • Seite 5 PNI CS202 connection diagram A: 2-way connection 2W L3 L2 L1 2W L3 L2 L1 B: 4-way connection L2 L1 2W L3 L2 L1 2W L3 L2 L1...
  • Seite 6 Note: up to 8 switches can be connected in 4-way mode. a. The Line wire connects to the “L” terminal on the back panel. b. The wire of the light bulb connects to L1, L2 terminal (depending on model). Wall mounting of the switch a.
  • Seite 7 returns. If you touch the panel too soon, the switch may not work properly. Troubleshooting The bulb lights up or flashes. If the light does not turn on, dims or flashes, please connect the capacitor in the package in parallel with the light bulb between the Null wire and the L1/L2 wire according to the wiring diagram.
  • Seite 8 light. Warnings • Installation should be performed by authorized personnel only. • Do not install the switch in factories or rooms with strong electromagnetic interference, such as computer tomography or magnetic resonance imaging rooms in hospitals. • For the correct operation of the switch, use only these types of light bulbs: LED, incandescent, halogen, energy-saving bulb, and fluorescent with electronic driver.
  • Seite 9: Technical Specifications

    • Operating temperature: -26°C ~ + 80°C • Dimensions: 86 x 86 x 34 mm Simplified EU Declaration of Conformity SC ONLINESHOP SRL declares that PNI CS101/PNI CS202 Touch Switch is in compliance with EMC Directive 2014/30/EU. The full text of the EU Declaration of Conformity is available at the following internet address: h t t p s : // w w w .
  • Seite 10 CERTIFICATE OF QUALITY AND COMMERCIAL WARRANTY The warranty period for individuals is 24 months from the date of delivery for manufacturing and material defects. The warranty period for legal entities is 12 months from the date of delivery for manufacturing and material defects. Cables, adapters, consumables, batteries, accumulators, power supplies, transformers, microphones, headphones, antennas that are part of the products or are delivered with them have...
  • Seite 11 on the consumption code with subsequent amendments and completions. Download the full version of the warranty certificate...
  • Seite 12: Ръководство За Употреба

    PNI CS101/PNI CS202 2-посочен сензорен превключвател Ръководство за употреба...
  • Seite 13: Подготовка За Монтаж

    Основните функции • Капацитивен преден панел с бърза реакция на докосване. • Прозрачен панел от безопасно стъкло. Може безопасно да се докосне дори с мокра ръка. Огнеупорен заден капак за компютър. • Може да замени стария ключ. Не са необходими допълнителни...
  • Seite 14 Схема за свързване на PNI CS101 A: 2-посочна връзка 2W L3 L2 L1 2W L3 L2 L1 B: 4-посочна връзка L2 L1 2W L3 L2 L1 2W L3 L2 L1...
  • Seite 15 Схема за свързване на PNI CS202 A: 2-посочна връзка 2W L3 L2 L1 2W L3 L2 L1 B: 4-посочна връзка L2 L1 2W L3 L2 L1 2W L3 L2 L1...
  • Seite 16 Забележка: до 8 превключвателя могат да бъдат свързани в 4-посочен режим. а. Линейният проводник се свързва към клемата “L” на задния панел. б. Проводникът на крушката се свързва към клема L1, L2 (в зависимост от модела). Стенен монтаж на превключвателя 1.
  • Seite 17: Отстраняване На Неизправности

    Превключвателят трябва да бъде инсталиран без електричество (захранване, изключени предпазители). Електричеството трябва да бъде включено след монтажа. Докоснете сензорния бутон 10 секунди след като захранването се върне. Ако докоснете панела твърде рано, превключвателят може да не работи правилно. Отстраняване на неизправности Крушката...
  • Seite 18: Предупреждения

    според диаграмата с измервателно устройство. Уверете се, че крушката е включена и функционира. а. Изключете захранването за 1 минута. б. Поставете отново превключвателя и стъкления панел. c. Включете захранването. д. Изчакайте 10 секунди и след това докоснете бутона, за да включите светлината. Предупреждения...
  • Seite 19: Технически Спецификации

    флуоресцентни с електронен драйвер. • Превключвателят не работи с луминесцентни лампи (неонови) с баласт с магнитна индуктивност. • Инсталирайте превключвателя на захранването при изключено захранване. • Не монтирайте превключвателя във влажна среда. • Не превишавайте максималното натоварване (10A). • Моля, следвайте инструкциите за инсталиране. Технически...
  • Seite 20 Опростена ЕС декларация за съответствие SC ONLINESHOP SRL декларира, че PNI CS101/PNI CS202 Touch Switch е в съответствие с Директива за ЕМС 2014/30/EU. Пълният текст на ЕС декларацията за съответствие е достъпен на следния интернет адрес: ht tps://w w w.mypni.eu/produc t s/8385/download/ certifications СЕРТИФИКАТ...
  • Seite 21 48 месеца, при условие че се спазват инструкциите за монтаж и употреба, които придружават продукта. Търговската гаранция не засяга правата на потребителя, предвидени от действащото действащо законодателство, съответно Спешна Наредба 140/28.12.2021 г. за някои аспекти по отношение на договори за продажба на стоки, Правителствена Наредба...
  • Seite 22: Benutzerhandbuch

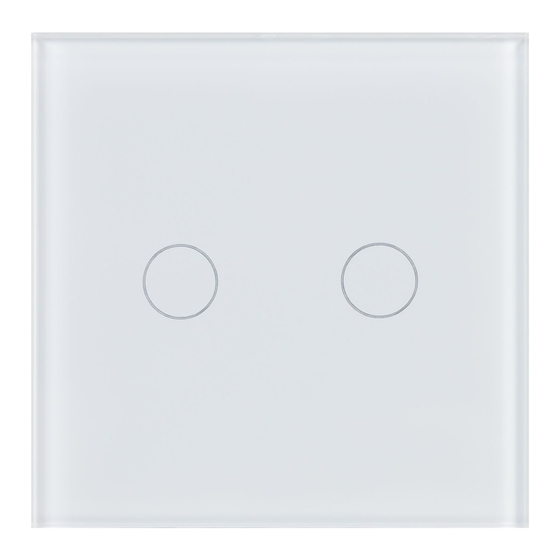
    PNI CS101/PNI CS202 2-Wege-Touch-Schalter Benutzerhandbuch...
  • Seite 23: Haupteigenschaften

    Haupteigenschaften • Kapazitive Frontplatte mit schneller Berührungsreaktion. • Transparente Sicherheitsglasscheibe. Es kann auch mit nasser Hand bedenkenlos berührt werden. Feuerfeste PC- Rückseite. • Es kann den alten Schalter ersetzen. Es sind keine zusätzlichen Kabel erforderlich. Befolgen Sie die Anschlussdiagramme sorgfältig. Vorbereitung für die Installation Anmerkungen: 1.
  • Seite 24 Anschlussplan PNI CS101 A: 2-Wege-Verbindung 2W L3 L2 L1 2W L3 L2 L1 B: 4-Wege-Verbindung L2 L1 2W L3 L2 L1 2W L3 L2 L1...
  • Seite 25 Anschlussplan PNI CS202 A: 2-Wege-Verbindung 2W L3 L2 L1 2W L3 L2 L1 B: 4-Wege-Verbindung L2 L1 2W L3 L2 L1 2W L3 L2 L1...
  • Seite 26 Hinweis: Im 4-Wege-Modus können bis zu 8 Schalter angeschlossen werden. a. Der Leitungsdraht wird mit dem „L“-Anschluss auf der Rückseite verbunden. b. Der Draht der Glühbirne wird an die Klemme L1, L2 angeschlossen (je nach Modell). Wandmontage des Schalters a. Bringen Sie den Schalter an der Wanddose an. b.
  • Seite 27 Der Schalter muss stromlos montiert werden (Netzanschluss, Sicherungen getrennt). Nach der Installation muss der Strom eingeschaltet werden. Berühren Sie die Touch-Taste 10 Sekunden nach der Rückkehr der Stromversorgung. Wenn Sie das Bedienfeld zu früh berühren, funktioniert der Schalter möglicherweise nicht richtig.
  • Seite 28 und funktionsfähig ist. a. Trennen Sie die Stromversorgung für 1 Minute. b. Bringen Sie den Schalter und die Glasscheibe wieder an. c. Schalte den Strom an. d. Warten Sie 10 Sekunden und tippen Sie dann auf die Taste, um das Licht einzuschalten. Warnungen •...
  • Seite 29: Technische Spezifikationen

    (Neon) mit Vorschaltgerät mit magnetischer Induktivität. • Installieren Sie den Netzschalter bei ausgeschalteter Stromversorgung. • Installieren Sie den Schalter nicht in einer feuchten Umgebung. • Überschreiten Sie nicht die maximale Last (10A). • Bitte folgen Sie den Installationsanweisungen. Technische Spezifikationen •...
  • Seite 30: Qualitätszertifikat Und Kommerzielle Garantie

    PNI CS101/PNI CS202 der EMV-Richtlinie 2014/30/ entspricht. vollständige Text Konformitätserklärung ist unter folgender Internetadresse abrufbar: h t t p s : // w w w . m y p n i . e u /p r o d u c t s / 8 3 8 5 /d o w n l o a d / certifications QUALITÄTSZERTIFIKAT UND KOMMERZIELLE...
  • Seite 31 Monate, sofern die dem Produkt beiliegende Installations- und Gebrauchsanweisung beachtet wird. Die gewerbliche Garantie berührt nicht die Rechte des Verbrauchers gemäß den geltenden Rechtsvorschriften bzw. der Notverordnung 140/28.12.2021 zu bestimmten Aspekten des Warenkaufvertrags, der Regierungsverordnung 21/1992 zum Verbraucherschutz mit späteren Änderungen und Ergänzungen und dem Gesetz 296/2004 über das Verbrauchsgesetzbuch mit späteren Änderungen und Ergänzungen.
  • Seite 32: Manual De Usuario

    PNI CS101/PNI CS202 Interruptor táctil de 2 vías Manual de usuario...
  • Seite 33: Principales Características

    Principales características • Panel frontal capacitivo con respuesta táctil rápida. • Panel de vidrio transparente de seguridad. Se puede tocar incluso con las manos mojadas de forma segura. Tapa trasera de PC ignífuga. • Puede reemplazar el viejo interruptor. No se requieren cables adicionales.
  • Seite 34 Diagrama de conexión de PNI CS101 R: conexión de 2 vías 2W L3 L2 L1 2W L3 L2 L1 B: conexión de 4 víasn L2 L1 2W L3 L2 L1 2W L3 L2 L1...
  • Seite 35 Diagrama de conexión de PNI CS202 R: conexión de 2 vías 2W L3 L2 L1 2W L3 L2 L1 B: conexión de 4 vías L2 L1 2W L3 L2 L1 2W L3 L2 L1...
  • Seite 36 Nota: se pueden conectar hasta 8 interruptores en modo de 4 vías. a. El cable de línea se conecta al terminal “L” en el panel posterior. b. El cable de la bombilla se conecta al terminal L1, L2 (dependiendo del modelo). Montaje en pared del interruptor a.
  • Seite 37: Solución De Problemas

    El interruptor debe instalarse sin electricidad (alimentación, fusibles desconectados). La electricidad debe encenderse después de la instalación. Toque el botón táctil 10 segundos después de que vuelva la energía. Si toca el panel demasiado pronto, es posible que el interruptor no funcione correctamente.
  • Seite 38 la bombilla esté enchufada y funcional. a. Desconecte la fuente de alimentación durante 1 minuto. b. Vuelva a instalar el interruptor y el panel de vidrio. c. Conectar la alimentación. d. Espere 10 segundos y luego toque el botón para encender la luz.
  • Seite 39: Especificaciones Técnicas

    • Dimensiones: 86 x 86 x 34 mm Declaración de conformidad de la UE simplificada SC ONLINESHOP SRL declara que el interruptor táctil PNI CS101/PNI CS202 cumple con la Directiva EMC 2014/30/ EU. El texto completo de la Declaración de conformidad de la...
  • Seite 40 UE está disponible en la siguiente dirección de Internet: h t t p s : // w w w . m y p n i . e u /p r o d u c t s / 8 3 8 5 /d o w n l o a d / certifications CERTIFICADO DE CALIDAD Y GARANTÍA COMERCIAL...
  • Seite 41 la Ordenanza de Urgencia 140/28.12.2021 sobre determinados aspectos relativos a los contratos de compraventa de bienes, la Ordenanza Gubernamental 21/1992 sobre protección del consumidor con sus posteriores modificaciones y complementos y la Ley 296/2004 sobre el código de consumo con modificaciones y complementos posteriores. Descargar la versión completa del certificado de garantía...
  • Seite 42: Manuel Utilisateur

    PNI CS101/PNI CS202 Interrupteur tactile à 2 voies Manuel de l’utilisateur...
  • Seite 43: Caractéristiques Principales

    Caractéristiques principales • Panneau avant capacitif avec réponse tactile rapide. • Panneau en verre de sécurité transparent. Il peut être touché même avec une main mouillée en toute sécurité. Couverture arrière en PC ignifuge. • Il peut remplacer l’ancien interrupteur. Aucun fil supplémentaire n’est nécessaire.
  • Seite 44 Schéma de connexion PNI CS101 A: connexion à 2 voies 2W L3 L2 L1 2W L3 L2 L1 B: connexion à 4 voies L2 L1 2W L3 L2 L1 2W L3 L2 L1...
  • Seite 45 Schéma de connexion PNI CS202 A: connexion à 2 voies 2W L3 L2 L1 2W L3 L2 L1 B: connexion à 4 voies L2 L1 2W L3 L2 L1 2W L3 L2 L1...
  • Seite 46 Remarque : jusqu’à 8 interrupteurs peuvent être connectés en mode 4 voies. a. Le fil de ligne se connecte à la borne « L » sur le panneau arrière. b. Le fil de l’ampoule se connecte à la borne L1, L2 (selon le modèle Montage mural de l’interrupteur a.
  • Seite 47 fusibles déconnectés). L’électricité doit être allumée après l’installation. Appuyez sur le bouton tactile 10 secondes après le retour du courant. Si vous touchez le panneau trop tôt, le commutateur peut ne pas fonctionner correctement. Dépannage L’ampoule s’allume ou clignote. Si la lumière ne s’allume pas, s’atténue ou clignote, veuillez connecter le condensateur jaune dans l’emballage en parallèle avec l’ampoule entre le fil Null et le fil L1/L2 selon le schéma de câblage.
  • Seite 48: Avertissements

    a. Débranchez l’alimentation pendant 1 minute. b. Réinstallez l’interrupteur et le panneau de verre. c. Allumer l’appareil. d. Attendez 10 secondes, puis appuyez sur le bouton pour allumer la lumière. Avertissements • L’installation doit être effectuée uniquement par du personnel autorisé. •...
  • Seite 49: Spécifications Techniques

    • Température de fonctionnement : -26°C ~ + 80°C • Dimensions : 86 x 86 x 34 mm Déclaration de conformité UE simplifiée SC ONLINESHOP SRL déclare que le commutateur tactile PNI CS101/PNI CS202 est conforme à la directive EMC...
  • Seite 50 2014/30/EU. Le texte complet de la déclaration de conformité UE est disponible à l’adresse Internet suivante: h t t p s : // w w w . m y p n i . e u /p r o d u c t s / 8 3 8 5 /d o w n l o a d / certifications CERTIFICAT DE QUALITÉ...
  • Seite 51 La garantie commerciale n’affecte pas les droits du consommateur prévus par la législation applicable en vigueur, respectivement l’ordonnance d’urgence 140/28.12.2021 sur certains aspects concernant les contrats de vente de biens, l’ordonnance gouvernementale 21/1992 sur la protection des consommateurs avec les modifications et compléments ultérieurs et la loi 296/2004 sur le code de la consommation avec modifications et compléments ultérieurs.
  • Seite 52: Használati Utasítás

    PNI CS101/PNI CS202 2 irányú érintőkapcsoló Használati utasítás...
  • Seite 53 Főbb jellemzői • Kapacitív előlap gyors érintéssel. • Átlátszó biztonsági üveglap. Vizes kézzel is biztonságosan megérinthető. Tűzálló PC hátlap. • Kiválthatja a régi kapcsolót. Nincs szükség további vezetékekre. Gondosan kövesse a csatlakozási rajzokat. Felszerelés előkészítése Megjegyzések: 1. A kapcsoló felszerelése előtt kapcsolja ki az áramellátást. 2.
  • Seite 54 PNI CS101 csatlakozási rajz A: 2 irányú kapcsolat 2W L3 L2 L1 2W L3 L2 L1 B: 4 irányú csatlakozás L2 L1 2W L3 L2 L1 2W L3 L2 L1...
  • Seite 55 PNI CS202 csatlakozási rajz A: 2 irányú kapcsolat 2W L3 L2 L1 2W L3 L2 L1 B: 4 irányú csatlakozás L2 L1 2W L3 L2 L1 2W L3 L2 L1...
  • Seite 56 Megjegyzés: 4-utas módban legfeljebb kapcsoló csatlakoztatható. a. A Line vezeték a hátlapon lévő „L” csatlakozóhoz csatlakozik. b. Az izzó vezetéke az L1, L2 csatlakozóhoz csatlakozik (modelltől függően). A kapcsoló falra szerelése a. Rögzítse a kapcsolót a fali dobozhoz. b. Rögzítse a két oldalsó csavart. c.
  • Seite 57: Hibaelhárítás

    meg az érintőgombot 10 másodperccel a tápellátás visszatérése után. Ha túl korán érinti meg a panelt, előfordulhat, hogy a kapcsoló nem működik megfelelően. Hibaelhárítás Az izzó világít vagy villog. Ha a lámpa nem gyullad ki, elhalványul vagy villog, kérjük, csatlakoztassa a csomagolásban található sárga kondenzátort párhuzamosan a villanykörtével a Null vezeték és az L1/L2 vezeték közé...
  • Seite 58 c. Kapcsolja be az áramellátást. d. Várjon 10 másodpercet, majd érintse meg a gombot a lámpa bekapcsolásához. Figyelmeztetések • A telepítést csak arra felhatalmazott személyzet végezheti. • Ne telepítse a kapcsolót olyan gyárakban vagy helyiségekben, ahol erős elektromágneses interferencia található, például számítógépes tomográfia vagy kórházi mágneses rezonancia képalkotási helyiségekben.
  • Seite 59: Műszaki Adatok

    • Üzemi hőmérséklet: -26°C ~ + 80°C • Méretek: 86 x 86 x 34 mm Egyszerűsített EU-megfelelőségi nyilatkozat Az SC ONLINESHOP SRL kijelenti, hogy a PNI CS101/ PNI CS202 Touch Switch megfelel a 2014/30/EU EMC- irányelvnek. Az EU-megfelelőségi nyilatkozat teljes szövege a következő...
  • Seite 60 MINŐSÉGI TANÚSÍTVÁNY ÉS KERESKEDELMI GARANCIA A garanciális időszak magánszemélyek esetében a szállítástól számított 24 hónap gyártási és anyaghibák esetén. A jótállási idő jogi személyek esetében a szállítástól számított 12 hónap gyártási és anyaghibák esetén. A termék részét képező vagy azokkal együtt szállított kábelekre, adapterekre, fogyóeszközökre, elemekre, akkumulátorokra, tápegységekre, transzformátorokra, mikrofonokra, fejhallgatókra, antennákra a termék végső...
  • Seite 61 Töltse le a jótállási jegy teljes verzióját...
  • Seite 62: Manuale Utente

    PNI CS101/PNI CS202 Interruttore tattile a 2 vie Manuale d’uso...
  • Seite 63: Caratteristiche Principali

    Caratteristiche principali • Pannello frontale capacitivo con risposta rapida al tocco. • Pannello in vetro di sicurezza trasparente. Può essere toccato anche con la mano bagnata in sicurezza. Cover posteriore in PC ignifugo. • Può sostituire il vecchio interruttore. Non sono necessari cavi aggiuntivi.
  • Seite 64 Schema di collegamento PNI CS101 A: Collegamento a 2 vie 2W L3 L2 L1 2W L3 L2 L1 B: Collegamento a 4 vie L2 L1 2W L3 L2 L1 2W L3 L2 L1...
  • Seite 65 Schema di collegamento PNI CS202 A: Collegamento a 2 vie 2W L3 L2 L1 2W L3 L2 L1 B: Collegamento a 4 vie L2 L1 2W L3 L2 L1 2W L3 L2 L1...
  • Seite 66 Nota: è possibile collegare fino a 8 interruttori in modalità a 4 vie. a. Il filo di linea si collega al terminale “L” sul pannello posteriore. b. Il filo della lampadina si collega al terminale L1, L2 (a seconda del modello). Montaggio a parete dell’interruttore a.
  • Seite 67: Risoluzione Dei Problemi

    dopo l’installazione. Toccare il pulsante a sfioramento 10 secondi dopo il ripristino dell’alimentazione. Se si tocca il pannello troppo presto, l’interruttore potrebbe non funzionare correttamente. Risoluzione dei problemi La lampadina si accende o lampeggia. Se la luce non si accende, si attenua o lampeggia, collegare il condensatore giallo nella confezione in parallelo con la lampadina tra il filo Null e il filo L1/L2 secondo lo schema elettrico.
  • Seite 68 c. Accendi la corrente. d. Attendi 10 secondi, quindi tocca il pulsante per accendere la luce. Avvertenze • L’installazione deve essere eseguita solo da personale autorizzato. • Non installare l’interruttore in fabbriche o stanze con forti interferenze elettromagnetiche, come tomografia computerizzata o sale di risonanza magnetica negli ospedali.
  • Seite 69: Specifiche Tecniche

    • Dimensioni: 86 x 86 x 34 mm Dichiarazione di conformità UE semplificata SC ONLINESHOP SRL dichiara che il Touch Switch PNI CS101/PNI CS202 è conforme alla Direttiva EMC 2014/30/ UE. Il testo completo della Dichiarazione di conformità UE è...
  • Seite 70 CERTIFICATO DI QUALITÀ E GARANZIA COMMERCIALE Il periodo di garanzia per i privati è di 24 mesi dalla data di consegna per difetti di fabbricazione e materiali. Il periodo di garanzia per le persone giuridiche è di 12 mesi dalla data di consegna per difetti di fabbricazione e materiali.
  • Seite 71 successive modifiche e integrazioni. Scarica la versione completa del certificato di garanzia...
  • Seite 72: Handleiding

    PNI CS101/PNI CS202 2-weg aanraakschakelaar Handleiding...
  • Seite 73: Belangrijkste Kenmerken

    Belangrijkste kenmerken • Capacitief voorpaneel met snelle aanrakingsrespons. • Transparant paneel van veiligheidsglas. Het kan veilig worden aangeraakt, zelfs met een natte hand. Vuurvaste achterkant van de pc. • Het kan de oude schakelaar vervangen. Er zijn geen extra draden nodig. Volg zorgvuldig de aansluitschema’s. Voorbereiding voor installatie Opmerkingen: 1.
  • Seite 74 PNI CS101 aansluitschema A: 2-weg verbinding 2W L3 L2 L1 2W L3 L2 L1 B: 4-weg verbinding L2 L1 2W L3 L2 L1 2W L3 L2 L1...
  • Seite 75 PNI CS202 aansluitschema A: 2-weg verbinding 2W L3 L2 L1 2W L3 L2 L1 B: 4-weg verbinding L2 L1 2W L3 L2 L1 2W L3 L2 L1...
  • Seite 76 Let op: er kunnen maximaal 8 schakelaars worden aangesloten in 4-weg modus. a. De lijndraad wordt aangesloten op de “L”-aansluiting op het achterpaneel. b. De draad van de gloeilamp wordt aangesloten op L1, L2 terminal (afhankelijk van het model). Wandmontage van de schakelaar a.
  • Seite 77: Probleemoplossen

    (voeding, zekeringen losgekoppeld). De elektriciteit moet na installatie worden ingeschakeld. Raak de aanraakknop 10 seconden nadat de stroom is hersteld aan. Als u het paneel te snel aanraakt, werkt de schakelaar mogelijk niet goed. Probleemoplossen De lamp brandt of knippert. Als het licht niet aangaat, dimt of knippert, sluit dan de gele condensator in het pakket parallel aan de gloeilamp aan tussen de nuldraad en de L1/L2-draad volgens het bedradingsschema.
  • Seite 78: Waarschuwingen

    c. Schakel de stroom in. d. Wacht 10 seconden en tik vervolgens op de knop om het licht aan te doen. Waarschuwingen • De installatie mag alleen worden uitgevoerd door bevoegd personeel. • Installeer de schakelaar niet in fabrieken of ruimtes sterke elektromagnetische interferentie,...
  • Seite 79: Technische Specificaties

    • Bedrijfstemperatuur: -26°C ~ + 80°C • Afmetingen: 86 x 86 x 34 mm Vereenvoudigde EU-conformiteitsverklaring SC ONLINESHOP SRL verklaart dat de PNI CS101/ PNI CS202 Touch Switch in overeenstemming is met de EMC-richtlijn 2014/30/EU. De volledige tekst van de EU-...
  • Seite 80 CERTIFICAAT VAN KWALITEIT EN COMMERCILE GARANTIE De garantieperiode voor particulieren is 24 maanden vanaf de datum van levering voor fabricage- en materiaalfouten. De garantieperiode voor rechtspersonen is 12 maanden vanaf de datum van levering voor fabricage- en materiaalfouten. Kabels, adapters, verbruiksartikelen, batterijen, accu’s, voedingen, transformatoren, microfoons, hoofdtelefoons, antennes die deel uitmaken van de producten of die ermee worden geleverd, hebben een commerciële garantie van 6...
  • Seite 81 betreffende consumentenbescherming met latere wijzigingen en aanvullingen en Wet 296/2004 over de verbruikscode met latere wijzigingen en aanvullingen. Download de volledige versie van het garantiecertificaat...
  • Seite 82: Instrukcja Obsługi

    PNI CS101/PNI CS202 Dwukierunkowy przełącznik dotykowy Instrukcja obsługi...
  • Seite 83: Główne Cechy

    Główne cechy • Pojemnościowy panel przedni z szybką reakcją na dotyk. • Przezroczysty panel ze szkła bezpiecznego. Można go bezpiecznie dotykać nawet mokrą ręką. Ognioodporna tylna pokrywa komputera. • Może zastąpić stary przełącznik. Nie są wymagane żadne dodatkowe przewody. Postępuj dokładnie zgodnie ze schematami połączeń.
  • Seite 84 Schemat połączeń PNI CS101 A: połączenie 2-kierunkowe 2W L3 L2 L1 2W L3 L2 L1 B: połączenie 4-kierunkowe L2 L1 2W L3 L2 L1 2W L3 L2 L1...
  • Seite 85 Schemat połączeń PNI CS202 A: połączenie 2-kierunkowe 2W L3 L2 L1 2W L3 L2 L1 B: połączenie 4-kierunkowe L2 L1 2W L3 L2 L1 2W L3 L2 L1...
  • Seite 86 Uwaga: w trybie 4-kierunkowym można podłączyć do 8 przełączników. a. Przewód linii łączy się z zaciskiem „L” na tylnym panelu. b. Przewód żarówki łączy się z zaciskiem L1, L2 (w zależności od modelu). Montaż ścienny przełącznika a. Przymocuj przełącznik do puszki ściennej. b.
  • Seite 87: Rozwiązywanie Problemów

    przycisku dotykowego 10 sekund po przywróceniu zasilania. Jeśli dotkniesz panelu zbyt wcześnie, przełącznik może nie działać prawidłowo. Rozwiązywanie problemów Żarówka świeci lub miga. Jeśli światło nie włącza się, przygasa lub miga, należy podłączyć żółty kondensator w pakiecie równolegle z żarówką między przewodem Null a przewodem L1/L2 zgodnie ze schematem elektrycznym.
  • Seite 88: Ostrzeżenia

    c. Włącz zasilanie. d. Odczekaj 10 sekund, a następnie dotknij przycisku, aby włączyć światło. Ostrzeżenia • Instalacja powinna być wykonywana wyłącznie przez upoważniony personel. • Nie należy instalować przełącznika fabrykach pomieszczeniach silnych zakłóceniach elektromagnetycznych, takich jak tomografia komputerowa lub sale rezonansu magnetycznego w szpitalach. •...
  • Seite 89: Specyfikacja Techniczna

    • Wymiary: 86 x 86 x 34 mm Uproszczona deklaracja zgodności UE SC ONLINESHOP SRL oświadcza, że przełącznik dotykowy PNI CS101/PNI CS202 jest zgodny z dyrektywą EMC 2014/30/UE. Pełny tekst deklaracji zgodności UE jest dostępny pod następującym adresem internetowym: h t t p s : // w w w . m y p n i . e u /p r o d u c t s / 8 3 8 5 /d o w n l o a d /...
  • Seite 90 CERTYFIKAT JAKOŚCI I GWARANCJA HANDLOWA Okres gwarancji dla osób fizycznych wynosi 24 miesiące od daty dostawy na wady produkcyjne i materiałowe. Okres gwarancji dla osób prawnych wynosi 12 miesięcy od daty dostawy na wady produkcyjne i materiałowe. Kable, przejściówki, materiały eksploatacyjne, baterie, akumulatory, zasilacze, transformatory, mikrofony, słuchawki, anteny, które wchodzą...
  • Seite 91 296/2004 w sprawie kodu zużycia z późniejszymi zmianami i uzupełnieniami. Pobierz pełną wersję karty gwarancyjnej...
  • Seite 92: Manual De Utilizare

    PNI CS101/PNI CS202 Intrerupator cap scara si cap cruce tactil Manual de utilizare...
  • Seite 93: Caracteristici Principale

    Caracteristici principale • Panou frontal tactil capacitiv, cu raspuns rapid la atingere. • Panou din sticla securizata transparenta. Poate fi atins chiar si cu mana umeda in conditii de siguranta. Carcasa spate din PC rezistent la foc. • Instalare fara fire suplimentare fata de instalatia clasica de tip cap-scara/cap-cruce.
  • Seite 94 Diagrama conexiuni PNI CS101 A - Conexiune cap scara 2W L3 L2 L1 2W L3 L2 L1 B - Conexiune cap scara - cap cruce L2 L1 2W L3 L2 L1 2W L3 L2 L1...
  • Seite 95 Diagrama conexiuni PNI CS202 A - Conexiune cap scara 2W L3 L2 L1 2W L3 L2 L1 B - Conexiune cap scara - cap cruce L2 L1 2W L3 L2 L1 2W L3 L2 L1...
  • Seite 96 Nota: in regim cap scara - cap cruce se pot conecta pana la 8 intrerupatoare. a. Firul cu faza se conecteaza la terminalul „L” de pe panoul din spate. b. Firul lampii/becului se conecteaza la terminalul L1, L2 ( in functie de model) Montajul intrerupatorului pe perete a.
  • Seite 97 sigurante decuplate). Electricitatea trebuie pornita dupa instalare. Atingeti butonul touch dupa 10 secunde de la revenirea alimentarii. Daca atingeti panoul inainte, este posibil ca intrerupatorul sa nu functioneze corect. Probleme si solutii Becul lumineaza usor sau palpaie. Daca becul nu se aprinde, lumineaza slab sau clipeste, va rugam sa conectati condensatorul din colet in paralel cu becul/sursa de iluminat intre firul Nul si firul L1/L2 conform schemei de conexiuni.
  • Seite 98 b. reinstalati intrerupatorul si panoul de sticla. c. porniti alimentarea. d. asteptati 10 secunde si apoi atingeti pentru a actiona intrerupatorul. Atentionari • Instalarea trebuie efectuata doar de personal autorizat. • Nu instalati intrerupatorul in fabrici sau incaperi cu interferente electromagnetice puternice, cum ar fi incaperile cu computer tomograf sau rezonanta magnetica din spitale.
  • Seite 99: Specificatii Tehnice

    • Dimensiuni: 86 x 86 x 34 mm Declaratie UE de conformitate simplificata SC ONLINESHOP SRL declara ca Intrerupator cap scara cu touch PNI CS101/PNI CS202 este in conformitate cu Directiva EMC 2014/30/EU. Textul integral al declaratiei UE de conformitate este disponibil la urmatoarea adresa de internet: h t t p s : // w w w .
  • Seite 100 CERTIFICAT DE CALITATE SI GARANTIE COMERCIALA Perioada de garantie pentru persoane fizice este de 24 luni de la data livrarii pentru defectele de fabricatie si de material. Perioada de garantie pentru persoane juridice este de 12 luni de la data livrarii pentru defectele de fabricatie si de material. Cablurile, adaptoarele, consumabilele, bateriile, acumulatorii, alimentatoarele, transformatoarele, microfoanele, castile, antenele care intra in componenta produselor sau se livreaza...
  • Seite 101 consumului cu modificarile si completarile ulterioare. Descarca versiunea completa a certificatului de garantie...

Diese Anleitung auch für:

Cs202

Inhaltsverzeichnis