Herunterladen Inhalt Inhalt Diese Seite drucken

Werbung

Verfügbare Sprachen
  • DE

Verfügbare Sprachen

  • DEUTSCH, seite 1
COOL & CLEAN
220
1610
50
240
Watts
Hz
Volts
DE
Bedienungsanleitung
FR
Mode d'emploi
NL
Handleiding
EN
Instruction manual
IT
Istruzioni per l'uso
ES
Manual del usuario
FREE APP AVAILABLE AT:
AAC14000WF
INSTRUCTION MANUAL
SE
Instruktionsmanual

Werbung

Inhaltsverzeichnis
loading

Inhaltszusammenfassung für Bestron AAC14000WF

  • Seite 1 COOL & CLEAN FREE APP AVAILABLE AT: AAC14000WF 1610 INSTRUCTION MANUAL Watts Volts Bedienungsanleitung Instruction manual Instruktionsmanual Mode d’emploi Istruzioni per l’uso Handleiding Manual del usuario...
  • Seite 3: Bei Einem Defekt

    HERZLICHEN GLÜCKWUNSCH! Herzlichen Glückwunsch zum Erwerb dieses Bestron-Produktes. In dieser Gebrauchsanweisung erläutern wir die Funktion und die Benutzung. Lesen Sie somit diese Gebrauchsanweisung aufmerksam durch, bevor Sie das Gerät benutzen. Verwenden Sie das Gerät nur so, wie es in der Gebrauchsanweisung beschrieben ist. Bewahren Sie die Gebrauchsanweisung danach sorgfältig auf.
  • Seite 4: Was Sie Über Dieses Gerät Wissen Müssen

    werden, dessen Fläche größer als 14m ist. • Halten Sie die Lüftungsöffnungen immer frei von Hindernissen. • Die Wartung darf nur nach den Vorgaben des Geräteherstellers durchgeführt werden. • Das Gerät ist in einem gut belüfteten Bereich aufzubewahren, in dem die Raumgröße dem Raumbereich zum Betrieb entspricht. •...
  • Seite 5: Gerät Von Benzin, Brennbaren Gasen, Öfen Und Anderen

    und fest an die Steckdose angeschlossen ist. • Verstauen Sie das Netzkabel ordentlich, damit niemand darüber stolpert oder • den Stecker herausziehen kann. • Sorgen Sie dafür, dass keine Gegenstände den Lufteinlass und -auslass der Klimaanlage behindern. Halten Sie den Lufteinlass und den Luftauslass frei von Hindernissen.
  • Seite 6: Das Gerät Muss In Übereinstimmung Mit Den Nationalen

    Personen ausgetauscht werden, um eine Gefährdung zu vermeiden. • Das Gerät muss in Übereinstimmung mit den nationalen Verkabelungsvorschriften installiert werden. • Betreiben Sie Ihre Klimaanlage nicht in einem feuchten Raum wie Badezimmer oder Waschraum. • Die Installation von Rohrleitungen ist auf ein Minimum von x 14 m zu beschränken.
  • Seite 7: Ce-Konformitätserklärung

    CE-KONFORMITÄTSERKLÄRUNG Dieses Produkt erfüllt die Anforderungen der für dieses Produkt anwendbaren EURichtlinien. Eine Kopie der Konformitätserklärung kann bei Bedarf unter den Kontaktdaten von www.bestron.com angefordert werden. R. Neyman QUALITY CONTROL NETZSPANNUNG 220-240 V LEISTUNGSAUFNAHME 1610 W MENGE KÄLTEMITTEL CA. 280 G TYP KÄLTEMITTEL...
  • Seite 8: Funktionsweise - Allgemein

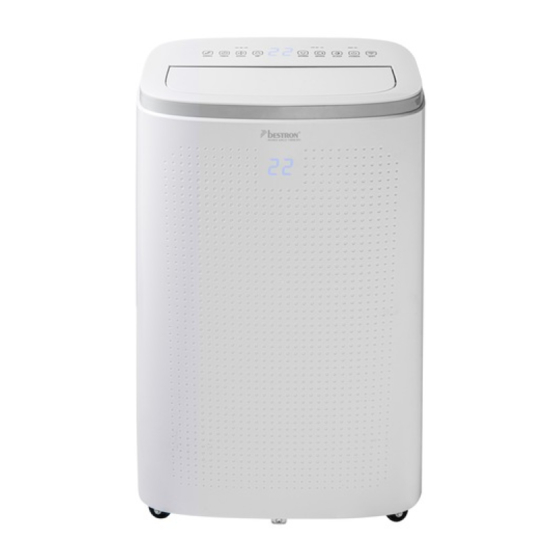
    FUNKTIONSWEISE - ALLGEMEIN Das Gerät ist nur für Haushaltszwecke bestimmt, nicht für den professionellen Gebrauch. F G H I J 1. Bedienfeld: 4. Handgriffe LED-Displays 5. Schwenkrollen Funktionstaste schwingen “SCHWENKEN” 6. Heißluftaustritt C. Timer-Funktionstaste “TIMER” 7. Kabel mit Stecker D. Lüfterfunktionstaste “GESCHWINDIGKEIT” 8.
  • Seite 9 MONTAGE Diese Klimaanlage muss an einen Stromkreis mit einem 16-A-Stromschalter angeschlossen werden. Sie muss von leicht entflammbaren Materialien ferngehalten werden und es muss einen Freiraum von 30 cm um das Gerät geben. Zusätzlich wird ein 30mA-Fehlerstromschutzschalter empfohlen. Verwenden Sie nur ein zugelassenes Verlängerungskabel mit einer Kapazität von 16 A.
  • Seite 10 Feuchtigkeit. Kühlen 1. Drücken Sie einmal oder mehrmals die Taste “MODUS” (Abbildung 1-G), bis die Kontrollleuchte bei “KÜHLEN” leuchtet. Das Gerät arbeitet jetzt als Luftkühler und kühlt die Luft mittels eines Kühlelements. 2. Verwenden Sie die Tasten “AUF” (1-E) und “AB” (Abbildung 1-F), um die Kühltemperatur zwischen 16 °C und 31 °C einzustellen.
  • Seite 11 Kurz darauf blinkt das Licht darüber schnell. 5. Drücken Sie nun innerhalb von 10 Sekunden in der App auf “Weiter”. Die App sucht nun nach dem Gerät. Dies dauert maximal 2 Minuten. Wenn das Gerät gefunden wird, wird die App “BESTRON TRAGBARE KLIMAANLAGE AAC14000WF” anzeigen.
  • Seite 12 Gerät wurde aus der Familie entfernt. Hinweis: Die App ‘Smart Life - Smart Living’ ist kein Bestron-Produkt und Bestron bietet daher keinen Service oder Support für diese App. Bestron ist nicht dafür verantwortlich, ob die App funktioniert oder nicht. Weitere Informationen: www.tuya.com REINIGUNG UND WARTUNG - Allgemein Im Laufe der Zeit kann sich Staub in den Gittern und zwischen den Lamellen des Geräts ansammeln.
  • Seite 13 2. Stellen Sie das Gerät auf eine Plattform und stellen Sie einen Eimer oder einen anderen Behälter unter das Ablaufloch des Wassersammlers. 3. Schrauben Sie die Gummikappe vom Ablaufloch ab (Abbildung 1-8), siehe auch Abbildung 5. Das Wasser fließt vom Wasserauffangbehälter in den Eimer.
  • Seite 14 FEHLERBESEITIGUNG Fehler Mögliche Ursache Empfohlene Lösung Die Klimaanlage Es gibt keinen Strom Stellen Sie sicher, dass die Steckdose, an die das funktioniert nicht Gerät angeschlossen ist, mit Strom versorgt wird Die Raumtemperatur ist niedriger als die eingestellte Ändern Sie die eingestellte Kühltemperatur Kühltemperatur Im Kühlmodus: Die Das Gerät arbeitet optimal bei einer...
  • Seite 15: Garantiebestimmungen

    GARANTIEBESTIMMUNGEN Bestron handhabt unter den folgenden Bedingungen eine Garantie von 60 Monaten ab Kaufdatum gegen Defekte, die durch Herstellungs- und/oder Materialfehler entstanden sind. 1. Im genannten Garantiezeitraum werden keine Kosten für Arbeitslohn und Material berechnet. 2. Die unter der Garantie ausgeführte Reparatur verlängert nicht die Garantiefrist.
  • Seite 16: En Cas De Dysfonctionnement

    FÉLICITATIONS ! Nous vous félicitons pour l’achat de votre produit Bestron. Dans le présent manuel d’utilisation, nous vous expliquons comment celui fonctionne et comment vous devez l’utiliser. Nous vous invitons par conséquent à lire attentivement les instructions d’utilisation avant d’utiliser l’appareil.
  • Seite 17 • Gardez toutes les ouvertures de ventilation dégagées de toute obstruction ; • L’entretien sera effectué uniquement comme recommandé par le fabricant. • L’appareil sera stocké dans un endroit bien ventilé dans lequel la taille de la pièce correspond à la zone de la pièce tel que précisé pour le fonctionnement.
  • Seite 18 • Lorsque des canalisation d’assainissement sont installées, assurez- vous que les canalisation d’assainissement soient bien raccordées, et qu’elles ne soient pas tordues ou courbées. • Ne forcez pas pour régler les rails de guidage d’air supérieur et inférieur afin d’éviter tout dommage. •...
  • Seite 19 • Les espaces comportant des conduites de fluides frigogènes doivent être conformes aux réglementations nationales en matière de gaz. • Transport d’équipement contenant des réfrigérants inflammables. • Lors de la mise au rebut de l’appareil, respectez les réglementations nationales relatives à l’élimination des appareils contenant des réfrigérants inflammables.
  • Seite 20: Déclaration De Conformité Ce

    DÉCLARATION DE CONFORMITÉ CE Ce produit répond aux exigences des directives Européennes. R. Neyman Contrôle qualité TENSION SECTEUR 220-240 V CONSOMMATION D'ÉNERGIE 1610 W QUANTITÉ DE RÉFRIGÉRANT CA. 280 G TYPE DE RÉFRIGÉRANT R 290 DISJONCTEUR DIFFÉRENTIEL RECOMMANDÉ 30 MA PROTECTION SUR SITE 16 A...
  • Seite 21 FONCTIONNEMENT - Généralités L’appareil est uniquement destiné à un usage ménager, et non à un usage professionnel. F G H I J 4. Poignées 1. Panneau de commande: 5. Roulettes pivotantes A. Ecrans LED 6. Sortie air chaud B. Bouton fonction swing “SWING” 7.
  • Seite 22 MONTAGE Ce climatiseur doit être branché sur un circuit électrique avec disjoncteur 16 A. Il doit être tenu à l’écart de matières hautement inflammables et il faut laisser un espace libre de 30 cm autour de l’appareil. On recommande également un disjoncteur de prise de terre de 30 mA. Utilisez uniquement des rallonges certifiées d’une capacité...
  • Seite 23 Refroidir 1. Appuyez une ou plusieurs fois sur le bouton “MODE” (figure 1-G), jusqu’à ce que l’indicateur lumineux “COOL” s’allume. L’appareil fonctionne maintenant comme un refroidisseur d’air et va refroidir l’air grâce à l’élément de refroidissement. 2. UTILISATION des boutons “UP” (figure 1-E) et “DOWN” (figure 1-F) pour définir la température entre 16°C et 31°C.
  • Seite 24 émette un bip. Tout de suite après l’indicateur lumineux, qui se trouve au-dessus, clignote rapidement. 5. Appuyez maintenant sur ‘Suivant’ dans l’appli pendant 10 secondes. L’appli va alors chercher l’appareil. Cela dure au maximum 2 minutes. Une fois l’appareil trouvé, l’appli affichera “BESTRON PORTABLE AIR CONDITIONER AAC14000WF”.
  • Seite 25 Remarque : L’appli ‘Smart Life – Smart Living’ n’est pas un produit Bestron et Bestron n’assure dès lors aucun service après-vente ni aucune assistance pour cette appli. Bestron n’est pas responsable du bon ou du mauvais fonctionnement de l’appli.
  • Seite 26 3. Dévissez le bouchon en caoutchouc du trou d’évacuation (figure 1-8), voir aussi figure 5. L’eau coule depuis le bac récolteur dans le seau. 4. Une fois le bac récolteur vide, replacez le bouchon en caoutchouc dans le trou d’évacuation et veillez à ce qu’il soit bien fermé. ATTENTION : •...
  • Seite 27: Problème Solution

    PROBLÈME SOLUTION Problème Cause possible Solution conseillée La climatisation ne Il n’y a pas d’électricité Contrôlez si la prise de courant sur laquelle fonctionne pas l’appareil est branché est alimentée en électricité La température ambiante est Modifiez la température de refroidissement définie plus basse que la températu- re de refroidissement définie Dans le mode...
  • Seite 28 DISPOSITIONS CONCERNANT LA GARANTIE Le présent produit Bestron bénéficie – aux conditions ci-après – d’une garantie de 60 mois suivant la date d’achat et couvrant toute panne résultant d’un défaut/vice de fabrication et/ou de fonctionnement. 1. Pendant la période de garantie précitée, aucun frais ne sera facturé au titre des coûts de main-d’œuvre et de matériel.
  • Seite 29 PROFICIAT! Proficiat met de aankoop van dit Bestron-product. In deze gebruiksaanwijzing leggen we de werking en het gebruik uit. Lees de gebruiksaanwijzing dus aandachtig door vóór u het apparaat gaat gebruiken. Gebruik het apparaat alleen zoals beschreven in de gebruiksaanwijzing. Bewaar de gebruiksaanwijzing daarna zorgvuldig.
  • Seite 30: Het Toestel Moet Bewaard Worden In Een

    • Zorg ervoor dat elektrische apparaten, snoeren of stekkers niet in aanraking komen met water. • Dompel elektrische apparaten, snoeren of stekkers nooit onder in water of een andere vloeistof. • Pak elektrische apparaten niet op wanneer ze in het water zijn gevallen.
  • Seite 31 door de industrie erkende beoordelings-autoriteit, die oordeelt dat ze bekwaam zijn om op een veilige manier om te gaan met koelmiddelen, volgens de door de industrie erkende beoordelingsspecificaties. • Onderhoud mag enkel in overeenstemming met de aanbevelingen van de fabrikant uitgevoerd worden. •...
  • Seite 32 vermijden dat er water of andere vloeistoffen in de airconditioning komen. • Gebruik geen insecticide in sprayvorm of andere ontvlambare stoffen in de buurt van de airconditioning. • Wrijf de airconditioning niet schoon of was deze niet met chemische oplosmiddelen zoals benzine of alcohol. •...
  • Seite 33: Eu-Conformiteitsverklaring

    EU-CONFORMITEITSVERKLARING Dit product voldoet aan de eisen volgens de Europese richtlijnen. R. Neyman Quality control NETSPANNING 220-240 V ENERGIEVERBRUIK 1610 W HOEVEELHEID KOELMIDDEL CA. 280 G TYPE KOELMIDDEL R 290 AANBEVOLEN AARDLEKSCHAKELAAR 30 MA BESCHERMING TER PLAATSE 16 A...
  • Seite 34 WERKING - Algemeen Het apparaat is alleen bedoeld voor huishoudelijke doeleinden, niet voor professioneel gebruik. F G H I J 1. Bedieningspaneel: 4. Handgrepen A. LED-displays 5. Zwenkwielen B. Knop swingfunctie “SWING” 6. Warmeluchtuitlaat C. Knop timerfunctie “TIMER” 7. Snoer met stekker D.
  • Seite 35 MONTAGE Deze airconditioner moet aangesloten worden op een elektrisch circuit met een 16 A stroomonderbreker. Hij moet weggehouden worden van snel ontvlambare materialen en er dient een vrije ruimte van 30 cm rond het toestel te zijn. Bijkomend wordt een aardlekschakelaar van 30 mA aanbevolen. Maak alleen gebruik van een goedgekeurde verlengkabel met een capaciteit van 16 A.
  • Seite 36 Koelen 1. Druk één of meerdere keren op de knop “MODE” (figuur 1-G), totdat het indicatielampje bij “COOL” gaat branden. Het apparaat werkt nu als luchtkoeler en zal de lucht middels een koelelement afkoelen. 2. Gebruik de knoppen “UP” (figuur 1-E) en “DOWN” (figuur 1-F) om de koeltemperatuur tussen 16°C en 31°C in te stellen.
  • Seite 37 5. Druk nu binnen 10 seconden in de app op ‘Volgende’. De app gaat nu zoeken naar het apparaat. Dit duurt maximaal 2 minuten. Als het apparaat gevonden is, zal de app “BESTRON PORTABLE AIR CONDITIONER AAC14000WF” weergeven.
  • Seite 38 Opmerking: De app ‘Smart Life – Smart Living’ is geen Bestron-product en Bestron verleent derhalve geen service of support op deze app. Bestron is niet verantwoordelijk voor het wel of niet functioneren van de app.
  • Seite 39 afvoergat van de wateropvangbak. 3. Draai de rubberen dop van het afvoergat (figuur 1-8), zie ook figuur 5. Het water stroomt vanuit de wateropvangbak in de emmer. 4. Als de wateropvangbak leeg is, plaats de rubberen dop terug in het afvoergat en zorg dat deze goed is afgesloten.
  • Seite 40: Probleemoplossing

    PROBLEEMOPLOSSING Probleem Mogelijke oorzaak Aangeraden oplossing De airconditioning Er is geen elektriciteit Controleer of het stopcontact waarop het apparaat werkt niet is aangesloten is voorzien van elektriciteit De kamertemperatuur is Verander de ingestelde koeltemperatuur lager dan de ingestelde koeltemperatuur In de koelmodus: de Het apparaat werkt optimaal bij een kamertemperatuur is te laag kamertemperatuur tussen 7°C en 35°C...
  • Seite 41: Garantiebepalingen

    9. Aanspraak op garantie kan alleen bij uw (web-)winkelier of rechtstreeks bij de Bestron Service Dienst. Stuur echter nooit zomaar iets op. Het pakket kan dan namelijk geweigerd worden en eventuele kosten zijn voor uw rekening.
  • Seite 42 CONGRATULATIONS! Congratulations with the purchase of this Bestron product. These instructions tell you how the product works and how to use it. Read the instructions carefully before you start using the appliance. Only use the appliance in the manner described in the instructions. Keep these instructions in a safe place for future reference.
  • Seite 43 • Any person who is involved with working on or breaking into a refrigerant circuit should hold a current valid certificate from an industry-accredited assessment authority, which authorizes their competence to handle refrigerants safely in accordance with an industry recognized assessment specification. •...
  • Seite 44 machine malfunction or even bring harm to persons and properties. To avoid danger, if a machine failure occurs, ask the manufacturer or professionals to repair it. • Do not install and use the air conditioning in the bathroom or other humid environments.
  • Seite 45: Ce Declaration Of Conformity

    ENVIRONMENT • Dispose of packaging material such as plastic and cardboard boxes in the designated containers. • Do not dispose of this product as normal domestic waste at the end of its life, but hand it in at a collection point for the reuse of electric and electronic equipment.
  • Seite 46 OPERATION - General The appliance is only intended for household use, not for professional use. F G H I J 1. Control panel: 4. Handles A. LED-displays 5. Castors B. Button swing function “SWING” 6. Warm air outlet C. Button timer function “TIMER” 7.
  • Seite 47 INSTALLATION This air conditioner must be connected to an electrical circuit with a 16 A circuit breaker. It must be kept away from easily flammable materials with a free space of 30 cm around the device. In addition, a 30 mA residual current device is recommended.
  • Seite 48 Cooling 1. Press the “MODE” button (Figure 1-G) once or more times, until the indicator light “COOL” lights up. The device will now function as an air cooler and will cool the air by means of a cooling element. 2. Use the “UP” (Figure 1-E) “DOWN” (Figure 1-F) buttons to set the cooling temperature between 16 °C and 31 °C.
  • Seite 49 5. Now press ‘Next’ in the app within 10 seconds. The app will now search for the device. This takes a maximum of 2 minutes. When the device is found, the app will display “BESTRON PORTABLE AIR CONDITIONER AAC14000WF”.
  • Seite 50 Comment: The ‘Smart Life - Smart Living’ app is not a Bestron product and Bestron therefore does not provide any service or support for this app. Bestron is not responsible for how the app functions. More information: www.tuya.com CLEANING AND MAINTENANCE - General Over time, dust can accumulate in the grids and between the fins in the appliance.
  • Seite 51 3. Unscrew the rubber cap from the drainage hole (figure 1-8), see also figure 5. The water flows from the water collector into the bucket. 4. When the water collector is empty, put the rubber cap back into the drain hole and make sure it is tightly closed.
  • Seite 52: Problem Solving

    PROBLEM SOLVING Problem Possible cause Advised solution The air- There is no electricity Check whether the socket the device is connected conditioning is not to, has electricity functioning The room temperature is lower than the set cooling Change the set cooling temperature temperature In the cooling mode: the The device optimally functions at a room...
  • Seite 53: Warranty Conditions

    8. The warranty does not entitle the purchaser to compensation for any damage other than replace- ment or repair of the faulty parts. Bestron cannot in any event be held liable for any indirect or consequential losses caused by or in relation to the equipment it has provided.
  • Seite 54: In Caso Di Guasto

    COMPLIMENTI! Congratulazioni per l’acquisto di questo prodotto Bestron. Nelle presenti istruzioni per l’uso viene spiegato il funzionamento e l’impiego dell’apparecchio. Pertanto, prima di utilizzarlo, leggerle attentamente. Utilizzare l’apparecchio esclusivamente come di seguito descritto. Conservare queste istruzioni in luogo sicuro. In caso di guasto: Nel caso indesiderato in cui l’unità...
  • Seite 55 dispositivo non siano ostruite. • La manutenzione del dispositivo deve essere eseguita esclusivamente nel rispetto delle raccomandazioni fornite dal produttore. • Il dispositivo deve essere conservato in un ambiente ben ventilato le cui dimensioni corrispondano alle specificazioni fornite dal produttore in tema di funzionamento del dispositivo stesso. •...
  • Seite 56 ostruite. • In fase di installazione dei tubi di drenaggio, verificare che gli stessi siano stati correttamente collegati e che non siano storti o piegati. • Non esercitare forza per regolare le guide dell’aria superiore e inferiore per evitare danni. •...
  • Seite 57 minima di 14m • I locali in cui sono stati collocati i cavi del climatizzatore devono essere conformi alle normative nazionali in materia di gas. • Trasporto di attrezzature contenenti liquidi refrigeranti infiammabili. • Quando si smaltisce il dispositivo, osservare le normative nazio- nali per lo smaltimento dei dispositivi con refrigeranti infiammabili.
  • Seite 58: Dichiarazione Di Conformità Ce

    DICHIARAZIONE DI CONFORMITÀ CE Questo prodotto soddisfa i requisiti delle linee guida Europee. R. Neyman Controllo qualità TENSIONE DI RETE 220-240 V CONSUMO DI ENERGIA 1610 W QUANTITÀ DI REFRIGERANTE CA. 280 G TIPO DI REFRIGERANTE R 290 INTERRUTTORE DIFFERENZIALE CONSIGLIATO 30 MA PROTEZIONE IN LOCO 16 A...
  • Seite 59 FUNZIONAMENTO - Generale L’apparecchio è destinato esclusivamente all’uso domestico, non all’uso professionale. F G H I J 1. Pannello di controllo: A. Display a LED 2. Bocchette d’uscita dell’aria B. Pulsante “SWING” PER 3. Alette LA FUNZIONE OSCILLAZIONE 4. Maniglie C.
  • Seite 60 INSTALLAZIONE Il climatizzatore deve essere collegato a un circuito elettrico con interruttore automatico da 16 A. Deve essere tenuto lontano da materiali facilmente infiammabili e, intorno all’apparecchio, deve essere lasciato uno spazio libero di almeno 30 cm. Si raccomanda inoltre di installare un interruttore differenziale da 30 mA. Utilizzare solo cavi di prolunga approvati con capacità...
  • Seite 61 Raffreddare 1. Premi una o più volte il pulsante “MODE” (Figura 1-G), fino a far accendere la spia “COOL” (freddo). L’apparecchio ora funzionerà come un raffreddatore ad aria sfruttando il proprio elemento di raffreddamento. 2. Con i tasti “UP” (Figura 1-E) e “DOWN” (Figura 1-F) puoi regolare la temperatura di raffreddamento in un intervallo che va dai 16°C ai 31°C.
  • Seite 62 Subito dopo, la spia luminosa su di esso inizierà a lampeggiare rapidamente. 5. Ora premi ‘Next’ sull’app entro 10 secondi. L’app cercherà il dispositivo. Ci vorranno al massimo 2 minuti in tutto. Quando trova l’apparecchio, l’app mostrerà “CLIMATIZZATORE PORTATILE BESTRON AAC14000WF”.
  • Seite 63 “Confirm” (Conferma). Il dispositivo ora è stato rimosso dalla famiglia. Precisazione: L’app “Smart Life - Smart Living” non è un prodotto Bestron, e quindi la nostra società non fornisce alcun servizio, né supporto in relazione a essa. La Bestron non è quindi in alcun modo responsabile del funzionamento dell’app.
  • Seite 64 3. Svita il tappo di gomma dal foro di scarico (figura 1-8), vedi anche la figura 5. L’acqua scorrerà dal collettore nel secchio. 4. Quando il collettore dell’acqua si è svuotato, rimetti il tappo di gomma nel foro di scarico e verifica che sia ben chiuso.
  • Seite 65: Risoluzione Dei Problemi

    RISOLUZIONE DEI PROBLEMI Problema Possibile causa Soluzione raccomandata Il condizionatore Non c’è corrente elettrica Verificare che la presa di corrente a cui è collegato d’aria non l’apparecchio sia alimentata elettricamente funziona La temperatura della stanza Modificare la temperatura di raffreddamento è...
  • Seite 66: Disposizioni Di Garanzia

    DISPOSIZIONI DI GARANZIA In base alle seguenti condizioni, Bestron garantisce questo apparecchio per la durata di 60 mesi dalla data di acquisto contro i guasti causati da difetti di fabbricazione e/o del materiale. 1. Durante il periodo di garanzia non verranno addebitati costi di manodopera e per i materiali neces- sari.
  • Seite 67 ¡FELICIDADES! Felicidades por la compra de este producto Bestron. En estas instrucciones le explicamos su funcionamiento y cómo usarlo. Antes de usar el aparato, lea bien el manual de instrucciones. Utilice el aparato únicamente tal y como se describe en el manual de instrucciones.
  • Seite 68 • Mantenga las aberturas de ventilación necesarias libres de obstrucciones. • El mantenimiento debe realizarse únicamente según lo recomendado por el fabricante. • El aparato debe almacenarse en una habitación bien ventilada cuyo tamaño se corresponda con lo especificado para la operación. •...
  • Seite 69 • Cuando se instalen tuberías de desagüe, asegúrese de que las tuberías de desagüe estén correctamente conectadas, y no estén distorsionadas ni dobladas. • No use la fuerza para ajustar los rieles de guía de aire superior e inferior para evitar daños. •...
  • Seite 70: Medio Ambiente

    • Al desechar el dispositivo, observe las regulaciones nacionales para el desecho de dispositivos con refrigerantes inflamables. Pregunte a su empresa responsable de eliminación de residuos. • • Cuando el dispositivo no esté en uso, guárdelo solo en habitaciones secas y sin escarcha. El dispositivo no debe dañarse durante el almacenamiento.
  • Seite 71: Declaración De Conformidad Ce

    DECLARACIÓN DE CONFORMIDAD CE Este producto cumple con los requisitos de las directrices Europeas R. Neyman Control de calidad TENSIÓN DE RED 220-240 V EL CONSUMO DE ENERGÍA 1610 W CANTIDAD DE REFRIGERANTE CA. 280 G TIPO DE REFRIGERANTE R 290 DISYUNTOR DE CORRIENTE RESIDUAL RECOMENDADO 30 MA PROTECCIÓN EN EL SITIO...
  • Seite 72 Funcionamiento - General El aparato debe utilizarse únicamente para entornos domésticos y no para uso profesional. F G H I J 1. Panel de control: 5. Ruedas giratorias A. Pantallas LED 6. Salida de aire caliente B. Botón función de balanceo “SWING” 7.
  • Seite 73 MONTAJE Este acondicionador de aire debe conectarse a un circuito eléctrico con un fusible de 16 A. Debe mantenerse alejado de materiales inflamables y necesita un espacio libre de 30 cm alrededor del aparato. Adicionalmente, se recomienda un interruptor diferencial de 30 mA. Utilizar únicamente un cable de extensión homologado con una capacidad de 16 A.
  • Seite 74 Enfriar 1. Pulsar una o varias veces el botón “MODE” (ilustración 1-G), hasta que se encienda el piloto de “COOL”. El aparato funciona ahora como refrigerador del aire y enfriará el ambiente por medio de un elemento de enfriamiento. 2. Usar el botón “UP” (ilustración 1-E) y “DOWN” (ilustración 1-F) para ajustar la temperatura entre 16°C y 31°C.
  • Seite 75 5. Pulsar dentro de los siguientes 10 segundos “Siguiente” en la aplicación. La aplicación buscará el aparato. Este proceso dura 2 minutos como máximo. Cuando encuentre el aparato, la aplicación indicará “BESTRON PORTABLE AIR CONDITIONER AAC14000WF”. 6. Pulsar “Seguir”. El aparato se ha añadido a la pantalla principal.
  • Seite 76 Observación: La aplicación “Smart Life - Smart Living” no es un producto Bestron y Bestron no presta servicios o apoyo sobre esta aplicación. Bestron no es responsable del funcionamiento o no funcionamiento de la aplicación.
  • Seite 77 3. Girar el tapón de goma del orificio de drenaje (ilustración 1-8), ver también ilustración 5. El agua sale del colector hasta el cubo. 4. Cuando el colector de agua esté vacío, volver a colocar el tapón de goma en el orificio de drenaje y asegurarse de que está...
  • Seite 78: Resolución De Problemas

    RESOLUCIÓN DE PROBLEMAS Problema Posible causa Solución recomendada El aire No hay electricidad Asegúrese de que la toma de corriente a la que acondicionado no está conectado el aparato tenga electricidad. funciona La temperatura ambiente es inferior a la temperatura de Cambie la temperatura de refrigeración refrigeración establecida establecida.
  • Seite 79: Condiciones De Garantía

    CONDICIONES DE GARANTÍA Bestron ofrece 60 meses de garantía después de la fecha de compra de este equipo. La garantía cubre las averías por errores de fabricación y/o material y se atiene a las siguientes condiciones. 1. La garantía no cubre ningún gasto por mano de obra ni material.
  • Seite 80 GRATULERAR! Gratulerar till köpet av denna Bestron-produkt. Denna bruksanvisning innehåller information om hur produkten används och fungerar. Läs därför bruksanvisningen noggrant innan du börjar använda apparaten. Apparaten får bara användas enligt beskrivningen i denna bruksanvisning. Efter användning ska den förvaras på lämpligt sätt.
  • Seite 81 takt med värmekällor, såsom en varm spis eller öppen eld. • Låt inte kablar hänga över kanten på disken, arbetsytan eller bord. • Dra alltid ur nätsladden när du inte använder den elektriska appara- ten. • När du tar ut kontakten ur uttaget, dra i själva kontakten, inte i kabeln. •...
  • Seite 82 anvisningar och, om nödvändigt, be en professionell tekniker att utföra installationen. • Placera apparaten på en platt och torr plats och håll ett avstånd av mer än 30 cm mellan enheten och omgivande föremål eller väggar. • Efter anslutning av luftkonditioneringen, se till att kontakten är intakt och att den är ordentligt ansluten till vägguttaget.
  • Seite 83: Vad Du Borde Veta Om Den Här Apparaten

    VAD DU BORDE VETA OM DEN HÄR APPARATEN • Var försiktig när du använder apparaten utomhus. • Använd aldrig apparaten på fuktiga eller våta platser. • Rengör apparaten noga efter användning (se Rengöring och underhåll). • Vi rekommenderar att installationen utförs av en kvalificerad elektriker som kan kontrollera styrkan på...
  • Seite 84 CE-MÄRKNING OCH FÖRSÄKRAN OM ÖVERENSSTÄMMELSE Denna produkt uppfyller bestämmelserna i följande europeiska direktiv på området för säkerhet: • EMC-direktivet 2014/30/EU • Lågspänningsdirektivet 2014/35/EU RoHS-direktivet 2011/65/EU R. Neyman Kvalitetskontroll STRÖM 220-240 V ENERGIFÖRBRUKNING 1610 W MÄNGD KÖLDMEDIUM CA. 280 G TYP AV KÖLDMEDIUM R 290 REKOMMENDERAD JORDFELSBRYTARE (RCD-BRYTARE) 30 MA...
  • Seite 85 ANVÄNDNING - Allmänt Enheten är endast avsedd för hushållsbruk, inte för professionellt bruk. F G H I J 4. Handtag 1. Kontrollpanel: 5. Hjul A. LED-displayer B. Knapp gungfunktion “GUNGA” 6. Varmluftutlopp C. Knapp timerfunktion “TIMER” 7. Sladd med stickkontakt D.
  • Seite 86 INSTALLATION Denna luftkonditioneringsenhet måste vara ansluten till en elektrisk krets med en 16 A kretsbrytare. Den måste hållas borta från lättantändliga material med ett fritt utrymme på 30 cm runt enheten. Dessutom rekommenderas en 30 mA jordfelsbrytare. Använd endast en godkänd förlängningskabel med en kapacitet på...
  • Seite 87 Kylning 1. Tryck på “LÄGE”-knappen (Figur 1-G) en eller flera gånger tills indikatorlampan “KYL” tänds. Enheten kommer nu att fungera som en luftkylare och kommer att kyla luften med hjälp av ett kylelement. 2. Använd knapparna “UPP” (Figur 1-E) “NER” (Figur 1-F) för att ställa in kyltemperaturen mellan 16°C och 31°C.
  • Seite 88 5. Tryck nu på ‘Nästa’ i appen inom 10 sekunder. Appen söker nu efter enheten. Detta tar högst 2 minuter. När enheten hittas kommer appen att visa “BESTRON PORTABLE AIR CONDITIONER AAC14000WF”. 6. Klicka på ‘Fortsätt’. Enheten har lagts till huvudskärmen.
  • Seite 89 2 sekunder. Klicka sedan på ‘Ta bort enhet’ och sedan ‘Bekräfta’. Enheten har tagits bort från familjen. Kommentar: ‘Smart Life - Smart Living’-appen är inte en Bestron-produkt och Bestron ger därför inte någon service eller support för denna app. Bestron ansvarar inte för hur appen fungerar. Mer information: www.tuya.com RENGÖRING OCH UNDERHÅLL - Allmänt...
  • Seite 90 3. Skruva av gummilocket från dräneringshålet (Figur 1-8), se även Figur 5. Vattnet strömmar från vattensamlaren in i hinken. 4. När vattenuppsamlaren är tom, sätt tillbaka gummilocket och skruvlocket i dräneringshålet och se till att det är tätt stängt. VARNING: •...
  • Seite 91: Problemlösning

    PROBLEMLÖSNING Problem Möjlig orsak Rekommenderad lösning Luftkonditioneringen Det finns ingen elektricitet. Kontrollera att eluttaget som apparaten är fungerar inte ansluten till har el Rumstemperaturen är Ändra inställd kyltemperatur lägre än den inställda kyltemperaturen I kylningsläge: Enheten fungerar optimalt vid en rumstemperatur rumstemperaturen är för låg mellan 7°...
  • Seite 92 GARANTIBESTÄMMELSER Bestron lämnar från köpedatum och enligt villkoren nedan 60 månaders garanti på denna apparatur som täcker defekter som uppstått genom tillverknings- och/eller materialfel. 1. Under denna garantiperiod kommer inga kostnader att debiteras för arbetstid och material. 2. Reparationer som utförs under garantin innebär inte en förlängning av garantitiden.
  • Seite 96 v201215-02 NEED HELP? CHAT WITH US! WHATSAPP CUSTOMER SERVICE B E S T R O N . C O M / W H A T S A P P...

Inhaltsverzeichnis