Inhaltsverzeichnis
Werbung
Verfügbare Sprachen
Verfügbare Sprachen
Quicklinks
GB
OPERATING MANUAL . . . . . . . . . . . . . . . . . . . . . . . . . . . . . . PAGE
DE
GEBRAUCHSANWEISUNG . . . . . . . . . . . . . . . . . . . . . . . . . . . . PAGE 14
FR
MANUAL D'UTILISATION . . . . . . . . . . . . . . . . . . . . . . . . . . . . PAGE 28
NL
GEBRUIKSAANWIJZING . . . . . . . . . . . . . . . . . . . . . . . . . . . . . PAGE 42
ES
INSTRUCCIONES DE USO . . . . . . . . . . . . . . . . . . . . . . . . . . . . PAGE 56
IT
ISTRUZIONI D'USO . . . . . . . . . . . . . . . . . . . . . . . . . . . . . . . . . PAGE 70
PT
MANUAL DE INTRUÇÕES . . . . . . . . . . . . . . . . . . . . . . . . . . . . PAGE 84
DK
BRUGERVEJLEDNING . . . . . . . . . . . . . . . . . . . . . . . . . . . . . . . PAGE 96
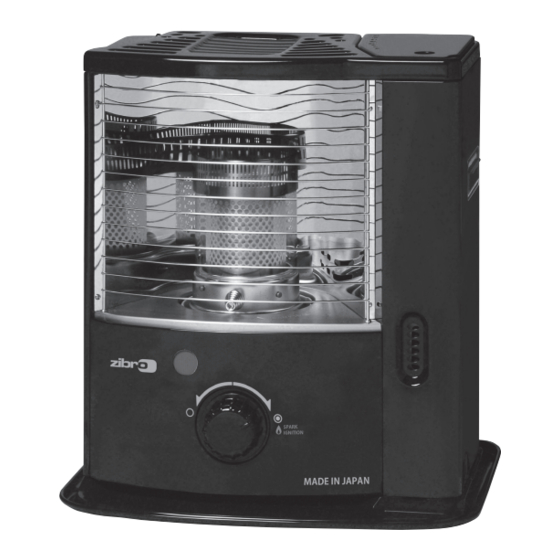
RS - 2222
2
Werbung
Inhaltsverzeichnis

Verwandte Anleitungen für Toyotomi zibro RS-2222


Inhaltszusammenfassung für Toyotomi zibro RS-2222
-
Seite 1: Inhaltsverzeichnis
RS – 2222 OPERATING MANUAL . . . . . . . . . . . . . . . . . . . . . . . . . . . . . . PAGE GEBRAUCHSANWEISUNG . - Seite 2 14 TIPS FOR SAFE USE 1 Make sure that children are always aware of the presence of a burning heater. 100 cm 2 DO NOT move the heater when it is burning or still hot. DO NOT 20 cm refill nor service the heater when it is burning or still hot. 50 cm 50 cm 3 Position the front of the heater at a minimum distance of 1.5...
- Seite 3 14 SICHERHEITSRATSCHLÄGE 1 Machen Sie Kinder immer auf die Anwesenheit eines brennenden Ofens aufmerksam. 100 cm 2 Transportieren Sie den Ofen NICHT, wenn er brennt oder 20 cm noch heiß ist. In diesem Fall auch KEINE Wartungsarbeiten 50 cm 50 cm durchführen.
- Seite 4 14 CONSEILS POUR UN USAGE EN TOUTE SÉCURITÉ 1 Attirez l’attention des enfants sur la présence d’un appareil en 100 cm combustion. 2 NE déplacez PAS l’appareil lorsqu’il chauffe ou s’il est encore 20 cm brûlant. Dans ces conditions, il NE faut PAS ajouter du 50 cm 50 cm combustible ni entreprendre l’entretien de l’appareil.
- Seite 5 14 TIPS VOOR EEN VEILIG GEBRUIK 1 Wijs kinderen altijd op de aanwezigheid van een brandende 100 cm kachel. 20 cm 2 Verplaats de kachel NIET als deze brandt of nog heet is. In dat geval ook NIET bijvullen en geen onderhoud verrichten. 50 cm 50 cm 3 Plaats de voorkant van de kachel op minimaal 1,5 meter van...
- Seite 6 14 SUGERENCIAS PARA UN USO SEGURO 1 Asegúrese de que los niños son siempre conscientes de la 100 cm presencia de una estufa encendida. 20 cm 2 NO transportar la estufa cuando esté encendida o esté aún 50 cm 50 cm caliente, ni tampoco llenarla de combustible, ni efectuar trabajos de mantenimiento.
- Seite 7 14 CONSIGLI PER UN USO SICURO 1 Richiamare sempre l’attenzione dei bambini sui pericoli di una 100 cm stufa accesa. 2 NON spostare la stufa se questa è accesa o se è ancora calda. 20 cm In tal caso, NON riempirla di combustibile e non eseguire la 50 cm 50 cm manutenzione.
- Seite 8 14 DICAS PARA UTILIZAÇÃO SEGURA 1 Assegure-se que as crianças têm noção da presença de um 100 cm aquecedor. 2 NÃO transportar o aquecedor quando está aceso ou ainda 20 cm quente, nem encher de combustível ou fazer qualquer trabalho 50 cm 50 cm de manutenção.
- Seite 9 14 TIPS FOR UFARLIG BRUG 1 Børn bør være under opsyn, så det sikres, at de ikke leger med 100 cm apparatet. 20 cm 2 Flyt ALDRIG kaminen, når den brænder eller stadig er varm. I 50 cm 50 cm dette tilfælde må...
- Seite 10 We hope that you’ll enjoy your Toyotomi appliance for years to come! We invite you to read this instruction manual first, to ensure the maximum lifetime for this appliance. Get to know us better…visit us at www.toyotomi.eu for our full line of products. 1 Read the diRections foR Use fiRst.
-
Seite 11: General Directions For Use
Fuel ages. Use new fuel at the start of every heating season. • Only use high quality and water-free pure paraffin in accordance with local legislation (TOYOTOMI fuel). • Before changing brands and/or types of fuel make sure that the mobile heater first... -
Seite 12: What You Need To Know In Advance
THE RIgHT FUEL Your heater has been designed for use with high-quality water-free pure paraffin oil (TOYOTOMI fuel). Only fuels of this kind will ensure clean and proper burning. Lower quality fuel may result in: increased possibility of malfunctioning ... -
Seite 13: Installing The Heater
manUal INSTALLINg THE HEATER 1 Carefully remove your heater from the box and check the contents. In addition to the heater you also need to have: a transportation cap these directions for use Keep the box and the packaging materials (Fig. A) for storage and/or transportation. -
Seite 14: Filling Fuel
FILLINg FUEL Fill the removable tank in a suitable place since there can always be some spillage. Follow the procedure below: 1 Make sure that the heater is switched off. 2 Open the upper lid and lift the removable tank out of the heater (Fig. G). Put down the removable tank (cap pointing upwards, handle on the floor) and screw off the fuel cap (Fig. - Seite 15 Before igniting the heater, always check the fuel indicator to see whether the removable tank needs filling up. Always ignite the heater with the knurled wick adjustment knob . Never use matches or a cigarette lighter. Follow the procedure below: 1 Turn the knurled wick adjustment knob ...
- Seite 16 SWITCHINg OFF THE HEATER Push the OFF-button . The flame will extinguish after a little while (Fig. N). MALFUNCTION, CAUSES ANd SOLUTIONS If any malfunctioning cannot be solved from the directions below, please contact your dealer. THE HEATER dOES NOT IgNITE ...
- Seite 17 MAINTENANCE Your heater needs hardly any maintenance. It is, however, important that you remove dust and stains in time with a damp cloth, because otherwise these may cause stains that are hard to remove. Under normal conditions, only 3 components are subject to wear: 1.
- Seite 18 TRANSpORTATION Take the following measures to avoid fuel leakage during the transportation of the heater: 1 Let the heater cool down. Remove the removable tank from the heater and remove the fuel acceptance fitting (Fig. P). Some drops may leak from the fuel acceptance fitting;...
- Seite 19 Replacement of the WicK ENSURE THAT THE HEATER IS OFF ANd COMpLETELY COOL BEFORE STARTINg TO REpLACE THE WICK. Open the lid and remove the removable tank. 2 Remove the batteries from the battery holder . 3 Open the front grill. Remove the combustion chamber from the heater.
- Seite 20 11 Install the wick to the wick sleeve according to the allo- wed direction engraved on the wick sleeve. 12 Install the wick sleeve (with wick) to the primary air tube. And then turn the wick sleeve clockwise to set in the handle arm.
-
Seite 21: Product Fiche
PRODUCT FICHE (a) Supplier's name/Trademark TOYOTOMI Europe Sales B.V. (b) Model RS-2222 (c) EEC (d) Direct heat output 2.2kW (e) Indirect heat output (f) EEI 95.0% (g) Useful energy efficiency 100% For assembly, installation or main- (h) Specific precaution tenance instructions, please refer to the operating manual. - Seite 22 Vielen Dank für den Kauf des Marken-Heizofens von Toyotomi! Der japanische Hersteller Toyotomi Co. Ltd. ist seit mehr als 65 Jahren weltweiter Marktführer im Bereich mobiler Petroleumöfen. Toyotomi steht für Service, Qualität und Garantie. Auf der ganzen Welt nutzen zufriedene Kunden die komfortablen und sicheren Heizöfen.
- Seite 23 • Brennstoff altert. Beginnen Sie jede Heizsaison mit neuem Brennstoff. • Verwenden Sie nur sauberes Heizpetroleum in Übereinstimmung mit der lokalen Gesetzgebung (TOYOTOMI Brennstoff). • Wenn Sie zwischen den einzelnen Sorten / Marken -wechseln, müssen Sie den Heizofen erst voll-ständig leer brennen lassen.
-
Seite 24: Wichtig Zu Wissen
Wichtig zu Wissen JEDERZEIT AUSREICHEND LÜFTEN Lesen Sie bitte vor der Anwendung des Geräts sorgfältig die Bedienungsanleitung und bewahren Sie sie für eine zukünftige Einsichtnahme auf. Das Gerät nur dann installieren, wenn die örtlich geltenden bzw. nationalen Vorschriften, Verordnungen und Normen erfüllt sind. Dieses Produkt ist für den Gebrauch als Heizofen in Wohngebäuden bestimmt, und darf nur in trockener Umgebung, unter normalen Haushaltsverhältnissen, in Wohnräumen, Küchen und in Garagen verwendet werden. -
Seite 25: Der Richtige Brennstoff
DER RICHTIGE BRENNSToFF Ihr Heizofen wurde für die Benutzung von, sauberem Heizpetroleum hoher Qualität, entwickelt (TOYOTOMI Brennstoff). Nur dieser Brennstoff sorgt für eine saubere und optimale Verbrennung. Brennstoff geringerer Qualität kann zu folgenden Problemen führen: erhöhte Störungsanfälligkeit unvollständige Verbrennung ... -
Seite 26: Bdas Befüllen Mit Brennstoff
Öffnen Sie den Deckel des Brennstofftanks und entfernen Sie das Stückchen Karton. 3 Befüllen Sie den Brennstofftank wie in Kapitel B beschrieben. 4 Legen Sie die Batterien in das dafür bestimmte Fach an der Rückseite des Heizofens (Abb. F). Achten Sie dabei auf die + und - Pole. Am besten verwenden Sie dazu neue Alkaline-Batterien (4 x Größ... -
Seite 27: Das Starten Des Heizofens
Kontrollieren Sie, ob der Tankverschluß gerade sitzt und fest angezogen ist. Setzen Sie den Brennstofftank wieder in den Heizofen ein (Tankverschluß nach unten). Schließen Sie den Deckel. HINWEIS: Sicherstellen, dass der Tankdeckel fest sitzt und überprüfen, ob Brennstoff ausläuft, wenn die Deckelseite nach unten zeigt. Anschließend den herausnehmbaren Brennstofftank in den Heizofen einfügen. -
Seite 28: Das Brennen Des Ofens
DAS BRENNEN DES oFENS Nachdem der Heizofen gestartet wurde, dauert es 30 Minuten, bevor Sie kontrollieren können, ob der Ofen gut brennt. Eine zu hohe Flamme kann Rauch- und Rußentwicklung verursachen, während eine zu niedrige Flamme zu Geruchsbildung führen kann (Abb. R). ✗... -
Seite 29: Die Wartung
Staubanhäufung im unteren Bereich des Heizofens. Wenden Sie sich an Ihren Händler. Die Dochthöhe ist nicht richtig. Wenden Sie sich an Ihren Händler. DER HEIZoFEN GEHT LANGSAM AUS. Der Brennstofftank ist leer. Siehe Kapitel B. Es befindet sich Feuchtigkeit im unteren Reservoir. Wenden Sie sich an Ihren Händler. -
Seite 30: Hlagerung (Ende Der Heizsaison)
3. ELEkTRoDEN Bei einer Verschmutzung der Elektroden durch Kohlenstoff oder Teer, diese reinigen. Beim Eintauchen der Elektroden in den Docht kann es zu einem Zündaussetzer kommen. In diesem Fall die Position der Elektroden anpassen. Dabei darauf achten, dass kein Wasser auf die Elektroden gespritzt wird. Entfernen Sie selbst keine Teile aus dem Heizofen. -
Seite 31: Jtechnische Daten
TECHNISCHE DATEN Zündung elektrisch Abmessungen (mm) Breite Brennstoff Heizpetroleum Tiefe (einschließlich Bodenplatte) Kapazität (kW) * 2,20 Höhe ) ** Geeigneter Raum (m 35-80 Zubehör: Transportverschluß Brennstoffverbrauch (Ltr/Std) * 0,229 Benötigte Batterien 4x LR14, MIN 1400 Brennstoffverbrauch (g/Std) * 1,5V, size C Brenndauer pro Tank (Std) * 17,5 Dochttyp... -
Seite 32: Wechseln Des Dochtes
WechseLn des dochtes DER oFEN MUSS GANZ ABGEkÜHLT SEIN, BEVoR SIE MIT DEM DoCHTWECHSEL BEGINNEN. 1 Öffnen Sie den Deckel und nehmen Sie den Brennstof- tank heraus. 2 Nehmen Sie die Batterien aus dem Batteriefach . 3 Das Gitter aus der Kerbung heben und nach vorn ziehen. Den Brennerkopf aus dem Ofen nehmen. - Seite 33 11 Den Docht in den Dochthalter in die Richtung, die auf dem Dochthalter eingraviert ist, einsetzen. 12 Platzieren Sie den Dochthalter (mit Docht) wieder an der ersten Luftöffnung. Anschließend drehen Sie den Dochthalter im Uhrzeigersinn auf die Dochtbefestigung. 13 Den Brennersitz wieder montieren. 14 Die Flügelmuttern gleichmäßig handfest anziehen.
-
Seite 35: Wichtige Einzelteile
PRODUKTDATENBLATT (a) Name / Warenzeichen des Lieferanten TOYOTOMI Europe Sales B.V. (b) Model RS-2222 (c) Energieeffizienzklasse (d) Direkte Wärmeleistung 2.2kW (e) Indirekte Wärmeleistung (f) Energieeffizienzindex 95.0% (g) Brennstoff-Energieeffizienz 100% Für das Zusammenstellen, die Instal- lation oder Wartung des Gerätes wir... - Seite 36 Merci d’avoir choisi un produit “TOYOTOMI”! Les produits de “ Toyotomi “ sont utilisés par des clients satisfaits à travers le monde entier. Afin d’assurer l’utilisation confortable et sûre de nos produits par les clients dans chaque pays, nos produits sont conformes aux normes de sécurité...
- Seite 37 • Utilisez uniquement paraffine de haute qualité, sans eau et pur conformément à la législation locale (TOYOTOMI combustible). • Si vous changez de marque et/ou de type de combustible, vous devez d’abord vous assurer que l’appareil mobile de chauffage à combustible liquide consomme...
-
Seite 38: Système De Sécurité
Votre appareil mobile de chauffage est conçu pour être utilisé avec un combustible obligatoirement le de haute qualité, pur et sans eau (TOYOTOMI combustible). Seuls ces combustibles bouchon de transport. vous assurent une combustion propre et optimale. Un combustible de moins bonne Il faut donc bien le qualité... -
Seite 39: Installation De L'appareil
Pour connaître le combustible le mieux adapté, consultez votre revendeur (www. toyotomi.eu). manueL INSTALLATION DE L’APPAREIL 1 Retirez avec précaution votre appareil du carton et vérifiez-en le contenu. - Seite 40 REMPLISSAGE DU COMBUSTIBLE Remplissez votre réservoir amovible dans un lieu approprié (au cas où vous renverseriez du combustible). Procédez comme suit: 1 Assurez-vous que l’appareil est éteint. 2 Soulevez le couvercle , dégagez le réservoir amovible et retirez-le de l’appareil (fig.
- Seite 41 Avant d’allumer l’appareil, vérifiez toujours l’indicateur du combustible pour savoir si vous devez d’abord remplir le réservoir amovible. Allumez toujours l’appareil en vous servant de son allumage électrique . N’utilisez jamais d’allumettes ou de briquet. Procédez comme suit: 1 Tournez le bouton central à droite jusqu’à la butée (fig. L). En exerçant une petite pression, vous pourriez faire tourner le bouton central un peu plus;...
-
Seite 42: Extinction De L'appareil
EXTINCTION DE L’APPAREIL Appuyez sur le bouton d’extinction . La flamme s’eteindra après quelques instants (fig. N). PANNES: CAUSES ET REMÈDES Si vous n’arrivez pas à remédier à une panne à l’aide des instructions ci-dessous, vous devez contacter votre revendeur. L’ALLUMAGE NE MARCHE PAS. - Seite 43 L’APPAREIL BRULE TROP FORT. Vous utilisez un combustible inadapté, trop volatil. Voir LE COMBUSTIBLE APPROPRIÉ. (voir le “CE QUE VOUS DEVEZ SAVOIR AU PRÉALABLE”) La mèche est trop élevée. Consultez votre revendeur. À PROPOS DE L’ENTRETIEN Votre appareil exige peu d’entretien. Mais vous devez essuyer la poussière et les taches au moyen d’un chiffon sec.
- Seite 44 3 Nettoyez l’appareil à l’aide d’un chiffon sec. 4 Retirez les piles de l’appareil et conservez-les dans un endroit sec. Rangez l’appareil dans un lieu sans poussière, si possible en utilisant l’emballage d’origine. Vous ne pourrez pas conserver le combustible restant pour la saison suivante.
- Seite 45 CONDITIONS DE GARANTIE Votre appareil est couvert par une garantie de 4 ans à compter de la date d’achat. Durant cette période, tous les vices de fabrication ou de conception seront réparés gratuitement. De plus, les règles suivantes s’appliquent : 1 Nous rejetons expressément toute autre demande d’indemnisation, y compris en cas de préjudice indirect.
- Seite 46 Le cHangement de La mècHe AVANT DE COMMENCER A CHANGER LA MECHE, L’APAPREIL DOIT ETRE ETEINT ET TOTALEMENT REFROIDI. 1 Ouvrez la porte de réservoir et retirez le réservoir amov- ible. 2 Retirez les piles qui se trouvent dans leur logement a l’arrière de l’appareil .
- Seite 47 11 Prenez la mèche et positionner les crochets de maintien (ergots) dans les trous de l’anneau support de mèche. 12 Remettez l’ensemble (anneau de mèche et mèche) dans son logement. Tournez-le dans le sens des aiguilles d’une montre afin de bien le repositionner. 13 Remettez le support de brûleur en place.
-
Seite 49: Fiche Produit
FICHE PRODUIT (a) Le nom du fournisseur / Marque commerciale TOYOTOMI Europe Sales B.V. (b) Modèle RS-2222 (c) La classe d'efficacité énergétique (d) La puissance thermique directe 2.2kW (e) La puissance thermique indirecte (f) L'indice d'efficacité énergétique 95.0% (g) Le rendement utile 100% Merci de vous référer au manuel... - Seite 50 Toyotomi stemt haar producten af op de behoeften van haar klanten en blijft haar klanten tevreden stellen door het nastreven van haar bedrijfs- filosofie, “het delen van vreugde in het dagelijks leven”. We zullen blijven doorgaan met het onderzoeken, ontwikkelen en produceren van producten die overeenkomen met een levensstijl voor efficiëntie, veiligheid en comfort.
-
Seite 51: Het Gebruik In Hoofdlijnen
Brandstof veroudert. Begin elk stookseizoen met nieuwe brandstof. • Gebruik alleen een hoge kwaliteits- en watervrije, zuivere paraffine overeenkomstig de lokale wetgeving (TOYOTOMI brandstof). • Indien u overgaat op een ander merk en/of soort brandstof, moet u de in de kachel... - Seite 52 wat u Vooraf moet weten ALTIJD VOLDOENDE VENTILEREN Lees deze gebruikershandleiding aandachtig alvorens het toestel te gebruiken en be- waar het voor later. Installeer dit toestel enkel wanneer het voldoet aan de lokale/ nationale wetgeving, regelgeving en normen. Dit product is bedoeld om gebruikt te worden als een kachel in woningen en is alleen geschikt voor gebruik binnenshuis in woonkamers, keukens en garages op droge plaatsen, in normale huishoudelijke omstandigheden.
-
Seite 53: De Juiste Brandstof
DE JUISTE BRANDSTOF Uw kachel is ontworpen voor het gebruik van watervrije, zuivere kerosine van hoge kwaliteit (TOYOTOMI brandstof). Alleen deze zorgt voor een schone en optimale verbranding. Brandstof van mindere kwaliteit kan leiden tot: verhoogde kans op storingen ... - Seite 54 3 Vul de wisseltank zoals aangegeven in hoofdstuk B. 4 Plaats de batterijen in de daarvoor bestemde houder aan de achterzijde van de kachel (fig. F). Let op de + en - polen. Het best kunt u nieuwe alkaline batterijen gebruiken (4 x type C).
- Seite 55 HET AANMAKEN VAN DE KACHEL Een nieuwe kachel veroorzaakt in het begin extra geur. Zorg dus voor extra ventilatie of ontsteek uw kachel de eerste keer buiten de leefruimte. Als u de kachel voor de eerste keer gebruikt, moet u na het plaatsen van de gevulde wisseltank zo’n 30 minuten wachten met aanmaken.
- Seite 56 Een te lage verbranding kan ontstaan door: te weinig brandstof (vul de tank) slechte brandstof (raadpleeg uw dealer) te weinig ventilatie (zet een raam of deur op een kier) slijtage van de kous (raadpleeg uw dealer, of vervang de kous, zie hoofdstuk L) HET UITZETTEN VAN DE KACHEL U schakelt de kachel uit door de UIT-toets ...
- Seite 57 De kachel had voor het bijvullen vrijwel alle brandstof verbruikt. Na het plaatsen van de volle wisseltank 30 minuten wachten met ontsteken. U gebruikt oude of verkeerde brandstof. Zie DE JUISTE BRANDSTOF (hoofdstuk ”Wat u vooraf moet weten”). ...
- Seite 58 OPSLAG (EINDE STOOKSEIZOEN) Wij raden u aan de kachel aan het einde van het stookseizoen helemaal leeg te branden en daarna goed op te bergen. U gaat als volgt te werk: 1 Maak de kachel aan buiten de leefruimte en laat hem geheel leegbranden. 2 Laat de kachel afkoelen.
- Seite 59 DE GARANTIEVOORWAARDEN U krijgt op uw kachel 48 maanden garantie vanaf de aankoopdatum. Binnen deze periode worden alle materiaal- en fabricagefouten kosteloos verholpen. Hierbij gelden de volgende regels: 1 Alle verdere aanspraken op schadevergoeding, inclusief gevolgschade wijzen wij uitdrukkelijk af. 2 Reparatie of vervanging van onderdelen binnen de garantietermijn leidt niet tot verlenging van de garantie.
- Seite 60 Het VerVangen Van de kous VOORDAT U BEGINT MET HET VERVANGEN VAN DE KOUS, DIENT DE KACHEL UIT EN VOLLEDIG AFGEKOELD TE ZIJN. 1 Open het tankklepje en haal de wisseltank eruit. 2 Haal de batterijen uit de batterijhouder . 3 Licht de grille uit de inkeping en trek hem naar voren.
- Seite 61 11 Plaats de kous overeenkomstig de op de koushouder aangegeven richting in de koushouder. 12 Plaats de koushouder (met kous) over de luchtschacht. Draai dan de koushouder vast met de klok mee. 13 Plaats de branderzitting terug. 14 Draai de vleugelmoeren gelijkmatig handvast aan. 15 Plaats de draaiknop op het kousmechanisme.
-
Seite 63: Productkaart
PRODUCTKAART (a) De naam van de leverancier / handelsmerk TOYOTOMI Europe Sales B.V. (b) Model RS-2222 (c) De energie-efficiëntieklasse (d) De directe warmteafgifte 2.2kW (e) De indirecte warmteafgifte (f) De energie-efficiëntie-index 95.0% (g) Het nuttig rendement 100% Raadpleeg de gebruikshandleiding... -
Seite 64: Instrucciones De Uso
¡ Gracias por escoger un producto “TOYOTOMI”! Clientes satisfechos del mundo entero usan productos Toyotomi. A fin de garantizar el uso cómodo y seguro de nuestros productos por clientes de todos los países, nuestros productos satisfacen los estándares de seguridad no solo de Japón,sino de todos aquellos países en los que prestamos servicio. - Seite 65 • El combustible envejece. Comience cada otoño con nuevo combustible. • Utilice exclusivamente parafina pura, sin agua y de alta calidad, conforme a las normativas legales locales (COMBUSTIBLES TOYOTOMI). • En caso de que cambie de tipo de combustible / de marca de combustible, debe asegurarse primero de que la estufa ha consumido todo el combustible presente.
- Seite 66 lo QuE dEbE sabEr PrEViaMEntE VENTILAR SIEMPRE SUFICIENTEMENTE Lea detenidamente este manual de usuario antes de usar el aparato y consérvelo para poder consultarlo en el futuro. Instale este dispositivo únicamente si satisface los requisitos de la legislación, las ordenanzas y las normas locales y nacionales correspondientes.
- Seite 67 EL COMBUSTIBLE APROPIADO Su estufa está diseñada para quemar parafina líquida (combustible especial para estufas), de alta calidad y sin agua (COMBUSTIBLES TOYOTOMI). Solamente este combustible asegura una combustión limpia y completa: Un combustible de calidad inferior puede conducir a: ...
- Seite 68 LLENAR DE COMBUSTIBLE No llene nunca el depósito extraíble dentro del salón, hágalo en un lugar más apropiado (existe siempre el riesgo de que caigan gotas de combustible). Proceda como sigue: Asegúrese de que la estufa está apagada. Abra la tapa y extraiga el depósito extraíble de la estufa (fig. G). Ponga el depósito extraíble en el suelo (tapón hacia arriba) y desenrosque con el tapón (fig.
- Seite 69 E N C E N D E R L A E S T U F A Al principio, una estufa nueva despide siempre algún olor. Por consiguiente, asegúrese que haya ventilación suplementaria o encienda la estufa por primera vez fuera del cuarto. Si Usted utiliza la estufa por primera vez, después de haber colocado el depósito extraíble lleno de combustible, espere mínimo unos 30 minutos antes de encenderla.
- Seite 70 Las posibles causas de una llama demasiado baja son: escaso combustible (llene el depósito) combustible de mala calidad (consulte a su distribuidor) insuficiente ventilación (entreabra una puerta o ventana) desgaste de la mecha (consulte a su distribuidor o cambiar mecha, capítulo L) A P A G A R L A E S T U F A Pulse el botón de apagado A.
-
Seite 71: Las Pilas
LA ESTUFA SIGUE FUNCIONANDO CON LLAMA BAJA. La mecha está demasiado baja. Consulte a su distribuidor. Antes de rellenar el depósito la estufa había consumido casi todo el combustible. Después de colocar el depósito extraíble lleno, esperar 30 minutos para encender la estufa. - Seite 72 A L M A C E N A M I E N T O ( F I N D E L I N V I E R N O ) Llegado el fin del invierno, le recomendamos que antes de guardarla, deje que la estufa queme todo el combustible existente en el depósito. Para este fin, siga las instrucciones siguientes: Encienda la estufa fuera del espacio habitable y deje que todo el combustible...
- Seite 73 E S P E C I F I C A C I O N E S T É C N I C A S Encendido eléctrico Dimensiones (mm) ancho Combustible parafina profundo (placa de base incl.) Capacidad (kW) * 2,20 alto ) ** Volumen apropiado del espacio (m...
- Seite 74 caMbiar la MEcHa ANTES DE COMENZAR A CAMBIAR LA MECHA, LA ESTUFA TIENE QUE ESTAR APAGADA Y COMPLETA - MENTE FRíA. 1 Abra la tapa del depósito extraíble y sáquelo. 2 Quite las pilas . 3 Abra la rejilla, levantándola ligeramente y tirando de ella hacia delante.
- Seite 75 11 Ponga la nueva mecha en el collar según la indicación grabada en este último. 12 Instale el soporte de mecha (con la mecha dentro) en el tubo de aire primario. Entonces, gire el soporte de me- cha en el sentido a las agujas del reloj y ajuste los pivotes del mismo en los encajes del mecanismo de la mecha hasta que quede bien sujeto.
-
Seite 77: Ficha De Producto
FICHA DE PRODUCTO (a) Nombre / Marca comercial del proveedor TOYOTOMI Europe Sales B.V. (b) Modelo RS-2222 (c) Clase de eficiencia energética (d) Potencia calorífica directa 2.2kW (e) Potencia calorífica indirecta (f) Índice de eficiencia energética 95.0% (g) Eficiencia energética útil... - Seite 78 Grazie per aver scelto un prodotto “TOYOTOMI”! I prodotti Toyotomi vengono usati da clienti soddisfatti in tutto il mondo. Per garantire un uso agevole e sicuro dei nostri prodotti da clienti di ogni paese, i nostri prodotti soddisfano le norme sulla sicurezza vigenti non solo in Giappone, ma anche in tutti gli altri paesi del mondo in cui operiamo.
-
Seite 79: Istruzioni D'uso
• Usare solo combustibile liquido per stufe portatili di alta qualità e senza acqua, in conformità con le direttive locali (TOYOTOMI combustibile). • Se si passa ad un’altra marca o tipo di combustibile, fare bruciare dapprima la stufa fino a che non vi è più traccia del vecchio combustibile. -
Seite 80: Osservazioni Generali
La stufa portatile è stata progettata per l’uso di un combustibile liquido per stufe trasporto si trova nella portatili di alta qualità, puro, senza acqua, che assicura una combustione pulita ed scatola. Serve per ottimale (TOYOTOMI combustibile). Un combustibile di qualità inferiore può causare trasportare la stufa i seguenti problemi: senza problemi dopo ... -
Seite 81: Installazione Della Stufa
Non sono coperti dalla garanzia i danneggiamenti e/o difetti di funzionamento del- l’apparecchio causati dall’utilizzo di un combustibile non idoneo. Consultare sempre il sito www.toyotomi.eu per la scelta del combustibile adatto alla stufa. manuale INSTALLAZIONE DELLA STUFA Estrarre con cautela la stufa dalla scatola e controllare il contenuto. - Seite 82 RIFORNIMENTO DEL COMBUSTIBILE Non riempire il serbatoio estraibile nello spazio abitativo, ma in un luogo più adatto (una parte di combustibile può sempre fuoriuscire). Compiere le seguenti operazioni: Assicurarsi che la stufa sia spenta. Aprire il coperchio ed estrarre il serbatoio dalla stufa (fig. G). Appoggiare il serbatoio (con il tappo in alto) e svitare il tappo (fig.
- Seite 83 Compiere le seguenti operazioni: Accendere la stufa girando la manopola B a destra (fig. L). Esercitando una leggera pressione il regolatore può essere girato ulteriormente; il regolatore torna da sé alla posizione originale. In questo modo la posizione dello stoppi- no è...
-
Seite 84: Guasti, Cause E Soluzioni
GUASTI, CAUSE E SOLUZIONI Se non si riesce a risolvere un guasto con l’aiuto delle indicazioni riportate qui di seguito, occorre rivolgersi direttamente al rivenditore della stufa. NON SI RIESCE AD ACCENDERE LA STUFA. Le batterie non sono installate correttamente nello scomparto. Controllare (fig. - Seite 85 LA MANUTENZIONE La stufa richiede una manutenzione minima. Tuttavia, occorre eliminare periodicamente polvere e sporco con un panno umido, perché potrebbero crearsi macchie difficili da eliminare. Normalmente sono solo 3 le parti che si consumano. 1. LE BATTERIE Le batterie possono essere sostituite. Controllare il suono della scarica di scintil- le.
- Seite 86 IMMAGAZZINAGGIO (FINE DELLA STAGIONE FREDDA) Alla fine della stagione fredda si consiglia di tenere accesa la stufa facendo in modo che si esaurisca tutto il combustibile in essa presente e poi di immagazzinarla in un luogo sicuro. A tale proposito compiere le seguenti operazioni: Accendere la stufa al di fuori dello spazio abitativo e lasciarla bruciare fino ad esaurimento del combustibile.
- Seite 87 Le condizioni sono le seguenti: La Toyotomi Europe Sales B.V. rifiuta esplicitamente tutti gli accordi relativi a rimborso dei danni, compreso il rimborso di danni sorti in seguito a guasti.
- Seite 88 sostituZione dello stoPPino PRIMA DI PROCEDERE ALLA SOSTITUZIONE DELLO S T O P P I N O , L A S T U FA D E V E E S S E R E S P E N TA E COMPLETAMENTE FREDDA.
- Seite 89 11 Reinserire lo stoppino nell’anello porta stoppino rispet- tando il giusto verso indicato sull’anello porta stoppino stesso. 12 Inserire l’anello porta stoppino (completo di stoppino) nel camino d’aspirazione. Girare l’anello porta stoppino in senso orario per fissarlo alla manopola. 13 Rimettere a posto il piano di combustione. 14 Avvitare gradualmente i galletti.
-
Seite 91: Scheda Prodotto
SCHEDA PRODOTTO (a) Nome / Marchio del fornitore TOYOTOMI Europe Sales B.V. (b) Modello RS-2222 (c) Classe di efficienza energetica (d) Potenza termica diretta 2.2kW (e) La potenza termica indiretta (f) Indice di efficienza energetica 95.0% (g) Efficienza utile 100%... - Seite 92 Obrigado por escolher um produto “TOYOTOMI”! Os produtos Toyotomi são usados por clientes satisfeitos em todo o mundo. De forma a garantir o uso seguro e confortável dos nossos produtos por parte dos clientes, estes estão em conformidade com as normas de segurança, não só do Japão, mas também de todos os países do mundo onde estamos representados.
- Seite 93 Use um combustível novo no início de cada estação. • Utilize apenas parafina pura de alta qualidade e de acordo com a legislação em vigor (TOYOTOMI combustível). • Antes de mudar de marca e/ou tipo de combustível certifique-se de que esvazia...
- Seite 94 O seu aquecedor foi projetado para a queima de parafina líquida (combustível transporte é embalado especial para aquecedores), de alta qualidade e livre de água (TOYOTOMI combu- separadamente na caixa. stível). Apenas este tipo de combustível garante uma combustão limpa e completa.
- Seite 95 água e de alta qua- lidade. Consulte sempre o seu distribuidor sobre qual o combustível a usar para o seu aquecedor (www.toyotomi.eu). MANUAL INSTALAÇÃO DO AQUECEDOR 1 Retire com cuidado o seu aquecedor da caixa e verifique o conteúdo. Além do aquecedor deve ter: ...
-
Seite 96: Abastecimento De Combustível
ABASTECIMENTO DE COMBUSTÍVEL Nunca encha o depósito removível na sala de estar, faça-o num espaço mais apropriado (existe sempre o risco de derrame de combustível). Siga o procedimento abaixo descrito: 1 Certifique-se de que o aquecedor está desligado. 2 Abra a tampa e retire o depósito do aquecedor (Fig. G). Coloque o tanque removível (tampa para cima) e desenrosque a tampa do combustível. - Seite 97 Siga o procedimento abaixo: 1 Rodar o botão giratório para a direita até parar (Fig. L). Se quiser aplicar mais pressão pode rodar um pouco mais, no entanto, o botão voltará à posição inicial. Se colocar o pavio na sua posição mais alta, irá ativar automaticamente o dispositivo de segurança.
- Seite 98 O AQUECEDOR NÃO LIGA. As baterias não estão posicionadas, corretamente, no suporte. Verificar (Fig. F). As pilhas não têm energia suficiente para a ignição. Substituir as pilhas. (Fig. F). O aquecedor consumiu o combustível todo ou a mecha foi substituída. Depois de reabastecer e colocar o depósito removível, esperar 30 minutos para acender o aquecedor.
- Seite 99 1. PILHAS A substituição das pilhas pode ser feita por si. Verifique o som da faísca de acendimento e se for seco as pilhas estão a ficar com carga baixa e dever proceder à sua substituição Se depois de substituir as pilhas o som se mantiver verifique a vela de ignição segundo o procedimento 3.
- Seite 100 3 Coloque a tampa de transporte na posição do filtro de combustível (Fig. Q) e pressione firmemente. Coloque novamente o depósito removível no lugar. 4 Mover sempre o aquecedor na posição vertical. ESPECIFICAÇÕES TÉCNICAS Ignição eléctrico Dimensões (mm) largura Combustível parafina (placa de base incl.) profundo Capacidade (kW)* 2,20...
- Seite 101 SUBSTITUIÇÃO DA MECHA Antes de substituir a mecha, Assegure-se que o aquecedor está desligado e completamente frio. Abra a tampa e retire o depósito removível. 2 Remova as pilhas do suporte . 3 Abra a grelha frontal. Retire a câmara de combustão do aquecedor.
- Seite 102 11 Coloque a mecha no colar de acordo com a gravura gra- vada no mesmo. 12 Coloque o suporte da mecha (com a mecha no interior) dentro do tubo de ar primário. De seguida, rode o suporte da mecha no sentido dos ponteiros do relógio e ajuste os pinos do mesmo nos encaixes do mecanismo, de forma a que fique bem seguro.
-
Seite 103: Ficha De Produto
FICHA DE PRODUTO (a) Nome do fornecedor/ marca comercial TOYOTOMI Europe Sales B.V. (b) Modelo RS-2222 (c) Classe de eficiência energética (d) Saída direta de calor 2.2kW (e) Saída indireta de calor (f) Índice de eficiência energética 95.0% (g) Eficiência energética útil 100% Para montagem, instalação ou... - Seite 104 Vi håber, at du i mange år vil nyde godt af dit Toyotomi produkt. Inden du tager din nye Transportable ovn i brug, beder vi dig læse brugsanvisningen omhyggeligt, således du kan være sikker på...
- Seite 105 • Brændstof kan blive forældet: Start hver fyringssæson med nyt brændstof. • Brug kun vandfri paraffin af høj kvalitet, som imødekommer lokale love (TOYOTOMI brændstof). • Før du skifter brændstofmærke og/eller brændstoftype, skal du sørge for at tømme den flytbare kamin helt for brændstof.
- Seite 106 DET RIGTIGE bRÆNDSTOF Deres kamin er fremstillet til at anvende vandfrit, rent petroleum af god kvalitet (TOYOTOMI brændstof). Kun med dette, fås en ren og optimal forbrænding. Denne transportprop Brændstof af ringere kvalitet kan medføre: findes løst i kassen. Kun ...
- Seite 107 Skader på kaminen og/eller funktionsfejl som følge brug af andet end anvendelse af vandfrit, rent petroleum af god kvalitet dækkes ikke af garantien. Spørg altid den nærmeste forhandler om den rigtige type brændstof til Deres ovn (www.toyotomi.eu). VEJLEDNING INSTALLATION AF OVNEN Tag forsigtigt Deres Kamin ud af kassen og kontroller indholdet.
-
Seite 108: Påfyldning Af Brændstof
pÅFYLDNING AF bRÆNDSTOF Påfyld brændstof på skiftetanken et passende sted, da der altid er risiko for at spilde. Følg proceduren nedenfor: Sørg for, at ovnen er slukket. Åbn dækslet og løft skiftetanken H ud af ovnen (fig. G). Sæt skiftetanken ned på jorden (med proppen opad) og skru tankproppen af (fig. - Seite 109 Sådan gør De: 1 Drej drejeknappen til højre indtil den ikke kan komme længere (fig. L). Med et let tryk kan man dreje drejeknappen lidt længere frem, men den fejdrer tilbage af sig selv. Hvis du har tændt for varmeapparatet, og det slår fra igen kort efter, skal batterierne udskiftes.
- Seite 110 DEN KAN IKKE TÆNDES. Batterierne ligger ikke rigtigt i holderen. Kontroller dem (fig. F). Batterierne er ikke længere kraftige nok til tændingen. Udskift dem (fig. F). De har ladet ovnen brænde helt tom eller vægen er udskiftet. Vent 30 minutter efter den fyldte skiftetank er blevet anbragt, før ovnen tændes.
- Seite 111 OM VEDLIGEHOLDELSEN Deres kræver ganske lidt vedligeholdelse, husk ovnen skal være kold. Støv og pletter skal dog tørres af med en fugtig klud snarest muligt, da der ellers kan komme pletter, der er vanskelige at fjerne. Normalt er det kun 3 dele, der udsættes for slitage: 1.
-
Seite 112: Transport
TRANSpORT For at forhindre, at ovnen lækker under transport, skal der tages følgende forholdsregler: Lad ovnen køle af. Fjern skiftetanken fra ovnen og fjern brændstoffiltret (fig. P). Det kan dryppe lidt fra dette. Hav en klud klar. Opbevar ikke brændstoffiltret og skiftetanken i ovnen. - Seite 113 GARANTIbETINGELSERNE På Deres kamin får De 48 måneders garanti regnet fra købsdatoen. I denne periode afhjælpes alle materiale- og fremstillingsfejl gratis. Derfor gælder følgende regler: Alle yderligere krav på skadesgodtgørelse, inklusive efterfølgende skade afvises udtrykkeligt. Reparation og udskiftning af dele i garantiperioden medfører ikke forlængelse af garantien.
- Seite 114 UDSKIFTNING AF VÆGEN I N D E N D u p Å b E G Y N D E R u D S K I F T N I N G E N A F V Æ G E N , S K A L K A M I N E N V Æ R E S L u K K E T O G H E L T A F K Ø...
- Seite 115 11 Sæt vægen i vægeholderen, sørg for at den vender den vej der er angivet i vægeholderen. 12 Anbring vægeholderen på det primære luftrør. Drej derefter vægeholderen med uret så håndtaget går i indgreb. 13 Sæt brænderholderen tilbage. 14 Spænd vingeskruerne fast. 15 Anbring drejeknappen på...
-
Seite 117: Vigtige Dele
DATABLAD (a) Leverandørens navn / varemærke TOYOTOMI Europe Sales B.V. (b) Model RS-2222 (c) Energieffektivitetsklasse (d) Den direkte varmeydelse 2.2kW (e) Den indirekte varmeydelse (f) Energieffektivitetsindekset 95.0% (g) Virkningsgrad 100% For montage-, installations- eller ved- (h) Eventuelle specifikke forholdsregler ligeholdelsesinstruktioner henvises til betjeningsvejledning. - Seite 118 Caso necessite de mais informações ou se ocorrerem problemas específicos que não constem neste manual de instruções, por favor, visite nosso website www .toyotomi .eu ou entre em contato com o nosso Suporte de Vendas (encontrará o número de telefone em www .toyotomi .eu) .