Werbung
Quicklinks
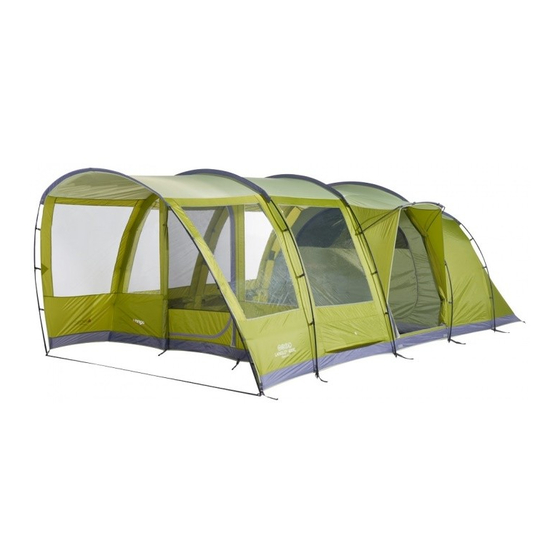
TENT PITCHING INSTRUCTIONS – LANGLEY 400/500/600 (UK)
FLYSHEET FIRST PITCHING:
•
Open out flysheet and position in required direction
•
Insert all poles through the pole sleeves on outside of fly sheet
•
Poles are colour coded to match corresponding pole sleeve entry points
•
Locate one end of each pole at one side of the tent into the metal pin system attached to the
groundsheet
•
Make sure poles locate into correct pin system, all poles follow corresponding flysheet seams to pin
system
•
Push poles into an arch from opposite ends and locate pole ends into corresponding metal pin
•
Tighten all the tensions straps at the base of the poles.
•
Securely peg out the rear corners of the tent
•
Pull the tent until the groundsheet is taut and peg out the main corners at the other end of the tent
•
Ensure the tent is in a straight line
•
The groundsheet should be flat and wrinkle free
•
Peg out the remaining poles and pegging points using pin pegs at the base of poles
•
Attach all flysheet pole clips onto poles
•
Peg out ALL guy lines using pin-pegs ensuring that guy line fabric attachment points are evenly tensioned.
PRE-ATTACHED FRONT EXTENSION:
• To erect the pre-attached canopy, insert the pole into the sleeve, connect to Ring and Pin system, tighten the tension straps and attach pole clips to pole.
• Pull canopy away from tent until roof of canopy is taut
• Pull porch taut, away from main body of tent and peg down the corners of the porch through the shock-cord pegging points using pin-pegs
• To roll away the pre-attached canopy, roll it away along the top until the guylines and webbing are rolled away neatly, flip the already rolled section to the
underside of the canopy and continue rolling
• Secure with the toggles provided
INNER ATTACHMENT:
• Open out inner tent inside flysheet and position doorways to correspond with the living area
• Suspend the inner by attaching toggles of inner tent through rings on inside of flysheet
• The inner attachments are colour coded to match the clips on the roof of the flysheet
• Do the rear first and work forward
• It is advisable to remove the inner when taking down the tent when wet.
TENSION BAND SYSTEM:
• Remove Tension Band System from pockets and attach into the corresponding clips at the apex of the pole
• Adjust the straps until they are taut
• DO NOT OVERTENSION. Excess tension will alter the shape of the tent
• Tension bands are designed to stabilise the tunnel structure of the tent
• The bands are not required to be used in calm weather
RING & PIN SYSTEM:
• Locate one end of pole onto the corresponding metal pin (figure 1)
• Peg the corners of the tent through the metal rings using pin-pegs (figure 2)
• Pegs should be positioned at a 45 degree angle to ensure maximum grip
........................................................................................................................................................................................................................................
TENT PITCHING INSTRUCTIONS – LANGLEY 400/500/600 (DE)
MIT AUßENZELTAUFBAU ZUERST:
• Außenzelt auslegen und korrekt ausrichten.
• Stecken Sie alle Stangen durch die Gestängekanäle an der Außenseite des Außenzelts ein.
• Die Stangen sind farbcodiert und farblich auf die zugehörigen Gestängekanaleingangspunkte abgestimmt.
• Befestigen Sie ein Ende jeder Stange auf einer Seite des Zelts in dem an der Bodenplane befestigte Metallstiftsystem.
• Achten Sie darauf, dass die Stangen in das korrekte Stift-System eingesteckt werden; alle Stangen verlaufen an den zugehörigen Außenzeltnähten entlang
zum Stift-System.
• Schieben Sie die Stangen von den gegenüberliegenden Seiten in eine gewölbte Form und stecken Sie die Stangenenden in die zugehörigen Metallstifte ein.
• Alle Spanngurte unten an den Stangen fest anziehen.
• Stecken Sie die hinteren Ecken des Zelts fest aus.
• Zelt ziehen, bis die Bodenplane straff ist, und die Hauptecken auf der anderen Seite des Zelts mit Heringen feststecken.
• Achten Sie darauf, dass sich das Zelt in einer geraden Linie ausgerichtet befindet.
• Die Bodenplane sollte glatt und knitterfrei sein.
• Übrige Stangen und Verankerungspunkte mithilfe der Stiftheringe unten an den Stangen fixieren.
• Befestigen Sie alle Außenzelt-Halterungsklemmen an den Stangen.
• ALLE Abspannleinen mit Stiftheringen fixieren, wobei darauf zu achten ist, dass die Befestigungspunkte der Abspannleinen an der Plane gleichmäßig
festgezogen sind.
VORBEFESTIGTES VORZELT:
• Um das vorbefestigte Vordach aufzustellen, setzen Sie die Stange in die Hülle ein, verbinden Sie sie mit dem Ring-und-Stift-System, straffen Sie die
Spannungsbänder und befestigen Sie die Stangenclips an der Stange.
• Ziehen Sie das Vordach vom Zelt weg bis das Dach des Vordachs gespannt ist
• Ziehen Sie den Vorbau straff und vom Hauptzelt weg und fixieren Sie die Ecken des Vorbaus durch die mit Gummizug ausgestatteten Befestigungspunkte mit
Stiftheringen.
• Um das vorbefestigte Vordach einzurollen, rollen Sie es entlang des Daches ein, bis die Spannschnüre und Verschlussbänder ordentlich eingerollt sind, drehen
Sie den schon eingerollten Teil auf die Unterseite des Vordachs und rollen Sie weiter ein
• Mit den enthaltenen Schnüren befestigen
INNENBEFESTIGUNG:
• Legen Sie die Innenzelte im Außenzelt aus und richten Sie die Eingänge so aus, dass sie in den Wohnbereich führen.
• Die Aufhängung des Innenzelts erfolgt, indem die Knebel des Innenzelts durch die auf der Innenseite des Außenzelts befindlichen Ringe gesteckt werden.
• Die Innenhalterungen sind farbcodiert und farblich auf die auf dem Dach des Außenzelts befindlichen Klemmen abgestimmt.
• Beginnen Sie hinten und arbeiten Sie sich nach vorn.
• Es ist ratsam, das Innenzelt zu lösen, wenn Sie das Zelt bei Nässe abbauen.
SPANNGURTVORRICHTUNG:
• Entnehmen Sie die Spanngurtvorrichtung aus den Taschen und befestigen Sie sie an den zugehörigen Halterungsklemmen an der Stangenspitze.
• Ziehen Sie die Gurte solange fest, bis sie straff gespannt sind.
• NICHT ZU STARK FESTZIEHEN. Zu starke Spannung bewirkt eine Verformung des Zelts.
• Die Spanngurte sollen die Tunnelstruktur des Zelts stabilisieren.
• Bei ruhigem Wetter ist eine Verwendung der Gurte nicht erforderlich.
RING-UND-STIFT-SYSTEM:
• Fixieren Sie ein Ende der Vorbaustange am dazu passenden Metallstift
• Stecken Sie die Ecken des Zelts durch die Metallringe, indem Sie die Arretierstifte benutzen.
• Die Heringe sollten in einem Winkel von 45 Grad platziert werden, um maximalen Halt zu erzielen.
........................................................................................................................................................................................................................................
Werbung

Verwandte Anleitungen für Vango LANGLEY 400


Inhaltszusammenfassung für Vango LANGLEY 400
- Seite 1 TENT PITCHING INSTRUCTIONS – LANGLEY 400/500/600 (UK) FLYSHEET FIRST PITCHING: • Open out flysheet and position in required direction • Insert all poles through the pole sleeves on outside of fly sheet • Poles are colour coded to match corresponding pole sleeve entry points •...
- Seite 2 TENT PITCHING INSTRUCTIONS – LANGLEY 400/500/600 (IT) PRIMO MONTAGGIO DEL TELO ESTERNO: • Aprire il telo esterno e posizionarlo nella direzione richiesta • Inserire tutti i paletti dentro i manicotti presenti sull'esterno del telo esterno • I paletti sono codificati a seconda del colore in modo da far combaciare i corrispondenti punti d'entrata dei manicotti del paletto •...
- Seite 3 TENT PITCHING INSTRUCTIONS – LANGLEY 400/500/600 (FR) MONTAGE EN COMMENÇANT PAR LE DOUBLE TOIT: • Déferler le double toit et orienter dans le sens requis • Passer tous les mâts par les manches à l'extérieur du double toit • Les mâts et les entrées de manche qui leur correspondent sont codifiés par couleurs •...