Canon imageRUNNER ADVANCE DX C3835i Faq
Vorschau ausblenden
Andere Handbücher für imageRUNNER ADVANCE DX C3835i:
- Anwenderhandbuch (2313 Seiten)

Verwandte Anleitungen für Canon imageRUNNER ADVANCE DX C3835i


Inhaltszusammenfassung für Canon imageRUNNER ADVANCE DX C3835i
- Seite 1 Questo manuale d’istruzione è fornito da trovaprezzi.it. Scopri tutte le offerte per Canon imageRUNNER ADVANCE DX C3822i o cerca il tuo prodotto tra le migliori offerte di Stampanti FAQ Guide...
- Seite 3 P.42 After you finish reading this guide, store it in a safe place for future reference. The information in this document is subject to change without notice. English User's Guide/FAQ Français Deutsch https://oip.manual.canon/ Italiano Español What is Your Question?
- Seite 4 Contents What's Your Problem? The Machine Does Not If Paper Jams Occur P.22 Operate Check the Following First ....6 Paper Jams Occur ......22 The Machine Does Not Respond to the Paper Jams Occur Frequently .
- Seite 5 Printing Results Are P.17 Canceling Copy/Print Jobs Not Satisfactory Installing the Printer Driver Replacement Parts An Error Screen is Displayed Illustrated Index Appendix Do You Want to Know More? Images Are Shifted/Slanted ....17 Irregularities Appear in Images/ You Can Consult the User's Guide! .
- Seite 6 The Machine Does Not Operate Check the Following First Check Check Is a message displayed on the touch Is the main power indicator Off? panel display? If the main power indicator does not light when you turn the main power ON, check the power plug.
- Seite 7 The Machine Does Not Respond to the Computer Solution Solution Restart the machine. Set the IP address again. Setting an IP Address Press the main power switch to turn off the machine. User's Guide 0YAS-00K Search CAUTION! Note that turning OFF the machine deletes the data that is waiting to be printed.
-
Seite 8: Loading Paper In The Paper Drawer
How to Load Paper Loading Paper in the Paper Drawer In the following, the operations that are common Place the paper drawer back into the machine. to paper drawers 1 and 2 are described by taking CAUTION! drawer 2 as example. Be careful not to get your fingers caught between the paper drawer and the machine. - Seite 9 For available paper, see the following. AVPP-TBM Search Available Paper P.47 How to use the search number When You Have Loaded a Different Type of Paper than the Preset One Select the Press paper type. Press [Preferences] [Paper Settings] [Paper Settings].
-
Seite 10: Loading Paper In The Multi-Purpose Tray
How to Load Paper Loading Paper in the Multi- Purpose Tray Adjust the paper guides to match the size of CAUTION! the loaded paper. When using coated paper or paper that does not feed well, load one sheet at a time. Align the paper guides to the paper size markings. - Seite 11 For available paper, see the following. AVPP-TBM Search Available Paper P.47 How to use the search number Press [Change] in [Paper Type]. Select the paper type. Press When you have loaded custom size paper Specify the paper size manually. Specifying Paper Size and Type in the User's Guide Multi-purpose Tray 0YAS-02F...
- Seite 12 How to Load Paper Loading Paper with Printed Logos Refer to the table below to load paper with printed logos. Example: When printing on A4 size paper Orientation Printing result Paper Drawer 1/Paper Drawer 2 Multi-Purpose Tray * Paper drawer 2 is taken as example. Logo t d .
-
Seite 13: Loading Envelopes
For available paper, see the following. AVPP-TBM Search Available Paper P.47 How to use the search number Loading Envelopes CAUTION! • You can load envelopes in the paper drawer or multi-purpose tray. • Do not use envelopes that have glue attached to their flaps, as the glue may melt due to the heat and pressure of the fixing unit. -
Seite 14: When Loading Envelopes In The Multipurpose Tray
How to Load Paper Preparation before Loading Envelopes When loading envelopes in the multi- purpose tray Check the orientation of the stack of envelopes, Take five or so pieces of envelopes, fan them well and load it in the multi-purpose tray. to eliminate curls, and level the stack flat. - Seite 15 For available paper, see the following. AVPP-TBM Search Available Paper P.47 How to use the search number When loading envelopes in the paper Load the envelopes. drawer In the following, the operations are described by taking drawer 2 as example. The front side Attach the Envelope Feeder Attachment to the of the envelopes...
- Seite 16 For available paper, see the following. AVPP-TBM Search Available Paper P.47 How to use the search number 1. Select the paper source. 2. Press 3. Select the envelope type. 4. Press...
-
Seite 17: Irregularities Appear In Images/Images Are Faint
Printing Results Are Not Satisfactory Irregularities Appear in Images Are Shifted/Slanted Images/Images Are Faint Solution Solution Adjust the paper guides. The paper may have absorbed moisture. Replace it with paper that has not absorbed moisture. Solution Perform gradation adjustment. Adjust the guide exactly. Press Multi-purpose tray Press [Adjustment/Maintenance] [Adjust Image... -
Seite 18: Black Streaks Appear In Images
Printing Results Are Not Satisfactory Black Streaks Appear in Images Open the inner cover. Solution Is the document feed scanning area dirty? If the Single Pass DADF-C is attached: Turn OFF the machine, and unplug the power plug from the AC power outlet. Open the feeder, and clean the lower side document feed scanning area (a) and feeder white plate (b) using the supplied glass-cleaning... - Seite 19 If the DADF-BA is attached: Open the feeder, and clean the lower side document feed scanning area using the supplied glass-cleaning sheet. N O T E Do not use glass cleaner or an alcohol solution, etc., as they will strip away the stain-proof coating.
-
Seite 20: White Streaks/Color Streaks Appear In Images
Printing Results Are Not Satisfactory White Streaks/Color Streaks Appear in Images Insert the cleaning stick into the hole with the Solution pad on its tip facing down. Cleaning the dust-proof glass. Turn the power OFF, and remove the power plug from the power outlet. - Seite 21 Bleed-through Occurs Solution Set the type of original properly. If bleed-through is observed in the copy result, a button on the Home screen may be able to help Press you reduce the bleed-through. Press [Copy (Prevent Bleed-Thru)] on the Home screen.
- Seite 22 If Paper Jams Occur Paper Jams Occur If paper jams occur, a screen like the following appears on the touch panel display. Follow the instructions in the screen to remove the jammed paper. Remedy Paper jam locations Use these buttons and bar to operate the video. P O I N T The screen disappears once all the jammed paper is removed and all the machine’s covers and drawers are closed correctly.
- Seite 23 Paper Jams Occur Frequently Solution Solution Adjust the paper guides. Check the paper type setting. Press Press Adjust the guide exactly. Multi-purpose tray If the paper type setting does not match the loaded paper, change the setting. • For paper drawer P.10 •...
- Seite 24 Loading Paper or Paper Settings Cannot Be Done Successfully Paper Is Not Fed • Solution Remove the excess amount of paper. Make sure that the paper stack does not Open the paper source to check whether exceed the load limit line ( paper has been loaded properly.
- Seite 25 If the "Load paper." Message Is Displayed Solution Solution Replenish paper. Check the paper type setting. Press Press If the paper source is vacant, replenish paper. If the paper type setting does not match the Solution loaded paper, change the setting. Adjust the paper guides.
- Seite 26 Loading Paper or Paper Settings Cannot Be Done Successfully Printing Cannot Be Performed Printing Cannot Be Performed on the Expected Side of Paper with the Expected Size Solution Solution Load paper in the correct orientation Make sure that the paper size setting and with the correct side face up/ matches the size of the loaded paper.
- Seite 27 In Two-Sided Printing, the Print Direction Differs between the Front and Back Sides of the Paper Solution Make settings for two-sided printing. In the application's print setting screen, select the print direction. In the [Printing Preferences] screen of the driver, set [Orientation] for the direction selected in step 1.
- Seite 28 Scan/Fax Cannot Be Performed Successfully If You Cannot Send Documents Stopping Scanning/Faxing to a Server Using [Scan and Send] To stop the paper feed Solution Check the server information. If you have updated something including the login password for the server (computer), change the information registered to the address book/one- touch buttons.
- Seite 29 Scanned Documents Cannot Be E-Mailed Solution Solution Check the information of the If e-mailing of documents is not possible at all, make correct destination. communication settings for the SMTP/ If any update has been done, change the DNS server. For the setting procedures, information registered to the address book/one- see the User's Guide.
- Seite 30 Scan/Fax Cannot Be Performed Successfully If You Cannot Send/Forward Faxes If no faxes can be sent If you cannot forward faxes Check if the telephone line is not connected to a Check the information of the forwarding wrong location. destination registered to the address book/one- touch buttons.
- Seite 31 If You Cannot Receive Faxes If you are using an optical line or IP Solution telephone line Delete unnecessary documents in the Communication errors may occur depending on memory to increase the free space. the line quality. For more information, contact your telephone carrier.
-
Seite 32: Canceling A Print Job
Canceling Copy/Print Jobs Canceling a Copy Job Canceling a Print Job To stop the paper feed For Windows OS In the computer screen, double-click the printer icon. Press Select the file you want to cancel. P O I N T You can also stop the paper feed by pressing Click To cancel a copy job waiting to be output... -
Seite 33: Installing The Printer Driver
For details of printer driver installation, see the Driver Installation Guide. The Guide can be downloaded from, or viewed on, the same page of the Canon website as for the printer driver. Latest OS support information See the Canon website (https://global. -
Seite 34: Replacement Parts
2 may appear first. Prepare the consumable. Check the item number.* * This is an item number identifying a Canon genuine consumables. For high quality printouts, we recommend that you use Canon genuine consumables. N O T E P.35... -
Seite 35: List Of Consumables
30°C and humidity is not higher than 80%. Be careful of counterfeit toners Please be aware that there are counterfeit Canon toners in the marketplace. Use of counterfeit toner may result in poor print quality or machine performance. Canon is not responsible for any malfunction, accident or damage caused by the use of counterfeit toner. -
Seite 36: An Error Screen Is Displayed
An Error Screen is Displayed If the "Contact your service An Error Message Is Displayed representative" Message Is Displayed If an error occurs during scanning or printing or When the machine ceases to operate normally if a problem occurs with network connection or due to a trouble, a message appears, asking you setting, a message is displayed on the touch panel to contact the service representative. - Seite 37 The machine enters the limited functions mode. When the problem is resolved, the [Call service representative.] message disappears in the screen at the bottom left. A Message Saying to Contact a Local Authorized Canon Dealer Is Displayed User's Guide 0YAS-0K0 Search P.47...
-
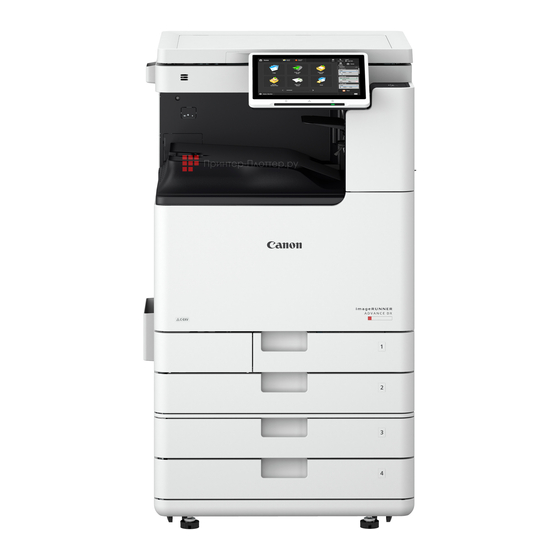
Seite 38: Main Unit
Illustrated Index You can easily identify the name of a part and find the page where that part is described. * The illustrations assume that the machine is equipped with a Cassette Feeding Unit-AW Main Unit Cassette Feeding Unit-AW P. 8 Paper size label Attach the paper size label so that it aligns with the cassette number... - Seite 39 Power switch P.10 Multi-purpose tray Tray extension Paper guides Paper drawer 1 P. 8 Paper guides P.15 Paper drawer 2 P. 8 Paper guides P.15 Envelope Feeder Attachment A P.15...
-
Seite 40: Control Panel
Illustrated Index Control Panel Home screen Onscreen number keypad Touch panel display [Energy Saver] Displays the settings screen and messages. Press to put the machine into sleep mode. Touch the panel to perform setting and other operations. [Log in]/[Log out] Press this to log in/out (when a login service [Settings/Registration] has been set). - Seite 41 [Timeline] Processing/Data indicator Displays a log for settings specified in Copy/ • Flashes when the machine is operating. Scan and Send. • Lights when the machine is waiting for a command. [Counter/Device Information] [Status Monitor] P.23 Press to display the copy and print count totals Press to check the status of a job or cancel a on the touch panel display.
-
Seite 42: Important Safety Instructions
Do not perform any operations not described in reactions occur Do not use near medical equipment. Radio • this manual. Canon will not be responsible for any • A location exposed to corrosive or toxic gases waves emitted from this machine may... - Seite 43 IMPORTANT Laser Safety Caution damage the platen glass and result in personal injury. When connecting power Close the feeder or the platen cover gently to • • Do not connect the power cord to an avoid catching your hands, as this may result uninterruptible power source.
- Seite 44 If affixed depending on the product. your skin still feels irritated after washing it or English (EN) Hereby, Canon Inc. declares that Maintenance and Inspections you ingest toner, consult a physician this equipment is in compliance with Directive immediately.
- Seite 45 Internet: http://www.canon-europe.com/ 14.08dBm Banda/e di frequenza: 2412-2472 MHz ce-documentation Irish (GA) Dearbhaíonn Canon Inc., leis seo, go Potenza massima a radiofrequenza: 14.08dBm Especificações de LAN Sem Fios bhfuil an trealamh seo i gcomhlíonadh leis an Banda(s) de frequências: 2412-2472 MHz Latvian(LV) Canon Inc.
-
Seite 46: Third Party Software
Appendix About This Manual Third Party Software Icelandic (IS) Hér með lýsir Canon Inc því yfir að þessi búnaður er í samræmi við tilskipun 2014/53/ESB. Screens This Canon product (the “PRODUCT”) includes Allur texti ESB-samræmisyfirlýsingar er í boði á Screens of the touch panel display used in this third-party software modules. - Seite 47 Do You Want to Know More? You Can Consult the User's Guide! If you notice a search number in a topic in this guide you are reading... Setting the network environment User's Guide You can search ABCD-123 Search through the User's Guide by the search number! P.47 How to use the search number...
- Seite 48 Memo...
-
Seite 49: Foire Aux Questions
Après que vous avez lu ce guide, conservez-le dans un endroit sûr afin de vous y reporter ultérieurement. Les informations dans ce document sont soumises à modification sans préavis. English Guide de l'utilisateur/FAQ Français Deutsch https://oip.manual.canon/ Italiano Español Quelle est votre question ? - Seite 50 Sommaire Quel est votre problème ? L'appareil ne fonctionne Si des bourrages papier P.52 P.68 surviennent Vérifiez d'abord les points suivants ..52 Des bourrages papier surviennent ... . . 68 L'appareil ne répond pas à...
- Seite 51 Les résultats de P.63 Annulation de tâches de copie ou l'impression ne sont d'impression pas satisfaisants Installation du pilote d'imprimante Pièces de rechange Un message d'erreur s'affiche Index illustré Annexe Les images sont décalées ou inclinées ..63 Vous souhaitez en savoir plus ? Des irrégularités apparaissent sur les images/ Les images sont pâles .
- Seite 52 L'appareil ne fonctionne pas Vérifiez d'abord les points suivants Vérification Vérification Un message est-il visible sur l'afficheur Le témoin d'alimentation est-il éteint ? tactile ? Si le témoin d'alimentation ne s'allume pas lorsque vous mettez l'appareil en marche, vérifiez la fiche d'alimentation. Témoin de l'alimentation principale I(MARCHE) Message simple...
- Seite 53 L'appareil ne répond pas à l'ordinateur Solution Solution Redémarrez l'appareil. Définissez de nouveau l'adresse IP. Configuration d'une adresse IP Actionnez l'interrupteur principal pour arrêter l'appareil. Guide de l'utilisateur 0YAS-00K Recherche ATTENTION ! L'arrêt de l'appareil a pour effet de supprimer les données en attente d'impression. Comment utiliser le numéro de recherche P.92 L'écran d'authentification (Ecran...
- Seite 54 Comment charger du papier Chargement de papier dans la cassette Dans ce qui suit, les opérations qui sont communes Replacez la cassette papier dans l'appareil. aux cassettes 1 et 2 sont décrites en prenant la ATTENTION ! cassette 2 comme exemple. Faites attention de ne pas vous coincer les doigts entre la cassette papier et l'appareil.
- Seite 55 Pour les papiers compatibles, voir ce qui suit. AVPP-TBM Recherche Papier disponible P.92 Comment utiliser le numéro de recherche Si vous avez chargé un type de papier différent du papier prédéfini Sélectionnez le type de Appuyez papier. Appuyez sur [Préférences] [Réglages papier] [Réglages papier].
- Seite 56 Comment charger du papier Chargement du papier dans le plateau multifonctions Ajustez les guides papier au format du papier ATTENTION ! chargé. En cas d'utilisation de papier couché ou d'un papier posant des problèmes d'alimentation, chargez une feuille à la fois. Alignez les guides papier avec les repères de format de papier.
- Seite 57 Pour les papiers compatibles, voir ce qui suit. AVPP-TBM Recherche Papier disponible P.92 Comment utiliser le numéro de recherche Appuyez sur [Modifier] dans [Type de papier]. Sélectionnez le type de papier. Appuyez Si vous avez chargé du papier de format personnalisé Enregistrez le format du papier manuellement.
- Seite 58 Comment charger du papier Chargement de papier comportant des logos imprimés Reportez-vous au tableau ci-après pour charger du papier comportant des logos imprimés. Exemple : Pour imprimer sur du papier de format A4 Orientation Résultat d'impression Cassette 1/cassette 2 Plateau multifonctions *La cassette 2 est prise en exemple.
- Seite 59 Pour les papiers compatibles, voir ce qui suit. AVPP-TBM Recherche Papier disponible P.92 Comment utiliser le numéro de recherche Chargement des enveloppes ATTENTION ! • Vous pouvez charger des enveloppes dans la cassette papier ou le plateau multifonctions. • N'utilisez pas d'enveloppes qui ont de la colle sur leurs volets car la colle peut fondre en raison de la chaleur et de la pression de l'unité...
- Seite 60 Comment charger du papier Préparation avant le chargement des Si vous chargez des enveloppes dans le enveloppes plateau multifonctions Prenez environ 5 enveloppes, déramez-les bien Vérifiez l'orientation de la pile d'enveloppes et pour éliminer les enroulements et aplanissez la chargez-la dans le plateau multifonctions. pile.
- Seite 61 Pour les papiers compatibles, voir ce qui suit. AVPP-TBM Recherche Papier disponible P.92 Comment utiliser le numéro de recherche Si vous chargez des enveloppes dans la Chargez les enveloppes. cassette papier Dans ce qui suit, les opérations sont décrites en prenant la cassette 2 comme exemple.
- Seite 62 Pour les papiers compatibles, voir ce qui suit. AVPP-TBM Recherche Papier disponible P.92 Comment utiliser le numéro de recherche 1. Sélectionnez la source de papier. 2. Appuyez 3. Sélectionnez la type d'enveloppe. 4. Appuyez...
- Seite 63 Les résultats de l'impression ne sont pas satisfaisants Les images sont décalées ou Des irrégularités inclinées apparaissent sur les images/ Les images sont pâles Solution Solution Réglez les guides papier. Le papier a peut-être absorbé de l'humidité. Remplacez-le par du papier sec.
- Seite 64 Les résultats de l'impression ne sont pas satisfaisants Des traînées noires apparaissent dans les images Ouvrez le capot intérieur. Solution La zone de lecture est-elle sale ? Si le Lecteur Couleur RV 1 Passe-C est monté : Arrêtez l'appareil, puis débranchez la fiche d'alimentation de la prise de courant.
- Seite 65 Si le CRV-BA est monté : Ouvrez le chargeur, puis, au moyen de la lingette fournie, nettoyez la zone de lecture des documents chargés située en partie basse. REMARQUE N'utilisez pas de produit pour vitres ou de solution à base d'alcool, etc. Ces produits enlèvent le revêtement anti-taches.
- Seite 66 Les résultats de l'impression ne sont pas satisfaisants Des traînées blanches apparaissent dans les images Insérez le bâton de nettoyage dans la Solution perforation, le tampon à son extrémité vers le bas. Nettoyage de la vitre anti-poussière. ETEIGNEZ l'alimentation et retirez la fiche de la prise.
- Seite 67 Le verso est visible par transparence Solution Définissez correctement le type d'original. Si vous constatez une bavure sur le résultat de la copie, un bouton sur l’écran d’accueil peut Appuyez permettre de vous aider à réduire la bavure. Appuyez sur [Copie (Éviter les bavures)] sur l'écran Accueil.
- Seite 68 Si des bourrages papier surviennent Des bourrages papier surviennent Si un bourrage papier survient, un écran analogue à celui qui est reproduit ci-après apparaît sur l'afficheur tactile. Suivez les instructions à l'écran pour éliminer le bourrage papier. Solution Emplacements des bourrages papier Utilisez ces boutons et la barre pour commander la vidéo.
- Seite 69 Des bourrages papier surviennent fréquemment Solution Solution Réglez les guides papier. Vérifiez le réglage de type de papier. Appuyez Appuyez Réglez le guide au plus juste. Plateau multifonctions Si le réglage de type de papier ne correspond pas au papier chargé, modifiez-le. P.54 •...
- Seite 70 Impossible de charger du papier ou d'effectuer les réglages papier Le papier n'est pas défini • Solution Enlevez l'excédent de papier. Assurez-vous que la pile de papier Ouvrez la source de papier pour vérifier ne dépasse pas la ligne de limite de si le papier a été...
- Seite 71 Si le message "Charger du papier." s'affiche Solution Solution Remettez du papier. Vérifiez le réglage de type de papier. Appuyez Appuyez Si la source de papier est vide, remettez du papier. Si le réglage de type de papier ne correspond Solution pas au papier chargé, modifiez-le.
- Seite 72 Impossible de charger du papier ou d'effectuer les réglages papier L'impression ne s'effectue pas L'impression ne s'effectue pas sur le bon côté des feuilles au bon format Solution Solution Chargez le papier en l'orientant Assurez-vous que le réglage de format correctement et en plaçant la face vers correspond bien au papier chargé.
- Seite 73 En impression recto verso, le sens d'impression n'est pas le même sur les deux faces des feuilles Solution Effectuez les réglages d'impression recto verso. Dans l'écran des options d'impression de l'application, sélectionnez le sens d'impression. Dans l'écran [Options d'impression] du pilote, définissez [Orientation] en fonction du sens sélectionné...
- Seite 74 Impossible d'effectuer une numérisation ou d'envoyer un fax Si vous ne parvenez pas à enregistrer Arrêt de la numérisation ou de la des documents sur un serveur avec télécopie l'option [Lire et envoyer] Pour arrêter l'alimentation papier Solution Vérifiez les informations du serveur. Si vous avez effectué...
- Seite 75 Impossible d'envoyer par e-mail des documents numérisés Solution Pour spécifier le numéro de port pour TX SMTP/RX POP Vérifiez les informations du destinataire. Appuyez Appuyez sur [Réglages de fonction] Si une mise à jour a été effectuée, modifiez les [Envoi] [Réglages E-mail/I-Fax] informations enregistrées dans le carnet d'adresses [Spécifier numéro de port pour TX SMTP/ ou associées aux boutons 1 touche.
- Seite 76 Impossible d'effectuer une numérisation ou d'envoyer un fax Si vous ne parvenez pas à envoyer ou à transférer des fax Si aucun fax ne peut être envoyé Si vous ne parvenez pas à transférer des Vérifiez si la ligne téléphonique n'est pas raccordée au mauvais endroit.
- Seite 77 Si vous ne parvenez pas à recevoir des fax Si vous utilisez une ligne optique ou une Solution ligne de téléphonie IP Supprimez les documents superflus de Selon la qualité de la ligne, des erreurs de la mémoire afin d'augmenter l'espace communication peuvent survenir.
- Seite 78 Annulation de tâches de copie ou d'impression Annulation d'une tâche Annulation d'une tâche de copie d'impression Pour arrêter l'alimentation papier Système d'exploitation Windows Double-cliquez sur l'icône de l'imprimante, dans l'écran de l'ordinateur. Appuyez Sélectionnez le fichier que vous souhaitez annuler. A N OT E R Vous pouvez également arrêter l'alimentation Cliquez...
-
Seite 79: Installation Du Pilote D'imprimante
Téléchargement depuis le site Web de Canon Vous pouvez télécharger le dernier pilote d'impression depuis le site Web de Canon (https:// global.canon/en/support/). A N OT E R Pour en savoir plus sur l'installation du pilote d'imprimante, consultez le guide d'installation du pilote. -
Seite 80: Pièces De Rechange
à l'étape 2 peut s'afficher. Préparez le consommable. Vérifiez la référence l'article*. * Cette référence identifie les consommables de marque Canon. Pour une qualité d'impression optimale, nous vous recommandons de n'utiliser que des consommables de marque Canon. REMARQUE P.81 Liste des consommables Pour vérifier la référence du... -
Seite 81: Liste Des Consommables
Toners : attention aux contrefaçons Il existe des toners Canon contrefaits sur le marché. Leur utilisation risque d'affecter la qualité de l'impression ainsi que les performances de la machine. Canon ne pourra être tenu responsable d'aucun dysfonctionnement, accident ou dommage causé... - Seite 82 Un message d'erreur s'affiche Si le message "Contactez votre Un message d'erreur s'affiche service après-vente" s'affiche Si une erreur survient pendant la numérisation ou Si l'appareil rencontre un dysfonctionnement, l'impression ou bien si un problème de connexion un message d'erreur apparaît vous demandant ou de réglage réseau se produit, un message de contacter le service après-vente.
- Seite 83 Une fois le problème résolu, le message [Appeler le service après-vente.] disparaît de la partie inférieure gauche de l'écran. Si le message demandant de contacter votre revendeur agréé Canon local s'affiche Guide de l'utilisateur 0YAS-0K0 Recherche Comment utiliser le numéro de recherche...
-
Seite 84: Unité Principale
Index illustré Cette section vous permet d'identifier facilement l'appellation d'une pièce et d'obtenir la page à laquelle elle est décrite. * Les illustrations correspondent à un appareil équipé d'un Socle double cassette-AW Unité principale Socle double cassette-AW Étiquette de format papier P. - Seite 85 P.53 Interrupteur d'alimentation P.56 Plateau multifonctions Extension de bac Guides papier Cassette 1 P. 54 Guides papier P.61 Cassette 2 P. 54 Guides papier P.61 Module enveloppes A P.61...
-
Seite 86: Panneau De Commande
Index illustré Panneau de commande Ecran d'accueil Clavier numérique à l'écran Afficheur tactile [Menu] P.52 Cet afficheur présente les écrans de réglage Personnalisez l'écran, par exemple en et les messages. Touchez cet afficheur réorganisant les boutons ou en créant des pour effectuer un réglage ou exécuter une touches de raccourci. - Seite 87 [Connexion]/[Déconnexion] Témoin Erreur Appuyez sur cette touche pour vous Ce témoin clignote ou s'allume si l'appareil connecter ou vous déconnecter (si un service rencontre une erreur. d'authentification a été déployé). Lorsque vous ※ Si le témoin Erreur émet une lumière rouge fixe, êtes connecté, le nom de l'utilisateur connecté...
-
Seite 88: Consignes De Sécurité Importantes
Les appareils avec des dispositifs de stockage tels l'appareil une fois celui-ci installé car il risquerait opération non décrite dans ce manuel. Canon ne que des disques durs risquent de ne pas fonctionner de tomber ou de se renverser, entraînant des correctement à... - Seite 89 Ne branchez et ne débranchez pas la fiche imprévus. de vous blesser. • d'alimentation avec les mains humides, car N'utilisez pas d'aérosols inflammables à • Touche Economie d'énergie (uniquement pour cela pourrait provoquer un choc électrique. proximité de cet appareil. Si des substances les produits avec une touche Economie •...
- Seite 90 à Utilisez un câble USB d'une longueur inférieure parenthèses ( ) peuvent être enregistré à la place. • ne pas couper les mains avec les bords du à 3 mètres. imageRUNNER ADVANCE DX C3835i/C3830i/ papier. C3826i/C3822i (F810300)
-
Seite 91: Logiciel De Tierce Partie
CEM de la directive CE. Nous document sont soumises à modifications sans déclarons que le présent produit est conforme aux préavis. Ce produit Canon ("PRODUIT") comprend des exigences CEM de la directive CE de l'entrée À L'EXCEPTION DE LA GARANTIE CI-INCLUSE, •... - Seite 92 Vous souhaitez en savoir plus ? Vous pouvez consulter le guide de l'utilisateur! Si vous relevez un numéro de recherche dans une rubrique de ce guide... Vous pouvez Configuration de l'environnement réseau Guide de l'utilisateur effectuer une recherche ABCD-123 Recherche dans le guide de l'utilisateur au moyen du numéro de recherche.
-
Seite 93: Faq Anleitung
S.132 Bewahren Sie diese Anleitung an einem sicheren Ort zwecks künftiger Einsichtnahme auf, nachdem Sie sie gelesen haben. Die Angaben in diesem Dokument können ohne vorherige Ankündigung geändert werden. English Anwenderhandbuch/FAQ Français Deutsch https://oip.manual.canon/ Italiano Español Wie lautet Ihre Frage? - Seite 94 Inhalt Welches Problem haben Sie? Das Gerät funktioniert Wenn ein Papierstau S.96 S.112 nicht auftritt Prüfen Sie zuerst Folgendes ....96 Papierstau tritt auf ......112 Das Gerät reagiert nicht auf den Computer .
-
Seite 95: Abbrechen Von Kopier-/ Druckaufträgen
Die Druckergebnisse sind S.107 Abbrechen von Kopier-/ nicht zufriedenstellend Druckaufträgen Installieren des Druckertreibers Austauschteile Ein Fehlerbildschirm wird angezeigt Bildlich dargestellter Index Die Bilder sind verschoben/schräg ... . 107 Anhang Unregelmäßigkeiten treten bei den Bildern auf/Die Bilder sind verblasst . -
Seite 96: Das Gerät Funktioniert Nicht
Das Gerät funktioniert nicht Prüfen Sie zuerst Folgendes Prüfen Sie Prüfen Sie Wird eine Meldung am Sensordisplay Ist die Bereitschaftsanzeige ausgeschaltet? angezeigt? Prüfen Sie den Netzstecker, wenn die Bereitschaftsanzeige nicht aufleuchtet, auch wenn Sie die Hauptstromversorgung eingeschaltet haben. Hauptschalter Anzeige I(EIN) Normale Meldung Nachricht... -
Seite 97: Das Gerät Reagiert Nicht Auf Den Computer
Das Gerät reagiert nicht auf den Computer Lösung Lösung Starten Sie das Gerät neu. Stellen Sie die IP-Adresse erneut ein. Einstellen einer IP-Adresse Drücken Sie den Hauptschalter, um das Gerät auszuschalten. Anwenderhandbuch 0YAS-00K Suchen VORSICHT! Beachten Sie, dass durch Ausschalten des Geräts die auf den Druck wartenden Daten gelöscht S.137 So verwenden Sie die Suchnummer... -
Seite 98: Einlegen Von Papier In Die Papierkassette
So legen Sie das Papier ein Einlegen von Papier in die Papierkassette Im Folgenden werden die Vorgänge, die bei den Schieben Sie die Papierkassette wieder in das Papierkassetten 1 und 2 üblich sind am Beispiel der Gerät. Papierkassette 2 beschrieben. VORSICHT! Geben Sie Acht, dass Sie Ihre Finger nicht zwischen der Papierkassette und dem Gerät... -
Seite 99: Wenn Sie Einen Anderen Papiertyp Eingelegt Haben Als Der Voreingestellte
Weitere Informationen zum verfügbaren Papier finden Sie nachfolgend. AVPP-TBM Suchen Verfügbare Papiertypen S.137 So verwenden Sie die Suchnummer Wenn Sie einen anderen Papiertyp eingelegt haben als der voreingestellte Wählen Drücken Sie den Sie. Papiertyp aus. Drücken Sie [Präferenzen] [Einstellungen Papier] [Einstellungen Papier]. VORSICHT! Achten Sie darauf, einen Papiertyp auszuwählen, dessen Basisgewicht dem des eingelegten Papiers... -
Seite 100: Einlegen Von Papier In Das Mehrzweckfach
So legen Sie das Papier ein Einlegen von Papier in das Mehrzweckfach Passen Sie die Papierführungen auf das Format VORSICHT! des eingelegten Papiers an. Wenn Sie beschichtetes Papier oder Papier verwenden, das sich nicht gut zuführen lässt, legen Sie jeweils nur ein Blatt ein. Richten Sie die Papierführungen an den Papierformatmarkierungen... - Seite 101 Weitere Informationen zum verfügbaren Papier finden Sie nachfolgend. AVPP-TBM Suchen Verfügbare Papiertypen S.137 So verwenden Sie die Suchnummer Drücken Sie [Ändern] unter [Papiertyp]. Wählen Sie den Papiertyp aus. Drücken Sie. Wenn Sie Papier in anwenderdefiniertem Format eingelegt haben Legen Sie das Papierformat manuell fest. Festlegen von Papierformat und Papiertyp für das Mehrzweckfach Anwenderhandbuch...
-
Seite 102: Einlegen Von Vorgedrucktem Brief-/Logopapier
So legen Sie das Papier ein Einlegen von vorgedrucktem Brief-/Logopapier Weitere Informationen wie Sie vorgedrucktes Brief-/Logopapier einlegen, finden Sie in der nachfolgenden Tabelle. Beispiel: Wenn auf A4-Papier gedruckt wird Ausrichtung Druckergebnis Papierkassette 1/Papierkassette 2 Mehrzweckfach * Papierkassette 2 wird hier beispielhaft verwendet. -
Seite 103: Einlegen Von Briefumschlägen
Weitere Informationen zum verfügbaren Papier finden Sie nachfolgend. AVPP-TBM Suchen Verfügbare Papiertypen S.137 So verwenden Sie die Suchnummer Einlegen von Briefumschlägen VORSICHT! • Sie können Briefumschläge entweder in die Papierkassette oder in das Mehrzweckfach einlegen. • Verwenden Sie keine Briefumschläge, die an ihren Umschlagklappen geleimt sind, da der Klebstoff aufgrund der Wärme und dem Druck der Fixiereinheit schmelzen kann. -
Seite 104: Vorbereitung Vor Dem Einlegen Von Briefumschlägen
So legen Sie das Papier ein Vorbereitung vor dem Einlegen von Wenn Sie Briefumschläge in das Briefumschlägen Mehrzweckfach einlegen Nehmen Sie circa 5 Briefumschläge, fächern Sie Prüfen Sie die Ausrichtung des sie gut auf, um Falten zu verhindern und ebnen Briefumschlagstapels und legen Sie ihn das Sie anschließend den Stapel. -
Seite 105: Wenn Briefumschläge In Die Papierkassette Eingelegt Werden
Weitere Informationen zum verfügbaren Papier finden Sie nachfolgend. AVPP-TBM Suchen Verfügbare Papiertypen S.137 So verwenden Sie die Suchnummer Wenn Briefumschläge in die 3. Stellen Sie die Position der Papierführung ein. Papierkassette eingelegt werden Im Folgenden werden die Vorgänge am Beispiel der Papierkassette 2 beschrieben. - Seite 106 Weitere Informationen zum verfügbaren Papier finden Sie nachfolgend. AVPP-TBM Suchen Verfügbare Papiertypen S.137 So verwenden Sie die Suchnummer 1. Wählen Sie die Papierzufuhr aus. 2. Drücken Sie. 3. Wählen Si den Briefumschlagtyp aus. 4. Drücken Sie.
-
Seite 107: Die Druckergebnisse Sind Nicht Zufriedenstellend
Die Druckergebnisse sind nicht zufriedenstellend Die Bilder sind verschoben/ Unregelmäßigkeiten treten bei den Bildern auf/Die schräg Bilder sind verblasst Lösung Lösung Stellen Sie die Papierführung ein. Das Papier ist eventuell feucht geworden. Ersetzen Sie es durch Papier, das nicht feucht ist. Lösung Führen Sie die Gradationsjustage aus. -
Seite 108: Schwarze Streifen Treten Bei Den Bildern Auf
Die Druckergebnisse sind nicht zufriedenstellend Schwarze Streifen treten bei den Bildern auf Öffnen Sie die Innenabdeckung. Lösung Ist der Scanbereich verschmutzt? Wenn der Single Pass DADF C angeschlossen wird: Schalten Sie das Gerät AUS, und ziehen Sie den Netzstecker aus der Netzsteckdose. Öffnen Sie die Zufuhr, und reinigen Sie die untere Seite des Scanbereichs (a) und die Weißplatte (b) der Zufuhr mit dem mitgelieferten... - Seite 109 Wenn D-ADF BA angebracht ist: Öffnen Sie die Zufuhr, und reinigen Sie die Unterseite des Scanbereichs der Dokumentenzufuhr mittels des mitgelieferten Glasreinigungstuchs. HINWEIS Verwenden Sie keinen Glasreiniger oder eine alkoholhaltige Lösung usw., damit die schmutzabweisende Beschichtung nicht entfernt wird. Schließen Sie die Zufuhr. HINWEIS Wenn nach der Schmutzentfernung immer noch schwarze Streifen erscheinen, führen Sie das...
-
Seite 110: Weiße Streifen/Farbige Streifen Treten In Den Bildern Auf
Die Druckergebnisse sind nicht zufriedenstellend Weiße Streifen/Farbige Streifen treten in den Bildern auf Stecken Sie den Reinigungsstift mit dem Lösung Reinigungskissen an seiner Spitze nach unten in das Loch. Reinigen des Staubschutzglases Schalten Sie das Gerät AUS, und ziehen Sie den Netzstecker aus der Netzsteckdose. -
Seite 111: Durchscheinender Text Tritt Auf
Durchscheinender Text tritt Beispiel: Fax Lösung Stellen Sie den Originaltyp korrekt ein. Wenn beim Kopierergebnis ein Durchbluten Drücken Sie festgestellt wird, kann eine Schaltfläche auf dem Startbildschirm helfen, das Durchbluten zu verringern. Drücken Sie [Kopie (Überstrahlung verhindern)] auf dem Bildschirm Startseite. Drücken Sie H I N W E I S Drücken Sie [Ja]. -
Seite 112: Wenn Ein Papierstau Auftritt
Wenn ein Papierstau auftritt Papierstau tritt auf Wenn ein Papierstau auftritt, wird ein Fenster ähnlich dem folgenden am Sensordisplay eingeblendet. Befolgen Sie die Anweisungen im Fenster, um das gestaute Papier zu entfernen. Abhilfe Papierstaupositionen Spielen Sie das Video mit diesen Tasten und der Leiste ab. H I N W E I S Das Fenster wird ausgeblendet, sobald Sie sämtliches gestautes Papier entfernt haben und alle Abdeckungen und Kassetten am Gerät korrekt geschlossen sind. -
Seite 113: Papierstau Tritt Häufig Auf
Papierstau tritt häufig auf Lösung Lösung Stellen Sie die Papierführung ein. Prüfen Sie die Papiertypeinstellung. Drücken Sie. Drücken Sie. Stellen Sie die Führung genau ein. Mehrzweckfach Wenn die Papiertypeinstellung nicht dem eingelegten Papier entspricht, ändern Sie die Einstellung. S.98 • Für die Papierkassette S.100 •... -
Seite 114: Papier Wird Nicht Eingezogen
Das Einlegen von Papier oder die Papiereinstellungen können nicht erfolgreich durchgeführt werden Papier wird nicht eingezogen • Lösung Entfernen Sie überschüssiges Papier. Vergewissern Sie sich, dass der Öffnen Sie die Papierzufuhr, um zu Papierstapel nicht über die prüfen, ob das Papier korrekt eingelegt Füllhöhenmarkierung hinausragt ( •... -
Seite 115: Wenn Die Meldung "Mehr Papier." Angezeigt Wird
Wenn die Meldung "Mehr Papier." angezeigt wird Lösung Lösung Füllen Sie Papier nach. Prüfen Sie die Papiertypeinstellung. Drücken Sie. Drücken Sie. Wenn die Papierzufuhr leer ist, füllen Sie Papier nach. Wenn die Papiertypeinstellung nicht dem Lösung eingelegten Papier entspricht, ändern Sie die Einstellung. - Seite 116 Das Einlegen von Papier oder die Papiereinstellungen können nicht erfolgreich durchgeführt werden Der Druckvorgang kann auf der vorgesehenen Der Druckvorgang kann mit dem vorgesehenen Papierseite nicht durchgeführt werden Format nicht durchgeführt werden Lösung Lösung Legen Sie Papier in der korrekten Vergewissern Sie sich, dass die Ausrichtung und mit der korrekten Papierformateinstellung dem Format...
- Seite 117 Bei doppelseitigem Druck ist die Druckrichtung zwischen der Vorder- und Rückseite des Papiers unterschiedlich Lösung Führen Sie Einstellungen für den doppelseitigen Druck durch. Wählen Sie die Druckausrichtung im Druckeinstellbildschirm der Anwendung. Stellen Sie im Fenster [Druckeinstellungen] des Treibers die Option [Ausrichtung] in die in Schritt 1 ausgewählte Richtung.
-
Seite 118: Der Scan-/Faxvorgang Kann Nicht Erfolgreich Durchgeführt Werden
Der Scan-/Faxvorgang kann nicht erfolgreich durchgeführt werden Wenn Sie die Dokumente nicht Stoppen des Scan-/Faxvorgangs über [Scannen und Senden] an einen Server senden können Lösung So stoppen Sie die Papierzufuhr Prüfen Sie die Serverinformationen. Wenn Sie irgendwelche Aktualisierungen einschließlich des Anmeldepassworts für den Server (Computer) durchgeführt haben, ändern Sie die im Adressbuch/auf den Zielwahltasten Drücken... -
Seite 119: Gescannte Dokumente Konnten Nicht Per E-Mail Versendet Werden
Gescannte Dokumente konnten nicht per E-Mail versendet werden Lösung Angeben der Portnummer für SMTP TX/POP RX Prüfen Sie die Informationen des Drücken Sie Empfängers. Drücken Sie [Einstellungen Funktion] [Senden] [Einstellungen E-Mail/I-Fax] Wenn eine Aktualisierung durchgeführt [Portnummer für SMTP SE/POP EM wurde, ändern Sie die im Adressbuch/auf den definieren]. -
Seite 120: Wenn Sie Faxnachrichten Nicht Senden/Übermitteln Können
Der Scan-/Faxvorgang kann nicht erfolgreich durchgeführt werden Wenn Sie Faxnachrichten nicht senden/übermitteln können Wenn keine Faxnachrichten gesendet Wenn Sie keine Faxnachrichten werden können übermitteln können Stellen Sie sicher, dass die Telefonleitung nicht an Überprüfen Sie die Informationen zu dem im einer falschen Stelle angeschlossen ist. -
Seite 121: Wenn Sie Faxnachrichten Nicht Empfangen Können
Wenn Sie Faxnachrichten nicht empfangen können Wenn Sie eine optische Leitung oder IP- Lösung Telefonleitung verwenden Löschen Sie nicht benötigte Kommunikationsfehler können je nach Dokumente im Speicher, um den freien Leitungsqualität auftreten. Speicherplatz zu erhöhen. Weitere Informationen erhalten Sie von Ihrer Telefongesellschaft. -
Seite 122: Abbrechen Von Kopie-/Druckaufträgen
Abbrechen von Kopie-/Druckaufträgen Abbrechen eines Kopierauftrags Abbrechen eines Druckauftrags So stoppen Sie die Papierzufuhr Für Windows Doppelklicken Sie auf das Druckersymbol auf dem Computerbildschirm. Drücken Sie. Wählen Sie die zu annullierende Datei aus. H I N W E I S Sie können die Papierzufuhr auch durch Drücken Klicken anhalten. -
Seite 123: Installieren Des Druckertreibers
H I N W E I S Weitere Einzelheiten zur Druckertreiberinstallation finden Sie in der Druckertreiberanleitung. Sie können die Anleitung von derselben Seite auf der Canon Website, wie für den Druckertreiber, herunterladen oder sie anzeigen. Neueste Supportinformationen für das Betriebssystem Siehe Canon-Website (https://global.canon/ en/support/). -
Seite 124: Austauschteile
Stellen Sie das Verbrauchsmaterial bereit. Prüfen Sie die Teilenummer.* * Das ist eine Teilenummer, die Originalverbrauchsmaterialien von Canon kennzeichnet. Für qualitativ hochwertige Druckausgaben empfehlen wir, Originalverbrauchsmaterialien von Canon zu verwenden. HINWEIS S.125 Liste der Verbrauchsmaterialien So überprüfen Sie die Teilenummer eines Verbrauchsmaterials im normalen Bedienfenster Drücken Sie... -
Seite 125: Liste Der Verbrauchsmaterialien
80% ist. Vorsicht vor gefälschten Tonern Wir weisen Sie darauf hin, dass gefälschte Canon-Toner auf dem Markt sind. Wenn Sie gefälschte Toner verwenden, können die Druckqualität und die Leistung des Systems darunter leiden. Canon ist nicht für Fehlfunktionen, Unfälle oder Schäden verantwortlich, die durch die Verwendung von gefälschten Tonern verursacht werden. -
Seite 126: Ein Fehlerbildschirm Wird Angezeigt
Ein Fehlerbildschirm wird angezeigt Eine Fehlermeldung wird Wenn die Meldung "Kontaktieren Sie Ihren angezeigt Kundendienstvertreter" angezeigt wird Wenn ein Fehler während des Scan- oder Wenn das Gerät aufgrund einer Störung nicht Druckvorgangs auftritt oder wenn ein Problem mit mehr normal funktioniert, wird eine Meldung mit der Netzwerkverbindung oder Einstellung auftritt, der Aufforderung den Kundendienstvertreter zu wird eine Meldung am Sensorbildschirm oder der... -
Seite 127: Wenn Die Schaltfläche [Modus Funkt.beschränkung.] Angezeigt Wird
Das Gerät wechselt in den eingeschränkten Funktionsmodus. Wenn das Problem behoben ist, wird die Meldung [Kundendienstvertreter anrufen.] links unten am Bildschirm ausgeblendet. Eine Meldung mit der Aufforderung, den autorisierten Canon-Händler vor Ort zu kontaktieren, wird angezeigt Anwenderhandbuch 0YAS-0K0 Suchen S.137... -
Seite 128: Haupteinheit
Bildlich dargestellter Index Sie können einfach den Namen des Ersatzteils und die Seite herausfinden, in der dieses Ersatzteil beschrieben wird. * Die Abbildungen setzen voraus, dass das Gerät mit einer Kassetteneinheit AW ausgestattet ist. Haupteinheit Kassetteneinheit AW S. 98 Papierformatetikett Befestigen Sie das Papierformatetikett so, dass es auf die Kassettennummernanzeige... - Seite 129 S.97 Netzschalter S.100 Mehrzweckfach Fachverlängerung Papierführungen Papierkassette 1 S. 98 Papierführungen S.105 Papierkassette 2 S. 98 Papierführungen S.105 Briefumschlagzuführung A S.105...
-
Seite 130: Bedienfeld
Bildlich dargestellter Index Bedienfeld Bildschirm Startseite Bildschirmnummernblock Sensordisplay [Menu] S.96 Zeigt den Einstellungsbildschirm und die Passen Sie den Bildschirm an, indem Sie Meldungen an. Berühren Sie das Display, um z. B. Schaltflächen neu anordnen oder Einstellungen und andere Bedienvorgänge Kurzwahltasten erstellen. durchzuführen. - Seite 131 [Login]/[Logout] Fehler Anzeige Mit dieser Taste melden Sie sich an/ab (sofern Blinkt oder leuchtet auf, wenn ein Fehler im ein Anmeldedienst festgelegt worden ist). Gerät vorhanden ist. Bei einem angemeldeten Benutzer wird der ※ Wenden Sie sich an Ihren Händler oder Kundendienst Benutzername des aktuell angemeldeten vor Ort, wenn die Fehleranzeige konstant rot leuchtet.
-
Seite 132: Anhang
In Höhen von 3.000 m oder höher über dem Verletzungen führt. Meeresspiegel beschriebene Bedienung, durch unsachgemäßen Geräte mit Speichermedien wie beispielsweise Gebrauch oder durch nicht von Canon oder von WICHTIG Canon autorisierten Dritten durchgeführte Festplatten funktionieren möglicherweise nicht Nicht an folgenden Orten aufstellen Reparaturen oder Veränderungen entstehen. -
Seite 133: Handhabung
Das mitgelieferte Netzkabel ist zur Handhabung Verletzungen führen kann. • Verwendung mit diesem System vorgesehen. Achten Sie darauf, dass Sie mit Ihren Händen • WARNUNG Schließen Sie das Netzkabel nicht an andere oder Fingern nicht in die Zufuhr oder die •... -
Seite 134: Fixiereinheit
Anhang Hinweis zur zum Reinigen ausschließlich Wasser. Verwenden Sie weder Alkohol, Benzin, Lasersicherheit Farbverdünner oder andere entzündliche Substanzen. Verwenden Sie keine Papiertaschentücher oder Papiertücher. Wenn solche Substanzen mit den elektrischen Teilen im Gerät in Kontakt kommen, kann sich statische Elektrizität bilden, und es besteht Feuergefahr oder die Gefahr eines Stromschlags. -
Seite 135: Informationen Zu Dieser Anleitung
Haftungsausschluss Information nur für Deutschland • Die Angaben in diesem Dokument können Wenn Sie mehr über Canon Produkte und den ohne vorherige Ankündigung geändert Blauen Engel erfahren wollen, gehen Sie bitte werden. auf unsere Canon Home Page. Hier finden Sie •... -
Seite 136: Software Von Drittanbietern
PRODUKTS, und lesen Sie die anderen Lizenzbedingungen für Softwaremodule von Drittanbietern, die im Anhang der Anleitung für die entsprechende Plattformversion beschrieben sind. Dieses Handbuch ist auf der Canon Website https://oip.manual.canon/ verfügbar. Durch die Nutzung des PRODUKTS gelten für Sie alle geltenden Lizenzbedingungen als vereinbart. - Seite 137 Möchten Sie mehr wissen? Schlagen Sie im Anwenderhandbuch nach! Wenn Ihnen eine Suchnummer in einem Thema dieser Anleitung auffällt, das Sie gerade lesen ... Einrichten der Netzwerkumgebung Anwenderhandbuch Sie können das ABCD-123 Suchen Anwenderhandbuch anhand der Suchnummer durchsuchen! S.139 So verwenden Sie die Suchnummer Suchnummer (Beispiel) Die gewünschte Seite wird im Handumdrehen eingeblendet!
- Seite 138 Memo...
- Seite 139 Dopo aver completato la lettura di questa guida, conservarla in un luogo sicuro per riferimenti futuri. Le informazioni contenute in questo documento sono soggette a modifiche senza preavviso. English Guida per l'utente/FAQ Français Deutsch https://oip.manual.canon/ Italiano Español Qual è la tua domanda?
- Seite 140 Sommario Quale problema si è verificato? La macchina non Se la carta si inceppa P .142 P.158 funziona Prima controllare quanto segue ... . 142 La carta si inceppa ......158 La macchina non risponde al computer .
- Seite 141 I risultati di stampa non P.153 Annullamento dei lavori di copia/ sono soddisfacenti stampa Installazione del driver stampante Parti di ricambio Appare una schermata di errore Indice illustrato Appendice Le immagini sono spostate/inclinate ..153 Irregolarità...
-
Seite 142: La Macchina Non Funziona
La macchina non funziona Prima controllare quanto segue Controllo Controllo Sul pannello digitale è visualizzato un L'indicatore di accensione è spento? messaggio? Se l'indicatore di accensione non si illumina quando si accende la macchina, controllare la spina di alimentazione. Indicatore di alimentazione I (ACCESO) Messaggio semplice Messaggio... - Seite 143 La macchina non risponde al computer Soluzione Soluzione Riavviare la macchina. Impostare di nuovo l'indirizzo IP. Impostazione di un indirizzo IP Premere l'interruttore principale per spegnere la macchina. Guida per l'utente 0YAS-00K Cerca ATTENZIONE! Notare che se si spegne la macchina vengono eliminati i dati in corso di stampa.
- Seite 144 Come caricare la carta Caricamento della carta nel cassetto della carta Di seguito, le operazioni comuni ai cassetti 1 e 2 Inserire nuovamente il cassetto nella macchina. vengono descritte prendendo come riferimento il ATTENZIONE! cassetto 2. Fare attenzione a non impigliare le dita tra il cassetto e la macchina.
- Seite 145 Per la carta disponibile, vedere quanto segue. AVPP-TBM Cerca Carta disponibile P.182 Come utilizzare il numero di ricerca Quando è stato caricato un tipo di carta diverso da quello preimpostato Selezionare Premere il tipo di carta. Premere [Preferenze] [Impostazioni carta] [Impostazioni carta].
- Seite 146 Come caricare la carta Caricamento carta nel vassoio multiuso Regolare le guide della carta in modo che ATTENZIONE! corrispondano al formato della carta caricata. Quando si utilizza carta patinata o carta che non si alimenta bene, caricare un foglio alla volta.
- Seite 147 Per la carta disponibile, vedere quanto segue. AVPP-TBM Cerca Carta disponibile P.182 Come utilizzare il numero di ricerca Premere [Cambia] in [Tipo di carta]. Selezionare il tipo di carta. Premere Quando è stata caricata carta di formato personalizzato Specificare manualmene il formato carta. Specificare il formato e il tipo di carta nel vassoio multiuso Guida per l'utente...
- Seite 148 Come caricare la carta Caricamento di carta con loghi stampati Fare riferimento alla tabella riportata di seguito per caricare carta con loghi stampati. Esempio: Quando si stampa su carta in formato A4 Orientamento Risultato di stampa Cassetto 1/Cassetto 2 Vassoio multiuso * Cassetto 2 indicato come esempio.
- Seite 149 Per la carta disponibile, vedere quanto segue. AVPP-TBM Cerca Carta disponibile P.182 Come utilizzare il numero di ricerca Caricamento di buste ATTENZIONE! • È possibile caricare le buste nel cassetto o nel vassoio multiuso. • Non usare buste con colla presente sulle linguette, poiché la colla potrebbe sciogliersi a causa del calore e della pressione dell'unità...
- Seite 150 Come caricare la carta Preparazione prima di caricare le buste Quando si caricano buste nel vassoio multiuso Controllare l'orientamento della risma di buste e Prendere circa cinque buste, smazzarle bene per caricarla nel vassoio multiuso. eliminare eventuali arricciature e appiattirle. N O TA Operazioni di base per la gestione del vassoio P.146...
- Seite 151 Per la carta disponibile, vedere quanto segue. AVPP-TBM Cerca Carta disponibile P.182 Come utilizzare il numero di ricerca Quando si caricano buste nel cassetto Caricare le buste. Di seguito, le operazioni vengono descritte prendendo come riferimento il cassetto 2. Applicare l'accessorio per buste al cassetto. Lato anteriore È...
- Seite 152 Per la carta disponibile, vedere quanto segue. AVPP-TBM Cerca Carta disponibile P.182 Come utilizzare il numero di ricerca 1. Selezionare la fonte alimentazione carta. 2. Premere 3. Selezionare la tipo di busta. 4. Premere...
- Seite 153 I risultati di stampa non sono soddisfacenti Le immagini sono spostate/ Irregolarità nelle immagini/ inclinate Immagini sbiadite Soluzione Soluzione Regolare le guide carta. La carta potrebbe aver assorbito umidità. Sostituirla con della carta priva di umidità. Soluzione Eseguire la regolazione della gradazione.
- Seite 154 I risultati di stampa non sono soddisfacenti Immagini con strisce nere Aprire il coperchio interno. Soluzione L'area di scansione dell'alimentazione dei documenti è sporca? Se è applicato il Single Pass DADF-C: Spegnere la macchina e scollegarla dalla presa di alimentazione CA. Aprire l'alimentatore e pulire l'area di scansione di alimentazione documenti nel lato inferiore (a) e la lastra bianca dell'alimentatore (b) con...
- Seite 155 Se è collegato il DADF-BA: Aprire l'alimentatore e pulire l'area di scansione per l'alimentazione documenti nella parte inferiore, usando l'apposito foglio di pulizia in dotazione. N O TA Non utilizzare detergenti per vetri o soluzioni a base di alcol, ecc., poiché tolgono il rivestimento anti-macchia.
- Seite 156 I risultati di stampa non sono soddisfacenti Immagini con strisce bianche/colorate Nell'inserire lo stick di pulizia nel foro, tenere il Soluzione tampone della sua punta rivolto verso il basso. Pulizia del vetro anti-polvere. Spegnere la macchina e rimuovere la spina di alimentazione dalla presa elettrica.
-
Seite 157: Immagini In Trasparenza
Immagini in trasparenza Soluzione Impostare il tipo di originale corretto. Se si osservano sbavature sul retro delle copie eseguite, un pulsante nella schermata Home Premere potrebbe aiutare a ridurre questo problema. Premere [Copia (Eliminazione trasparenza)] nella schermata Home. I M P O R TA N T E Per effettuare una regolazione manuale, premere [Regola] e regolare la densità... -
Seite 158: Se La Carta Si Inceppa
Se la carta si inceppa La carta si inceppa Se la carta si inceppa, sul pannello digitale appare una schermata come quella riportata di seguito. Per rimuovere la carta inceppata, seguire le istruzioni riportate sullo schermo. Soluzione Posizioni della carta inceppata Utilizzare questi pulsanti e questa barra per azionare il video. - Seite 159 La carta si inceppa di frequente Soluzione Soluzione Regolare le guide carta. Controllare l'impostazione del tipo di carta. Premere Premere Regolare la guide con precisione. Vassoio multiuso Se l'impostazione del tipo di carta non corrisponde alla carta caricata, cambiare l'impostazione. P.144 •...
- Seite 160 Non è possibile eseguire correttamente il caricamento o le impostazioni della carta La carta non viene alimentata • Soluzione Rimuovere la quantità di carta in eccesso. Aprire la fonte di alimentazione carta Verificare che la risma non superi il segno per verificare se la carta è...
- Seite 161 Se appare il messaggio "Caricare carta." Soluzione Soluzione Ricaricare la carta. Controllare l'impostazione del tipo di carta. Premere Premere Se la fonte di alimentazione carta è vuota, ricaricare la carta. Se l'impostazione del tipo di carta non Soluzione corrisponde alla carta caricata, cambiare l'impostazione.
- Seite 162 Non è possibile eseguire correttamente il caricamento o le impostazioni della carta Non è possibile stampare sul Non è possibile stampare con lato del foglio previsto il formato previsto Soluzione Soluzione Caricare la carta con l'orientamento Verificare che l'impostazione del corretto e con il lato di stampa formato carta corrisponda al formato correttamente rivolto verso l'alto/...
- Seite 163 Nella stampa fronte-retro, la direzione di stampa è diversa tra la fronte e il retro del foglio Soluzione Eseguire le impostazioni per la stampa fronte-retro. Nella schermata delle impostazioni di stampa dell'applicazione, selezionare la direzione di stampa. Nella schermata [Preferenze stampa] del driver, impostare [Orientamento] per la direzione selezionata nel passo 1.
- Seite 164 Non è possibile eseguire correttamente le operazioni di scansione/fax Se non è possibile inviare i documenti Interruzione dell'operazione di su un server usando [Scansione e invio] scansione/fax Soluzione Per interrompere l'alimentazione carta Controllare le informazioni sul server. Se sono stati eseguiti degli aggiornamenti tra cui la password di accesso al server (computer), cambiare le informazioni registrate nella rubrica/nei pulsanti di selezione veloce.
- Seite 165 Impossibile inviare tramite e-mail i documenti acquisiti Soluzione Per specificare il numero di porta per SMTP TX/POP RX Controllare le informazioni della Premere destinazione. Premere [Impostazioni funzione] [Invio] [Impostazioni e-mail/I-Fax] [Specifica Se sono stati eseguiti degli aggiornamenti, numero porta per TX SMTP/RX POP]. cambiare le informazioni registrate nella rubrica/ Specificare il numero di porta.
- Seite 166 Non è possibile eseguire correttamente le operazioni di scansione/fax Se non è possibile inviare/ inoltrare fax Se non si riesce a spedire alcun fax Se non è possibile inoltrare fax Verificare che la linea telefonica non sia connessa a Verificare le informazioni della destinazione di una posizione errata.
- Seite 167 Se non è possibile ricevere fax Se si utilizza una linea ottica o una linea Soluzione telefonica IP Eliminare i documenti non necessari Possono verificarsi errori di comunicazione a nella memoria per aumentare lo spazio seconda della qualità della linea. libero.
- Seite 168 Annullamento dei lavori di copia/stampa Annullamento di un lavoro di Annullamento di un lavoro di copia stampa Per interrompere l'alimentazione carta Per Windows Nello schermo del computer, fare doppio clic sull'icona della stampante. Premere Selezionare il file che si desidera annullare. I M P O R TA N T E Inoltre, è...
-
Seite 169: Installazione Del Driver Stampante
Per ulteriori dettagli sull'installazione del driver stampante, vedere la Guida di Installazione del Driver. È possibile scaricare o visualizzare la Guida nella stessa pagina del sito Web di Canon utilizzato per il driver stampante. Informazioni sul supporto del sistema operativo più aggiornato Vedere il sito Web di Canon (https://global. -
Seite 170: Parti Di Ricambio
Preparare il materiale di consumo. Controllare il codice articolo.* * Questo codice articolo identifica i materiali di consumo originali Canon. Per stampe di alta qualità, si consiglia di utilizzare materiali di consumo originali Canon. N O TA P.171 Elenco dei materiali di consumo... - Seite 171 L'uso di toner contraffatti può causare un peggioramento della qualità di stampa o ridurre le prestazioni della macchina. Canon non è responsabile di difetti di funzionamento, incidenti o danni causati dall'uso di toner contraffatti. Per maggiori informazioni al riguardo, vedere global.canon/ctc.
- Seite 172 Appare una schermata di errore Appare il messaggio "Contattare il Appare un messaggio di errore tecnico dell'assistenza" Se si verifica un errore durante la scansione Quando la macchina cessa di funzionare o la stampa o si verifica un problema con la normalmente a causa di un problema, appare un connessione di rete o l'impostazione, appare un messaggio che chiede di contattare il tecnico di...
- Seite 173 Quando il problema è risolto, il messaggio [Contattare il tecnico dell'assistenza] scompare dalla parte inferiore sinistra dello schermo. Viene visualizzato un messaggio che dice di contattare un rivenditore autorizzato locale Canon Guida per l'utente 0YAS-0K0 Cerca P.182 Come utilizzare il numero di ricerca...
-
Seite 174: Unità Principale
Indice illustrato È possibile identificare facilmente il nome di una parte e trovare la pagina in cui viene descritta tale parte. * Le immagini riportate presuppongono che la macchina sia dotata di Cassette Feeding Unit-AW Unità principale Cassette Feeding Unit-AW Etichetta formato carta P. - Seite 175 P.143 Interruttore di alimentazione P.146 Vassoio multiuso Estensione vassoio Guide della carta Cassetto 1 P. 144 Guide della carta P.151 Cassetto 2 P. 144 Guide della carta P.151 Envelope Feeder Attachment A P.151...
-
Seite 176: Pannello Comandi
Indice illustrato Pannello comandi Schermata principale Tastierino numerico a video Pannello digitale [Menu] P.142 Visualizza la schermata delle impostazioni e i Personalizzare la schermata, ad esempio messaggi. Toccare il pannello per eseguire le riordinando i pulsanti o creando tasti di scelta impostazioni e altre operazioni. - Seite 177 [Accedi]/[Esci] Indicatore di errore Premere questo tasto per accedere/ Lampeggia o si illumina in caso di errore nella macchina. disconnettersi (quando è stato impostato ※ Se l'indicatore di errore emette una luce rossa un servizio di registrazione). Quando è stato costante, contattare il proprio rivenditore o effettuato l'accesso, viene visualizzato il nome rappresentante dell'assistenza.
-
Seite 178: Importanti Istruzioni Per La Sicurezza
PSTN. effettuate direttamente da Canon o da una terza Luoghi soggetti a valori estremi, sia alti che • Collegando la macchina a una linea telefonica parte autorizzata da Canon. - Seite 179 Non avvolgere il cavo di alimentazione né scosse elettriche o incendio. durante giorni di ferie consecutivi. • annodarlo, in quanto potrebbero verificarsi Quando si collega/scollega un cavo USB • Sicurezza laser incendi o scosse elettriche. mentre il cavo di alimentazione è collegato a Questo prodotto è...
-
Seite 180: Materiali Di Consumo
è in alternativi, indicati fra parentesi ( ). funzione. La carta potrebbe incepparsi. imageRUNNER ADVANCE DX C3835i/C3830i/ • Utilizzare un cavo modulare di massimo 3 Materiali di consumo C3826i/C3822i (F810300) metri. -
Seite 181: Informazioni Su Questo Manuale
Contains Wireless LAN Module approved by TRC/ questo manuale sono catturate con una mantengono a tutti gli effetti il titolo, il SS/2014/407 imageRUNNER ADVANCE DX C3835i dotata dei possesso e i diritti di proprietà intellettuale RE Directive seguenti accessori opzionali installati: correlati al SOFTWARE. - Seite 182 Vuoi saperne di più? È possibile consultare la Guida per l'utente! Se osservi un numero di ricerca riportato in un argomento di questa guida, stai leggendo... Impostazione dell'ambiente di rete Guida per l'utente Con il numero di ricerca ABCD-123 Cerca è...
- Seite 183 P.222 Al acabar de leer esta guía, guárdela en un lugar seguro para consultas futuras. La información de este documento puede ser English modificada sin previo aviso. Français Guía de usuario/FAQ Deutsch https://oip.manual.canon/ Italiano Español ¿Cuál es su pregunta?
- Seite 184 Contenido ¿Qué problema tiene? El equipo no funciona Si se produce un atasco P .186 P.202 de papel Verifique primero lo siguiente ....186 Se producen atascos de papel ....202 El equipo no responde al ordenador .
- Seite 185 Los resultados de P.197 Cancelar trabajos de copia/ impresión no son impresión satisfactorios Instalar el controlador de impresora Piezas de repuesto Aparece una pantalla de error Índice ilustrado Las imágenes están desplazadas/inclinadas . . . 197 Apéndice Aparecen irregularidades en las imágenes/ Las imágenes tienen poca intensidad .
- Seite 186 El equipo no funciona Verifique primero lo siguiente Compruebe Compruebe ¿Está apagado el indicador de ¿Aparece algún mensaje en la pantalla alimentación principal? táctil? Si el indicador de alimentación principal no se ilumina al encender la alimentación principal, compruebe el enchufe. Indicador de alimentación principal I(ON) Mensaje simple...
- Seite 187 El equipo no responde al ordenador Solución Solución Reinicie el equipo. Vuelva a configurar la dirección IP. Configurar una dirección IP Pulse el interruptor de alimentación principal para apagar el equipo. Guía del usuario 0YAS-00K Buscar ATENCIÓN Tenga en cuenta que si apaga el equipo se eliminarán los datos que están a la espera de P.226 Cómo utilizar el número de búsqueda...
-
Seite 188: Cargar Papel En El Casete
Cómo cargar papel Cargar papel en el casete A continuación se describen las operaciones Vuelva a colocar el casete en el equipo. comunes a los casetes 1 y 2, tomando como ATENCIÓN ejemplo el casete 2. Tenga cuidado de no pillarse los dedos entre el casete y el equipo. - Seite 189 Consulte aquí el papel disponible. AVPP-TBM Buscar Papel disponible P.226 Cómo utilizar el número de búsqueda Si ha cargado un tipo de papel distinto del preestablecido Seleccione Pulse el tipo de papel. Pulse [Preferencias] [Opciones de papel] ATENCIÓN [Opciones de papel]. Asegúrese de seleccionar un tipo de papel que coincida con el peso de base del papel cargado.
- Seite 190 Cómo cargar papel Carga de papel en la bandeja multiuso Ajuste las guías del papel conforme al tamaño ATENCIÓN del papel cargado. Al utilizar papel estucado o papel que no se alimenta bien, cárguelo de hoja en hoja. Alinee las guías del papel con las marcas de tamaño de papel.
- Seite 191 Consulte aquí el papel disponible. AVPP-TBM Buscar Papel disponible P.226 Cómo utilizar el número de búsqueda Pulse [Cambiar] en [Tipo de papel]. Seleccione el tipo de papel. Pulse Si ha cargado papel de tamaño personalizado Especifique el tamaño de papel manualmente.
- Seite 192 Cómo cargar papel Cargar papel con logotipos impresos Consulte la tabla a continuación para cargar papel con logotipos impresos. Ejemplo: Al imprimir en papel de tamaño A4 Orientación Resultado de impresión Casete 1/Casete 2 Bandeja multiuso * Se utiliza como ejemplo el casete 2. Logotipo t d .
- Seite 193 Consulte aquí el papel disponible. AVPP-TBM Buscar Papel disponible P.226 Cómo utilizar el número de búsqueda Cargar sobres ATENCIÓN • Los sobres se pueden cargar en el casete o en la bandeja multiuso. • No utilice sobres que lleven pegamento en la solapa, ya que el pegamento podría derretirse con el calor y la presión de la unidad de fijación.
- Seite 194 Cómo cargar papel Preparativos para cargar los sobres Al cargar sobres en la bandeja multiuso Coja un taco de unos cinco sobres, airéelo para Compruebe la orientación del taco de sobres y eliminar las dobleces y aplánelo bien. cárguelo en la bandeja multiuso. NOTA Operaciones básicas de manejo de la bandeja P.190...
- Seite 195 Consulte aquí el papel disponible. AVPP-TBM Buscar Papel disponible P.226 Cómo utilizar el número de búsqueda Al cargar sobres en el casete Cargue los sobres. A continuación se describen las operaciones tomando como ejemplo el casete 2. Acople el Alimentador de sobres en el casete. Los sobres Puede cargar sobres en el casete 1 sin colocar el con el anverso...
- Seite 196 Consulte aquí el papel disponible. AVPP-TBM Buscar Papel disponible P.226 Cómo utilizar el número de búsqueda 1. Seleccione el origen del papel. 2. Pulse 3. Seleccione el Tipo de sobre. 4. Pulse...
- Seite 197 Los resultados de impresión no son satisfactorios Las imágenes están Aparecen irregularidades en desplazadas/inclinadas las imágenes/Las imágenes tienen poca intensidad Solución Solución Ajuste las guías del papel. El papel puede haber absorbido humedad. Sustitúyalo por papel que no haya absorbido humedad. Solución Realice el ajuste de gradación.
- Seite 198 Los resultados de impresión no son satisfactorios Aparecen rayas negras en las imágenes Abra la tapa interior. Solución ¿El área de lectura de alimentación de documentos está sucia? Si estuviera acoplada la Unidad Lectora Duplex-C: Apague el equipo y desenchufe el conector de alimentación de la toma de corriente de CA.
- Seite 199 Si estuviera acoplado el DADF-BA: Abra el alimentador y limpie la parte inferior del área de lectura de alimentación de documentos mediante la hoja de limpieza del cristal provista. NOTA No utilice limpiacristales o una solución alcohólica, etc., ya que quitarán el recubrimiento antimanchas.
- Seite 200 Los resultados de impresión no son satisfactorios Aparecen rayas blancas/rayas de colores en las imágenes Introduzca la varilla de limpieza en el agujero Solución con la esponja de la punta hacia abajo. Limpiar el cristal antipolvo. Apague el equipo y saque el enchufe de la toma de corriente.
- Seite 201 La tinta traspasa el papel Solución Establezca correctamente el tipo de original. Pulse Si se observara que el tóner se transparenta en el reverso en el resultado de copia, en la pantalla de inicio hay un botón para reducir este problema. Pulse [Copia (Evitar transparencia)] en la pantalla PU N TO Inicio.
- Seite 202 Si se produce un atasco de papel Se producen atascos de papel Si se produce un atasco de papel, aparecerá una pantalla como la siguiente en la pantalla táctil. Siga las instrucciones de la pantalla para retirar el papel atascado. Solución Ubicaciones de atascos de papel...
- Seite 203 Se producen atascos de papel con frecuencia Solución Solución Ajuste las guías del papel. Compruebe la configuración del tipo de papel. Pulse Pulse Ajuste la guía exactamente. Bandeja multiuso Si el tipo de papel configurado no coincide con el papel cargado, cambie la configuración. P.188 •...
- Seite 204 No se puede cargar papel o configurar las opciones de papel correctamente El papel no se ha introducido • Solución Retire la cantidad sobrante de papel. Asegúrese de que la pila de papel no Abra el origen de papel para comprobar excede la línea de límite de carga ( si el papel se ha cargado correctamente.
- Seite 205 Si aparece el mensaje "Cargue papel." Solución Solución Compruebe la configuración del tipo de papel. Reponga el papel. Pulse Pulse Si el origen de papel está vacío, reponga el papel. Si el tipo de papel configurado no coincide con Solución el papel cargado, cambie la configuración.
- Seite 206 No se puede cargar papel o configurar las opciones de papel correctamente No se puede imprimir en la No se puede imprimir con el cara prevista del papel tamaño previsto Solución Solución Cargue papel en la orientación correcta Asegúrese de que el tamaño del papel y con la cara correcta hacia arriba/ configurado coincide con el tamaño abajo.
- Seite 207 En la impresión de doble cara, la dirección de impresión difiere entre el anverso y el reverso del papel Solución Configure las opciones de impresión a doble cara. En la pantalla de configuración de impresión de la aplicación, seleccione la dirección de impresión.
- Seite 208 No se ha podido escanear/enviar por fax correctamente Si no puede enviar documentos a un Parar de escanear/enviar por fax servidor empleando [Leer y enviar] Solución Para detener la alimentación de papel Consulte la información del servidor Si ha realizado alguna actualización, incluida la contraseña de inicio de sesión para el servidor (ordenador), cambie la información registrada en la libreta de direcciones/botones de acceso directo.
- Seite 209 No se pueden enviar por correo electrónico los documentos escaneados Para especificar el número de puerto Solución para SMTP TX/POP RX Compruebe la información del destino. Pulse Pulse [Opciones de funciones] Si se ha realizado alguna actualización, cambie la [Envío] [Opciones de e-mail/I-fax] información registrada en la libreta de direcciones/ [Especifique número de puerto para TX botones de acceso directo.
- Seite 210 No se ha podido escanear/enviar por fax correctamente Si no puede enviar/reenviar faxes Si no puede enviarse ningún fax Si no puede reenviar faxes Compruebe que la línea telefónica no esté Compruebe la información del destino de reenvío conectada a una ubicación incorrecta. registrada en la libreta de direcciones/botones de acceso directo.
- Seite 211 Si no puede recibir faxes Si utiliza una línea de fibra óptica o de Solución telefonía a través de IP Elimine los documentos innecesarios Pueden producirse errores de comunicación en de la memoria para aumentar el función de la calidad de la línea. espacio libre.
- Seite 212 Cancelar trabajos de copia/impresión Cancelar un trabajo de copia Cancelar un trabajo de impresión Para detener la alimentación de papel Para el SO Windows En la pantalla del ordenador, haga doble clic en el icono de la impresora. Pulse Seleccione el archivo que desee cancelar. PU N TO También podrá...
- Seite 213 Guía de instalación del controlador. Dicha guía puede descargarse de la misma página del sitio web de Canon que el controlador de impresora, o bien consultarse allí. Información más reciente de asistencia del SO Consulte el sitio web de Canon (https:// global.canon/en/support/).
-
Seite 214: Piezas De Repuesto
Prepare el consumible. Consulte el número de artículo.* * Se trata de un número de artículo que identifica un consumible original de Canon. Para conseguir una alta calidad de impresión, se recomienda utilizar consumibles originales de Canon. NOTA P.215 Lista de consumibles Para consultar el número de artículo... -
Seite 215: Lista De Consumibles
Tenga cuidado con el tóner falsificado Le informamos que existe tóner Canon falsificado en el mercado. El uso de tóner falsificado puede producir mala calidad de impresión o un funcionamiento deficiente de la máquina. Canon no se hace responsable de posibles defectos de funcionamiento, accidentes o daños ocasionados por el uso de cartuchos de tóner Canon falsificados. - Seite 216 Aparece una pantalla de error Si aparece el mensaje "Póngase en Aparece un mensaje de error contacto con su servicio al cliente" Si se produce un error durante la lectura o la Si el equipo deja de funcionar con normalidad impresión, o si se produce un problema con la debido a un problema, aparecerá...
- Seite 217 [Llame al servicio al cliente.] en la esquina inferior izquierda de la pantalla. Aparece un mensaje que le pide que se ponga en contacto con su distribuidor autorizado de Canon Guía del usuario 0YAS-0K0 Buscar P.226...
-
Seite 218: Unidad Principal
Índice ilustrado Puede identificar fácilmente el nombre de una pieza y buscar la página donde se describe. * Las ilustraciones asumen que el equipo cuenta con una Unidad de Alimentación por Casete AW Unidad principal Unidad de Alimentación por Casete AW Etiqueta de tamaño de papel P. - Seite 219 P.187 Interruptor de alimentación P.190 Bandeja multiuso Extensión de la bandeja Guías del papel Casete 1 P. 188 Guías del papel P.195 Casete 2 P. 188 Guías del papel P.195 Alimentador de sobres A P.195...
-
Seite 220: Panel De Control
Índice ilustrado Panel de control Pantalla Inicio Teclado numérico en pantalla Pantalla táctil [Ahorro de energía] P.186 P.186 Muestra la pantalla de opciones y mensajes. Pulse poner el equipo en el modo de reposo. Pulse el panel para configurar opciones y otras operaciones. - Seite 221 [Cronograma] Indicador Procesando/datos Muestra un registro de las opciones • Pa r p a d e a c u a n d o e l e q u i p o e s t á e n especificadas en Copiar/Leer y Enviar. funcionamiento.
-
Seite 222: Instrucciones De Seguridad Importantes
No instale el equipo en los siguientes lugares productos con una función de fax) realizados por Canon o un tercero autorizado por De otro modo, podrían producirse daños en el Este equipo está en conformidad con la Canon. - Seite 223 No utilice alargadores ni regletas múltiples con inesperados. extrae el casete, ya que esto podría tener • el equipo. De lo contrario, podrían producirse No utilice pulverizadores inflamables cerca de como resultado lesiones personales. • descargas eléctricas o incendios. este equipo. Si alguna sustancia inflamable Tecla de Ahorro de energía (solo en productos •...
- Seite 224 (los) siguiente(s) cortarse las manos con los bordes del papel. a 3 metros. nombre(s) entre paréntesis ( ). Símbolos relacionados con la seguridad imageRUNNER ADVANCE DX C3835i/C3830i/ Consumibles C3826i/C3822i (F810300) Interruptor de alimentación: Posición "ON" (encendido) Interruptor de alimentación: Posición "OFF"...
-
Seite 225: Software De Otros Fabricantes
NINGÚN TIPO EN RELACIÓN CON ESTE cumplir con los requisitos técnicos de la Directiva MATERIAL, YA SEAN EXPRESAS O IMPLÍCITAS, Este producto de Canon (el "PRODUCTO") incluye de compatibilidad electromagnética. EXCEPTO EN LA MEDIDA EN QUE SE DESCRIBE módulos de software de terceros. El uso y la EN ESTE DOCUMENTO, INCLUIDAS, SIN distribución de dichos módulos de software,... - Seite 226 ¿Quiere saber más? Puede consultar la Guía del usuario Si ve un número de búsqueda en un tema de esta guía que está leyendo... Puede buscar Configurar el entorno de red Guía del usuario en la Guía del usuario ABCD-123 Buscar con el número de búsqueda.
- Seite 228 Building A, The Park Estate, 5 Talavera Road, 146-8501, Japan Macquarie Park, NSW 2113, Australia CANON U.S.A., INC. CANON SINGAPORE PTE LTD One Canon Park, Melville, NY 11747, U.S.A. 1 Fusionopolis Place, #15-10, Galaxis, Singapore 138522 CANON CANADA INC. 8000 Mississauga Road Brampton ON L6Y 5Z7, Canada CANON EUROPA N.V.