Inhaltsverzeichnis
Werbung
Verfügbare Sprachen
Verfügbare Sprachen
Quicklinks
Werbung
Inhaltsverzeichnis

Verwandte Anleitungen für BH FITNESS G869


Inhaltszusammenfassung für BH FITNESS G869
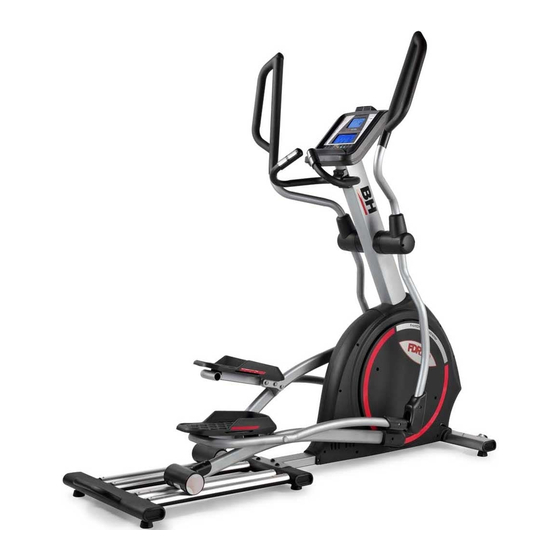
- Seite 1 G869 Instrucciones de montaje y utilización Instructions for assembly and use Instructions de montage et utilisation Montage und gebrauchsanleitung Instruções de montagem e utilização Montage-en gebruiksinstrukties...
- Seite 2 Fig 0...
- Seite 3 Fig.1...
- Seite 4 Fig.2...
- Seite 5 Fig.3 Fig.4...
- Seite 6 Fig.5 Fig.6...
- Seite 7 Fig.7 Fig.8...
- Seite 8 Fig.9 Fig.10...
- Seite 9 Fig.11...
-
Seite 10: Instrucciones De Seguridad
Español INSTRUCCIONES DE con las instrucciones. Si encuentra algún componente defectuoso durante SEGURIDAD.- montaje comprobación Antes comenzar cualquier aparato, o si oye algún ruido extraño programa de ejercicio, consulte a su durante la utilización, pare. médico. Se recomienda la realización No utilice este aparato hasta que se de un examen físico completo. -
Seite 11: Indicaciones Generales
Es muy importante mantener un ritmo de calentamiento y relajación de constante. El ritmo de ejercicio será lo costumbre, pero cuando esté llegando bastante alto para aumentar al final de la fase de ejercicio, pulsaciones hasta la zona objetivo aumente la resistencia para someter muestra gráfico sus piernas a un mayor esfuerzo. -
Seite 12: Instrucciones De Montaje
5 Su unidad sólo puede ser usada por (58) Tuerca M-8. una persona al mismo tiempo. (83) Tornillo de M-5x10. 6 Utilice prendas de vestir y calzado (118) Tornillo de M-5x15. adecuado. Átese cordones Llaves de montaje. correctamente. 2.- MONTAJE DEL TUBO 1.- INSTRUCCIONES DE REMO.- MONTAJE.-... -
Seite 13: Montaje De Los Brazos
de montar al mes de uso de la NIVELACIÓN.- máquina. Una vez colocada la unidad en su lugar definitivo, para realización 5.- MONTAJE DE LOS TUBOS ejercicio, compruebe PEDALES.- asentamiento suelo nivelación sean correctos. Esto se Coloque el tubo pedal izquierdo (8) en conseguirá... -
Seite 14: Safety Instructions
English SAFETY INSTRUCTIONS.- If you discover any defective component while assembling or checking the Consult your doctor before starting any equipment, or if you hear any strange exercise program. It is advisable to noise during exercise then stop. Do not undergo complete physical... -
Seite 15: General Instructions
Weight loss In this case the important factor is the effort made. The more intense and the longer the session, the greater the number of calories burned. Even though you are dong the same work as you do to improve fitness, the objective has changed. -
Seite 16: Fitting The Handlebar
1.- ASSEMBLY INSTRUCTIONS.- 2.- FITTING THE MAIN POST.- 1. Take the unit out of its box and make Bring the main post (2) up to boss on sure that all of the pieces are there: the main body (1), Fig.3, connect the terminals (61), (76) Fig.3. -
Seite 17: Mains Connection
(83), Fig.6. Perform same LEVELLING.- assembly with the right foot bar (9). Once the unit has been placed into its Perform the same assembly on the final position, make sure that it sits flat right side. on the floor and that it is level. This can Put the bushing (86) on the left foot bar be achieved by screwing the adjustable (8) using the screw (32), Fig.7. -
Seite 18: Consignes De Sécurité
Français CONSIGNES DE SÉCURITÉ.- qu’un élément est défectueux ou si vous entendez bruit étrange Avant de commencer tout exercice, durantl’utilisation, ne pas utiliser la demandez l’avis de votre médecin. Il machine avant d’avoir résout est conseillé de passer un examen problème. -
Seite 19: Indications Générales
Il est très important de maintenir un physique en général, vous devrez rythme constant. rythme modifier votre programme l’exercice sera suffisamment élevé d’entraînement. Faites les exercices pour augmenter les pulsations jusqu’à d’échauffement relaxation zone-objectif indiquée habituels et à la fin de phase de schéma suivant. -
Seite 20: Montage Du Guidon
5 Seule une personne à la fois peut (49) Rondelle D25xD8.2xt2.0. monter sur l’appareil. (50) Rondelle D8. 6 L’utilisateur de l’appareil doit porter (53) Rondelle D8. des vêtements et des chaussures (58) Ecrou M-8. appropriés pour réaliser l’exercice. (83) Vis M-5x10. (118) Vis M-5x15. - Seite 21 NIVELLEMENT.- IMPORTANT : Il est conseillé de resserrer les vis qui viennent d’être Après avoir installé l’unité à posées un mois après l’utilisation de l’emplacement qui lui a été réservé la machine. pour réaliser les exercices, vérifi ez si l’assise au sol et le nivellement sont 5.- MONTAGE DES TUBES corrects.
-
Seite 22: Sicherheitshinweise
Deutsch SICHERHEITSHINWEISE.- montiert haben. Nutzen Gerät stets Bevor einem entsprechend der Anleitung. Sollten Sie Trainingsprogramme beginnen, bei der Montage oderÜberprüfung des konsultieren Sie bitte Ihren Arzt. Wir Geräts feststellen, dass eine empfehlen dabei eine komplette Komponente defekt ist oder sollte Untersuchung. -
Seite 23: Allgemeine Hinweise
2. Trainingsphase Möglicherweise müssen sie dabei die dieser Phase erfolgt Dauer des Trainings reduzieren. Wenn hauptsächliche physische Anstren- Sie darüber hinaus Ihre allgemeine gung. Nach dem regelmäßigen Training physische Form verbessern wollen, wird die Flexibilität der Beinmuskulatur müssen Sie Ihr Trainingsprogramm gesteigert. -
Seite 24: Montage Des Lenkers
4 Der Eigentümer hat die Aufgabe (46) Schraube ST4x20. sicherzustellen, dass alle Benutzer des (49) Unterlegscheibe D25xD8.2xt2.0. Geräts über alle notwendigen (50) Unterlegscheibe D8. Sicherheitsmaßnahmen informiert sind (53) Unterlegscheibe D8. und sich entsprechend verhalten. (58) Mutter M-8. 5 Das Gerät darf nicht von mehreren (83) Schraube M-5x10. -
Seite 25: Montage Der Arme
WICHTIG: Nach einem Monat NIVELLIEREN DES GERÄTS.- Nutzung des Geräts sollten diese Schrauben nachgezogen werden. Wenn sich das Gerät an seinem endgültigen Aufste- llungsort befindet, 5.- MONTAGE DER FUSSROHRE.- prüfen Sie, ob es einen stabilen Stand Bringen Sie das linke Pedalrohr (8) an auf dem Boden hat und korrekt die Schiene, nutzen Sie hierfür die nivelliert ist. -
Seite 26: Instruções De Segurança
Português INSTRUÇÕES DE acordo com as instruções. Se encontrar alguma peça com defeito durante a SEGURANÇA.- montagem ou durante a verificação do Antes de começar qualquer programa equipamento, ou se ouvir algum ruído de exercício, consulte o seu médico. estranho durante a utilização, pare. Não Recomendamos a realização de um utilize o equipamento até... -
Seite 27: Indicações Gerais
aumentar as pulsações até à zona resistência para submeter as suas objectivo como se indica no seguinte pernas a um maior esforço. Deverá gráfico. reduzir a velocidade para manter o ritmo cardíaco na zona objectivo. Perda de peso Neste caso, o mais importante é o esforço realizado: quando mais intenso e mais prolongado for o treino, maior será... -
Seite 28: Instruções De Montagem
1.- INSTRUÇÕES DE 2.- MONTAGEM DO TUBO MONTAGEM.- CENTRAL.- 1 Retire o equipamento da embalagem Una o tubo central (2) ao tubo que sai e verifique que estão todas as peças. do corpo central (1), Fig.3, e ligue os terminais (61), (76), Fig.3. ATENÇÃO: Recomenda-se a ajuda Coloque o tudo central (2) na peça de uma segunda pessoa para a... -
Seite 29: Montagem Dos Braços
(49). equipamento está nivelado no chão. Coloque a tampa (108) usando o Poderá nivelar equipamento parafuso (83), Fig. 6. roscando mais ou menos os pés Proceder à mesma montagem para o reguláveis (38) como mostra a Fig.10. tudo pedal direito (9). Coloque o casquilho (86) no tubo pedal MOVIMENTO E esquerdo... -
Seite 30: Veiligheidsaanwijzingen
Nederlands VEILIGHEIDSAANWIJZINGEN Als u tijdens het monteren een defect onderdeelvindt of als u tijdens de Raadpleeg uw geneesheer alvorens u werking van het toestel een vreemd met een oefeningenprogramma begint. geluid hoort, stop dan onmiddellijk. Het wordt aangeraden om een volledig Gebruik het toestel niet opnieuw totdat onderzoek te laten doen. -
Seite 31: Algemene Aanwijzingen
Het ritme van de oefening dient gewoonlijk, maar wanneer u aan het voldoende hoog te liggen om de einde van de oefening komt, vermeerdert polsslag in de zone te krijgen die in de u de weerstand om zo een grotere onderstaande grafiek is aangegeven. -
Seite 32: Montage-Instructies
1.- MONTAGE-INSTRUCTIES.- 2.- DE HOOFDSTANG Haal het apparaat uit de verpakking en BEVESTIGEN.- controleer of alle onderdelen aanwezig Breng de hoofdstang (2) vervolgens zijn. omhoog naar naaf N.B.: De hulp van een tweede persoon hoofdframe (1), Fig.3, verbind de wordt aanbevolen bij het monteren van uiteinden van de kabels (61 en 76) dit toestel Fig.3. -
Seite 33: Aansluiting Op Het Elektriciteitsnet
BELANGRIJK: Plaats afdekplaten onderkant aanbevelenswaardig deze focusstang (90) en (91) op de linker schroeven opnieuw aan te draaien focusstang (5) gebruikmakend van de na één maand toestelgebruik. schroeven (83), Fig. 9. Voer dezelfde montagestappen voor MONTEREN de rechter stang uit. STANGEN VOOR NIVELLERING.-... - Seite 34 bijstandsdienst door dienstverlening te BH BEHOUDT ZICH HET RECHT TOE DE PRODUCTSPECIFICATIES- bellen (zie laatste pagina van de handleiding). ZONDERVOORAFGAAND BERICHT TE VERANDEREN.
- Seite 35 G869...
- Seite 36 Para pedido de repuesto: Indicar el código de la pieza y la cantidad To order replacement parts: State the part code and Quantity Pour toute commande pièces détachées: Indiquer le code de la pièce et la quantité Bestellung von Ersatzteilen: Bitte angeben Teil-code und Menge Para encomendar peças: Indicar o código da peça e a quantidade Per ordinare pezzi di ricambio: Indicare il codice del pezzo e la quantità...
- Seite 37 Crank cover (8200-32) Tapa biela G869079 Pedal-left(8200- 33) Repospiés izquierdo G869080 Reposapiés derecho G869081 Pedal-right (8200-34) Outer cover end plug Tapa base G869084 Roller Rodillo G869085 Bushing for sliding wheel Casquillo antidescarrilamiento G869086 Console Monitor E1 Crosshiit G869087 Deep groove ball bearing R10ZZ Rodamiento R10ZZ G869089 Handlebar down cover (8200-43)
- Seite 38 Español Por medio de la presente Exercycle S.L. declara que este producto cumple con los requisitos esenciales y cualesquiera otras disposiciones aplicables o exigibles de las Directivas 2009/125/CE, 2011/65/CE, 2004/108/CE y 2006/95/CE. Hereby, Exercycle S.L, declares that this product is in compliance with the English essential requirements and other relevant provisions of Directives 2005/32/EC, 2011/65/EC, 2004/108/EC and 2006/95/EC.
- Seite 39 POST-VENTA Tel: +34 945 292 012 / 902 170 258 Fax: +34 945 56 05 27 e-mail: sat@bhfitness.com BH FITNESS NORTH AMERICA BH FITNESS MEXICO BH FITNESS UK 620 N. 2nd Street, St. Charles BH Exercycle de México S.A. de...