Herunterladen Diese Seite drucken

Werbung

Verfügbare Sprachen

Verfügbare Sprachen

Eee Box PC
User Manual

Werbung

loading

Inhaltszusammenfassung für EeeBox B202

  • Seite 1 Eee Box PC User Manual...
  • Seite 2 E3870 First Edition V1 May 2008 Copyright © 2008 ASUSTeK COMPUTER INC. All Rights Reserved. No part of this manual, including the products and software described in it, may be reproduced, transmitted, transcribed, stored in a retrieval system, or translated into any language in any form or by any means, except documentation kept by the purchaser for backup purposes, without the express written permission of ASUSTeK COMPUTER, INC.
  • Seite 3: Inhaltsverzeichnis

    Contents Contents ....................... 3 Notices ......................5 Safety information ..................7 Notes for this manual ................9 Welcome ..............10 Package contents ..................10 Knowing your Eee Box PC ........11 Front view ....................11 Rear view ....................13 Positioning your Eee Box PC ........15 Installing the stand .................15 Installing your Eee Box PC to a monitor .........16 Setting up your Eee Box PC ........17...
  • Seite 4 Contents Recovering your system ...........30 Using the recovery DVD ...............30 Using the hidden partition ..............32 Eee Box PC...
  • Seite 5: Notices

    Notices Federal Communications Commission Statement This device complies with Part 15 of the FCC Rules. Operation is subject to the following two conditions: • This device may not cause harmful interference, and • This device must accept any interference received including interference that may cause undesired operation.
  • Seite 6: Canadian Department Of Communications Statement

    Canadian Department of Communications Statement This digital apparatus does not exceed the Class B limits for radio noise emissions from digital apparatus set out in the Radio Interference Regulations of the Canadian Department of Communications. This class B digital apparatus complies with Canadian ICES-003. Macrovision Corporation Product Notice This product incorporates copyright protection technology that is protected by method claims of certain U.S.
  • Seite 7: Safety Information

    Safety information Your Eee Box PC is designed and tested to meet the latest standards of safety for information technology equipment. However, to ensure your safety, it is important that you read the following safety instructions. Setting up your system •...
  • Seite 8 • Liquid has been spilled into the system. • The system does not function properly even if you follow the operating instructions. • The system was dropped or the cabinet is damaged. • The system performance changes. Lithium-Ion Battery Warning CAUTION: Danger of explosion if battery is incorrectly replaced.
  • Seite 9: Notes For This Manual

    Notes for this manual To make sure that you perform certain tasks properly, take note of the following symbols used throughout this manual. WARNING: Vital information that you MUST follow to prevent injury to yourself. IMPORTANT: Instructions that you MUST follow to complete a task.
  • Seite 10: Welcome

    Welcome Congratulations on your purchase of the Eee Box PC. The following illustration displays the package contents of your new Eee Box PC. If any of the below items is damaged or missing, contact your retailer. Package contents Eee Box PC Stand Metal shelf (optional) Wireless antenna...
  • Seite 11: Knowing Your Eee Box Pc

    Knowing your Eee Box PC Front view Refer to the diagram below to identify the components on this side of the system. Hard disk LED The hard disk LED blinks when data is being written into or read from the hard disk drive. Power switch The power switch allows powering ON and OFF the system.
  • Seite 12 USB port The USB (Universal Serial Bus) port is compatible with USB devices such as keyboards, mouse devices, cameras, and hard disk drives. USB allows many devices to run simultaneously on a single computer, with some peripheral acting as additional plug-in sites or hubs. Headphone/Audio Out jack The stereo headphone jack (3.5mm) is used to connect the system’s audio out signal to amplified speakers or...
  • Seite 13: Rear View

    Rear view Refer to the diagram below to identify the components on this side of the system. Wireless antenna jack The jack is used to connect the supplied wireless antenna to enhance wireless signal reception. Power input (DC 19V) The supplied power adapter converts AC power to DC power for use with this jack.
  • Seite 14 DVI port The Digital Visual Interface (DVI) port supports a high quality VGA-compatible device such as a monitor or projector to allow viewing on a larger external display. USB port The USB (Universal Serial Bus) port is compatible with USB devices such as keyboards, mouse devices, cameras, and hard disk drives.
  • Seite 15: Positioning Your Eee Box Pc

    Positioning your Eee Box PC Installing the stand Erect your Eee Box PC with the supplied stand. To do so: Locate the screw hole on the bottom of the Eee Box PC. Align the stand screw to the PC screw hole, and then secure the stand to the PC with a coin.
  • Seite 16: Installing Your Eee Box Pc To A Monitor

    Installing your Eee Box PC to a monitor You can also install your Eee Box PC to the back of a monitor. To do Secure the metal shelf (optional accessory) to your monitor with four screws. To fasten the metal shelf, your monitor must comply with VESA75 or VESA100 standard.
  • Seite 17: Setting Up Your Eee Box Pc

    Setting up your Eee Box PC You need to connect peripherals before using your Eee Box PC. Connecting to a display Connect one end of a DVI cable to the display ( ) and the other end to the DVI port on the system rear panel ( Connecting to USB devices Connect USB devices like keyboards, mouse devices, and printers to the USB ports on the system rear panel.
  • Seite 18: Connecting To A Network Device

    Connecting to a network device Connect one end of a network cable to the LAN port on the system rear panel and the other end to a hub or switch. Network cable with RJ-45 connectors Network hub or switch Turning on the system Connect the supplied AC adapter to the DC IN jack on the system rear panel, and then press the power switch on the front panel to turn on the system.
  • Seite 19: Using Your Eee Box Pc

    Using your Eee Box PC Configuring wireless connection To connect to a wireless network, follow the instructions below: Connect the supplied wireless antenna to your Eee Box PC to enhance wireless signal reception. From the Windows® notification area, right-click the wireless network icon and select View Available Wireless Networks.
  • Seite 20: Configuring Wired Connection

    Configuring wired connection To establish a wired network, follow the instructions below: Using a static IP Right-click the network icon on the notification area and select Open Network Connections. Right-click Local Area Connection and select Properties. Hightlight Internet Protocol (TCP/IP) and click Properties.
  • Seite 21: Using A Dynamic Ip (Pppoe Connection)

    Select Use the following IP address. Enter your IP address, Subnet mask and Default gateway. If needed, enter the Preferred DNS server address. After entering all of the related values, click OK to finish the configuration. Using a dynamic IP (PPPoE connection) Repeat Step 1–3 in the previous section.
  • Seite 22 Click Next. Select Connect to the Internet and click Next. Select Set up my Select your connection type and click Next. connection manually. Enter your ISP Name and Enter your User name and click Next. Password. Click Next. Eee Box PC...
  • Seite 23 10. Click Finish to finish the 11. Enter your user name and password. Click Connect to configuration. connect to the Internet. Contact your Internet Service Provider (ISP) if you have problems connecting to the network. Eee Box PC...
  • Seite 24: Asus Easy Update

    ASUS Easy Update ASUS Easy Update is a software tool that automatically detects and downloads the latest BIOS, drivers, and applications for your Eee Box PC. From the Windows® notification area, right-click the ASUS Easy Update icon. Select Schedule to set how often you want to update your system.
  • Seite 25: Eee Box Express Gate

    Eee Box Express Gate Eee Box Express Gate is an instant-on environment that gives you quick access to web, Skype, and your photo albums. A few seconds after turning on your Eee Box PC, you will be at the Express Gate menu where you can start the web browser, Skype, or other Express Gate applications.
  • Seite 26: Knowing The Express Gate Keyboard Shortcuts

    LaunchBar In the Express Gate environment, click the icons on the LaunchBar to open or switch among applications. You can also switch among applications by pressing ALT + TAB on the keyboard. Right-clicking anywhere on the desktop opens a menu of applications. The red dot below an application icon on the LaunchBar indicates that the application is running, so you can switch to it immediately.
  • Seite 27: Using The Configuration Panel

    Using the Configuration panel The configuration panel allows you to change Express Gate settings. Click an icon to open a configuration tool. The following tools are available: • Date and Time: sets date and time as well as time zone. •...
  • Seite 28: Using The Launchbar

    Using the LaunchBar The LaunchBar contains application and system status icons. The LaunchBar can be hidden or located on any side of the screen. Starts the Web Browser for quick access to the World Wide Web. Starts the Photo Manager album/organizer tool. Starts the Chat instant messaging tool.
  • Seite 29 Customizes LaunchBar settings. Shows the “ASUS Utility” panel. Shows Express Gate version information. Opens Express Gate online Help. Opens the “Power Off” menu. You can also press CTRL + ALT + DEL on the keyboard to open this menu. Power Off Enter OS Restart Click to save...
  • Seite 30: Recovering Your System

    Recovering your system Using the recovery DVD The recovery DVD includes an image of the operating system installed on your system at the factory. The recovery DVD, working with the support CD, provides a comprehensive recovery solution that quickly restores your system to its original working state, provided that your hard disk drive is in good working order.
  • Seite 31 Insert the support CD into the optical drive when you are asked to. After the system recovery is completed, restart the computer. After the system reboots, Windows® will begin system configurations and install drivers and utilities. Set up your language, time zone, keyboard, computer name, and user name to enter the Windows®...
  • Seite 32 Using the hidden partition The recovery partition includes an image of the operating system, drivers, and utilities installed on your system at the factory. The recovery partition provides a comprehensive recovery solution that quickly restores your system’s software to its original working state, provided that your hard disk drive is in good working order.
  • Seite 33 Eee Box-PC Benutzerhandbuch...
  • Seite 34 G3870 Erste Ausgabe V1 Juni 2008 Copyright © 2008 ASUSTeK COMPUTER INC. Alle Rechte vorbehalten. Kein Teil dieses Handbuchs, einschließlich der darin beschriebenen Produkte und Software, darf ohne ausdrückliche, schriftliche Genehmigung von ASUSTeK COMPUTER INC. (“ASUS”) in irgendeiner Form, ganz gleich auf welche Weise, vervielfältigt, übertragen, abgeschrieben, in einem Wiedergewinnungssystem gespeichert oder in eine andere Sprache übersetzt werden.
  • Seite 35: Inhalt

    Inhalt Inhalt ......................35 Erklärungen....................37 Sicherheitsinformationen ..............39 Hinweise für dieses Handbuch ............41 Willkommen ..............42 Paketinhalt ....................42 Kennenlernen Ihres Eee Box-PC .........43 Vorderseite ....................43 Rückseite ....................45 Eee Box-PC aufstellen ..........47 Ständer installieren ................47 Eee Box PC an einen Bildschirm anschließen .......48 Eee Box-PC vorbereiten ...........49 Bildschirm anschließen .................49 USB-Geräte anschließen ...............49 An ein Netzwerkgerät anschließen ..........50...
  • Seite 36 Inhalt Systemwiederherstellung ........62 Verwenden der Wiederherstellungs-DVD ........62 Benutzen der versteckten Partition..........64 Eee Box-PC...
  • Seite 37: Erklärungen

    Erklärungen Erklärung der Federal Communications Commission Dieses Gerät entspricht den FCC-Vorschriften, Teil 15. Sein Betrieb unterliegt den folgenden zwei Bedingungen: • Dieses Gerät darf keine schädigenden Interferenzen erzeugen, • Dieses Gerät muss alle empfangenen Interferenzen aufnehmen, einschließlich derjenigen, die einen unerwünschten Betrieb erzeugen.
  • Seite 38: Erklärung Des Kanadischen Ministeriums Für Telekommunikation

    Erklärung des kanadischen Ministeriums für Telekommunikation Dieses Digitalgerät überschreitet keine Grenzwerte für Funkrauschemissionen der Klasse B, die vom kanadischen Ministeriums für Telekommunikation in den Funkstörvorschriften festgelegt sind. Dieses Digitalgerät der Klasse B stimmt mit dem kanadischen ICES-003 überein. Macrovision Corporation-Produktanmerkung Dieses Produkt verfügt über Kopierschutztechnologie, die durch methodische Anforderungen bestimmter U.S.A.-Patente und anderer geistiger Eigentumsrechte der Macrovision Corporation...
  • Seite 39: Sicherheitsinformationen

    Sicherheitsinformationen Ihr ASUS Desktop-PC wurde auf die neuesten Sicherheitsstandards für Informationstechnologie geprüft und für gut befunden. Um allerdings die sichere Handhabung des Produkts zu gewährleisten, sollten Sie den Anweisungen in diesem Dokument unbedingt Folge leisten. Einstellen des Systems • Lesen und befolgen Sie alle Anweisungen des Handbuchs, bevor Sie den Asteio Media Center PC in Betrieb nehmen.
  • Seite 40: Lithium-Ionen-Akku-Warnung

    • das System nicht ordnungsgemäß funktioniert, auch wenn alle Betriebsanleitungen befolgt werden • der PC fallen gelassen wurde oder das Gehäuse beschädigt ist • sich die Systemleistung drastisch verändert Lithium-Ionen-Akku-Warnung WARNUNG: Bei unsachgemäßem Austausch kann der Akku explodieren. Verwenden Sie als Ersatz nur vom Hersteller empfohlene oder ähnliche Modelle.
  • Seite 41: Hinweise Für Dieses Handbuch

    Hinweise für dieses Handbuch Um sicherzustellen, dass Sie bestimmte Aufgaben richtig ausführen, beachten Sie bitte die folgenden Symbole, die in diesem Handbuch verwendet werden. GEFAHR/WARNUNG: Informationen zum Vermeiden von Verletzungen beim Ausführen einer Aufgabe. WICHTIG: Anweisungen, die Sie beim Ausführen einer Aufgabe befolgen müssen.
  • Seite 42: Willkommen

    Willkommen Herzlichen Glückwunsch zu Ihrem Kauf eines Eee Box-PCs. Der Inhalt des Produktpakets wird im Folgenden aufgeführt. Sollten folgende Artikel beschädigt oder nicht vorhanden sein, wenden Sie sich bitte an Ihren Händler. Paketinhalt Eee Box-PC Ständer Metallhalterung (optional) Wireless-Antenne Netzteil Netzkabel Mini-Buchse zum S/PDIF- Support-CD...
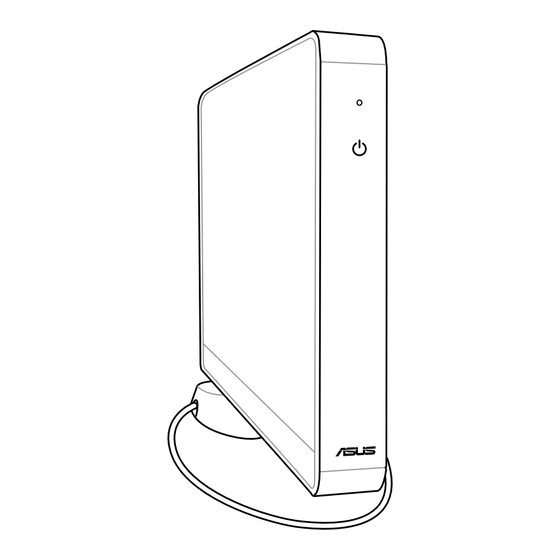
  • Seite 43: Kennenlernen Ihres Eee Box-Pc

    Kennenlernen Ihres Eee Box-PC Vorderseite Die nachstehende Abbildung zeigt die Komponenten auf dieser Seite des Systems. Laufwerks-LED Diese LED blinkt, wenn Daten auf der Festplatte gelesen oder auf ihr geschrieben werden.. Netzschalter Dieser Schalter schaltet das System EIN und AUS. Speicherkartensteckplatz Der integrierte Kartenleser liest MMC/SD/SDHC/MS/MS Pro- Karten aus Geräten wie z.B.
  • Seite 44 USB-Anschluss Der USB (Universal Serial Bus)-Anschluss ist kompatibel mit USB-Geräten wie z.B. Tastaturen, USB-Mäuse, Kameras und externe Laufwerke. USB macht es möglich, mehrere Geräte gleichzeitig an einem Computer zu nutzen. Einige Peripherigeräte können dabei als zusätzliche Steck- Möglichkeiten oder Hubs genutzt werden. Kopfhörer-/Audio-Ausgang Die Stereo-Kopfhörerbuchse (3,5mm) dient zum Verbinden des Audioausgangssignals des Systems mit verstärkten...
  • Seite 45: Rückseite

    Rückseite Die nachstehende Abbildung zeigt die Komponenten auf dieser Seite des Systems. Wireless-Antennenbuchse Diese Buchse verbindet mit der mitgelieferten Wireless- Antenne, um den Signalempfang zu verbessern. Netzteileingang (Gleichspannung) Hier schließen Sie das mitgelieferte Netzteil an, das Wechselspannung zum Betrieb Ihres Eee PC in Gleichspannung umwandelt.
  • Seite 46 DVI-Anschluss Der Digital Visual Interface (DVI)-Anschluss unterstützt DVI- kompatible Geräte wie z.B. Monitore oder Projektoren, um die Anzeige auf einem externen Gerät zu ermöglichen. USB-Anschluss Der USB (Universal Serial Bus)-Anschluss ist kompatibel mit USB-Geräten wie z.B. Tastaturen, USB-Mäuse, Kameras und externe Laufwerke. USB macht es möglich, mehrere Geräte gleichzeitig an einem Computer zu nutzen.
  • Seite 47: Eee Box-Pc Aufstellen

    Eee Box-PC aufstellen Ständer installieren Stellen Sie den Eee Box-PC mit dem mitgelieferten Ständer folgendermaßen auf: Suchen Sie die Schraubenlöcher auf der Unterseite des Eee Box-PCs. Richten Sie die Ständerschrauben auf die Löcher aus, und befestigen Sie dann den Ständer mit Hilfe einer Münze am PC. Eee Box-PC Unterseite Schraubenloch Ständerschraube...
  • Seite 48: Eee Box Pc An Einen Bildschirm Anschließen

    Eee Box PC an einen Bildschirm anschließen Sie können Ihren Eee Box-PC auch an der Rückseite eines Bildschirms befestigen. Gehen Sie dazu folgendermaßen vor: Befestigen Sie die Metallhalterung (optionales Zubehör) mit vier Schrauben am Bildschirm. Um die Metallhalterung befestigen zu können, muss der Bildschirm dem Standard VESA75 oder VESA100 entsprechen.
  • Seite 49: Eee Box-Pc Vorbereiten

    Eee Box-PC vorbereiten Bevor Sie Ihrem Eee Box-PC nutzen können, müssen Sie einige Peripheriegeräte anschließen. Bildschirm anschließen Verbinden Sie ein Ende des DVI-Kabels mit dem Bildschirm ( und das andere Ende mit dem DVI-Anschluss auf der Rückseite des Systems ( USB-Geräte anschließen Verbinden Sie USB-Geräte wie Tastatur, Maus oder Drucker mit den USB -Anschlüssen auf der Rückseite des Systems.
  • Seite 50: An Ein Netzwerkgerät Anschließen

    An ein Netzwerkgerät anschließen Verbinden Sie ein Ende des Netzwerkkabels mit dem LAN-Anschluss auf der Rückseite des Systems und das andere mit einem Hub oder Switch. Netzwerkkabel mit RJ-45-Anschluss Netzwerk-Hub oder Switch System einschalten Verbinden Sie das Netzteil mit dem Anschluss DC IN auf der Rückseite des Systems und drücken Sie dann den Netzschalter auf der Vorderseite, um das System einzuschalten.
  • Seite 51: Eee Box Pc Benutzen

    Eee Box PC benutzen Wireless-Verbindung konfigurieren Um sich mit einem Wireless-Netzwerk zu verbinden, gehen Sie folgendermaßen vor: Verbinden Sie die mitgelieferte Wireless-Antenne mit Ihrem Eee Box-PC, um den Signalempfang zu verbessern. Rechtsklicken Sie in der Windows®-Taskleiste auf das Wireless-Netzwerk- Symbol und wählen Sie Verfügbare Netzwerke anzeigen.
  • Seite 52: Netzwerkverbindung Konfigurieren

    Netzwerkverbindung konfigurieren Wenn Sie auf ein lokales Netzwerk zugreifen möchten, gehen Sie folgendermaßen vor: Statische IP verwenden Rechtsklicken Sie auf das Netzwerk-Symbol in der Taskleiste und wählen Sie Netzwerkverbindungen öffnen. Rechtsklicken Sie auf Lokale Verbindung und wählen Sie Eigenschaften. Wählen Sie Internet Protokoll (TCP/IP) und klicken Sie auf Eigenschaften.
  • Seite 53: Dynamische Ip Verwenden (Pppoe-Verbindung)

    Wählen Sie Folgende IP- Adresse verwenden. Geben Sie Ihre IP-Adresse, Subnetzmaske und Standard-Gateway ein. Falls notwendig, geben Sie die Adresse für den Bevorzugten DNS Server ein. Wenn alle erforderlichen Werte eingegeben wurden, klicken Sie auf OK, um die Konfiguration fertigzustellen. Dynamische IP verwenden (PPPoE-Verbindung) Wiederholen Sie Schritt 1–3 im vorhergehenden...
  • Seite 54 Klicken Sie Weiter. Wählen Sie Mit dem Internet verbinden und klicken Sie auf Weiter. Wählen Sie Verbindung Wählen Sie den manuell einrichten. Verbindungstyp und klicken Sie auf Weiter. Geben Sie Ihren ISP- Geben Sie Ihren Namen ein und klicken Sie Benutzernamen und das auf Weiter.
  • Seite 55 10. Klicken Sie auf Fertig, 11. Geben Sie Ihren um die Konfiguration zu Benutzernamen und das beenden. Passwort ein. Klicken Sie auf Verbinden, um sich mit dem Internet zu verbinden. Wenden Sie sich an Ihren Internet Service Provider (ISP), wenn Sie Probleme mit der Netzwerkverbindung haben.
  • Seite 56: Asus Easy Update

    ASUS Easy Update ASUS Easy Update ist eine Hilfs-Software, welche automatisch die neuesten BIOS-Versionen, Treiber und Anwendungen für Ihren Eee Box-PC erkennt und herunterlädt. Rechtsklicken Sie in der Windows®-Taskleiste auf das Symbol ASUS Easy Update. Wählen Sie Schedule, um einzustellen, wie oft Sie Ihr System aktualisieren wollen.
  • Seite 57: Eee Box Express Gate

    Eee Box Express Gate Bei Express Gate handelt es sich um eine direkt zu startende Arbeitsumgebung mit direktem Zugriff auf das Internet, Skype, und Ihre Bilderordner. Sekunden nach dem Start Ihres Eee Box-PCs können Sie über das Express Gate-Menü im Internet surfen, Skype benutzen oder andere Express Gate-Anwendungen ausführen.
  • Seite 58: Die Express Gate-Tastaturkürzel

    LaunchBar Klicken Sie in der Express Gate-Benutzeroberfläche auf die Symbole der LaunchBar, um Anwendungen zu öffnen oder zwischen ihnen hin und her zu schalten. Sie können auch zwischen Anwendungen wechseln, indem Sie auf der Tastatur ALT + TAB drücken. Rechtsklicken Sie auf dem Desktop, um ein Anwendungsmenü...
  • Seite 59: Konfigurationsanzeige Benutzen

    Konfigurationsfeld benutzen Hier können Sie die Einstellungen von Express Gate festlegen. Klicken Sie auf ein Symbol, um eine bestimmte Einstellungsoption zu öffnen. Die folgenden Optionen stehen zur Verfügung: • Datum und Uhrzeit: Legt das aktuelle Datum und die Zeitzone fest •...
  • Seite 60: Startleiste Benutzen

    LaunchBar benutzen Auf der LaunchBar erscheinen Symbole für Anwendungen und Systemstatus. Die LaunchBar kann verkleinert oder an einer beliebigen Seite der Anzeige festgestellt werden. Startet den Web Browser für einen direkten Zugriff aufs Internet Startet das Photo Manager-Bildorganisationsprogramm Startet das Chat-Programm Startet Skype Öffnet das Konfigurationsfeld, mit der Sie Netzwerkeinstellungen und andere Optionen festlegen.
  • Seite 61 Hier können Sie die Einstellungen der Startleiste ändern Zeigt die “ASUS Utility”-Anzeige Zeigt die Express Gate Versionsinformationen Öffnet die Express Gate Online-Hilfe Öffnet das “Ausschalten”-Menü. Drücken Sie CTRL + ALT + DEL auf der Tastatur, um dieses Menü zu öffnen. Ausschalten Betriebssystem Zurücksetzen...
  • Seite 62: Systemwiederherstellung

    Systemwiederherstellung Verwenden der Wiederherstellungs-DVD Die Wiederherstellungs-DVD beinhaltet ein Image (Abbild) des Betriebssystems, wie es vom hersteller auf Ihrem Eee PC installiert wurde. Die Wiederherstellungs-DVD bietet eine umfangreiche Wiederherstellungslösung, die System schnell Originalzustand zurück versetzt, vorausgesetzt, Ihre Festplatte arbeitet ordnungsgemäß. Bevor Sie die Wiederherstellungs-DVD verwenden, kopieren Sie alle persönlichen Daten (z.B.
  • Seite 63 Nachdem die Systemwiederherstellung abgeschlossen ist, werden Sie aufgefordert die Suppoet-CD in das optische Laufwerk zu legen. Starten Sie den Computer neu, wenn die Wiederherstellung abgeschlossen ist. Nachdem das System neu gestartet wurde, beginnt Windows® mit der Systemkonfiguration und installiert die Treiber und Dienstprogramme.
  • Seite 64: Benutzen Der Versteckten Partition

    Benutzen der versteckten Partition Die Wiederherstellungs-Partition enthält ein Image (Abbild) des Betriebssystems, der Treiber und der vom Hersteller in Ihren System installierten Programme. Die Wiederherstellungs-Partition bietet somit eine umfangreiche Wiederherstellungslösung, die Ihre Systemsoftware schnell in den originalen Arbeitszustand zurück versetzt und Ihre Festplatte in ordnungsgemäßem Betriebszustand hält.
  • Seite 65 Eee Box PC Manuale Utente...
  • Seite 66 I3870 Prima Edizione V1 Giugno 2008 Copyright © 2008 ASUSTeK COMPUTER INC. Tutti i Diritti Riservati. Alcuna parte di questo manuale, compresi i prodotti e i software in esso descritti, può essere riprodotta,trasmessa, trascritta, archiviata in un sistema di recupero o tradotta in alcuna lingua, in alcuna forma e in alcun modo, fatta eccezione per la documentazione conservata dall’...
  • Seite 67 Condizioni e Limiti di Copertura della Garanzia sul Prodotto Le condizioni di garanzia variano a seconda del tipo di prodotto e sono specificatamente indicate nel Certificato di Garanzia allegato, cui si fa espresso rinvio. Inoltre la presente garanzia non è valida in caso di danni o difetti dovuti ai seguenti fattori: (a) uso non idoneo, funzionamento o manutenzione improprio, incluso senza limitazioni l’...
  • Seite 68: Licenza Software

    Licenza Software I prodotti ASUS possono essere corredati da software, secondo la tipologia del prodotto. I software, abbinati ai prodotti, sono in versione “OEM”: il software OEM viene concesso in licenza all’ utente finale, come parte integrante del prodotto; ciò significa che non può essere trasferito ad altri sistemi hardware e che, in caso di rottura, di furto o in ogni altra situazione che lo renda inutilizzabile, anche la possibilità...
  • Seite 69 Sommario Comunicazioni ..................71 Informazioni in materia di Sicurezza ..........73 Note sul Manuale ..................75 Benvenuti ..............76 Contenuto della Confezione ...............76 Descrizione di Eee Box PC ........77 Lato Frontale .....................77 Lato Posteriore ..................79 Montaggio di Eee Box PC .........81 Installazione del Piedistallo ..............81 Installazione di Eee Box PC su un Monitor ........82 Connessioni di Eee Box PC ........83 Connessine con un Display ..............83...
  • Seite 70 Sommario Ripristino del Sistema ..........96 Tramite DVD di Ripristino ..............96 Tramite Partizione di Ripristino ............98 Eee Box PC...
  • Seite 71: Comunicazioni

    Comunicazioni Federal Communications Commission Statement This device complies with Part 15 of the FCC Rules. Operation is subject to the following two conditions: • This device may not cause harmful interference, and • This device must accept any interference received including interference that may cause undesired operation.
  • Seite 72 Canadian Department of Communications Statement This digital apparatus does not exceed the Class B limits for radio noise emissions from digital apparatus set out in the Radio Interference Regulations of the Canadian Department of Communications. This class B digital apparatus complies with Canadian ICES-003. Macrovision Corporation Product Notice This product incorporates copyright protection technology that is protected by method claims of certain U.S.
  • Seite 73: Informazioni In Materia Di Sicurezza

    Informazioni in materia di Sicurezza Eee Box PC è stato realizzato e testato per soddisfare i nuovissimi standard di sicurezza per apparecchiature IT . Tuttavia, per garantirne l’ osservanza, è importante leggere le seguenti norme di sicurezza. Installazione del Sistema •...
  • Seite 74 • Il sistema non funziona correttamente, pur attenendosi alle istruzioni operative. • Il sistema è caduto o il cabinet è stato danneggiato. • Le prestazioni del sistema non sono conformi. Avvertenza Batteria Ioni-Litio ATTENZIONE: Pericolo di esplosione se la batteria è sostituita in modo non corretto.
  • Seite 75: Note Sul Manuale

    Note sul Manuale Per essere sicuri di eseguire certe operazioni in modo corretto, ricordare la seguente simbologia, ricorrente in tutto il manuale. AVVERTENZA: Informazioni importanti per un utilizzo sicuro del dispositivo. IMPORTANTE: Istruzioni da seguire OBBLIGATORIAMENTE per completare un’ operazione. SUGGERIMENTO: Informazioni utili di ausilio nel completamento di un’...
  • Seite 76: Benvenuti

    Benvenuti Complimenti per l’ acquisto di Eee Box PC. L’ illustrazione sottostante mostra il contenuto della confezione del nuovo Eee Box PC. Contattare il rivenditore, in caso di danno o smarrimento di uno degli articoli indicati di seguito. Contenuto della Confezione Eee Box PC Piedistallo Ripiano in metallo (opz.)
  • Seite 77: Descrizione Di Eee Box Pc

    Descrizione di Eee Box PC Lato Frontale Riferirsi alla figura sottostante per identificare i componenti su questo lato del sistema. LED Disco Rigido Il LED del disco rigido lampeggia in fase di scrittura o lettura dati da disco rigido. Pulsante di Accensione ll pulsante di accensione consente di ACCENDERE e SPEGNERE il sistema.
  • Seite 78 Porta USB La porta USB (Universal Serial Bus) è compatibile con i dispositivi USB, come tastiere, dispositivi di puntamento, videocamere e dischi rigidi. USB consente a molti dispositivi di operare contemporaneamente su uno stesso computer, tramite periferiche che funzionano come hub o siti plugin aggiuntivi.
  • Seite 79: Lato Posteriore

    Lato Posteriore Riferirsi alla figura sottostante per identificare i componenti presenti su questo lato del sistema. Jack Antenna Wireless Questo jack è utilizzato per collegare l’ antenna wireless in dotazione, in modo da migliorare la ricezione del segnale wireless. Ingresso Alimentazione (DC 19V) L’adattatore in dotazione converte la corrente elettrica alternata di rete in corrente continua da utilizzare con questo jack.
  • Seite 80 Porta DVI La porta DVI (Digital Visual Interface) supporta un dispositivo compatibile DVI di alta qualità, come un monitor o un proiettore, per consentire la visualizzazione su uno schermo esterno di dimensioni maggiori. Porta USB La porta USB (Universal Serial Bus) è compatibile con i dispositivi USB, come tastiere, dispositivi di puntamento, videocamere e dischi rigidi.
  • Seite 81: Montaggio Di Eee Box Pc

    Montaggio di Eee Box PC Installazione del Piedistallo Porre Eee Box PC in posizione verticale sul piedistallo in dotazione. A questo fine: Individuare il foro per la vite sul lato inferiore di Eee Box PC. Allineare la vite del piedistallo con il foro per la vite del PC, quindi fissare il piedistallo al PC con una moneta.
  • Seite 82: Installazione Di Eee Box Pc Su Un Monitor

    Installazione di Eee Box PC su un Monitor E’ inoltre possibile installare Eee Box PC sul retro di un monitor. A questo fine: 1. Fissare il ripiano metallico (accessorio opzionale) al monitor con quattro viti. Per l’ installazione del ripiano metallico, il monitor deve essere conforme allo standard VESA75 o VESA100.
  • Seite 83: Connessioni Di Eee Box Pc

    Connessioni di Eee Box PC Prima di utilizzare Eee Box PC , è necessario collegare le periferiche. Connessione con un Display Collegare un’ estremità di un cavo DVI al display ( ) e l’ altra estremità alla porta DVI sul pannello posteriore del sistema ( Connessione con Dispositivi USB Collegare dispositivi USB , come tastiere, mouse e stampanti, alle porte USB sul pannello posteriore del sistema.
  • Seite 84: Connessione Con Un Dispositivo Di Rete

    Connessione con un Dispositivo di Rete Collegare un’ estremità del cavo di rete alla porta LAN sul pannello posteriore del sistema e l’ altra estremità ad un hub o switch. Cavo di rete con connettori RJ-45 Switch o hub di rete Accensione del Sistema Collegare l’...
  • Seite 85: Utilizzo Di Eee Box Pc

    Utilizzo di Eee Box PC Configurazione di una Connessione Wireless Per la connessione con una rete wireless, attenersi alle seguenti istruzioni: Collegare l’ antenna wireless in dotazione a Eee Box PC per migliorare la ricezione del segnale wireless. Dall’ area di notifica di Windows®...
  • Seite 86: Configurazione Di Una Connessione Via Cavo

    Configurazione di una Connessione via Cavo Per stabilire una rete via cavo, attenersi alle istruzioni di seguito: Tramite IP Statico Cliccare con il tasto di destra sull’ icona di rete in area di notifica e selezionare Open Network Connections (Apri connessioni di rete). Con il tasto di destra, cliccare Local Area Connection e selezionare Properties...
  • Seite 87: Tramite Ip Dinamico (Connessione Pppoe)

    Selezionare Use the following IP address (Utilizza il seguente indirizzo IP). Inserire IP address (Indirizzo IP), Subnet mask e Default gateway (Gateway predefinito). Se necessario, inserire l’ indirizzo di Preferred DNS server (Server DNS preferito). Dopo l’ inserimento dei relativi valori, cliccare OK per completare la configurazione.
  • Seite 88 Cliccare Next (Avanti). Selezionare Connect to the Internet Connessione a Internet e cliccare Next (Avanti). Selezionare Set up my Selezionare il tipo di connection manually connessione e cliccare (Imposta connessione Next (Avanti). manualmente). Inserire il nome dell’ ISP e Inserire Nome Utente e cliccare Next (Avanti).
  • Seite 89 10. Cliccare Finish (Fine) 11. Inserire nome utente per terminare la e password. Cliccare configurazione. Connect (Connetti) per la connessione a Internet. Contattare l’ Internet Service Provider (ISP) , in caso di problemi di connessione di rete. Eee Box PC...
  • Seite 90: Asus Easy Update

    ASUS Easy Update ASUS Easy Update è un software che rileva e scarica automaticamente i più recenti BIOS, driver ed applicazioni per Eee Box PC. Dalla barra delle applicazioni di Windows®, cliccare con il tasto di destra sull’ icona ASUS Easy Update.
  • Seite 91: Eee Box Express Gate

    Eee Box Express Gate Express Gate è un programma ad accensione istantanea, che consente di accedere rapidamente a internet, Skype e agli album fotografici. Pochi secondi dopo aver acceso Eee Box PC, si apre il menu Express Gate, da cui è possibile avviare il browser web, Skype o altre applicazioni Express Gate.
  • Seite 92: Tasti Rapidi Express Gate

    LaunchBar Una volta in Express Gate, cliccare sulle icone sulla LaunchBar per avviare le applicazioni o spostarsi fra di esse. E’ inoltre possibile spostarsi fra le applicazioni anche premendo ALT + TAB sulla tastiera. Un clic con il tasto di destra su un punto qualunque del desktop permette di aprire un menu di applicazioni.
  • Seite 93: Pannello Di Configurazione

    Pannello di Configurazione Il pannello di configurazione consente di modificare le impostazioni Express Gate. Cliccare su un’ icona per aprire uno strumento di configurazione. Gli strumenti disponibili sono i seguenti: • Date and Time (Data e Ora): impostazioni data, ora e fuso orario. •...
  • Seite 94: Launchbar

    LaunchBar La LaunchBar contiene le icone di stato del sistema e delle applicazioni. La LaunchBar può essere nascosta o posizionata in uno dei lati dello schermo. Avvia Web Browser per un rapido accesso a Internet. Avvia lostrumento di classificazione foto/album Photo Manager.
  • Seite 95 Personalizza le impostazioni LaunchBar. Mostra il pannello “ASUS Utility” . Mostra le informazioni sulla versione Express Gate. Apre la Guida online Express Gate. Apre il menu “Power Off”(Fine della sessione di lavoro). E’ anche possibile premere CTRL + ALT + DEL sulla tastiera per aprire questo menu.
  • Seite 96: Ripristino Del Sistema

    Ripristino del Sistema Tramite DVD di Ripristino Il DVD di Ripristino contiene un' immagine del sistema operativo installato dal fabbricante. Il DVD di Ripristino, insieme al DVD di Supporto, offre una soluzione completa per il ripristino del sistema, che è così riportato rapidamente allo stato operativo originario, purchè...
  • Seite 97 In fase di ripristino del sistema, saranno persi tutti i dati. Prima dell' operazione, assicurarsi di eseguire una copia di riserva dei dati importanti. A richiesta, inserire il CD di supporto nell’ unità ottica. Al termine del ripristino del sistema, riavviare il computer. Dopo aver riavviato il sistema, Windows®...
  • Seite 98: Tramite Partizione Di Ripristino

    Tramite Partizione di Ripristino La partizione di ripristino comprende un’ immagine del sistema operativo, i driver e le utilità installate nel sistema dal fabbricante. offre una soluzione completa La partizione di ripristino per riportare rapidamente il software del sistema allo stato operativo originario, purchè...
  • Seite 99 Eee Box PC Manuel d’utilisation...
  • Seite 100 F3870 Première édition Juin 2008 Copyright © 2008 ASUSTeK COMPUTER INC. Tous droits réservés. Aucun extrait de ce manuel, incluant les produits et logiciels qui y sont décrits, ne peut être reproduit, transmis, transcrit, stocké dans un système de restitution, ou traduit dans quelque langue que ce soit sous quelque forme ou quelque moyen que ce soit, à...
  • Seite 101: Table Des Matières

    Table des matières Table des matières ................101 Notes ......................103 Consignes de sécurité ................ 105 Notes pour ce manuel ................ 107 Bienvenue .............. 108 Contenu de la boîte ................108 Faire connaissance avec votre Eee Box PC ... 109 Vue avant ....................
  • Seite 102 Table des matières Restaurer le système ..........128 Utiliser le DVD de restauration ............128 Utiliser la partition cachée ..............130 102 Eee Box PC...
  • Seite 103: Notes

    Notes Rapport de la Commission Fédérale des Communications Ce dispositif est conforme à l’alinéa 15 des règles établies par la FCC. L'opération est sujette aux 2 conditions suivantes: • Ce dispositif ne peut causer d'interférence nuisible, et • Ce dispositif se doit d'accepter toute interférence reçue, incluant toute interférence pouvant causer des résultats indésirés.
  • Seite 104 Rapport du Département Canadien des Communications Cet appareil numérique ne dépasse pas les limites de classe B en terme d'émissions de nuisances sonore, par radio, par des appareils numériques, et ce conformément aux régulations d’interférence par radio établies par le département canadien des communications. (Cet appareil numérique de la classe B est conforme à...
  • Seite 105: Consignes De Sécurité

    Safety information Votre Eee Box PC a été conçu et testé pour satisfaire aux standards de sécurité les plus récents en matière d’équipements informatiques. Toutefois, afin de garantir une utilisation sans risque de ce produit, il est important que vous respectiez les consignes de sécurité présentées dans ce manuel.
  • Seite 106 • La prise ou le câble d’alimentation est endommagé. • Du liquide a été renversé sur le système. • Le système ne fonctionne pas correctement alors que les consignes ont été respectées. • Le système est tombé ou le boîtier est endommagé. •...
  • Seite 107: Notes Pour Ce Manuel

    Notes pour ce manuel Pour être certains que vous effectuiez certaines tâches correctement, veuillez prendre notes des symboles suivants. Ces symboles possèdent différents degrés d’importance : AVERTISSEMENT : Instructions que vous DEVEZ suivre pour éviter de vous blesser lors de la réalisation d’une tâche. IMPORTANT : Instructions que vous DEVEZ suivre pour mener une tâche à...
  • Seite 108: Bienvenue

    Bienvenue Félicitations pour l’achat du Eee Box PC. Les illustrations suivantes font état du contenu de la boîte de votre Eee Box PC. Si l’un des éléments ci-dessous était manquant ou endommagé, contactez votre revendeur. Contenu de la boîte Tablette métallique Eee Box PC Socle (accessoire optionnel)
  • Seite 109: Faire Connaissance Avec Votre Eee Box Pc

    Faire connaisance avec votre Eee Box PC Vue avant Référez-vous au diagramme ci-dessous pour identifier les composants localisés en façade de l'appareil. LED d’activité du disque dur La LED du disque dur clignote lorsque des données sont lues ou inscrites sur le disque dur. Interrupteur d’alimentation L’interrupteur d’alimentation permet de mettre l’appareil sous/hors tension.
  • Seite 110 Port USB Le port USB (Universal Serial Bus) est compatible avec les périphériques USB tels que les claviers, les périphériques de pointage, les appareils-photos et les disques durs. La norme USB permet à plusieurs périphériques de fonctionner simul- tanément sur un ordinateur. Port casque/sortie audio Le port casque stéréo de 1/8”...
  • Seite 111: Vue Arrière

    Vue arrière Référez-vous au diagramme ci-dessous pour identifier les composants localisés à l'arrière de l'appareil. Connecteur pour antenne sans fil Ce connecteur est utilisé pour la connexion de l’antenne sans fil fournie afin d’accroître la réception du signal sans fil. Port d’alimentation (CC 19V) L’adaptateur d’alimentation inclus convertit le courant alternatif en courant continu pour alimenter le système.
  • Seite 112 Port DVI Le port DVI (Digital Visual Interface) supporte les périphériques d'affichage compatibles DVI tels que les moniteurs ou les projecteurs, afin de permettre l'affichage sur un écran externe. Port USB Le port USB (Universal Serial Bus) est compatible avec les périphériques USB tels que les claviers, les périphériques de pointage, les appareils-photos et les disques durs.
  • Seite 113: Positionner Votre Eee Box Pc

    Positionner votre Eee Box PC Installer le socle Placez le Eee Box PC sur son socle. Pour ce faire : Localisez le pas de vis sous le Eee Box PC. Alignez la vis du socle au pas de vis du PC, puis sécurisez le socle au PC à...
  • Seite 114: Installer Votre Eee Box Pc Sur Un Moniteur

    Installer votre Eee Box PC sur un moniteur Vous pouvez aussi installer votre Eee Box PC à l’arrière d’un moniteur. Pour ce faire : Sécurisez la tablette métallique (accessoire optionnel) à votre moniteur à l’aide de quatre vis. Pour sécuriser la tablette métallique, votre moniteur doit être compatible avec le standard VESA75 ou VESA100.
  • Seite 115: Configurer Votre Eee Box Pc

    Configurer votre Eee Box PC Il est nécessaire de connecter certains périphériques avant de pouvoir utiliser votre Eee Box PC. Connexion d'un écran Connectez une extrémité du câble DVI sur l'écran externe. ( ) et l’autre extrémité au port DVI localisé à l'arrière du système ( Connexion de périphériques USB Connectez des périphériques USB tels qu’une souris, un clavier ou une imprimante aux ports USB du système...
  • Seite 116: Connexion Réseau

    Connexion réseau Connectez une extrémité du câble réseau au port LAN localisé à l’arrière du système et l’autre extrémité à un hub ou switch. Câble réseau RJ-45 Hub réseau ou switch Allumer le système Connectez l’adaptateur secteur au port DC IN localisé à l’arrière du système, puis appuyez sur l’interrupteur d’alimentation situé...
  • Seite 117: Utiliser Votre Eee Box Pc

    Utiliser votre Eee Box PC Configurer une connexion sans fil Pour établir une connexion réseau sans fil, suivez les instructions suivantes : Connectez l’antenne sans fil fournie à votre Eee Box PC pour améliorer la réception du signal sans fil. Faites un clic droit sur l’icône réseau sans fil de la zone de notification de...
  • Seite 118: Configurer Une Connexion Filaire

    Configurer une connexion filaire Pour établir une connexion réseau filaire, suivez les instructions suivantes: Utiliser une IP statique Faites un clic droit sur l’icône réseau de la zone de notification de Windows® et sélectionnez Ouvrir les connexions réseau. Faites un clic droit sur Connexion à...
  • Seite 119: Utiliser Une Ip Dynamique (Connexion Pppoe)

    Sélectionnez Utiliser l’adresse IP suivante. Entrez votre Adresse IP, le Masque de sous-réseau et la Passerelle par défaut. Si nécessaire, entez votre adresse de Serveur DNS préféré . Une fois terminé, cliquez sur OK pour terminer la configuration. Utiliser une IP dynamique (connexion PPPoE) Répétez les étapes 1 à...
  • Seite 120 Cliquez sur Suivant. Sélectionnez Etablir une connexion à Internet et cliquez sur Suivant. Sélectionnez Configurer Sélectionnez votre type de ma connexion connexion et cliquez sur manuellement. Suivant. Entrez le nom de votre FAI Entrez votre Nom et cliquez sur Suivant. d’utilisateur et Mot de passe.
  • Seite 121 10. Cliquez sur Terminer pour 11. Entrez votre Nom d’utilisateur compléter la configuration. et Mot de passe. Cliquez sur Se connecter pour vous connecter à Internet. Contactez votre Fournisseur d’Accès à Internet (FAI) si vous rencontrez des problèmes lors de la connexion au réseau. Eee Box PC 121...
  • Seite 122: Asus Easy Update

    ASUS Easy Update ASUS Easy Update est un outil logiciel qui détecte et télécharge automatiquement les dernières version de BIOS, pilotes et applications pour votre Eee Box PC. Dans la zone de notification de Windows®, faites un clic droit sur l’icône ASUS Easy Update.
  • Seite 123: Eee Box Express Gate

    Eee Box Express Gate Eee Box Express Gate offre un environnement unique pour profiter d’un accès instantané aux fonctions les plus couramment utilisées telles que la navigation sur Internet, Skype et vos albums photo. En seulement quelques secondes après la mise sous-tension du Eee Box PC, l’écran principal de Express Gate apparaît et vous permet de lancer le navigateur Internet, Skype ou l’une des autres applications Express Gate.
  • Seite 124: Raccourcis Clavier Express Gate

    Barre de lancement rapide Dans l’environnement Express Gate, cliquez sur une des icônes de la barre de lancement rapide pour exécuter ou basculer d’une applica- tion à l’autre. Pour basculer d’une application à l’autre, appuyez sur ALT + TAB sur le clavier.
  • Seite 125: Utiliser Le Panneau De Configuration

    Utiliser le panneau de configuration Le panneau de configuration permet de modifier divers paramètres Express Gate. Cliquez sur une icône pour ouvrir un outil de configuration spécifique. Les outils suivants sont disponibles : • Date et heure : permet de régler la date, l’heure et le fuseau horaire.
  • Seite 126: Utiliser La Barre De Lancement Rapide

    Utiliser la barre de lancement rapide La barre de lancement rapide intègre les icônes d’application ou de statut du système. Elle peut être masquée ou déplacée sur n’importe quel coin de l’écran. Démarre l’explorateur Internet. Démarre le Gestionnaire de photo. Démarre les outils de messagerie instantanée.
  • Seite 127 Cliquez pour modifier les options de la barre de lancement. Affiche le panneau “ASUS Utility” . Affiche les informations de version de Express Gate. Ouvre l’aide en ligne de Express Gate. Ouvre le menu d’extinction. Vous pouvez aussi appuyer sur les touches CTRL + ALT + DEL du clavier pour ouvrir ce menu.
  • Seite 128: Restaurer Le Système

    Restaurer le système Utiliser le DVD de restauration Le DVD de restauration contient une image du système d'exploitation installé sur votre système en usine. Le DVD de restauration, en plus du DVD de support, offre une solution de restauration complète permet- tant de restaurer rapidement votre système dans son état de fonction- nement d'origine, à...
  • Seite 129 Toutes vos données seront perdues lors du processus de restauration. Assurez-vous d'avoir fait une copie de sauvegarde de vos données avant de restaurer le système. Lorsque demandé, insérez le CD de support dans le lecteur optique. Une fois le processus de restauration terminé, redémarrez l’ordinateur.
  • Seite 130 Utiliser la partition cachée La partition de restauration contient une image du système d'exploitation, des pilotes et des utilitaires installés sur votre système en usine. La partition de restauration offre une solution de restauration complète permettant de restaurer rapidement la partie logicielle de votre système dans son état de fonctionnement d'origine, à...