LAUNCH CR401 Kurzanleitung
Verfügbare Sprachen
Verfügbare Sprachen
CR401/CR4001
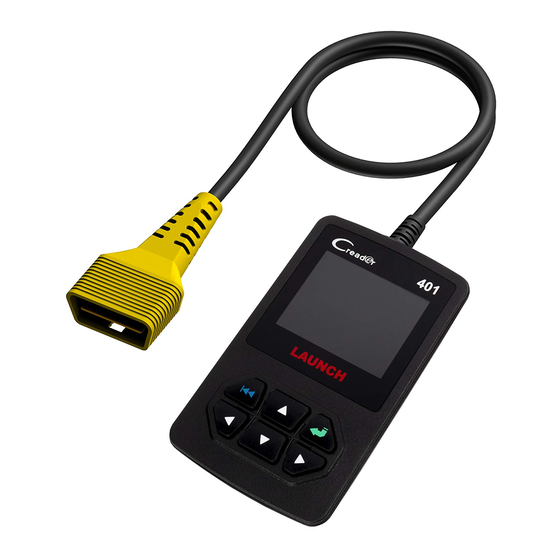
CR401/CR4001 Handset
Diagnostic Cable
LCD Screen
ESC Button
(To return to the
previous screen.)
USB Port
(To update your tool
via USB cable.)
Notes:
Ÿ
To make sure the tool is running the latest available software, it is
advisable to check for updates on a frequent basis. Refer to Section
3 "Register & Update" for details.
This Quick Start Guide is subject to change without written
Ÿ
notice.
Quick Start Guide
OK Button
Selection Button
1. Preparation & Connections
1. Preparation
Turn the vehicle ignition on.
Ÿ
Vehicle battery voltage range should be 9-14Volts.
Ÿ
Throttle should be in a closed position.
Ÿ
2. Vehicle Connection
1. Locate vehicle's DLC socket: The DLC (Diagnostic Link
Connector) is typically a standard 16-pin connector where
diagnostic code readers interface with a vehicle's on-board
computer. It is usually located 12 inches from the center of
the steering wheel, under or around the driver's side for
most vehicles.
If the DLC cannot be found, refer to the vehicle's service
manual for the location.
2. Connect the diagnostic cable into the vehicle's DLC
socket.
LAUNCH
EN
Inhaltsverzeichnis

Inhaltszusammenfassung für LAUNCH CR401
- Seite 7 LAUNCH CR401/CR4001 Schnellstartanleitung CR401/CR4001 Hörer 1. Preparación & Conexiones 1. Vorbereitung Die Fahrzeugzündung einschalten. Ÿ Diagnoseleitung Ÿ Der Batteriespannungsbereich der Batterie soll 9-14 Volt betragen. Die Drosselklappe soll sich in einer geschlossenen Ÿ Stellung befinden. 2. Fahrzeuganschluss 1. DLC-Steckplatz des Fahrzeugs finden: Der DLC...
- Seite 8 LAUNCH CR401/CR4001 Schnellstartanleitung 3. Aktualisieren 3. Aktualisieren Das Gerät ist über USB-Kabel aktualisierbar. Hinweis: Sicherstellen, dass PC ans Internet angeschlossen ist. 1. Auf http://mycar.x431.com(“Products” -> “Creader Online” -> “CR4001”) gehen und das Update-Tool auf PC laden. Klicken Sie auf [Upgrade], um die Aktualisierung zu starten Beim Abschluss der Aktualisierung erscheint ein Nachrichtenfeld "Aktualisierung erfolgreich".