Kapitel
Inhaltsverzeichnis
Fehlerbehebung

Verwandte Anleitungen für Wessamat Blue Line W19L

Inhaltszusammenfassung für Wessamat Blue Line W19L
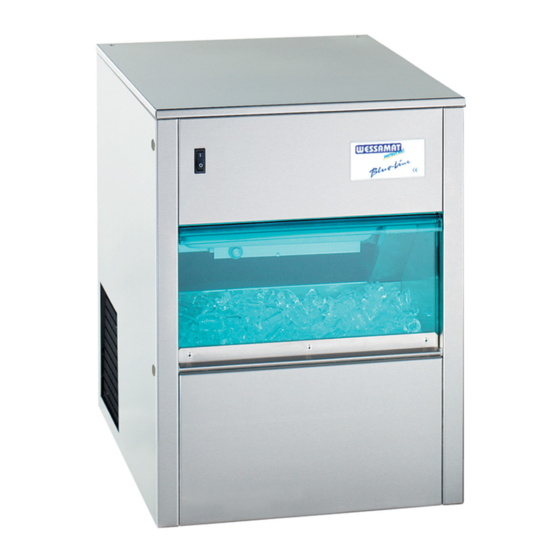
- Seite 1 Bedienungsanleitung für WESSAMAT Eiswürfelbereiter Operating Instructions for WESSAMAT ice cube makers Mode d’emploi pour WESSAMAT machine a glaçons W 19 L / LE / W W 29 L / LE / W W 49 L / LE / W...
- Seite 2 Dear customer, Thank you for choosing a Blue-Line ice cube maker from WESSAMAT. You have acquired a top product whereof you can now see for yourself the quality and performance. In order to make optimum use of all the benefits offered by this ice cube maker, please study and follow these operation instructions before installation and operation.
- Seite 3 D- 67661 Kaiserslautern Tel: +49 (0) 6301-7910-0 Fax: +49 (0) 6301-7910-20 Bevollmächtigter Technische Unterlagen: Claudia Sauer Authorised agent for technical documentation: c/o WESSAMAT Eismaschinenfabrik GmbH Agent autorisé pour documentation technique: Beschreibung der Maschine: Bezeichnung, Funktion: Eiswürfelbereiter Description of machine: Designation, Function:...
-
Seite 4: Inhaltsverzeichnis
2.2 Sicherheitsmaßnahmen im Betrieb ........................7 2.3 Gefahren durch elektrische Energie ........................7 2.4 Kältemittelkreislauf ............................... 7 2.5 Feuerbekämpfung ..............................7 2.6 Umgang mit WESSAMAT-Spezialreiniger ......................7 2.7 Schmiermittel ............................... 7 3. Verpackung, Lagerung und Transport ....................8 3.1 Auslieferungszustand ............................8 3.2 Verpackung und Transport ........................... - Seite 5 10.6 Ersatzteilpositionierung/ Spare parts position/ Positionnement de pièce de rechange W19 W ...... 84 10.7 Ersatzteilpositionierung/ Spare parts position/ Positionnement de pièce de rechange W29 L ....... 85 10.8 Ersatzteilpositionierung/ Spare parts position/ Positionnement de pièce de rechange W29 LE ..... 86 10.9 Ersatzteilpositionierung/ Spare parts position/ Positionnement de pièce de rechange W29 W ......
-
Seite 6: E 1.1 Bestimmungsgemäße Verwendung
1. Grundlegende Hinweise Die hier vorliegende Betriebsanleitung macht den Betreiber eines Eiswürfelbereiters mit der Arbeitsweise, der Bedienung, den Sicherheitshinweisen und der Reinigung vertraut. 1.1 Bestimmungsgemäße Verwendung Der Eiswürfelbereiter ist ein technisches Gerät, das ausschließlich zur Verwendung bei der Arbeit bestimmt ist. Der Eiswürfelbereiter ist ausschließlich zur Herstellung von Eiswürfeln aus hygienisch einwandfreiem Trinkwasser bestimmt. -
Seite 7: N 2.6 Umgang Mit Wessamat-Spezialreiniger
Bei hohen Temperaturen kann das eingesetzte Kältemittel gefährliche Zersetzungsprodukte bilden! 2.6 Umgang mit WESSAMAT-Spezialreiniger Den Reiniger bitte für Kinder unzugänglich aufbewahren. Bei der Anwendung die im Kapitel 7.1 beschriebenen Reinigungsanleitungen und Hinweise beachten. Wenn versehentlich Reiniger in die Augen gerät, sofort mit fließendem Wasser ausspülen und einen Arzt aufsuchen. -
Seite 8: Verpackung, Lagerung Und Transport
3. Verpackung, Lagerung und Transport 3.1 Auslieferungszustand Die Maschine wird komplett vormontiert ausgeliefert. Die entsprechenden Betriebsmittel (z.B. Kältemittel) sind bereits eingefüllt. 3.2 Verpackung und Transport Nach dem Auspacken der Maschine sollten Sie nach Möglichkeit die Originalverpackung aufbewahren. Sofern eine Versendung der Maschine notwendig ist (z.B. Einsendung zur Reparatur), sollte am besten die Original- verpackung verwendet werden. -
Seite 9: Technische Daten Und Einsatzbedingungen W19 L,Le,W
4.4 Technische Daten und Einsatzbedingungen W19 L,LE,W Modell W19 L W19 LE W19 W Allgemeine Daten Abmessungen Maschine -ohne Stellfüße- 535 x 410 x 545 585 x 500 x 545 535 x 410 x 545 H x B x T (mm) Höhenverstellung Füße 10-25 von –... -
Seite 10: Technische Daten Und Einsatzbedingungen W29 L,Le,W
4.5 Technische Daten und Einsatzbedingungen W29 L,LE,W Modell W29 L W29 LE W29 W Allgemeine Daten Abmessungen Maschine -ohne Stellfüße- 655 x 510 x 600 705 x 600 x 600 655 x 510 x 600 H x B x T (mm) Höhenverstellung Füße 10-25 von –... -
Seite 11: Technische Daten Und Einsatzbedingungen W49 L,Le,W
4.6 Technische Daten und Einsatzbedingungen W49 L,LE,W Modell W49 L W49 LE W49 W Allgemeine Daten Abmessungen Maschine -ohne Stellfüße- 655 x 510 x 600 705 x 600 x 600 655 x 510 x 600 H x B x T (mm) Höhenverstellung Füße 10-25 von –... -
Seite 12: Installation Und Inbetriebnahme
5. Installation und Inbetriebnahme Damit der Eiswürfelbereiter optimal funktioniert, sind bei der Aufstellung und Installation folgende Punkte zu beachten: 5.1 Aufstellung Der Eiswürfelbereiter darf in folgenden Umgebungen nicht betrieben werden: • explosionsgefährdete Umgebung, • giftige Atmosphäre, • Feuchträume. Direkte Wärmequellen Öfen, Spülmaschinen usw. -
Seite 13: Installation Luftgekühlte Maschinen (Ausführung L)
5.2 Installation luftgekühlte Maschinen (Ausführung L) 600 mm 150 mm 150 mm 150 mm Ablauf- schlauch 50 mm Ablauf- trichter mit Siphon Abb. 5.2.a: Rückansicht L-Modell Abb. 5.2.b: Ablaufvorschlag Zum sicheren Betrieb muss bei luftgekühlten Geräten auf allen Seiten ein Mindestabstand zur Wand und nach oben eingehalten werden (siehe Abb. -
Seite 14: Installation Luftgekühlte, Einbaufähige Maschinen (Ausführung Le)
5.3 Installation luftgekühlte, einbaufähige Maschinen (Ausführung LE) Luftansauggitter Vorderansicht LE-Modell 100 mm Ablauf- schlauch 50 mm Ablauf- trichter mit Siphon Abb. 5.3.a: Rückansicht LE-Modell Abb. 5.3.b: Ablaufvorschlag Luftgekühlte, einbaufähige Eiswürfelbereiter können ohne Einhaltung von Mindestabständen installiert werden. Von der Rückseite der Maschine zur Wand sollte jedoch Platz für die Anschluss-Schläuche vorhanden sein (siehe Abb. -
Seite 15: Installation Wassergekühlte Maschinen (Ausführung W)
5.4 Installation wassergekühlte Maschinen (Ausführung W) 100 mm Ablauf- schlauch 50 mm Ablauf- trichter mit Siphon Abb. 5.4.a: Rückansicht W-Modell Abb. 5.4.b: Ablaufvorschlag Wassergekühlte Eiswürfelbereiter können ohne Einhaltung von Mindestabständen und ohne Berücksichtigung von Frischluftzirkulation installiert werden. Von der Rückseite der Maschine zur Wand sollte jedoch Platz für die Anschluss-Schläuche vorhanden sein (siehe Abb. -
Seite 16: Prüfung Vor Inbetriebnahme
5.5 Prüfung vor Inbetriebnahme Vor der ersten Inbetriebnahme und nach längeren Stillstandzeiten (z.B. Betriebsferien oder Transport) den Eis- würfelbereiter reinigen (siehe Kapitel 7.1), sowie durch einen Sachkundigen prüfen und ordnungsgemäße Funktion bescheinigen lassen. 5.6 Inbetriebnahme Wasserhahn (Wasserabsperrventil) öffnen und Eiswürfelbereiter in Betrieb nehmen (Produktionsschalter auf Stellung „Produktion ein/on“... -
Seite 17: Höhe Und Stärke Der Eiswürfel
Die Höhe und die Stärke der Eiswürfel kann durch Verstellen der Wasserstandssonde und des Eisstärkeendschalters verändert werden (siehe Kapitel 6.3 und 6.4). ACHTUNG: Änderungen Einstellung Eisstärkeendschalters sollten nur durch den WESSAMAT - Service Abb. 6.2: Seitenansicht Eisstärkemotor oder durch autorisierte Fachhändler vorgenommen werden. -
Seite 18: Einstellen Der Eiswürfelstärke
Gegebenheiten in regelmäßigen Abständen gereinigt und überprüft werden. HINWEIS: Zur wirkungsvollen Reinigung und Desinfektion sowie zum schnellen und nachhaltigen Entfernen von Ablagerungen (Kalk, Rost, Eisen, Mangan) empfiehlt sich die Verwendung des gebrauchsfertigen WESSAMAT-Spezialreinigers. Dieser kann über den Fachhandel oder direkt bei WESSAMAT bestellt werden. -
Seite 19: Reinigung Von Wanne Und Wasserstandssonde
2. Das im Vorratsbehälter befindliche Eis vollständig entfernen. Zum Verzehr bestimmtes Eis darf nicht mit dem Reinigungsmittel in Berührung kommen. 3. Sauberen Schwamm oder Tuch ausreichend mit WESSAMAT-Spezialreiniger benetzen und senkrecht positionierte Wanne durch den Vorratsbehälter hindurch auswischen. Diesen Vorgang mehrfach wiederholen. -
Seite 20: Luftansauggitter Einhängen Und Maschine In Betrieb Nehmen
Beim Wiedereinbau darauf achten, dass sich der Ablaufschlauch und der Kühlwasserablaufschlauch nicht hochstellen oder abknicken und dadurch den Wasserablauf verhindern! Weitere Wartungsarbeiten sollten nur von autorisierten WESSAMAT-Service-Technikern oder Service- Mitarbeiter vom autorisierten Fachhandel durchgeführt werden! Die Häufigkeit der Wartung ist vom Aufstellort und von der Wasserqualität (z.B. Wasserhärte, Schmutzpartikel etc.) abhängig. -
Seite 21: Maßnahmen Zur Störungsbeseitigung
7.3 Störungsbeseitigung Die Beseitigung von Störungen sollte nur durch eine Fachkraft oder einen Service-Mitarbeiter eines autorisierten WESSAMAT-Fachhändlers vorgenommen werden. Maßnahmen zur Störung Ursache Störungsbeseitigung Maschine produziert eine 1. Eisstärkemotor ist defekt, 1. Eisstärkemotor austauschen Eisplatte Getriebe dreht nicht mehr 2. Eisstärke-Endschalter ist defekt 2. - Seite 22 Eiswürfel frieren bei 1. Eisstärkemotor schaltet zu spät 1. Eisstärkemotor nachjustieren Eisbereitungsprozess zusammen 2. Undichtigkeit im Kältesystem 2. Undichtigkeit suchen, beseitigen (Eisbereiter hat zu wenig und fehlendes Kältemittel nachfüllen Kältemittel) Maschine läuft, produziert aber 1. Undichtigkeit im Kältesystem 1. Undichte Stelle am Kältesystem kein Eis suchen und beseitigen 2.
-
Seite 23: Entsorgung
Sollte die Maschine einmal nicht mehr benötigt werden, bitte folgende Hinweise beachten: Der Kältemittelkreislauf des Eiswürfelbereiters enthält HFKW und wassergefährdende Schmierstoffe! Daher muss die Maschine fachgerecht und den Umweltschutzbestimmungen entsprechend entsorgt werden. Wenn Sie keine Möglichkeit zur fachgerechten Entsorgung haben, wenden Sie sich bitte an Ihren Fachhändler oder direkt an WESSAMAT. - Seite 24 2.3 Risks from electricity ............................27 2.4 Refrigerant circuit ............................... 27 2.5 Fire fighting ................................ 27 2.6 Handling of WESSAMAT special cleaner ......................27 2.7 Lubricants ................................27 3. Packaging, storage and transport ..................... 28 3.1 Delivery status ..............................28 3.2 Packaging and transport ............................
-
Seite 25: L A
10.6 Ersatzteilpositionierung/ Spare parts position/ Positionnement de pièce de rechange W19 W ...... 84 10.7 Ersatzteilpositionierung/ Spare parts position/ Positionnement de pièce de rechange W29 L ....... 85 10.8 Ersatzteilpositionierung/ Spare parts position/ Positionnement de pièce de rechange W29 LE ..... 86 10.9 Ersatzteilpositionierung/ Spare parts position/ Positionnement de pièce de rechange W29 W ...... -
Seite 26: Basic Information
1. Basic information These operating instructions are intended to familiarise the ice cube maker operator with its functions, safety instructions and cleaning procedures. 1.1 Appropriate use The ice cube maker is a technical medium, which is intended for work use only. The ice cube maker is exclusively intended for the production of ice cubes from hygienically clean drinking water. -
Seite 27: General Safety Notes
At high temperatures, the refrigerant used can create dangerous decomposition products! 2.6 Handling of WESSAMAT special cleaner The cleaner should be kept out of reach of children. Follow the cleaning instructions and notes described in chapter 7.1. -
Seite 28: Packaging, Storage And Transport
3. Packaging, storage and transport 3.1 Delivery status The machine is supplied completely pre-assembled. The corresponding operating fluids (e.g. refrigerant) are already contained. 3.2 Packaging and transport After unwrapping the machine, keep the original packaging if possible. If the machine has to be dispatched (e.g. return for repair), the original packaging should be used if possible. -
Seite 29: Technical Data And Operating Conditions W19 L,Le,W
4.4 Technical data and operating conditions W19 L,LE,W Model W19 L W19 LE W19 W General data Machine dimensions -without feet- 535 x 410 x 545 585 x 500 x 545 535 x 410 x 545 H x W x D (mm) Adjustable feet 10-25 from –... -
Seite 30: Technical Data And Operating Conditions W29 L,Le,W
4.5 Technical data and operating conditions W29 L,LE,W Model W29 L W29 LE W29 W General data Machine dimensions -without feet- 655 x 510 x 600 705 x 600 x 600 655 x 510 x 600 H x W x D (mm) Adjustable feet 10-25 from –... -
Seite 31: Technical Data And Operating Conditions W49 L,Le,W
4.6 Technical data and operating conditions W49 L,LE,W Model W49 L W49 LE W49 W General data Machine dimensions -without feet- 655 x 510 x 600 705 x 600 x 600 655 x 510 x 600 H x W x D (mm) Adjustable feet 10-25 from –... -
Seite 32: Installation And Commissioning
5. Installation and commissioning Follow the instructions below during assembly and installation to ensure optimum functioning of the ice cube maker: 5.1 Assembly The ice cube maker must not be operated in the following environments: • atmosphere subject to explosion hazard, •... -
Seite 33: Installation Air-Cooled Units (Version L)
5.2 Installation air-cooled units (version L) 600 mm 150 mm 150 mm 150 mm outlet hose 50 mm discharge funnel with siphon Fig. 5.2.a: Back view L-model Fig. 5.2.b: outlet proposition To ensure safe operation, in air-cooled units a minimum distance to walls on all sides and at the top has to be adhered to (see Fig. -
Seite 34: Installation Air-Cooled, Built-In Units (Version Le)
5.3 Installation air-cooled, built-in units (version LE) Lateral air grille Front view LE-model 100 mm outlet hose 50 mm discharge funnel with siphon Fig. 5.3.a: Back view LE-model Fig. 5.3.b: outlet proposition Air-cooled, built-in type ice cube makers can be installed without taking into account the minimum distances, however there should be distance to the wall from the back side of the machine in order to have enough space for the connection tubes (see Fig. -
Seite 35: Installation Water-Cooled Units (Version W)
5.4 Installation water-cooled units (version W) 100 mm outlet hose 50 mm discharge funnel with siphon Fig. 5.4.a: Back view W-model Fig. 5.4.b: outlet proposition Water-cooled ice cube makers can be installed without taking into account the minimum distances and without provision for air circulation, however there should be distance to the wall from the back side of the machine in order to have enough space for the connection tubes (see Fig. -
Seite 36: Pre-Commissioning Check
5.5 Pre-commissioning check Prior to first commissioning and after prolonged periods of non-operation (e.g. company holiday or transport) the ice cube maker should be cleaned (see chapter 7.1), and checked and its proper function testified by a specialist. 5.6 Commissioning Open the water shut-off valve and start the ice cube maker (switch the production switch in position “Produktion ein/on”). -
Seite 37: Height And Thickness Of The Ice Cubes
(see chapter 6.3 and 6.4). CAUTION: The setting of the ice thickness limit switch should only be changed by the WESSAMAT service department or an authorised specialist dealer. Fig. 6.2: Side view of ice thickness motor... -
Seite 38: Setting The Ice Cube Thickness
NOTE: For effective cleaning and disinfecting, and for quick and lasting removal of deposits (lime, rust, iron, manganese) we recommend using the ready-to-use special cleaner from WESSAMAT. It can be ordered from specialised dealers or directly from WESSAMAT. -
Seite 39: Cleaning The Trough And The Water Level Sensor
3. Adequately wet a clean sponge or cloth with WESSAMAT special cleaner and wipe the vertically positioned trough by reaching through the storage container. Repeat this procedure several times. Keep wetting the sponge or cloth with WESSAMAT special cleaner as required. Allow a few minutes for the special cleaner to act. -
Seite 40: Maintenance
CAUTION: When the device is pushed back in, the water drain tube may become bent or kinked, thus preventing draining of the water. Please keep an eye on the tube during re-assembly. If you have any further questions regarding cleaning, please contact your specialist dealer or the WESSAMAT service department. -
Seite 41: Trouble Shooting
7.3 Trouble shooting Troubleshooting should only be carried out by a specialist or by service staff from an authorised WESSAMAT specialist dealer. Fault Cause Trouble shooting measures Machine produces an ice plate 1. Ice thickness motor faulty, 1. Replace ice thickness motor gearing no longer rotating 2. - Seite 42 Ice cubes stick to each other 1. Ice thickness motor switches too 1. Readjust ice thickness motor during the ice-making process late 2. Leak(s) in the cooling system 2. Locate leak(s), rectify and top up (ice maker has insufficient refrigerant refrigerant) Machine runs, but does not 1.
-
Seite 43: Disposal
The refrigerant circuit of the ice cube maker contains HFC and lubricants that are harmful to water! The machine must therefore be disposed of properly according to the relevant environmental protection regulations. Should you have no options for proper disposal, please contact your specialist dealer or WESSAMAT directly. - Seite 44 2.3 Dangers dus à l’énergie électrique ........................47 2.4 Circuit de liquide réfrigérant ..........................47 2.5 Lutte contre l’incendie ............................47 2.6 Manipulation du nettoyant spécial WESSAMAT ....................47 2.7 Lubrifiants ................................47 3. Emballage, stockage et transport ..................... 48 3.1 Etat de Livraison ..............................
- Seite 45 10.7 Ersatzteilpositionierung/ Spare parts position/ Positionnement de pièce de rechange W29 L ....... 85 10.8 Ersatzteilpositionierung/ Spare parts position/ Positionnement de pièce de rechange W29 LE ..... 86 10.9 Ersatzteilpositionierung/ Spare parts position/ Positionnement de pièce de rechange W29 W ...... 87 10.10 Ersatzteilpositionierung/ Spare parts position/ Positionnement de pièce de rechange W49 L .....
-
Seite 46: Remarques Fondamentales
1. Remarques fondamentales Les présentes instructions d’utilisation ont pour but de familiariser l’exploitant d’une machine à glaçons avec son fonctionnement, son utilisation, les consignes de sécurité ainsi que son nettoyage. 1.1 Utilisation conforme à la destination Une machine à glaçons est un outil professionnel - technique - destiné exclusivement aux Professionnels. -
Seite 47: Consignes Générales De Sécurité
! Ö 2.6 Manipulation du nettoyant spécial WESSAMAT Veuillez garder le nettoyant hors de portée des enfants. Lors de l’utilisation du nettoyant, veuillez respecter les instructions et consignes de nettoyage données au chapitre 7.1. Si le nettoyant entre malencontreusement en contact avec les yeux, rincez immédiatement à... -
Seite 48: Emballage, Stockage Et Transport
3. Emballage, stockage et transport 3.1 Etat de Livraison La machine est livrée complétement pre-assemblée. Le matériel d’opération (p.ex. fluide frigorigène) est déjà rempli. 3.2 Emballage Après avoir déballé la machine, veuillez si possible conserver l’emballage original. Si la machine doit ultérieurement faire l’objet d’un envoi (par exemple retour pour réparations), il est préférable d’utiliser l’emballage original. -
Seite 49: Caractéristiques Techniques Et Conditions D'utilisation W19 L,Le,W
4.4 Caractéristiques techniques et conditions d’utilisation W19 L,LE,W Modèle W19 L W19 LE W19 W Données générales Dimensions de la machine -sans pieds- 535 x 410 x 545 585 x 500 x 545 535 x 410 x 545 H x L x P (mm) Réglage en hauteur des pieds 10-25 de –... -
Seite 50: Caractéristiques Techniques Et Conditions D'utilisation W29 L,Le,W
4.5 Caractéristiques techniques et conditions d’utilisation W29 L,LE,W Modèle W29 L W29 LE W29 W Données générales Dimensions de la machine -sans pieds- 655 x 510 x 600 705 x 600 x 600 655 x 510 x 600 H x L x P (mm) Réglage en hauteur des pieds 10-25 de –... -
Seite 51: Caractéristiques Techniques Et Conditions D'utilisation W49 L,Le,W
4.6 Caractéristiques techniques et conditions d’utilisation W49 L,LE,W Modèle W49 L W49 LE W49 W Données générales Dimensions de la machine -sans pieds- 655 x 510 x 600 705 x 600 x 600 655 x 510 x 600 H x L x P (mm) Réglage en hauteur des pieds 10-25 de –... -
Seite 52: Installation Et Mise En Service
5. Installation et mise en service Afin que votre machine à glaçons fonctionne de manière optimale, il convient de respecter les points suivants lors du montage et de l’installation : 5.1 Montage La machine à glaçons ne peut pas être exploitée dans les environnements suivants : •... -
Seite 53: Installation Appareils Refroidis Par Air (Version L)
5.2 Installation appareils refroidis par air (Version L) 600 mm 150 mm 150 mm 150 mm Tuyau de vidange 50 mm Orifice de vidange avec Siphon Fig. 5.2.a: Vue arrière L-Modèle Fig. 5.2.b: Proposition de vidange Pour un fonctionnement en toute sécurité, il faut respecter, pour les appareils refroidis par air, une distance minimale par rapport aux murs et vers le haut (voir Fig. -
Seite 54: Installation Appareils Encastrables Refroidis Par Air (Version Le)
5.3 Installation appareils encastrables refroidis par air (Version LE) Grille aérienne latérale Vue frontale LE-Modèle 100 mm Tuyau de vidange 50 mm Orifice de vidange avec Siphon Fig. 5.3.a: Vue arrière LE-Modèle Fig. 5.3.b: Proposition de vidange Les machines à glaçons encastrables refroidies par air peuvent être installées sans devoir tenir compte de distances minimales, toutefois il faut avoir une distance entre l’arrière de la machine et le mur pour les tuyaux de raccordement (voir Fig. - Seite 55 100 mm Tuyau de vidange 50 mm Orifice de vidange avec Siphon Fig. 5.4.a: Vue arrière W-Modèle Fig. 5.4.b: Proposition de vidange Les machines à glaçons refroidies par eau peuvent être installées sans devoir tenir compte de distances minimales ou d’une circulation d'air frais, toutefois il faut avoir une distance entre l’arrière de la machine et le mur pour les tuyaux de raccordement (voir Fig.
-
Seite 56: Inspection Avant La Mise En Service
5.5 Inspection avant la mise en service Avant la première mise en service et après une interruption de service prolongée (p.ex. vacances ou transport) il faut faire nettoyer (voir chapitre 7.1), et examiner la machine à glaçons par un expert qui certifiera son fonctionnement correct. -
Seite 57: Hauteur Et Épaisseur Des Glaçons
Fig. 6.2: vue latérale du moteur d’épaisseur de ATTENTION : Les modifications du réglage de la fin de course glaçon et de la sonde de niveau d’eau d’épaisseur de glaçon ne peuvent être effectuées que par le service clientèle WESSAMAT ou par les revendeurs autorisés. Ç... -
Seite 58: Réglage De L'épaisseur Des Glaçons
NOTE : Afin d’assurer le nettoyage et la désinfection efficaces, ainsi que l’enlèvement rapide et durable des dépôts (calcaire, rouille, fer, manganèse), on recommande l’utilisation du nettoyant spécial prêt à l’emploi WESSAMAT. Celui-ci peut être commandé auprès de votre revendeur ou directement auprès de WESSAMAT. -
Seite 59: Nettoyage Du Bac Et De La Sonde De Niveau D'eau
3. Imbibez une éponge ou un chiffon propre avec suffisamment de nettoyant spécial WESSAMAT et nettoyez le bac positionné à la verticale depuis le bas en passant par le bac de stockage. Répétez ce nettoyage plusieurs fois. -
Seite 60: Maintenance
Les autres travaux de maintenance ne peuvent être effectués que par les techniciens du service clientèle WESSAMAT ou le personnel de service clientèle du revendeur agréé! Ö... -
Seite 61: Suppression Des Dérangements
7.3 Suppression des dérangements La suppression des dérangements ne peut être effectuée que par un professionnel ou un employé du service clientèle de votre revendeur WESSAMAT autorisé. Mesures permettant la suppression Dérangement Cause du dérangement La machine produit une plaque 1. - Seite 62 trop faible environnante ou changez d’endroit 5. La fiche de secteur de la 5. Remplacez la fiche de secteur machine à glaçons est défectueuse 6. L’interrupteur de production se 6. Placez l’interrupteur de production trouve dans une mauvaise position sur la position « Produktion ein/on ». («...
-
Seite 63: Mise Au Rebut
C’est pourquoi la machine doit être mise au rebut de manière correcte conformément aux dispositions relatives à l’environnement. Si vous ne disposez pas de possibilités appropriées de mise au rebut, veuillez vous adresser à votre revendeur ou directement à WESSAMAT. Ö... -
Seite 64: Elektrische Schaltschemen
9. Elektrische Schaltschemen 9.1 Elektrisches Schaltschema W19 L, W29 L, W49 L... -
Seite 65: Elektrisches Schaltschema W19 Le, W29 Le, W49 Le
9.2 Elektrisches Schaltschema W19 LE, W29 LE, W49 LE... -
Seite 66: Elektrisches Schaltschema W19 W, W29 W, W49 W
9.3 Elektrisches Schaltschema W19 W, W29 W, W49 W... -
Seite 67: Wiring Diagram
9. Wiring diagram 9.1 Wiring diagram W19 L, W29 L, W49 L... -
Seite 68: Wiring Diagram W19 Le, W29 Le, W49 Le
9.2 Wiring diagram W19 LE, W29 LE, W49 LE... -
Seite 69: Wiring Diagram W19 W, W29 W, W49 W
9.3 Wiring diagram W19 W, W29 W, W49 W... -
Seite 70: Schéma De Connexion Électrique
9. Schéma de connexion électrique 9.1 Schéma de connexion électrique W19 L, W29 L, W49 L Ö Ç... -
Seite 71: Schéma De Connexion Électrique W19 Le, W29 Le, W49 Le
9.2 Schéma de connexion électrique W19 LE, W29 LE, W49 LE Ö Ç... -
Seite 72: Schéma De Connexion Électrique W19 W, W29 W, W49 W
9.3 Schéma de connexion électrique W19 W, W29 W, W49 W Ö Ç... -
Seite 73: Ersatzteillisten, Ersatzteilpositionierungen
10. Ersatzteillisten, Ersatzteilpositionierungen 10.1 Ersatzteilliste W19 L,LE,W Modell Art. Nr. Artikel-Bezeichnung W19 L W19 LE W19 W 10082 Eisstärkeendschalter 10083 Kippmotorendschalter unten 10084 Kippmotorendschalter oben 10085 Wanne mit Wippe einbaufertig 12014 Produktionsschalter 12510 Heißgasmagnetventil, 6 mm Löt 12817 Hochdruckschalter, Löt 6 mm, R404a 18446 Verflüssiger einbaufertig (für Wasserkühlung) 20032... -
Seite 74: Ersatzteilliste W29 L,Le,W
10.2 Ersatzteilliste W29 L,LE,W Modell Art. Nr. Artikel-Bezeichnung W29 L W29 LE W29 W 10082 Eisstärkeendschalter 10083 Kippmotorendschalter unten 10084 Kippmotorendschalter oben 10194 Wanne mit Wippe einbaufertig 12014 Produktionsschalter 12510 Heißgasmagnetventil, 6 mm Löt 12626 Querstrom-Lüfter einbaufertig 12817 Hochdruckschalter, Löt 6 mm, R404a 18447 Verflüssiger einbaufertig (für Wasserkühlung) 19027... -
Seite 75: Ersatzteilliste W49 L,Le,W
10.3 Ersatzteilliste W49 L,LE,W Modell Art. Nr. Artikel-Bezeichnung W49 L W49 LE W49 W 10082 Eisstärkeendschalter 10083 Kippmotorendschalter unten 10084 Kippmotorendschalter oben 10195 Wanne mit Wippe einbaufertig 12014 Produktionsschalter 12510 Heißgasmagnetventil, 6 mm Löt 12626 Querstrom-Lüfter einbaufertig 12817 Hochdruckschalter, Löt 6 mm, R404a 18448 Verflüssiger einbaufertig (für Wasserkühlung) 19017... -
Seite 76: Spare Parts Lists, Spare Parts Positions
10. Spare parts lists, spare parts positions 10.1 Spare parts list W19 L,LE,W Model Item no. Description W19 L W19 LE W19 W 10082 limit switch for ice thickness 10083 limit switch for tilting motor (bottom) 10084 limit switch for tilting motor (top) 10085 trough with rocker, ready for installation 12014... -
Seite 77: Spare Parts List W29 L,Le,W
10.2 Spare parts list W29 L,LE,W Model Item no. Description W29 L W29 LE W29 W 10082 limit switch for ice thickness 10083 limit switch for tilting motor (bottom) 10084 limit switch for tilting motor (top) 10194 trough with rocker, ready for installation 12014 switch for production 12510... -
Seite 78: Spare Parts List W49 L,Le,W
10.3 Spare parts list W49 L,LE,W Model Item no. Description W49 L W49 LE W49 W 10082 limit switch for ice thickness 10083 limit switch for tilting motor (bottom) 10084 limit switch for tilting motor (top) 10195 trough with rocker, ready for installation 12014 switch for production 12510... -
Seite 79: Listes De Pièces De Rechange, Positionnement De Pièce De Rechange
10. Listes de pièces de rechange, Positionnement de pièce de rechange 10.1 Liste de pièces de rechange W19 L,LE,W Modèle N° d’article Désignation de l’article W19 L W19 LE W19 W 10082 Fin de course d’épaisseur de glaçon 10083 Fin de course inférieure pour moteur de basculement 10084 Fin de course supérieure pour moteur de basculement 10085... -
Seite 80: Liste De Pièces De Rechange W29 L,Le,W
10.2 Liste de pièces de rechange W29 L,LE,W Modèle N° d’article Désignation de l’article W29 L W29 LE W29 W 10082 Fin de course d’épaisseur de glaçon 10083 Fin de course inférieure pour moteur de basculement 10084 Fin de course supérieure pour moteur de basculement 10194 Bac avec bascule préassemblé... -
Seite 81: Liste De Pièces De Rechange W49 L,Le,W
10.3 Liste de pièces de rechange W49 L,LE,W Modèle N° d’article Désignation de l’article W49 L W49 LE W49 W 10082 Fin de course d’épaisseur de glaçon 10083 Fin de course inférieure pour moteur de basculement 10084 Fin de course supérieure pour moteur de basculement 10195 Bac avec bascule préassemblé... -
Seite 82: Ersatzteilpositionierung/ Spare Parts Position/ Positionnement De Pièce De Rechange W19 L
10.4 Ersatzteilpositionierung/ Spare parts position/ Positionnement de pièce de rechange W19 L 10084 10082 32304 32301 10083 32202 41125 32127 12014 42111 42301 42201 10085 12510 32303 42105 Ö 35120 32201 35183 20032 32401 20346 25105 34101 Ç... -
Seite 83: Ersatzteilpositionierung/ Spare Parts Position/ Positionnement De Pièce De Rechange W19 Le
10.5 Ersatzteilpositionierung/ Spare parts position/ Positionnement de pièce de rechange W19 LE 32410 10082 10084 32301 32304 32202 10083 32127 41125 12014 42111 42301 42201 10085 12510 32303 Ö 42105 35120 32201 35183 20032 32401 20346 25105 34101 Ç... -
Seite 84: Ersatzteilpositionierung/ Spare Parts Position/ Positionnement De Pièce De Rechange W19 W
10.6 Ersatzteilpositionierung/ Spare parts position/ Positionnement de pièce de rechange W19 W 10084 10082 32304 32301 10083 32202 41125 32127 12014 42111 42301 42201 10085 32303 12817 42105 12510 Ö 32201 35120 18446 20032 35161 25105 34101 20347 Ç... -
Seite 85: Ersatzteilpositionierung/ Spare Parts Position/ Positionnement De Pièce De Rechange W29 L
10.7 Ersatzteilpositionierung/ Spare parts position/ Positionnement de pièce de rechange W29 L 10084 10082 32304 32301 10083 32202 41125 32127 12014 42111 42301 42203 10194 12510 32302 Ö 42105 35120 32201 19027 20032 32402 20346 25105 34101 Ç... -
Seite 86: Ersatzteilpositionierung/ Spare Parts Position/ Positionnement De Pièce De Rechange W29 Le
10.8 Ersatzteilpositionierung/ Spare parts position/ Positionnement de pièce de rechange W29 LE 12626 10082 10084 32301 32304 32202 10083 32127 41125 12014 42111 42301 42203 10194 12510 32302 Ö 42105 35120 32201 19027 20032 32402 20346 25105 34101 Ç... -
Seite 87: Ersatzteilpositionierung/ Spare Parts Position/ Positionnement De Pièce De Rechange W29 W
10.9 Ersatzteilpositionierung/ Spare parts position/ Positionnement de pièce de rechange W29 W 10084 10082 32304 32301 10083 32202 41125 32127 12014 42111 42301 42203 10194 32302 12817 42105 12510 Ö 32201 35120 18447 20032 35161 25105 34101 20347 Ç... -
Seite 88: Ersatzteilpositionierung/ Spare Parts Position/ Positionnement De Pièce De Rechange W49 L
10.10 Ersatzteilpositionierung/ Spare parts position/ Positionnement de pièce de rechange W49 L 10084 10082 32304 32301 10083 32202 41125 32127 12014 42111 42301 42204 10195 12510 32302 42105 Ö 35120 32201 19017 20059 32402 20346 25105 34101 Ç... -
Seite 89: Ersatzteilpositionierung/ Spare Parts Position/ Positionnement De Pièce De Rechange W49 Le
10.11 Ersatzteilpositionierung/ Spare parts position/ Positionnement de pièce de rechange W49 LE 12626 10082 10084 32301 32304 32202 10083 32127 41125 12014 42111 42301 42204 10195 12510 32302 Ö 42105 35120 32201 19017 20059 32402 20346 25105 34101 Ç... -
Seite 90: Ersatzteilpositionierung/ Spare Parts Position/ Positionnement De Pièce De Rechange W49 W
10.12 Ersatzteilpositionierung/ Spare parts position/ Positionnement de pièce de rechange W49 W 10084 10082 32304 32301 10083 32202 41125 32127 12014 42111 42301 42204 10195 32302 12817 42105 12510 Ö 32201 35120 18448 20059 35161 25105 34101 20347 Ç... -
Seite 91: Notizen/ Notes/ Remarques
11. Notizen/ Notes/ Remarques Ö Ç... - Seite 92 WESSAMAT Eismaschinenfabrik GmbH Marie-Curie-Straße 1 D - 67661 Kaiserslautern Tel: +49 (0) 6301-7910-0 Fax: +49 (0) 6301-7910-20 e-mail: perfect-ice@wessamat.de Internet: http://www.wessamat.de...