Herunterladen Inhalt Inhalt Diese Seite drucken
Inhaltsverzeichnis

Werbung

Verfügbare Sprachen
  • DE

Verfügbare Sprachen

  • DEUTSCH, seite 39
MED-730
Réf : 57730

Werbung

Inhaltsverzeichnis
loading

Inhaltszusammenfassung für CARE FITNESS MED-730

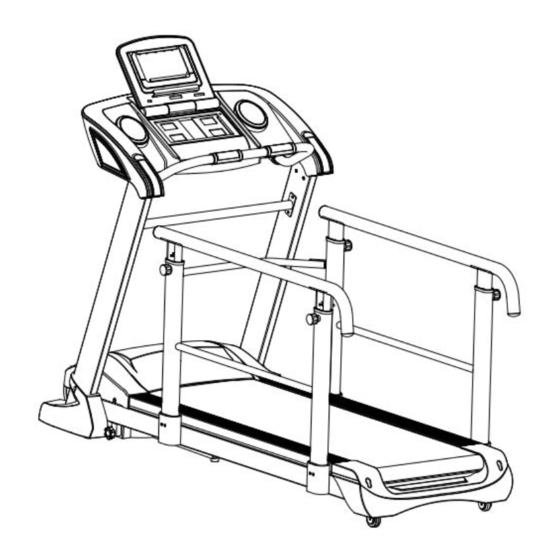
  • Seite 1 MED-730 Réf : 57730...
  • Seite 2: Avertissements

    AVERTISSEMENTS Sécurité -Lisez et conservez avec précaution ce manuel de l’utilisateur. N’utilisez ce produit que de la manière indiquée. -Cet appareil doit être assemblé et utilisé par des adultes. -Votre appareil est conforme à la norme EN-957 classe SA pour une utilisation à domicile, il ne doit pas être utilisé...
  • Seite 3 Important: Read these instructions before using the equipment! Safety Read this user manual and keep it in a safe place. Use this product exclusively in the manner indicated. This equipment must be assembled and used by adults. The equipment complies with the EN-957 standard, classification SA for use in the home. It must not be used in a sports center or any other public, associative or rented space.
  • Seite 4: Wartung

    Achtung: Nehmen Sie diese Ratschläge zur Kenntnis, bevor Sie Ihr Gerät benutzen! Sicherheit - Lesen Sie dieses Benutzerhandbuch sorgfältig und bewahren Sie es gut auf. Benutzen Sie dieses Gerät nur wie angegeben. - Dieses Gerät ist von Erwachsenen zu montieren und zu benutzen. - Ihr Gerät entspricht der Norm EN 957, Klasse SA, für eine Verwendung zu Hause, es darf nicht in einer Sporthalle oder an einem anderen öffentlichen, einem Verein gehörenden oder angemieteten Ort verwendet werden.
  • Seite 5: Seguridad

    ¡Atención: tenga en cuenta estos consejos antes de utilizar el aparato! Seguridad - Lea cuidadosamente y conserve este manual del usuario. No utilice este producto de un modo distinto del indicado. - Este aparato sólo deben ensamblarlo y utilizarlo personas adultas. - El aparato cumple las especificaciones de la norma EN-957 clase SA para uso domiciliario.
  • Seite 6 Attenzione: leggere attentamente queste accomandazioni prima di utilizzare l’attrezzo ! Sicurezza - Leggere e conservare con cura il manuale utente. Utilizzare questo prodotto unicamente nei modi Indicati - Questo attrezzo deve essere montato e utilizzato da persone adulte. - L’attrezzo è conforme alla norma EN-957 classe SA per un utilizzo domestico e non deve quindi essere utilizzato in palestre o altri luoghi pubblici, di associazione o a scopo locativo.
  • Seite 7: Belangrijke Aanwijzingen

    BELANGRIJKE AANWIJZINGEN Veiligheid Deze gebruikshandleiding aandachtig lezen en zorgvuldig bewaren. Dit toestel mag alleen op de aangegeven manier worden gebruikt. Dit toestel moet door volwassenen worden gemonteerd en gebruikt. Uw toestel voldoet aan de norm EN-957 categorie SA voor privé-gebruik in huis en mag niet in een sportzaal of elke andere openbare plaats, in verenigingsverband of voor verhuurde toepassingen worden gebruikt.
  • Seite 8 3L/R 32/33 86/87 SPECIFICATION SPECIFICATION 3L/R ∮9*∮16*t1.6 4L/R ∮11*∮20*t2 M4*15 M10*20 M10*80 32/33 M10*90 M8*15...
  • Seite 12 ATTENTION / ACHTUNG / ATENCIÓ / ATTENZIONE / LET OP Assurez-vous que l’appareil est complètement monté comme indiqué ci-dessus, puis vissez tous les boulons. Procédez comme suit après avoir vérifié que tout était en ordre : Avant d'utiliser le tapis de course, lisez attentivement le mode d'emploi. 1.
  • Seite 13 2. Si vous devez ajuster la hauteur du guidon, tirez la molette vers l’extérieur et tournez la barre du guidon afin que la molette ne s’enclenche pas dans le trou, puis ajustez la hauteur du guidon, enfoncez la molette et serrez-la bien. 2.
  • Seite 14 PIC I PIC II F INSTRUCTIONS D’INCLINAISON Les boutons 【INCLINE+】,【INCLINE-】,【+】 et 【-】 sont les boutons de réglages de l’inclinaison. Pour ajuster l’inclinaison alors que vous utilisez le tapis, le pas est de 1 niveau/appui. Appuyez sur le bouton pendant plus de 2 secondes pour élever ou baisser le tapis automatiquement. Vous disposez également des raccourcis 4, 8 et 12.
  • Seite 15 E INSTRUCCIONES DE INCLINACIÓN 【INCLINE+】【INCLINE-】y 【+】【-】en la barra de manos son los botones para añadir y reducir la inclinación. Para ajustar la inclinación durante el funcionamiento de la cinta de correr, el incremento es de 1 nivel cada vez. Pulse el botón durante más de 2 segundos, aumentará o disminuirá automáticamente. También tiene las teclas de acceso rápido 4, 8 y 12.
  • Seite 16: Utilisation De L'ordinateur

    Utilisation de l'ordinateur...
  • Seite 17 FONCTIONS DE L’ÉCRAN LCD 1. CHAMP « INCL/PUL » : 1.1 Lorsque l’indicateur rouge est sous « INCL », le champ indique l’inclinaison. 1.2 Lorsque l’indicateur rouge est sous « PUL », le champ indique le rythme cardiaque. 2. CHAMP « TIME/DIST » : 2.1 Lorsque l’indicateur rouge est sous «...
  • Seite 18: Fonctions Des Boutons

    . FONCTIONS DES BOUTONS START : démarrage normal après 3 secondes. STOP : appuyez sur ce bouton pour arrêter le tapis de course. PROG. : sert à sélectionner le programme. Les programmes sont les suivants : P1 à P18, FAT. MODE :permet de sélectionner le mode parmi : manual modes (modes manuels)--time count-down (compte à...
  • Seite 19 7. PARAMÈTRES DES MODES Appuyez sur le bouton MODE, et choisissez entre : time count-down (compte à rebours du temps),distance count-down (compte à rebours de la distance) et calories count-down (compte à rebours des calories). Le grand champ affiche alors le message suivant : AJUSTEZ LE TEMPS ET APPUYEZ SUR START AJUSTEZ LA DISTANCE ET APPUYEZ SUR START AJUSTEZ LES CALORIES ET APPUYEZ SUR START...
  • Seite 20: Inhaltsverzeichnis

    GRILLE DES EXERCICES DU PROGRAMME TIME TEMPS DE COURSE/16 SESSIONS = TEMPS DE CHAQUE SESSION INCLINE (HEURE) SPEED PROG INCLINE SPEED INCLINE SPEED 10 10 INCLINE SPEED INCLINE SPEED INCLINE SPEED INCLINE SPEED INCLINE SPEED 10 12 INCLINE SPEED...
  • Seite 21: Incline 2 2 2 2 2 2 2 2 1 4 2 4 3 4 4 2 5

    INCLINE SPEED INCLINE SPEED INCLINE SPEED INCLINE SPEED INCLINE SPEED INCLINE SPEED 12 12 INCLINE SPEED INCLINE SPEED INCLINE SPEED 9. UTILISATEUR Pour accéder aux paramètres des programmes définis par l’utilisateur : Appuyez sur le bouton PROG jusqu’à ce que les programmes utilisateur (U1, U2, U3) soient affichés. Choisissez-en un et réglez-le.
  • Seite 22 Effectuez les mêmes étapes que pour le premier segment, et ce pour les 20 segments. Une fois que vous avez entré toutes vos données, le message « OK » s’affiche : votre programme utilisateur personnalisé est maintenant enregistré et prêt à l’emploi. Lorsque vous travaillez avec un programme utilisateur, l’écran indique successivement l’inclinaison et la vitesse lorsque que les niveaux que vous avez programmés sont affichés.
  • Seite 23: Mode Économie D'énergie

    11. FONCTION RYTHME CARDIAQUE Lorsque le tapis est en marche, serrez le capteur cardiaque inclus à la poignée pendant environ 5 secondes : les données concernant le rythme cardiaque apparaissent. Lors de la mesure, une icône en forme de cœur apparait sur l’écran. Pour obtenir votre rythme cardiaque précis, faites le test alors que le tapis est arrêté, et ne tenez pas le capteur plus de 30 secondes.
  • Seite 24 Entretien et traitement des dysfonctionnements 1) La surface du tapis roulant doit être conservée propre, retirez le cordon d'alimentation avant le nettoyage. Vous pouvez nettoyer la bande de roulement et la surface du tapis roulant avec un chiffon doux et humide. 2) Le tapis de course est réglé...
  • Seite 25 ENTRETIEN LUBRIFICATION Il est important de prendre soin de votre tapis de course (en particulier la surface de course sous le tapis). Une bonne lubrification en silicone améliorera aussi la performance de votre tapis de course. NOTE : Utilisez la silicone fournie avec le tapis de course. Vous pouvez en acheter à nouveau dans votre magasin distributeur.
  • Seite 26 CODE DESCRIPTION DE TRAITEMENT DE L’ERREUR D’ERREUR L’ERREUR Erreur de L’appareil s’arrête et passe en mode erreur. L’appareil ne communication : les fonctionne plus, l’écran affiche le code d’erreur E01 et l’alarme commandes et sonne 3 fois. l’ordinateur ont rencontré Raisons possibles :obstruction de la communication entre les une erreur de commandes et l’ordinateur.
  • Seite 27 POUR COMMANDER DES PIECES DETACHEES Dans un soucis d’efficacité munissez-vous des éléments suivants avant de contacter notre Service Après Vente : Le nom ou la référence du produit. Le numéro de fabrication indiqué sur le châssis principal et sur le carton d’emballage. Le numéro de la pièce manquante ou défectueuse indiqué...
  • Seite 28: Computer Instruction

    Computer instruction...
  • Seite 29: Button Function

    LCD WINDOW FUNCTION 1. "INCL / PUL" WINDOW: 1.1 When red light on the “INCL”, it shows INCLINE. 1.2 When the light on the “PUL”, it show PULSE. 2."TIME / DIST" WINDOW: 2.1 When red light on the “TIME”, it shows running time,including count-down Time. 2.2 When red light on the “DIST”, it shows DISTANCE,including count-down Distance.
  • Seite 30: Main Function

    SPEED+/-: Adjust speed. You can adjust parameter when it stops. INCLINE+/-: Adjust incline. You can adjust parameter when it stops. 4,8,12 can adjust the speed when treadmill is running. 4,8,12 can adjust the incline when the treadmill is running. It can adjust the volume when music is playing It can switch to the songs you are interested in when SD or USB equipment is working.
  • Seite 31: Build-In Program

    8. BUILD-IN PROGRAM When the treadmill is not running, press PROG button, the speed window will display “P1-P20”. Choose any one in P1---P20 and the time window shows default value 30:00 and flickers. Press "SPEED + -" or “INCLINE+-”button to adjust the time you need. Press "START" button to start build- in program.
  • Seite 32: Incline 2 2 4 2 2 2 4 2 2 2 4 2

    INCLINE SPEED INCLINE SPEED INCLINE SPEED INCLINE SPEED INCLINE SPEED INCLINE SPEED INCLINE SPEED INCLINE SPEED INCLINE SPEED INCLINE SPEED INCLINE SPEED...
  • Seite 33 9. USER For user defined programs setting: Press PROG until it shows the user program (U1, U2, U3) Choose one and enter it. Press MODE enter time set, the range is 5:00 -- 99:00. Press MODE again and use “SPEED +/-” or “ INCLINE +/-” to select your desired speed Or incline, press MODE once more and your choice will be set,then the next workout Segment will flash.
  • Seite 34 FA(BMI) RESULT ≤19 UNDER WEIGHT 20--25 NORMAL WEIGHT 25--29 OVER WEIGHT ≥30 OBESITY 11. PULSE FUNCTION When the treadmill is running, hold the handle pulse about 5 seconds, it will display pulse data. It has heart-shaped graphics when testing pulse. To get the exact heartbeat rate, please test when the treadmill stops, and hold the hand pulse not less than 30 seconds.
  • Seite 35 Maintenance and Malfunction Treatment 1) The surface of the treadmill should be kept clean, pull out the power line before cleaning. You can clean the running belt and the surface of the treadmill with a soft and wet cloth. 2) The running belt is adjusted at factory; it may runs defectively after transportation and use. Turn off the treadmill before adjusting, pull the belt in the center, and then adjust the left and right bolts in rear roller with hex spanner (See figure ) it is better to adjust 1/2 circle once.
  • Seite 36 FAULT CODE FAULT DESCRIPTION FAULT PROCESSING Stop and go into fault. The machine can’t running, the computer Communication shows fault code “E01”, and the buzzle will ringing three tone. abnormal: The control and computer has Possible reasons:Communication obstructed between abnormal communication controller and computer, please check the wire and make sure after start the wire connect well and the wire without and danger.
  • Seite 37 To order spare parts To guarantee an efficient service, make sure you have the following items before you contact our After Sales Service: The name or reference of the product. The manufacturing number shown on the main chassis and on the packing box. The number of the missing or faulty part shown on the exploded view of the product described in this manual.
  • Seite 38: Bedienung Des Computers

    Bedienung des Computers...
  • Seite 39: Anzeige "Geschwindigkeit"

    FUNKTION DES LCD-ANZEIGEFELDES 1. ANZEIGE „NEIGUNG / PULS“: 1.1 Wenn das rote Licht bei „NEIGUNG“ brennt, wird die NEIGUNG angezeigt. 1.2 Wenn das Licht bei „PULS“ brennt, wird der PULS angezeigt. 2. ANZEIGE „ZEIT / DISTANZ“: 2.1 Wenn das rote Licht bei „ZEIT“ brennt, wird die verstrichene Zeit und die verbleibende Zeit angezeigt.
  • Seite 40: Funktion Der Knöpfe

    6. FUNKTION DER KNÖPFE START: Normaler Start nach 3 Sekunden-Countdown. STOP: Drücken Sie diesen Knopf, um das Programm zu beenden. PROG.: Es gibt folgende Möglichkeiten der Programmauswahl: P01-P18, FETT, MODUS: Wählen Sie einen Modus aus: Manueller Modus--Countdown/Zeit-- Countdown/Distanz--Countdown/Kalorien. GESCHWINDIGKEIT+/-: Anpassung der Geschwindigkeit. Wenn das Band still steht, können Sie die Parameter anpassen.
  • Seite 41: Modus Parameter Einstellungen

    7. MODUS PARAMETER EINSTELLUNGEN Drücken Sie die MODUS-Taste und stellen Sie anschließend Countdown/Zeit, Countdown/Distanz, und Countdown/Kalorien ein. Auf dem großen Anzeigenfeld erscheint nacheinander: STELLEN SIE DIE ZEIT EIN UND DRÜCKEN SIE AUF START STELLEN SIE DIE DISTANZ EIN UND DRÜCKEN SIE AUF START STELLEN SIE DIE KALORIEN EIN UND DRÜCKEN SIE AUF START Drücken Sie die „MODUS“-Taste, und stellen Sie anschließend : Countdown/Zeit, Countdown/Distanz, und Countdown/Kalorien ein.
  • Seite 42 PROGRAMM-VERLAUF TIME (ZEIT) EINGESTELLTE ZEIT / 16 ABSCHNITTE = ZEIT EINES ABSCHNITTS PROG STEIGUNG GESCHWINDIGKEIT STEIGUNG GESCHWINDIGKEIT STEIGUNG GESCHWINDIGKEIT STEIGUNG GESCHWINDIGKEIT STEIGUNG GESCHWINDIGKEIT STEIGUNG GESCHWINDIGKEIT STEIGUNG GESCHWINDIGKEIT STEIGUNG GESCHWINDIGKEIT STEIGUNG GESCHWINDIGKEIT STEIGUNG GESCHWINDIGKEIT STEIGUNG GESCHWINDIGKEIT...
  • Seite 43 STEIGUNG GESCHWINDIGKEIT STEIGUNG GESCHWINDIGKEIT STEIGUNG GESCHWINDIGKEIT STEIGUNG 12 12 GESCHWINDIGKEIT STEIGUNG GESCHWINDIGKEIT STEIGUNG GESCHWINDIGKEIT STEIGUNG GESCHWINDIGKEIT 9. USER Einstellungen für benutzerdefinierte Programme: Drücken Sie die PROG-Taste, bis das Benutzerprogramm (U1, U2, U3) angezeigt wird. Wählen Sie ein Programm aus und bestätigen Sie. Drücken Sie die MODUS-Taste und geben Sie die Zeit zwischen 5:00 -- 99:00 ein.
  • Seite 44 10. KÖRPERFETTMESSUNG Drücken Sie zu Beginn die PROGRAM-Taste, um zum Körperfett-Tester (FETT) zu gelangen. In der Anzeige erscheint FETT. Drücken Sie die MODUS-Taste und geben Sie die entsprechenden Werte ein für (F-1 GESCHLECHT, F-2 ALTER, F-3 GRÖSSE, F-4 GEWICHT, F-5 FETT-TESTER). Betätigen Sie die Tasten GESCHWINDIGKEIT+, GESCHWINDIGKEIT- zum Einstellen der Werte.
  • Seite 45: Puls-Funktion

    11. PULS-FUNKTION Umfassen Sie, wenn das Laufband in Betrieb ist, für 5 Sekunden die Sensorflächen. Es wird Ihr Puls angezeigt. Es wird ein Herzsymbol angezeigt, während der Puls geprüft wird. Um die genaue Herzfrequenz zu prüfen, führen Sie den Test durch, während das Laufband still steht, und umfassen Sie die Sensorflächen mindestens 30 Sekunden lang.
  • Seite 46: Instandhaltung Und Störungen

    Instandhaltung und Störungen Die Fläche des Laufbands muss sauber gehalten werden. Vor der Reinigung den Stecker herausziehen. Das Laufband und die Oberfläche des Geräts mit einem feuchten weichen Tuch reinigen. Das Laufband wird bei der Herstellung passend in das Gerät eingebaut. Es kann nach dem Transport oder der Benutzung Funktionsstörungen aufweisen.
  • Seite 47 FEHLERCODE FEHLERBESCHREIBUNG BEHEBEN DES FEHLERS Drücken Sie auf Stop und gehen Sie in die Fehleranzeige. Das Gerät setzt sich nicht in Bewegung, der Computer zeigt den Fehlercode Störung der Kommunikation: „E01“ an, und es ertönen drei Warntöne. Kontrollanzeige und Computer zeigen Störungen Mögliche Gründe: Die Kommunikation zwischen Kontrolleinheit und der Kommunikation nach Computer ist gestört.
  • Seite 48: Bestellung Von Einzelteilen

    Bestellung von Einzelteilen Für eine effizientere Abwicklung stellen Sie bitte, bevor Sie unseren Kundendienst kontaktieren, folgende Angaben zusammen: Den Namen oder die Artikelnummer des Produkts. Die Fabrikationsnummer, die auf dem Hauptrahmen und dem Verpackungskarton steht. Die Nummer des fehlenden oder schadhaften Teils, wie sie aus der diesen Informationen beigefügten Explosionszeichnung hervorgeht.
  • Seite 49 Instrucciones del ordenador...
  • Seite 50 FUNCIÓN VENTANA LCD 1. VENTANA "INCL / PUL": 1.1 Cuando la luz roja se encuentra en “INCL”, muestra INCLINACIÓN. 1.2 Cuando la luz roja se encuentra en “PUL”, muestra PULSO. 2. VENTANA "TIME / DIST": 2.1 Cuando la luz roja se encuentra en “TIME”, muestra el tiempo de carrera, incluida la cuenta atrás del tiempo.
  • Seite 51: Función De Los Botones

    6. FUNCIÓN DE LOS BOTONES START: inicio normal tras cuenta atrás de 3 segundos. STOP: pulse este botón para detener la cinta. PROG.: para selección de programas, los programas son los siguientes: P01- P18, FAT, MODE:selecciona modos: modos manuales, modo cuenta atrás de tiempo, cuenta atrás de distancia, cuenta atrás de calorías.
  • Seite 52 7. MODO AJUSTE DE PARÁMETROS Pulse el botón MODE, puede seleccionar: cuenta atrás de tiempo, cuenta atrás de distancia, cuenta atrás de calorías. La ventana grande mostrará lo siguiente: ADJUST TIME THEN PRESS START (ajuste el tiempo y pulse START) ADJUST DISTANCE THEN PRESS START (ajuste la distancia y pulse START) ADJUST CALORIES THEN PRESS START (ajuste las calorías y pulse START) Pulse el botón "MODE", seleccione: cuenta atrás de tiempo, cuenta atrás de distancia, cuenta atrás de...
  • Seite 53 SECUENCIA EJERCICIO DE PROGRAMA TIME AJUSTAR TIEMPO/16 GRADOS = CADA GRADO DE TIEMPO PROG 11 12 INCLINACIÓN VELOCIDAD INCLINACIÓN VELOCIDAD INCLINACIÓN VELOCIDAD INCLINACIÓN VELOCIDAD INCLINACIÓN VELOCIDAD INCLINACIÓN VELOCIDAD INCLINACIÓN VELOCIDAD INCLINACIÓN VELOCIDAD INCLINACIÓN VELOCIDAD INCLINACIÓN VELOCIDAD INCLINACIÓN VELOCIDAD INCLINACIÓN VELOCIDAD INCLINACIÓN VELOCIDAD...
  • Seite 54 INCLINACIÓN VELOCIDAD INCLINACIÓN VELOCIDAD INCLINACIÓN VELOCIDAD INCLINACIÓN VELOCIDAD INCLINACIÓN VELOCIDAD...
  • Seite 55 9. USER Para el ajuste de programas definidos por el usuario: Pulse PROG hasta que muestre el programa de usuario (U1, U2, U3) Seleccione y acceda a uno. Pulse MODE para introducir el tiempo, el rango va de 5:00 a 99:00. Vuelva a pulsar MODE y utilice “SPEED +/-”...
  • Seite 56: Modo Ahorro De Energía

    11. FUNCIÓN PULSO Cuando la cinta de correr está en funcionamiento, sujete el pulso de mano durante 5 segundos, mostrará los datos de pulso. Presenta gráficos con forma de corazón cuando se encuentra en modo pulso Para obtener la frecuencia cardíaca exacta, mídala cuando se detenga la cinta de correr y sujete el pulso de mano 30 segundos como mínimo.
  • Seite 57: Mantenimiento Y Solución De Problemas

    Mantenimiento y solución de problemas La superficie de la cinta de correr debe mantenerse limpia, desconectar el cable de alimentación antes de limpiarla. Puede limpiar la cinta de correr y la superficie de la máquina con un paño suave y húmedo. La cinta de correr se ajusta en fábrica, puede que no funcione correctamente tras el transporte y el uso.
  • Seite 58 LIMPIEZA Transpiración debe ser limpiada de la superficie de la consola y correa después de su entrenamiento. Usted debe limpiar su caminadora una vez por semana con un paño suave y humedecido con agua. Tenga cuidado de no humedecer excesivamente la pantalla ya que esto podría causar un peligro eléctrico o que los electrónicos fallen.
  • Seite 59 CÓDIGO DE DESCRIPCIÓN DE FALLO PROCESAMIENTO DE FALLO FALLO Parada y arranque hasta fallo. La máquina no puede funcionar, el Comunicación anormal: el ordenador muestra el código de fallo "E01" y emitirá tres pitidos. control y el ordenador presentan una Posibles razones: comunicación obstaculizada entre controlador y comunicación anormal tras ordenador, compruebe el cable y asegúrese de conectar...
  • Seite 60 Para solicitar piezas sueltas En aras de la eficacia, antes de ponerse en contacto con nuestro Servicio Posventa, tenga a mano los siguientes datos: El nombre o la referencia del producto. El número de fabricación indicado en el chasis principal y en la caja de embalaje. El número de la pieza que falta o está...
  • Seite 61 Istruzioni per il computer...
  • Seite 62 FUNZIONE LCD 1. "INCL / PUL": 1.1 Se “INCL” compare in rosso, la pedana si inclina (INCLINE). 1.2 Se “PUL” compare in rosso, la pedana funziona a impulsi (PULSE). 2."TIME / DIST": 2.1 Se “TIME” compare in rosso, viene visualizzato il tempo di esercizio e il conto alla rovescia. 2.2 Se “DIST”...
  • Seite 63: Funzioni Dei Pulsanti

    6. FUNZIONI DEI PULSANTI START: Inizio normale dopo un conto alla rovescia di 3 secondi. STOP: Premere questo pulsante per l’arresto. PROG.: Per scegliere il programma, i programmi sono i seguenti: P01-P18, FAT, MODE:Selezione delle modalità: modalità manuali--conto alla rovescia tempo-- conto alla rovescia distanza--conto alla rovescia calorie.
  • Seite 64 ADJUST TIME THEN PRESS START ADJUST DISTANCE THEN PRESS START ADJUST CALORIES THEN PRESS START Premere il pulsante "MODE” e selezionare conto alla rovescia tempo, conto alla rovescia distanza, conto alla rovescia calorie. Sui display viene visualizzato un valore predefinito, che lampeggia. Premere il pulsante "SPEED + -"...
  • Seite 65 GRAFICO DEI PROGRAMMI DI ESERCIZIO TIME TEMPO DI IMPOSTAZIONE / 16 SEZIONI = TEMPO DI CIASCUNA SEZIONE PROG INCLINE SPEED INCLINE SPEED INCLINE SPEED 10 10 INCLINE SPEED INCLINE SPEED INCLINE SPEED INCLINE SPEED INCLINE SPEED 10 12 INCLINE SPEED INCLINE SPEED INCLINE...
  • Seite 66 INCLINE SPEED INCLINE SPEED 12 12 INCLINE SPEED INCLINE SPEED INCLINE SPEED 9. UTENTE Per impostare programmi definiti dall’utente: Premere PROG finché non visualizza il programma utente (U1, U2, U3) Sceglierne uno e confermare la selezione. Premere MODE e immettere il tempo impostato. L’intervallo si estende da 5:00 a 99:00. Premere nuovamente MODE e utilizzare “SPEED +/-”...
  • Seite 67 10. TEST DELLA MASSA GRASSA Nello stato iniziale, premere PROGRAM e proseguire accedendo al tester della massa grassa FAT; sul display comparirà FAT. Premere MODE e immettere i valori (F-1 SEX, F-2 AGE, F-3 HEIGHT, F-4 WEIGHT, F-5 FAT TESTER). Premere SPEED+, SPEED- per impostare il valore desiderato. Premere MODE per impostare F-5, afferrare il sensore palmare;...
  • Seite 68: Modalità Di Risparmio Energetico

    11. FUNZIONE PULSE Quando il tapis roulant è in funzione, tenere il sensore palmare per circa 5 secondi. Il display visualizzerà i dati delle pulsazioni. Durante l’acquisizione della frequenza cardiaca avrà una grafica a forma di cuore. Per ottenere la frequenza esatta, testare il valore quando il tapis roulant è...
  • Seite 69: Cura & Manutenzione

    MANUTENZIONE E INTERVENTO MALFUNZIONAMENTO La superficie del tapis roulant deve essere tenuta pulita, staccare l'alimentazione prima di pulire. Si può pulire il nastro per la corsa e la superficie del tapis roulant con un panno morbido e umido. Il nastro per la corsa è regolato in fabbrica; può girare in modo difettoso dopo il trasporto e l'uso. Spegnere il tapis roulant prima della regolazione, mettere il nastro nel centro e poi regolare i bulloni sinistro e destro nel rullo posteriore con la chiave esagonale (vedere figura) è...
  • Seite 70: Lubrificazione

    PULIZIA T racce di sudore devono essere rimosse dalla console e dalla superficie del tapis roulant dopo ogni allenamento. Pulire il tapis roulant con uno straccio morbido e leggermente umido facendo attenzione a non inumidire troppo il pannello del display. Un eccesso di umidità può causare un guasto elettrico ed essere pericoloso.
  • Seite 71 CODICE DESCRIZIONE DEL GESTIONE DELL’ANOMALIA DIFETTO DIFETTO Arrestare la macchina e passare in modalità Guasto. La macchina non Anomalia di comunicazione: è in grado di funzionare, il computer riporta il codice difetto “E01” ed Comando e computer emette un cicalino tritonale. comunicano in modo Possibili cause: Comunicazione interrotta tra controller e computer.
  • Seite 72: Ordine Di Pezzi Di Ricambio

    ORDINE DI PEZZI DI RICAMBIO Prima di contattare il nostro Servizio post-vendita, assicurarsi di disporre dei seguenti elementi: Il nome o il riferimento del prodotto. Il numero di serie indicato sul telaio principale e sul cartone dell’imballaggio. Il numero del pezzo mancante o difettoso indicato sull’esploso del prodotto presente in queste istruzioni. Servizio post-vendita E mail : service-it@carefitness.com...
  • Seite 73 WEERGAVESCHERM...
  • Seite 74 FUNCTIE LCD-SCHERM 1. VENSTER "INCL / PUL": 1.1 Wanneer het rode lampje brandt op het venster “INCL” wordt de HELLINGSHOEK weergegeven. 1.2 Wanneer het lampje brandt op het venster “PUL”, wordt de HARTSLAG weergegeven. 2.VENSTER "TIME / DIST": 2.1 Wanneer het rode lampje brandt op het venster "TIME", wordt de looptijd weergegeven, inclusief de aflopende tijd.
  • Seite 75 6 TOETSFUNCTIE: START: Normale start na 3 seconden aftellen. STOP: Druk op deze knop om te stoppen. PROG.: Om programma's te selecteren. De programma's zijn als volgt: P01- P18, FAT, MODE:Modusselectie: handmatige modus--aflopende tijd--aflopende afstand-- aflopende calorieën. SPEED+/-: Snelheid aanpassen. U kunt de parameter aanpassen wanneer de loopband stopt.
  • Seite 76 ADJUST CALORIES THEN PRESS START Druk op de "MODE"-knop en kies: aflopende tijd, aflopende afstand, aflopende calorieën. De vensters tonen een standaardwaarde en lichten op. Klik op "SPEED + -" om de gewenste waarden in te stellen. Druk op de START-knop. Na 3 seconden zal de loopband op de laagste snelheid starten. Klik op "SPEED + -", ”4 / 8 / 12 ”...
  • Seite 77 GRAFIEK MET TRAININGSPROGRAMMA'S TIME TIJDSINSTELLING / 16 STAPPEN = ALLE TIJDSTAPPEN PROG INCLINE SPEED INCLINE SPEED INCLINE SPEED 10 10 INCLINE SPEED INCLINE SPEED INCLINE SPEED INCLINE SPEED INCLINE SPEED 10 12 INCLINE SPEED INCLINE SPEED INCLINE SPEED INCLINE SPEED INCLINE...
  • Seite 78: P14

    SPEED INCLINE SPEED INCLINE SPEED 12 12 INCLINE SPEED INCLINE SPEED INCLINE SPEED...
  • Seite 79 9. GEBRUIKER Voor door gebruikers gedefinieerde programma-instelling: Druk op PROG totdat het gebruikersprogramma wordt weergegeven (U1, U2, U3) Kies een programma. Druk op MODE en stel de tijd in, het instelbereik is 5:00 -- 99:00. Druk nogmaals op MODE en op “SPEED +/-” of “ INCLINE +/-” om de gewenste snelheid of hellingshoek te selecteren, druk nogmaals op MODE en uw keuze is geselecteerd.
  • Seite 80: Energiebesparende Modus

    FA(BMI) RESULTAAT ≤19 ONDERGEWICHT 20--25 NORMAAL GEWICHT 25--29 OVERGEWICHT ≥30 OBESITAS 11. HARTSLAGFUNCTIE Wanneer u de loopband gebruikt, houdt u beide handen gedurende 5 seconden op de handsensoren. Uw hartslag wordt weergegeven. Er wordt een knipperend hartje weergegeven wanneer de hartslag gemeten wordt. Voor een exacte hartslagwaarde, test u deze wanneer de loopband stopt, en houdt u uw handen minstens 30 seconden op de handsensoren.
  • Seite 81: Zorg & Onderhoud

    14. FUNCTIE VEILIGHEIDSSLOT Op het venster wordt "SAFETY KEY PROTECTION" weergegeven wanneer het veiligheidsslot wordt verwijderd. De loopband zal stoppen en u hoort twee pieptonen. Als u het veiligheidsslot terugplaatst wordt het standaardprogramma geactiveerd. Onderhoud en probleemoplossingen bij storingen Het oppervlakte van de loopmat dient te allen tijde schoon te worden gehouden. Zorg ervoor dat u de stekker van de loopband uit het stopcontact haalt alvorens u hieraan schoonmaakwerkzaamheden uitvoert.
  • Seite 82 Smeerolie voor het loopband dek Dit schema geldt als aanbevolen behandeling bij een enkele gebruiker, tot 20-30 minuten per training, 3-4 keer per week. Neem voor een smeerbeurt contact op met de dealer. SCHOONHOUDEN Transpiratievocht dient van de console en de loopband te worden verwijderd na de training. Maak de loopband een keer per week schoon met een vochtig, zacht doekje.
  • Seite 83 C/ Sproei de silicone gelijkmatig zoals is aangegeven op de tekening. (WAARSCHUWING : de loopband hoort STIL TE STAAN voordat de silicone wordt aangebracht om letsel te voorkomen, anders zou u zich met de scherpe kant van de band kunnen snijden of de vingers zouden klem kunnen komen tussen de rollen) Breng niet te veel silicone aan op de band.
  • Seite 84 FOUTCODE FOUTBESCHRIJVING FOUTVERWERKING Loopband stopt en geeft storing aan. De loopband kan niet draaien, op het scherm wordt foutcode “E01” weergegeven en er klinken drie Communicatiestoring De geluidssignalen. besturing en de computer communiceren na het Mogelijke oorzaak: communicatiestoring tussen controller en computer. starten op afwijkende wijze Controleer de bedrading, zorg dat alle draden goed en veilig zijn aangesloten.
  • Seite 85 BESTELLING VAN VERVANGENDE ONDERDELEN Voor een snellere afhandeling van uw bestelling vragen wij u de volgende elementen onder bereik te houden alvorens onze Klantendienst te bellen: De naam of de referentie van het artikel. Het fabricagenummer dat op het hoofdframe en op de verpakking staat vermeld. Het onderdeelnummer van het ontbrekende of defecte onderdeel dat op de overzichtstekening van het artikel in deze handleiding wordt aangegeven.

Diese Anleitung auch für:

57730

Inhaltsverzeichnis