Herunterladen Inhalt Inhalt Diese Seite drucken
Inhaltsverzeichnis

Werbung

Verfügbare Sprachen
  • DE

Verfügbare Sprachen

  • DEUTSCH, seite 69
GUIDE D'INSTALLATION RAPIDE
QUICK INSTALLATION GUIDE
GUÍA D'INSTALACIÓN RÁPIDA
KURZANLEITUNG INSTALLATION
GUIDA RAPIDA PER L'INSTALLAZIONE
GUIA DE INSTALAÇÃO RÁPIDA
S S S S
LIM
LIM
LIM
LIM
B B B B
OX
OX
OX
OX
SlimBox
P.6
P.23
P.45
P.67
P.89
P.111
P. 1/132

Werbung

Inhaltsverzeichnis
loading

Inhaltszusammenfassung für Storex SlimBox

  • Seite 1 GUIDE D’INSTALLATION RAPIDE P.23 QUICK INSTALLATION GUIDE P.45 GUÍA D’INSTALACIÓN RÁPIDA P.67 KURZANLEITUNG INSTALLATION P.89 GUIDA RAPIDA PER L’INSTALLAZIONE P.111 GUIA DE INSTALAÇÃO RÁPIDA S S S S B B B B SlimBox P. 1/132...
  • Seite 2 SlimBox P. 2/132...
  • Seite 3 Débranchez le produit de la prise murale avant de procéder au nettoyage du produit, Nettoyez l’extérieur du produit ainsi que la télécommande à l’aide d’un chiffon doux et sec. Ne jamais utiliser de tampon abrasif, de poudre à récurer ou de solvants tels que l’alcool ou l’essence. SlimBox P. 3/132...
  • Seite 4: Remarque Importante

    Les téléviseurs à écran plasma et les téléviseurs à projection y sont sensibles. SÉCURITÉ – ENVIRONNEMENT Votre produit STOREX a été testé en laboratoire ; il est conforme aux directives Européennes correspondant au marquage CE en vigueur au moment de sa commercialisation.
  • Seite 5: Inhaltsverzeichnis

    FACE ARRIERE .......................... 7 CÔTÉ ............................7 DÉTAIL DE LA TÉLÉCOMMANDE ....................8 CONNECTER LA PASSERELLE "SLIMBOX" Á LA TV ................. 10 CONNECTER UN PÉRIPHÉRIQUE À VOTRE "SLIMBOX" ................11 LECTURE D’UN FICHIER ......................12 LECTURE À PARTIR D’UNE CARTE MÉMOIRE ................13 BARRE DE RACCOURCIS ......................
  • Seite 6: Introduction

    - Alimentation électrique INPUT : ~100V - 240V 50-60Hz 0.6A OUTPUT : 12.0V 2000mA - Formats supportés - Vidéo : Avi, Rmvb, Ts, Vob, Mkv, Mov - Audio : MP3, WMA, AAC, WAV, OGG - Photo : BMP, JPEG, TIF, GIF et PNG SlimBox P. 6/132...
  • Seite 7: Détail Du Produit

    4. COAXIAL : Pour connecter un câble coaxial (de votre SlimBox à votre amplificateur audio). 5. AV TV : Pour connecter votre SlimBox à la TV grâce au câble AV fourni. 6. HDMI : Pour connecter un câble HDMI (de votre SlimBox à votre TV).
  • Seite 8: Détail De La Télécommande

    DÉTAIL DE LA TÉLÉCOMMANDE TÉLÉCOMMANDE RÉELLE NUMÉRATION DES TOUCHES SlimBox P. 8/132...
  • Seite 9 Permet d’accéder directement à l’explorateur de fichiers. FILE Permet d’accéder directement à la page "FLASH". FLASH DVD MENU Permet d’accéder directement au menu DVD. Permet de zoomer. ZOOM Permet d’effectuer une rotation pendant la visualisation d’un diaporama. ROTATE SlimBox P. 9/132...
  • Seite 10: Connecter La Passerelle "Slimbox" Á La Tv

    CONNECTER LA PASSERELLE "SLIMBOX" Á LA TV Plan arrière d’une TV Câble HDMI Câble AV 1. Connectez une extrémité de votre câble AV derrière le produit et l’autre extrémité à la TV (voir l’illustration ci-dessus), normalement un schéma vous guidera (AV1, AV2, EXT1, EXT2…) une fois connectée à la TV.
  • Seite 11: Connecter Un Périphérique À Votre "Slimbox

    CONNECTER UN PÉRIPHÉRIQUE À VOTRE "SLIMBOX" La passerelle "S l i m Bo x" est équipée de ports "USB Host" permettant de connecter une clé USB ou un disque dur USB directement sur la passerelle " S li m B ox ", de le parcourir et ainsi de lire le contenu multimédia qui y est stocké.
  • Seite 12: Lecture D'un Fichier

    3. Appuyez sur la touche " " pour faire apparaître la barre de raccourcis suivante : Vous trouverez les raccourcis suivants dans l’ordre respectif : 1. Précédent 2. Pause 3. Rotation 4. Zoom 5. Musique de fond 6. Affichage photo 7. Suivant SlimBox P. 12/132...
  • Seite 13: Lecture À Partir D'une Carte Mémoire

    " pour changer votre périphérique de lecture. À chaque appui sur la touche le périphérique de lecture change puis s’affiche en bleu. 3. Sélectionnez les répertoires et fichiers avec les touches directionnelles et validez la sélection en appuyant sur “ENTER”. SlimBox P. 13/132...
  • Seite 14: Barre De Raccourcis

    6. Zoom 7. Avance Rapide 8. Suivant 2. MUSIQUE 1. Précédent 2. Retour Rapide 3. Play/Pause 4. Stop 5. Lecture séquentielle ou aléatoire 6. Répéter tout, répéter répertoire ou répéter un. 7. Avance Rapide 8. Suivant SlimBox P. 14/132...
  • Seite 15: Paramètres De La "Slimbox

    Déplacez-vous à l’aide des touches directionnelles puis validez avec la touche "ENTER". Appuyez sur la touche " " pour faire disparaître la barre de raccourcis. PARAMÈTRES DE LA "SLIMBOX" Sur cette page vous pouvez procéder à plusieurs réglages, dont celui de la langue et de la résolution d’affichage.
  • Seite 16: Réseau Sans Fil (Wifi)

    Sur cette page vous pouvez modifier la résolution d’affichage de "SlimBox". Réseau sans fil (WIFI) 1. La clé WIFI est une option de la "S l im B ox ", veuillez contacter votre distributeur ou consulter le site http://www.e-storex.com pour acquérir une clé WiFi compatible.
  • Seite 17 6. Saisissez votre clé en fonction de la sécurité (WEP pour l’exemple) à l’aide du pavé numérique virtuel. Appuyez sur le bouton "ENTER" pour valider. 7. Une fois votre clé saisie, sélectionnez "SUBMIT" puis appuyez sur "ENTER". SlimBox P. 17/132...
  • Seite 18 NOTE Il est recommandé de configurer le réseau après avoir correctement connecté la clé USB WiFi à la SlimBox. Veuillez vérifier que l’anti-virus ou le pare-feu ne bloque pas l'accès de cette unité au réseau. Vous subirez peut-être une coupure momentanée et un gel du contenu Av lu par le biais du réseau WiFi à...
  • Seite 19: Conditions De Garantie

    CONDITIONS DE GARANTIE La garantie proposée par STOREX est de 1 an pour la passerelle "Sl i m Bo x" et de 3 mois pour ses accessoires (télécommande, câbles AV, bloc d’alimentation…). STOREX garantit votre produit contre tout défaut de fabrication ou d’assemblage. Cette garantie ne s’applique qu’au premier achat d’une "S li m B ox "...
  • Seite 20: Site Web Storex

    SITE WEB STOREX Vous trouverez sur le site Web STOREX une rubrique SUPPORT associée à chaque produit STOREX. Rendez-vous à l’adresse http://www.storex.eu. Sélectionnez "Passerelle Multimédia" puis "S l i mB o x". Vous pourrez télécharger la dernière version complète du manuel, des mises à jour logicielles et consulter les questions fréquemment posées. Avant de contacter notre support technique ou notre service après-vente, veuillez d’abord vérifier la section...
  • Seite 21 SlimBox P. 21/132...
  • Seite 22 SlimBox P. 22/132...
  • Seite 23: Quick Installation Guide

    QUICK INSTALLATION GUIDE S S S S B B B B SlimBox P. 23/132...
  • Seite 24 SlimBox P. 24/132...
  • Seite 25 Unplug the product from the wall socket before cleaning it, Clean the product's surface as well as the remote control with a soft and dry cloth. Never use rough materials, scourer powder or solvents such as alcohol or spirits. SlimBox P. 25/132...
  • Seite 26: Safety - Environment

    Plasma screen televisions and projector screens are particularly sensitive. SAFETY – ENVIRONMENT Your STOREX product has been laboratory tested; it complies to European guidelines corresponding to the CE labelling in force at the time of its launch. Your STOREX product's components are tracable; this demonstrates the product's compliance to environmental guidelines (RoHS) in force at the time of its launch.
  • Seite 27 REAR PANEL ..........................29 SIDE ............................29 REMOTE CONTROL DETAILS ...................... 30 CONNECTING THE "SLIMBOX" GATEWAY TO THE TV ..............32 CONNECTING A PERIPHERAL TO YOUR "SLIMBOX" ................33 READING A FILE ........................34 READING FROM A MEMORY CARD ....................35 SHORTCUT BAR ........................
  • Seite 28: Introduction

    INTRODUCTION Your "SlimBox" is a multimedia gateway allowing you to watch photos and videos in high definition, or listen to music. OPERATION - Once connected to the TV, you can watch multimedia files from your USB peripheral or SD/MMC memory card in high definition on your "SlimBox".
  • Seite 29: Product Details

    4. COAXIAL: To connect a coaxial cable (from your SlimBox to your audio amplifier). 5. AV TV: To connect your SlimBox to your TV using the provided AV cable. 6. HDMI: To connect a HDMI cable (from your SlimBox to your TV).
  • Seite 30: Remote Control Details

    REMOTE CONTROL DETAILS REAL REMOTE CONTROL KEYPAD NUMBERING SlimBox P. 30/132...
  • Seite 31 TOUCHE FONCTION Allows the user to call the shortcut bar while viewing a file. TASKBAR Turning the SlimBox on/off STANDBY Allows the user to activate/deactivate the sound. MUTE Allows the user to browse between the different files and folders. DIRECTIONNAL Allows the user to confirm their selection or to launch the reading of a file.
  • Seite 32: Connecting The "Slimbox" Gateway To The Tv

    (AV1, AV2, EXT1, EXT2…) once connected to the TV. 3. Connect the power adaptor to the "SlimBox" and switch the commuter (under the product) to 4. Press the "Standby" key on your remote control.
  • Seite 33: Connecting A Peripheral To Your "Slimbox

    CONNECTING A PERIPHERAL TO YOUR "SLIMBOX" The "SlimBox" gateway is equipped with "USB Host" ports allowing the user to connect a USB stick or a USB hard drive directly to the "SlimBox", to browse it and read the multimedia content stored in it.
  • Seite 34: Reading A File

    2. Press the " " key to show the following shortcut bar: You will be shown the following shortcuts in respective order: 1. Previous 2. Pause 3. Rotation 4. Zoom 5. Background music 6. Photo display 7. Next SlimBox P. 34/132...
  • Seite 35: Reading From A Memory Card

    " key to change your reading peripheral. Each time you press the key the reading peripheral will change and be displayed in blue. 3. Select the directories and files with the directional pad and confirm the selection by pressing “ENTER”. SlimBox P. 35/132...
  • Seite 36: Shortcut Bar

    6. Zoom 7. Fast Forward 8. Next 2. MUSIC 1. Previous 2. Rewind 3. Play/Pause 4. Stop 5. Sequential or random play 6. Repeat all, repeat directory or repeat one. 7. Fast Forward 8. Next SlimBox P. 36/132...
  • Seite 37: Slimbox" Settings

    Press the " " key to hide the shortcut bar. "SLIMBOX" SETTINGS On this page you can perform several adjustments, including the language and the display resolution. 1. Press the “SETUP” key on the remote control to enter the settings menu.
  • Seite 38: Wireless Network (Wifi)

    On this page you can modify the "SlimBox" display resolution. Wireless network (WIFI) 1. The WIFI is optional for the "SlimBox", please contact your retailer or refer to the http://www.e-storex.com website to purchase a compatible WiFi key. 2. Connect the USB WiFi key (optional) to one of the USB HOST ports.
  • Seite 39 5. Select your WiFi network and press "ENTER" 6. Enter your key according to safety settings (WEP in this example) with the virtual digital number pad. Press "ENTER" to confirm. 7. Once you have entered your key, select "CONFIRM" and press "ENTER". SlimBox P. 39/132...
  • Seite 40 NOTE We recommend setting up the network after properly connecting the USB WiFi stick to the SlimBox. Please ensure that the antivirus or firewall aren't blocking this unit's access to the network. You may experience a temporary cut and a freeze of the AV content via the WiFi network due to the network speed, the input capacity or AV files including HD files.
  • Seite 41: Terms Of Guarantee

    TERMS OF GUARANTEE STOREX's available guarantee is valid for 1 year for the "S lim B ox " gateway and 3 months for its accessories (remote control, AV cables, power supply…). STOREX guarantees your product against any manufacturing or assembling faults. This guarantee applies to the first hand purchase of a "S li mB o x"...
  • Seite 42: Storex Website

    STOREX WEBSITE You will find a SUPPORT section associated with each STOREX product on STOREX's website. Log on to http://www.storex.eu. Select "Multimedia Gateway" and "S lim B ox ". You will be able to download the latest complete version of the manual, software updates, and refer to the frequently asked questions section. Before contacting our technical support team or our after-sales service, please check the "Forum"...
  • Seite 43 Remote handling "Hello, I can't install my external hard drive" Using the STORwebEX platform allows the Hotline technicians to connect remotely to the customer's computer, in order to resolve installation issues pertaining to a STOREX product. SlimBox P. 43/132...
  • Seite 44 SlimBox P. 44/132...
  • Seite 45: Guía D'instalación Rápida

    GUÍA D’INSTALACIÓN RÁPIDA S S S S B B B B SlimBox P. 45/132...
  • Seite 46 SlimBox P. 46/132...
  • Seite 47 Desconecte el producto de la toma de corriente antes de limpiarlo. Limpie la superficie del producto además del mando a distancia con un trapo seco y suave. Nunca utilice materiales abrasivos, esponjillas metálicas o disolventes tales como el alcohol. SlimBox P. 47/132...
  • Seite 48: Resolución De Problemas

    SEGURIDAD – MEDIO AMBIENTE Su producto STOREX ha sido probado en laboratorio; éste cumple con las normas europeas correspondientes a la etiquete CE de acuerdo a su fecha de fabricación. Los componentes de su producto STOREX son identificables; esto demuestra la conformidad del producto con respecto a las directrices ambientales (RoHS) de acuerdo a su fecha de fabricación.
  • Seite 49 PANEL LATERAL ........................51 DETALLES DEL CONTROL REMOTO ..................... 52 CONEXIÓN DE LA PASARELA "SLIMBOX" AL TV ................54 CONEXIÓN DE UN DISPOSITIVO EXTERNO A SU "SLIMBOX" ............55 LECTURA DE UN ARCHIVO ......................56 LECTURA DESDE UNA TARJETA DE MEMORIA ................57 BARRA DE ACCESO DIRECTO .....................
  • Seite 50: Introducción

    INTRODUCCIÓN Su "SlimBox" es una pasarela multimedia que le permite ver fotos y vídeos en alta definición, o escuchar música. OPERACIÓN - Una vez conectado al TV, podrá ver archivos multimedia desde su USB externa o tarjeta de memoria SD/MMC en alta definición a través de su "SlimBox".
  • Seite 51: Detalles Del Producto

    PANEL TRASERO 1. DC IN 12V: Para conectar el adaptador de energía. 2. OPTICAL: Para conectar el cable óptico (desde su SlimBox hacia el amplificador de audio). 3. LAN: Para conectar un cable de Ethernet (desde su SlimBox hacia un enrutador).
  • Seite 52: Detalles Del Control Remoto

    DETALLES DEL CONTROL REMOTO CONTROL REMOTO REAL TECLADO NUMÉRICO SlimBox P. 52/132...
  • Seite 53 PRESIONE FUNCIÓN Permite al usuario ir a un acceso directo mientras observa un archivo. BARRA DE TAREAS Enciende/Apaga el SlimBox. INACTIVO Permite al usuario activar/desactivar el sonido. MUDO Permite al usuario explorar entre varios archivos y carpetas. PANEL DIRECCIONAL Permite al usuario confirmar su selección o ejecutar la lectura de un archivo.
  • Seite 54: Conexión De La Pasarela "Slimbox" Al Tv

    Normalmente, el diagrama lo guiará (HDMI1, HDMI2, EXT1, EXT) una vez conectado al TV. 3. Conecte el adaptador de energía al "SlimBox" y cambie el conmutador (debajo del producto) a la posición ON. 4. Presione la tecla "Standby" (Inactivo) en su mando a distancia.
  • Seite 55: Conexión De Un Dispositivo Externo A Su "Slimbox

    CONEXIÓN DE UN DISPOSITIVO EXTERNO A SU "SLIMBOX" La pasarela "SlimBox" está equipada con puertos "USB Host" que permiten al usuario conectar una memoria USB o un disco duro extraíble directamente a la pasarela multimedia "SlimBox", para explorarlos y reproducir el contenido multimedia que estos contienen.
  • Seite 56: Lectura De Un Archivo

    " para mostrar la barra de acceso directo a continuación: Podrá observar los siguientes accesos directos en el siguiente orden: 1. Anterior 2. Pausa 3. Rotación 4. Zoom 5. Música de fondo 6. Mostrar foto 7. Siguiente SlimBox P. 56/132...
  • Seite 57: Lectura Desde Una Tarjeta De Memoria

    " para cambiar su lectura externa. Cada vez que presiona la tecla, la lectura externa cambiará y será mostrada en azul. 3. Selecione los directorios y archivos con el panel direccional y confirme la selección presionando “ENTER”. SlimBox P. 57/132...
  • Seite 58: Barra De Acceso Directo

    6. Zoom 7. Avance rápido 8. Siguiente 2. MÚSICA 1. Anterior 2. Retroceder 3. Reproducir/Pausar 4. Detener 5. Reproducción aleatoria o secuencial 6. Repetir todo, repetir directorio, o repetir una 7. Avance rápido 8. Siguiente SlimBox P. 58/132...
  • Seite 59: Ajustes De "Slimbox

    1. Presione la tecla “SETUP” (Configuración) en el control remoto para ingresar al menú de ajuste. 2. Utilice el teclado direccional para seleccionar los ajustes y presione “ENTER”. En esta página podrá seleccionar el idioma. En esta página podrá modificar la resolución de pantalla del "SlimBox". SlimBox P. 59/132...
  • Seite 60: Red Inalámbrica (Wifi)

    Red inalámbrica (WIFI) 1. La red WIFI es opcional para el "SlimBox", comuníquese con su distribuidor o visite el sitio web: http://www.e-storex.com para adquirir una llave WiFi USB compatible. 2. Conecte la llave WiFi USB (opcional) a uno de los puertos USB HOST.
  • Seite 61 6. Ingrese su clave de acuerdo a los ajustes de seguridad (WEP, en este ejemplo) con el panel de número digital virtual. Presione "ENTER" para confirmar. 7. Una vez que haya ingresado su clave, seleccione "CONFIRMAR" y presione "ENTER". SlimBox P. 61/132...
  • Seite 62 NOTA Recomendamos configurar la red después de conectar correctamente la llave WiFi USB al SlimBox. Asegúrese de que el antivirus o firewall no estén bloqueando el acceso de la unidad a la red. Es posible que experimente un corte temporal o parada del contenido AV a través de la red WiFi debido a la velocidad de la red, la capacidad de entrada, o los archivos AV, incluyendo los archivos HD.
  • Seite 63: Términos De La Garantía

    TÉRMINOS DE LA GARANTÍA La garantía de STOREX es válida por 1 año para la pasarela multimedia "SlimBox" y 3 meses para sus accesorios (mando a distancia, cables AV, cables de energía, etc.). STOREX garantiza que su producto está libre de fallas de fabricación o ensamble. Esta garantía aplica para compra de productos nuevos de "SlimBox"...
  • Seite 64: Sitio Web De Storex

    Si experimenta una falla del producto, comuníquese con su distribuidor para hacer reparar su "Slimbox" en garantía, o envíe una solicitud a través del correo electrónico a la siguiente dirección: soporte@storex.eu o telefónicamente a través de los siguientes números telefónicos: 01 55 85 82 00 (Costo de llamada local a París)
  • Seite 65 "Hola, no puedo instalar mi disco externo" A través de la plataforma STORwebEX usted podrá conectarse remotamente con la línea directa de técnicos desde su computador para resolver problemas de instalación relacionados con cualquier producto de STOREX. SlimBox P. 65/132...
  • Seite 66 SlimBox P. 66/132...
  • Seite 67: Kurzanleitung Installation

    KURZANLEITUNG INSTALLATION S S S S B B B B SlimBox P. 67/132...
  • Seite 68 SlimBox P. 68/132...
  • Seite 69: Reinigung

    Ziehen Sie vor der Reinigung des Produkts den Netzstecker aus der Steckdose. Reinigen Sie das Äußere des Produkts und die Fernbedienung mit einem weichen, trockenen Tuch. Verwenden Sie niemals Scheuermittel, Scheuerpulver oder Lösungsmittel wie Alkohol oder Spiritus. SlimBox P. 69/132...
  • Seite 70: Sicherheit - Umwelt

    Ihrem Fernsehbildschirm für einen längeren Zeitraum, kann zu Schäden am Fernsehbildschirm führen. Plasma-Fernseher und Projektorbildschirme sind besonders empfindlich. SICHERHEIT - UMWELT Ihr STOREX Produkt wurde im Labor getestet und erfüllt die europäischen Richtlinien bezüglich der CE-Kennzeichnung zum Zeitpunkt der Vermarktung. Die Komponenten Ihres STOREX-Produkts sind wiederverwertbar. Das Symbol weist darauf hin, dass das Produkt der Umwelt-Richtlinie (RoHS) zum Zeitpunkt der Vermarktung entspricht.
  • Seite 71 FRONT ............................ 73 RÜCKSEITE ..........................73 SEITE ............................. 73 FERNBEDIENUNGSDETAILS ....................... 74 ANSCHLUSS DES „SLIMBOX“-GATEWAYS AN DEN FERNSEHER ............76 ANSCHLUSS EINES PERIPHERIEGERÄTS AN IHRE „SLIMBOX“ ............77 WIEDERGABE EINER DATEI ....................... 78 VON EINER SPEICHERKARTE WIEDERGEBEN ................79 SCHNELLTASTENLEISTE ......................80 „SLIMBOX“-EINSTELLUNGEN .....................
  • Seite 72: Einleitung

    EINLEITUNG Ihre „SlimBox“ ist ein Multimedia-Gateway, mit dem Fotos und Videos in Hoch Auflösung oder Musik wiedergeben werden können. INBETRIEBNAHME - Sobald die „SlimBox“ an den Fernseher angeschlossen wurde, können Sie Mediendateien in Hoch Auflösung von Ihrem USB-Gerät oder einer SD/MMC-Speicherkarte wiedergeben.
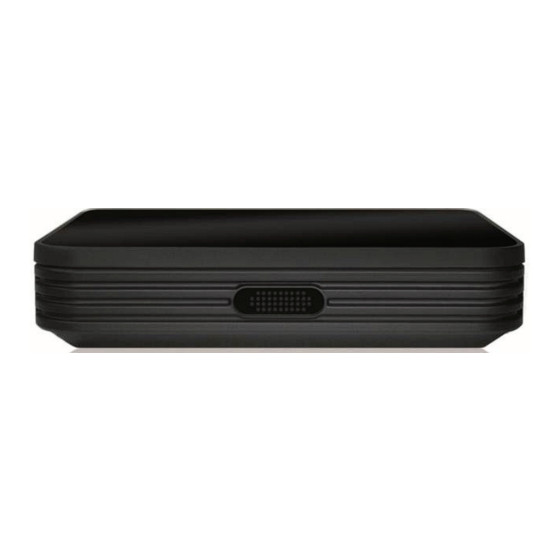
  • Seite 73: Produktdetails

    LAN: Anschluss eines Ethernetkabels (von Ihrer SlimBox an Ihren Router). KOAXIAL: Anschluss eines koaxialen Kabels (von Ihrer SlimBox an Ihren Audioverstärker). AV TV: Anschluss Ihrer SlimBox an Ihren Fernseher mittels des mitgelieferten AV-Kabels. HDMI: Anschluss eines HDMI-Kabels (von Ihrer SlimBox an Ihren Fernseher).
  • Seite 74: Fernbedienungsdetails

    FERNBEDIENUNGSDETAILS REALE FERNBEDIENUNG NUMMERIERTE TASTEN SlimBox P. 74/132...
  • Seite 75 TASTE FUNKTION Aufrufen der Schnelltastenleiste bei der Wiedergabe einer Datei. TASKLEISTE Schaltet die SlimBox ein oder aus. STANDBY Aktiviert oder deaktiviert die Stummschaltung. MUTE Dateien und Ordner durchsuchen. PFEILTASTEN Eine Auswahl bestätigen oder die Wiedergabe einer Datei starten. BESTÄTIGEN Verlassen oder zur vorherigen Seite zurückkehren.
  • Seite 76: Anschluss Des „Slimbox"-Gateways An Den Fernseher

    Fernseher an (Siehe Abbildung oben). Normalerweise wird ein Diagramm als Leitfaden angezeigt (AV1, AV2, EXT1, EXT2 usw.), sobald das Gerät am Fernseher angeschlossen wird. Schließen Sie den Netzadapter an die „SlimBox“ an und stellen Sie den Ein/Ausschalter (unter dem Produkt) in die Stellung ON (Ein).
  • Seite 77: Anschluss Eines Peripheriegeräts An Ihre „Slimbox

    ANSCHLUSS EINES PERIPHERIEGERÄTS AN IHRE „SLIMBOX“ Der „SlimBox“-Gateway ist mit „USB-Host“-Schnittstellen ausgestattet, an die ein USB Memory Stick oder eine USB-Festplatte direkt an den „SlimBox“-Gateway angeschlossen werden kann, um diese zu durchsuchen und die darauf gespeicherten Multimedia-Inhalte wiederzugeben. 1. Wählen Sie entsprechend zum Dateityp, den Sie wiedergeben möchten, eines der Symbole (Video, Musik oder Foto).
  • Seite 78: Wiedergabe Einer Datei

    1. Wählen Sie Ordner und Dateien mit den Pfeiltasten und bestätigen Sie die Auswahl mit „ENTER“. 2. Zeigen Sie mit „ folgende Schnelltastenleiste an: “ Folgende Schnelltasten werden in der Reihe nach angezeigt: Zurück 2. Pause Drehen 4. Zoomen Hintergrundmusik 6. Fotoanzeige 7. Weiter SlimBox P. 78/132...
  • Seite 79: Von Einer Speicherkarte Wiedergeben

    1. Stecken Sie die Speicherkarte in den dafür vorgesehenen Kartenleser (siehe „Produktdetails“). 2. Wechseln Sie mit „ “ das Eingabegerät. Das Eingabegerät wird mit jedem Tastendruck gewechselt und wird blau markiert. 3. Wählen Sie Ordner und Dateien mit den Pfeiltasten und bestätigen Sie die Auswahl mit „ENTER“. SlimBox P. 79/132...
  • Seite 80: Schnelltastenleiste

    5. Audio (Audiotrack ändern). 6. Zoomen 7. Schneller Vorlauf 8. Weiter 2. MUSIK 1. Zurück 2. Schneller Rücklauf 3. Play/Pause 4. Stopp 5. Sequentielle oder zufällige Wiedergabe 6. Alle wiederholen, Ordner wiederholen oder Einmal wiederholen. 7. Schneller Vorlauf 8. Weiter SlimBox P. 80/132...
  • Seite 81: Slimbox"-Einstellungen

    1. Rufen Sie das Setupmenü mit „SETUP“ auf der Fernbedienung auf. 2. Wählen Sie mit den Pfeiltasten die Einstellung und drücken Sie „ENTER“. Auf dieser Seite können Sie die Sprache einstellen. Auf dieser Seite können Sie die die Displayauflösung der „SlimBox“ ändern. SlimBox P. 81/132...
  • Seite 82: Drahtloses Netzwerk (Wi-Fi)

    Drahtloses Netzwerk (Wi-Fi) 1. Wi-Fi ist für die „SlimBox“ optional, wenden Sie sich bitte an Ihren Händler oder besuchen Sie die Website http://www.e-storex.com, um einen kompatiblen Wi-Fi-Stick zu erwerben. 2. Stecken Sie den USB Wi-Fi-Stick (optional) in eine der USB-Hostschnittstellen.
  • Seite 83 Geben Sie Ihren Schlüssel, entsprechend zu den Sicherheitseinstellungen (WEP in diesem Beispiel), mit der virtuellen digitalen Tastatur ein. Bestätigen Sie mit „ENTER“. 7. Sobald Sie Ihren Schlüssel eigegeben haben, wählen Sie „CONFIRM“ (Bestätigen) und drücken Sie „ENTER“. SlimBox P. 83/132...
  • Seite 84 “ HINWEIS Wir empfehlen, das Netzwerk erst nach ordnungsgemäßem Anschluss des USB-Wi-Fi Sticks an der SlimBox einzurichten. Bitte achten Sie darauf, dass Antivirus- oder Firewall-Software den Zugriff des Geräts auf das Netzwerk nicht blockiert. Es könnte wegen der Netzwerkgeschwindigkeit und der Übertragungskapazität von AV-Dateien über das Wi-Fi-Netzwerk, einschließlich Dateien im HD-Format, zu einem vorübergehenden...
  • Seite 85: Garantiebedingungen

    GARANTIEBEDINGUNGEN STOREX gibt für den „SlimBox“-Gateway eine 1-jährige Garantie und für das Zubehör 3 Monate (Fernbedienung, AV-Kabel, Netzadapter usw.). STOREX gewährt für Ihr Produkt eine Gewährleistung auf Herstellungs- oder Montagefehler. Diese Garantie gilt nur für den Erstkäufer einer „SlimBox“ als Endverbraucher und ist nicht übertragbar, wenn das Gerät weiter veräußert wird.
  • Seite 86: Storex-Website

    Sie ein, die Garantie Ihrer „SlimBox“ auf unserer Website unter der folgenden Adresse zu registrieren: http://garantie.storex.eu Sollte das Produkt defekt sein, wenden Sie sich für eine Garantiereparatur der „SlimBox“ bitte an Ihren Händler oder senden Sie Ihre Anfrage per E-Mail an die folgende Adresse: support@storex.eu...
  • Seite 87 Hotline-Technikern die the Hotline technicians to connect Fernverbindung mit dem Computer des remotely to the customer's computer, in Kunden, um Installationsprobleme bezüglich eines STOREX-Produkts zu beheben. order to resolve installation issues pertaining to a STOREX product. SlimBox P. 87/132...
  • Seite 88 SlimBox P. 88/132...
  • Seite 89: Guida Rapida Per L'installazione

    GUIDA RAPIDA PER L’INSTALLAZIONE S S S S B B B B SlimBox P. 89/132...
  • Seite 90 SlimBox P. 90/132...
  • Seite 91 Scollegare il prodotto dalla presa di corrente prima di pulirlo Pulire la superficie del prodotto e il telecomando con un panno morbido e asciutto. Non utilizzare mai materiali ruvidi, polveri pulenti o solventi come alcool o spiriti. SlimBox P. 91/132...
  • Seite 92: Risoluzione Dei Problemi

    Televisori al plasma e schermi a proiezione sono particolarmente sensibili. SICUREZZA - AMBIENTE Il vostro prodotto STOREX è stato testato in laboratorio; segue le linee guida europee corrispondenti all’etichetta CE in vigore al momento del lancio. I componenti del vostro prodotto STOREX sono tracciabili; ciò dimostra che il prodotto rispetta le linee guida ambientali (RoHS) in vigore al momento del lancio del prodotto.
  • Seite 93 PANNELLO FRONTALE ........................95 PANNELLO POSTERIORE ......................95 DETTAGLI DEL TELECOMANDO ....................96 COLLEGARE IL GATEWAY "SLIMBOX" ALLA TV ................. 98 COLLEGARE UNA PERIFERICA AL VOSTRO "SLIMBOX" ............99 LETTURA DI UN FILE ........................100 LETTURA DA SCHEDA DI MEMORIA ..................101 BARRA SCORCIATOIE .........................
  • Seite 94: Introduzione

    INTRODUZIONE Il vostro "SlimBox" è un gateway multimediale che vi permette di visualizzare foto e video in alta definizione o di ascoltare musica. OPERATIVITÀ’ - Dopo la connessione alla TV, potrete visualizzare file multimediali da periferica USB o scheda di memoria SD/MMC in alta definizione sul vostro "SlimBox".
  • Seite 95: Dettagli Del Prodotto

    3. LAN: Collegamento di cavo Ethernet (da SlimBox al router). 4. COASSIALE: Collegamento di cavo coassiale (da SlimBox all’amplificatore audio). 5. AV TV: Collegamento di SlimBox alla TV tramite il cavo AV in dotazione. 6. HDMI: Collegamento di cavo HDMI (da SlimBox alla TV).
  • Seite 96: Dettagli Del Telecomando

    DETTAGLI DEL TELECOMANDO TELECOMANDO REALE NUMERAZIONE TASTI SlimBox P. 96/132...
  • Seite 97 Tasto FUNZIONE Permette all’utente di richiamare la barra scorciatoie durante la SCORCIATOIE visualizzazione di un file Accende/Spegne SlimBox STANDBY Permette all’utente di attivare/disattivare il suono. MUTO Permette all’utente di navigare tra i vari file e cartelle. TASTI DIREZIONE Permette all’utente di confermare la selezione o di lanciare la lettura di un CONFERMA file.
  • Seite 98: Collegare Il Gateway "Slimbox" Alla Tv

    (AV1, AV2, EXT1, EXT2…) una volta collegata la TV. 3. Collegare l’alimentatore di corrente a “SlimBox” e posizionare l’interruttore (sotto il prodotto) su 4. Premere il tasto "Standby" sul telecomando. 5. Il menu principale compare entro pochi secondi.
  • Seite 99: Collegare Una Periferica Al Vostro "Slimbox

    COLLEGARE UNA PERIFERICA AL VOSTRO "SLIMBOX" Il gateway “SlimBox” è dotato di porte “USB Host” che consentono di collegare una chiavetta USB o un disco rigido USB direttamente al gateway “SlimBox”, esplorarne i contenuti e leggere i contenuti multimediali immagazzinati.
  • Seite 100: Lettura Di Un File

    2. Premere il tasto " " Per visualizzare la seguente barra scorciatoie: Verranno mostrate le seguenti scorciatoie nel seguente ordine: 1. Precedente 2. Pausa 3. Rotazione 4. Zoom 5. Musica di sottofondo 6. Visualizza Foto 7. Prossimo SlimBox P. 100/132...
  • Seite 101: Lettura Da Scheda Di Memoria

    " per cambiare la periferica selezionata. Ogni volta che si preme il tasto, si passerà ad un’altra periferica ed essa verrà visualizzata in blu. 3. Selezionare le cartelle e i file con i tasti direzione e confermare la selezione premendo “ENTER”. SlimBox P. 101/132...
  • Seite 102: Barra Scorciatoie

    6. Zoom 7. Avanti Veloce 8. Successivo 2. MUSICA 1. Precedente 2. Riavvolgi 3. Play/Pausa 4. Stop 5. Riproduzione sequenziale o casuale 6. Ripeti tutti, ripeti cartella o ripeti uno. 7. Avanti Veloce 8. Successivo SlimBox P. 102/132...
  • Seite 103: Impostazioni Di "Slimbox

    1. Premere il tasto “SETUP” sul telecomando per entrare nel menu impostazioni. 2. Utilizzare i tasti direzione per selezionare le impostazioni e premere “ENTER”. In questa pagina è possibile selezionare la lingua. In questa pagina è possibile modificare la risoluzione schermo di “SlimBox”. SlimBox P. 103/132...
  • Seite 104: Rete Senza Fili (Wifi)

    Rete senza fili (WIFI) 1. La funzione WIFI è opzionale per "SlimBox", si prega di contattare il rivenditore o far riferimento al sito http://www.e-storex.com per l’acquisto di una chiavetta WiFi compatibile. 2. Collegare la chiavetta USB WiFi (opzionale) a una delle porte USB HOST.
  • Seite 105 5. Selezionare la vostra rete WiFi e premere "ENTER" 6. Digitare la propria parola chiave a seconda delle impostazioni di sicurezza (in questo esempio WEP) con la tastiera digitale virtuale. Premere "ENTER"per confermare. 7. Dopo aver inserito la parola chiave, selezionare "CONFIRM" e premere "ENTER". SlimBox P. 105/132...
  • Seite 106 9. Premere " " per tornare alla pagina principale. NOTA Si raccomanda di impostare la rete dopo aver collegato la chiavetta USB WiFi a SlimBox. Si prega di assicurarsi che l’antivirus o il firewall non stiano bloccando l’accesso alla rete dell’unità.
  • Seite 107: Termini Di Garanzia

    TERMINI DI GARANZIA La garanzia STOREX è valida per 1 anno per il gateway “SlimBox” e per 3 mesi per i suoi accessori (telecomando, cavi AV, cavi alimentazione…). STOREX garantisce il vostro prodotto contro difetti di produzione e assemblaggio. Questa garanzia è...
  • Seite 108: Sito Internet Storex

    SITO INTERNET STOREX Sul sito STOREX si trova una sezione di SUPPORTO associata ad ogni prodotto STOREX. Aprire l’indirizzo www.storex.eu Selezionare “Multimedia Gateway”, quindi “SlimBox”. È possibile scaricare l’ultima versione completa dei manuali, gli aggiornamenti software e consultare la sezione delle domande frequenti. Prima di contattare il nostro supporto tecnico o la nostra assistenza post-vendita, pregasi controllare la sezione “Forum”...
  • Seite 109 "Salve, non riesco a installare il mio disco rigido esterno" Utilizzare la piattaforma STORwebEX permette ai tecnici del servizio telefonico di collegarsi via remoto al computer dell’utente, per poter risolvere problemi di installazione legati a prodotti STOREX. SlimBox P. 109/132...
  • Seite 110 SlimBox P. 110/132...
  • Seite 111: Guia De Instalação Rápida

    GUIA DE INSTALAÇÃO RÁPIDA S S S S B B B B SlimBox P. 111/132...
  • Seite 112 SlimBox P. 112/132...
  • Seite 113 Desligue o produto da tomada de parede antes de o limpar. Limpe também a superfície do produto como o controlo remoto com um pano seco e suave. Nunca utilize materiais ásperos, esfregões de aço ou solventes como álcool ou diluentes. SlimBox P. 113/132...
  • Seite 114: Resolução De Problemas

    As televisões Plasma e os ecrãs projectores são particularmente sensíveis. SEGURANÇA - AMBIENTE O seu produto STOREX foi testado em laboratório; cumpre todas as linhas de orientação Europeias correspondente ao rótulo CE em vigor na altura do seu lançamento.
  • Seite 115 LATERAL ..........................117 DETALHES DO CONTROLO REMOTO ..................118 LIGAÇÃO DA GATEWAY "SLIMBOX" À TV ................... 120 LIGAÇÃO DE UM PERIFÉRICO À SUA "SLIMBOX" ............... 121 LEITURA DE UM FICHEIRO ...................... 122 LEITURA DE UM CARTÃO DE MEMÓRIA ..................123 BARRA DE ATALHOS .......................
  • Seite 116: Introdução

    INTRODUÇÃO A sua "SlimBox" é uma passerelle multimédia que lhe permite visualizar fotografias e vídeos em alta definição, ou ouvir música. FUNCIONAMENTO - Uma vez ligado à TV, pode ver ficheiros multimédia a partir do seu periférico USB ou cartão de memória SD/MMC em alta definição na sua "SlimBox".
  • Seite 117: Detalhes Do Produto

    4. COAXIAL: Para ligar a um cabo coaxial (da sua SlimBox para o seu amplificador). 5. AV TV: Para ligar a sua SlimBox à sua TV com o cabo AV fornecido. 6. HDMI: Para ligar um cabo HDMI (da sua SlimBox para a sua TV).
  • Seite 118: Detalhes Do Controlo Remoto

    DETALHES DO CONTROLO REMOTO CONTROLO REMOTO REAL NUMERAÇÃO DO TECLADO SlimBox P. 118/132...
  • Seite 119 Num. TECLA FUNÇÃO Permite ao utilizador chamar a barra de atalhos durante a exibição de um TASKBAR ficheiro. Ligar/Desligar a SlimBox STANDBY Permite ao utilizador activar/desactivar o som. MUTE Permite ao utilizador pesquisar nos diferentes ficheiros e pastas. TECLAS DIRECCIONAIS Permite ao utilizador confirmar a sua selecção ou lançar a leitura de um...
  • Seite 120: Ligação Da Gateway "Slimbox" À Tv

    (AV1, AV2, EXT1, EXT2…) uma vez ligado à TV. 3. Ligue o adaptador de potência à "SlimBox" e ligue o comutador (por baixo do produto) para LIGADO. 4. Pressione a tecla "Standby" do seu controlo remoto.
  • Seite 121: Ligação De Um Periférico À Sua "Slimbox

    LIGAÇÃO DE UM PERIFÉRICO À SUA "SLIMBOX" A gateway "SlimBox" está equipada com as interfaces "USB" permitindo ao utilizador ligar a chave de armazenamento USB ou um disco rígido USB directamente, para a visualizar e ler o conteúdo multimédia aí armazenado.
  • Seite 122: Leitura De Um Ficheiro

    2. Pressione a tecla " " para mostrar a seguinte barra de atalhos: Ser-lhe-ão mostrados os seguintes atalhos pela ordem respectiva: 1. Anterior 2. Pausa 3. Rotação 4. Ampliar 5. Música de fundo 6. Exibição de imagens 7. Próximo SlimBox P. 122/132...
  • Seite 123: Leitura De Um Cartão De Memória

    " para mudar o seu periférico para leitura. Cada vez que pressionar a tecla o periférico para leitura irá mudar e será mostrado em azul. 3. Seleccione os directórios e ficheiros com o teclado direccional e confirme a selecção pressionando “ENTER”. SlimBox P. 123/132...
  • Seite 124: Barra De Atalhos

    5. Audio (permite ao utilizador alterar a faixa áudio). 6. Ampliar 7. Avanço rápido 8. Próximo 2. MUSIC 1. Anterior 2. Recuar 3. Reproduzir/Pausa 4. Parar 5. Reprodução sequencial ou aleatória 6. Repetir tudo, repetir pasta ou repetir 7. Avanço rápido 8. Próximo SlimBox P. 124/132...
  • Seite 125: Definições Da "Slimbox

    Pressione a tecla " " para ocultar a barra de atalhos: DEFINIÇÕES DA "SLIMBOX" Nesta página pode efectuar vários ajustes, incluindo o idioma e a resolução de exibição. 1. Pressione a tecla "SETUP" do controlo remoto para entrar no menu de definições.
  • Seite 126: Rede Sem Fios (Wifi)

    Nesta página pode modificar a resolução de exibição da "SlimBox". Rede sem fios (WIFI) 1. O WIFI é opcional para a "SlimBox", contacte o seu vendedor ou consulte o endereço http://www.e-storex.com para comprar um adaptador WiFi compatível. 2. Ligue o adaptador WiFi USB (opcional) a uma das portas USB.
  • Seite 127 6. Introduza a sua chave de acordo com as definições de segurança (WEP por exemplo) com o teclado numérico digital virtual. Prima "ENTER" para confirmar. 7. Uma vez introduzida a sua chave, seleccione "CONFIRMAR" e pressione "ENTER". SlimBox P. 127/132...
  • Seite 128 " para voltar à página inicial. NOTA Recomendamos que configure a rede depois de ligar correctamente o adaptador WiFi USB à SlimBox. Assegure-se de que o antivírus ou a firewall não estão a bloquear o acesso desta unidade à rede.
  • Seite 129: Termos De Garantia

    TERMOS DE GARANTIA A garantia disponível da STOREX é válida para 1 ano para a gateway "S lim B ox " e 3 meses para os seus acessórios (controlo remoto, cabos AV, alimentação...). A garantia STOREX cobre falhas de fabrico ou montagem do seu produto. Esta garantia aplica-se à...
  • Seite 130: Página Storex

    PÁGINA STOREX Irá encontrar uma secção APOIO associada a cada produto STOREX na página da STOREX. Entre em http://www.storex.eu. Seleccione "Multimedia Gateway" e S l im Bo x ". Será capaz de descarregar a última versão completa do manual, actualizações de software, e consultar a secção de questões frequentes. Antes de contactar a sua equipa de apoio técnico ou o serviço pós-venda, verifique primeiro a secção "Forum", disponível...
  • Seite 131 "Olá, não consigo instalar o meu disco rígido externo" A utilização da plataforma STORwebEX permite aos técnicos da linha de assistência ligar remotamente ao computador do cliente, para resolver questões relacionadas com segurança a um produto STOREX. SlimBox P. 131/132...
  • Seite 132 È una serie di prodotti di É parte da gama de produto fabricado por www.storex.eu © STOREX –2010 Toutes les marques citées sont déposées par leurs propriétaires respectifs All mentioned brand names are patented by their respective owners. Todas las marcas mencionadas están patentadas por sus respectivos propietarios.

Inhaltsverzeichnis