Inhaltsverzeichnis
Werbung
Quicklinks
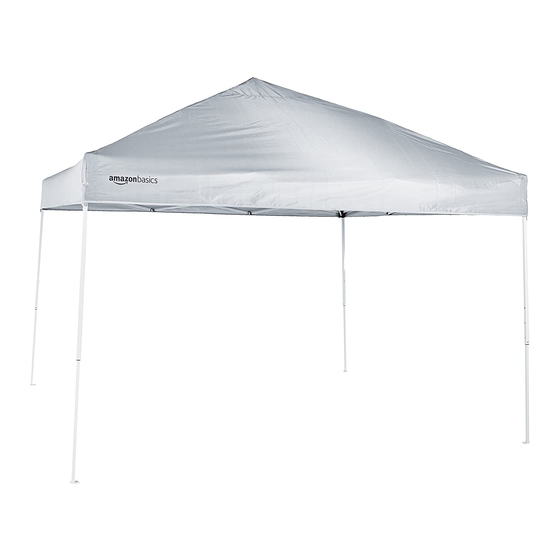
Pop-up Canopy Tent - 10-Foot x 10-Foot
Auvent Pop-up - 3 m x 3 m
Pop-Up-Pavillon - 3 m x 3 m
Gazebo Pop-Up - 3 m x 3 m
Carpa Desplegable - 3 m x 3 m
ポップアップキャノピーテント - 3m x 3m
速开尖顶帐篷 - 3 米 x 3 米
B076N6P6T4, B076N6P8HC, B076N5V6LN
76N6P6T4 (115323)-AmazonBasics-IM-V05 (Global).indb 1
2/7/18 2:38 PM
Werbung
Inhaltsverzeichnis

Verwandte Anleitungen für amazon basics B076N6P6T4


Inhaltszusammenfassung für amazon basics B076N6P6T4
- Seite 1 Pop-Up-Pavillon - 3 m x 3 m Gazebo Pop-Up - 3 m x 3 m Carpa Desplegable - 3 m x 3 m ポップアップキャノピーテント - 3m x 3m 速开尖顶帐篷 - 3 米 x 3 米 B076N6P6T4, B076N6P8HC, B076N5V6LN 76N6P6T4 (115323)-AmazonBasics-IM-V05 (Global).indb 1 2/7/18 2:38 PM...
- Seite 2 English ........3 Français ......... 18 Deutsch ........33 Italiano ........48 Español ........63 日本語 ........78 中文 ........93 76N6P6T4 (115323)-AmazonBasics-IM-V05 (Global).indb 2 2/7/18 2:38 PM...
- Seite 3 Welcome Guide • English Pop-up Canopy Tent - 10-Foot x 10-Foot Contents: Before getting started, ensure the package contains the following components: Part Canvas Storage bag Rope Pegs 76N6P6T4 (115323)-AmazonBasics-IM-V05 (Global).indb 3 2/7/18 2:38 PM...
- Seite 4 Assembly Step 1: • Place the frame with the canvas in the chosen assembly area. 76N6P6T4 (115323)-AmazonBasics-IM-V05 (Global).indb 4 2/7/18 2:38 PM...
- Seite 5 Assembly Step 2: • Carefully pull the frame outward until it is fully extended. 76N6P6T4 (115323)-AmazonBasics-IM-V05 (Global).indb 5 2/7/18 2:38 PM...
- Seite 6 Assembly Step 3: • Pull the corner sliders upward until they click into place. 76N6P6T4 (115323)-AmazonBasics-IM-V05 (Global).indb 6 2/7/18 2:38 PM...
- Seite 7 Assembly Step 4: • Fully extend the legs until they are securely locked into place. • The height of the legs can be adjusted. 76N6P6T4 (115323)-AmazonBasics-IM-V05 (Global).indb 7 2/7/18 2:38 PM...
- Seite 8 Assembly Step 5: • Use the hook and loop fastener strips attached to the canvas to secure the canvas to the frame and the corners of the canvas to the corner of each leg. 76N6P6T4 (115323)-AmazonBasics-IM-V05 (Global).indb 8 2/7/18 2:38 PM...
- Seite 9 Assembly Step 6: • Pegs can be used to secure the 4 legs to the ground to further stabilize the structure in case of wind. 76N6P6T4 (115323)-AmazonBasics-IM-V05 (Global).indb 9 2/7/18 2:38 PM...
- Seite 10 Assembly Step 7: • Tie one end of the rope to the canopy and the other end to a peg. Stake the peg into the ground. 76N6P6T4 (115323)-AmazonBasics-IM-V05 (Global).indb 10 2/7/18 2:38 PM...
- Seite 11 Assembly Step 8: • Press on the pins on the legs to unlock and retract them. 76N6P6T4 (115323)-AmazonBasics-IM-V05 (Global).indb 11 2/7/18 2:38 PM...
- Seite 12 Assembly Step 9: • Pull the pin to disengage the corner slider. 76N6P6T4 (115323)-AmazonBasics-IM-V05 (Global).indb 12 2/7/18 2:38 PM...
- Seite 13 Assembly Step 10: • Fold the frame with canvas (as shown above). 76N6P6T4 (115323)-AmazonBasics-IM-V05 (Global).indb 13 2/7/18 2:38 PM...
- Seite 14 Assembly Step 11: • Ensure the canvas is dry and clean. Place the frame with canvas inside the storage bag. 76N6P6T4 (115323)-AmazonBasics-IM-V05 (Global).indb 14 2/7/18 2:38 PM...
-
Seite 15: Safety And Compliance
Safety and Compliance • Read this instruction manual carefully and keep the instructions for future reference. If you lend or give the product to anyone else, please be sure to include these instructions. • Make sure all components are included in the package prior to assembly. •... -
Seite 16: Cleaning And Maintenance
Cleaning and Maintenance Part How to Clean Canvas Clean it with a mild detergent and allow it to dry thoroughly. Remove mildew and mold stains with mild soap. Never use solvent-based detergents. These may bleach the material and damage the fabric. Do not use any alkali or acidic detergents or steam blasters to clean the product. - Seite 17 Feedback Love it? Hate it? Let us know with a customer review. AmazonBasics is committed to delivering customer-driven products that live up to your high standards. We encourage you to write a review sharing your experiences with the product. Please visit: amazon.com/review/review-your-purchases# For further services: Visit amazon.com/gp/help/customer/contact-us —...
- Seite 18 Guide de Bienvenue • Français Auvent Pop-up - 3 m x 3 m Contenu : Avant de commencer, veuillez vous assurer que l’emballage contient les composants suivants : Composant Qté Toile Housse de protection Corde Sardines 76N6P6T4 (115323)-AmazonBasics-IM-V05 (Global).indb 18 2/7/18 2:38 PM...
- Seite 19 Montage Étape 1 : • Placez l’armature avec la toile sur la zone de montage choisie. 76N6P6T4 (115323)-AmazonBasics-IM-V05 (Global).indb 19 2/7/18 2:38 PM...
- Seite 20 Montage Étape 2 : • Tirez avec précaution l’armature vers l’extérieur jusqu’à ce qu’elle soit complètement déployée. 76N6P6T4 (115323)-AmazonBasics-IM-V05 (Global).indb 20 2/7/18 2:38 PM...
- Seite 21 Montage Étape 3 : • Enclenchez le mécanisme de fixation des angles en poussant vers le haut. 76N6P6T4 (115323)-AmazonBasics-IM-V05 (Global).indb 21 2/7/18 2:38 PM...
- Seite 22 Montage Étape 4 : • Déployez complètement les pieds jusqu’à ce qu’ils soient correctement enclenchés. • La hauteur des pieds est ajustable. 76N6P6T4 (115323)-AmazonBasics-IM-V05 (Global).indb 22 2/7/18 2:38 PM...
- Seite 23 Montage Étape 5 : • Utilisez les fixations à scratch pour attacher la toile à l’armature et les coins de la toile à chaque angle. 76N6P6T4 (115323)-AmazonBasics-IM-V05 (Global).indb 23 2/7/18 2:38 PM...
- Seite 24 Montage Étape 6 : • Les sardines peuvent être utilisées pour fixer les 4 pieds au sol et stabiliser davantage la structure en cas de vent. 76N6P6T4 (115323)-AmazonBasics-IM-V05 (Global).indb 24 2/7/18 2:38 PM...
- Seite 25 Montage Étape 7 : • Nouez une extrémité de la corde sur l’auvent, et l’autre extrémité sur une cheville. Plantez la cheville dans le sol. 76N6P6T4 (115323)-AmazonBasics-IM-V05 (Global).indb 25 2/7/18 2:38 PM...
- Seite 26 Montage Étape 8 : • Appuyez sur le cran de sécurité des pieds pour les désenclencher et les rétracter. 76N6P6T4 (115323)-AmazonBasics-IM-V05 (Global).indb 26 2/7/18 2:38 PM...
- Seite 27 Montage Étape 9 : • Tirez la goupille pour désengager le système de fixation de l’angle. 76N6P6T4 (115323)-AmazonBasics-IM-V05 (Global).indb 27 2/7/18 2:38 PM...
- Seite 28 Montage Étape 10 : • Pliez l’armature avec la toile (comme indiqué ci-dessus). 76N6P6T4 (115323)-AmazonBasics-IM-V05 (Global).indb 28 2/7/18 2:38 PM...
- Seite 29 Montage Étape 11 : • Assurez-vous que la toile est sèche et propre. Placez l’armature et la toile dans la housse de protection. 76N6P6T4 (115323)-AmazonBasics-IM-V05 (Global).indb 29 2/7/18 2:38 PM...
-
Seite 30: Sécurité Et Conformité
Sécurité et Conformité • Lisez attentivement ce manuel d’utilisation et conservez les instructions pour une consultation ultérieure. Si vous prêtez ou donnez le produit à une autre personne, assurez-vous de lui transmettre ce manuel. • Assurez-vous qu’il ne manque aucune pièce avant de commencer le montage. •... -
Seite 31: Nettoyage Et Entretien
Nettoyage et Entretien Pièce Comment nettoyer le produit Toile Nettoyez à l’aide d’un détergent doux et laissez sécher complètement. Enlevez les moisissures et les taches à l’aide d’un savon doux. N’utilisez jamais de détergents à base de solvants. Ils pourraient décolorer et endommager le tissu. - Seite 32 Vos Avis Vous l’adorez ? Vous le détestez ? Faites-le nous savoir en laissant un commentaire. AmazonBasics s’engage à vous offrir des produits axés sur les besoins de la clientèle et répondant à vos normes élevées. Nous vous encourageons à rédiger un commentaire visant à partager vos expériences sur le produit.
- Seite 33 Bedienungsanleitung • Deutsch Pop-Up-Pavillon - 3 m x 3 m Inhalt: Bevor Sie beginnen, prüfen Sie, ob die Verpackung die folgenden Teile enthält: Teil Anzahl Plane Aufbewahrungsbeutel Seil Haken 76N6P6T4 (115323)-AmazonBasics-IM-V05 (Global).indb 33 2/7/18 2:38 PM...
- Seite 34 Montage Schritt 1: • Stellen Sie den Rahmen mit der Plane im gewählten Montagebereich auf. 76N6P6T4 (115323)-AmazonBasics-IM-V05 (Global).indb 34 2/7/18 2:38 PM...
- Seite 35 Montage Schritt 2: • Ziehen Sie den Rahmen vorsichtig nach außen, bis er vollständig ausgeklappt ist. 76N6P6T4 (115323)-AmazonBasics-IM-V05 (Global).indb 35 2/7/18 2:38 PM...
- Seite 36 Montage Schritt 3: • Ziehen Sie die Eckschieber nach oben, bis sie einrasten. 76N6P6T4 (115323)-AmazonBasics-IM-V05 (Global).indb 36 2/7/18 2:38 PM...
- Seite 37 Montage Schritt 4: • Ziehen Sie die Beine ganz heraus, bis sie sicher einrasten. • Die Höhe der Beine kann eingestellt werden. 76N6P6T4 (115323)-AmazonBasics-IM-V05 (Global).indb 37 2/7/18 2:38 PM...
- Seite 38 Montage Schritt 5: • Verwenden Sie die Klettverschlussstreifen an der Plane, um sie am Rahmen und an den Ecken der Plane und jeder Beinecke zu sichern. 76N6P6T4 (115323)-AmazonBasics-IM-V05 (Global).indb 38 2/7/18 2:39 PM...
- Seite 39 Montage Schritt 6: • Die Haken können dazu verwendet werden, um die 4 Beine am Untergrund zur weiteren Stabilisierung der Struktur bei Wind zu sichern. 76N6P6T4 (115323)-AmazonBasics-IM-V05 (Global).indb 39 2/7/18 2:39 PM...
- Seite 40 Montage Schritt 7: • Verbinden Sie ein Ende des Seils mit der Plane und das andere Ende mit einem Hering. Stecken Sie den Hering in den Boden. 76N6P6T4 (115323)-AmazonBasics-IM-V05 (Global).indb 40 2/7/18 2:39 PM...
- Seite 41 Montage Schritt 8: • Drücken Sie auf die Stifte an den Beinen, um sie zu entriegeln und einzuziehen. 76N6P6T4 (115323)-AmazonBasics-IM-V05 (Global).indb 41 2/7/18 2:39 PM...
- Seite 42 Montage Schritt 9: • Ziehen Sie den Stift heraus, um den Eckschieber zu lösen. 76N6P6T4 (115323)-AmazonBasics-IM-V05 (Global).indb 42 2/7/18 2:39 PM...
- Seite 43 Montage Schritt 10: • Klappen Sie den Rahmen mit der Plane zusammen (wie oben dargestellt). 76N6P6T4 (115323)-AmazonBasics-IM-V05 (Global).indb 43 2/7/18 2:39 PM...
- Seite 44 Montage Schritt 11: • Achten Sie darauf, dass die Plane trocken und sauber ist. Stecken Sie den Rahmen zusammen mit der Plane in den Aufbewahrungsbeutel. 76N6P6T4 (115323)-AmazonBasics-IM-V05 (Global).indb 44 2/7/18 2:39 PM...
-
Seite 45: Sicherheit Und Konformität
Sicherheit und Konformität • Lesen Sie diese Bedienungsanleitung sorgfältig durch und bewahren Sie sie zum späteren Nachschlagen auf. Sollten Sie das Produkt an Dritte verleihen oder weitergeben, dann muss diese Bedienungsanleitung mit ausgehändigt werden. • Stellen Sie vor der Montage sicher, dass alle Komponenten in der Verpackung enthalten sind. •... -
Seite 46: Reinigung Und Wartung
Reinigung und Wartung Teil Reinigung Plane Reinigen Sie sie mit einem milden Reinigungsmittel und lassen Sie sie gründlich trocknen. Entfernen Sie Schimmel und Stockflecken mit milder Seifenlauge. Verwenden Sie niemals lösungsmittelhaltige Reinigungsmittel. Diese können das Material ausbleichen und den Stoff beschädigen. Verwenden Sie keine alkali- oder säurehaltigen Reinigungsmittel und reinigen Sie das Produkt nicht mit einem Dampfstrahler. - Seite 47 Feedback Gefällt es Ihnen? Gefällt es Ihnen nicht? Dann bewerten Sie das Produkt auf unserer Webseite! AmazonBasics setzt sich für die Bereitstellung kundenorientierter Produkte ein, um Ihre hohen Qualitätsstandards zu erfüllen. Bitte schreiben Sie eine Rezension, in der Sie Ihre Erfahrungen mit dem Produkt teilen.
- Seite 48 Guida di Benvenuto • Italiano Gazebo Pop-Up - 3 m x 3 m Contenuto: Prima di iniziare, assicurarsi che la confezione contenga i seguenti componenti: Pezzo Qtà Telo Custodia Corda Picchetti 76N6P6T4 (115323)-AmazonBasics-IM-V05 (Global).indb 48 2/7/18 2:39 PM...
- Seite 49 Montaggio Passo 1: • Posizionare il telaio con il telo nell’area di montaggio desiderata. 76N6P6T4 (115323)-AmazonBasics-IM-V05 (Global).indb 49 2/7/18 2:39 PM...
- Seite 50 Montaggio Passo 2: • Estrarre delicatamente il telaio fino a estenderlo completamente. 76N6P6T4 (115323)-AmazonBasics-IM-V05 (Global).indb 50 2/7/18 2:39 PM...
- Seite 51 Montaggio Passo 3: • Tirare i meccanismi di scorrimento sugli angoli verso l’alto fino a bloccarli in posizione. 76N6P6T4 (115323)-AmazonBasics-IM-V05 (Global).indb 51 2/7/18 2:39 PM...
- Seite 52 Montaggio Passo 4: • Estendere completamente le gambe fino a bloccarle in posizione. • L’altezza delle gambe può essere regolata. 76N6P6T4 (115323)-AmazonBasics-IM-V05 (Global).indb 52 2/7/18 2:39 PM...
- Seite 53 Montaggio Passo 5: • Utilizzare il gancio e le fasce di velcro del telo per fissare il telo al telaio e gli angoli del telo agli angoli di ciascuna gamba. 76N6P6T4 (115323)-AmazonBasics-IM-V05 (Global).indb 53 2/7/18 2:39 PM...
- Seite 54 Montaggio Passo 6: • I picchetti possono essere utilizzati per fissare le 4 gambe al terreno e stabilizzare ulteriormente la struttura in caso di vento. 76N6P6T4 (115323)-AmazonBasics-IM-V05 (Global).indb 54 2/7/18 2:39 PM...
- Seite 55 Montaggio Passo 7: • Legare un’estremità della corda all’angolo superiore della tenda e l’altra estremità al picchetto. Fissare poi il paletto nel terreno. 76N6P6T4 (115323)-AmazonBasics-IM-V05 (Global).indb 55 2/7/18 2:39 PM...
- Seite 56 Montaggio Passo 8: • Premere i perni sulle gambe per sbloccarle e ritrarle. 76N6P6T4 (115323)-AmazonBasics-IM-V05 (Global).indb 56 2/7/18 2:39 PM...
- Seite 57 Montaggio Passo 9: • Tirare l’anello per sbloccare il meccanismo di scorrimento sull’angolo. 76N6P6T4 (115323)-AmazonBasics-IM-V05 (Global).indb 57 2/7/18 2:39 PM...
- Seite 58 Montaggio Passo 10: • Piegare il telaio con il telo (come illustrato sopra). 76N6P6T4 (115323)-AmazonBasics-IM-V05 (Global).indb 58 2/7/18 2:39 PM...
- Seite 59 Montaggio Passo 11: • Assicurarsi che il telo sia asciutto e pulito. Posizionare il telaio con il telo all’interno della custodia. 76N6P6T4 (115323)-AmazonBasics-IM-V05 (Global).indb 59 2/7/18 2:39 PM...
-
Seite 60: Sicurezza E Conformità
Sicurezza e Conformità • Leggere attentamente il presente manuale e conservarlo come riferimento futuro. In caso di cessione del prodotto a terzi, includere anche il presente manuale. • Assicurarsi che tutti i componenti siano contenuti nella confezione prima del montaggio. •... -
Seite 61: Pulizia E Manutenzione
Pulizia e Manutenzione Parte Come pulire Telo Pulire con un detergente delicato e lasciar asciugare completamente. Rimuovere eventuali macchie di muffa utilizzando un sapone delicato. Non utilizzare mai detergenti a base di solventi. Potrebbero scolorire il materiale e danneggiare il tessuto. Non utilizzare solventi alcalini o acidi o pulitori a vapore per la pulizia del prodotto. - Seite 62 Feedback Ti piace? Oppure no? Faccelo sapere scrivendo la tua recensione. AmazonBasics si impegna a distribuire prodotti orientati al cliente che siano all’altezza degli standard più elevati. Pertanto, invitiamo i clienti a scrivere una recensione per condividere le proprie esperienze con il prodotto. Visitare: amazon.it/review/review-your-purchases Per ulteriori servizi: Visita amazon.it/gp/help/customer/contact-us...
- Seite 63 Guía de Bienvenida • Español Carpa Desplegable - 3 m x 3 m Contenido: Antes de comenzar, compruebe que el embalaje incluye los siguientes componentes: Componente Cant. Lona Bolsa de almacenamiento Cuerda Estacas 76N6P6T4 (115323)-AmazonBasics-IM-V05 (Global).indb 63 2/7/18 2:39 PM...
-
Seite 64: Montaje
Montaje Paso 1: • Coloca la estructura con la lona en el área de montaje elegida. 76N6P6T4 (115323)-AmazonBasics-IM-V05 (Global).indb 64 2/7/18 2:39 PM... - Seite 65 Montaje Paso 2: • Tira cuidadosamente de la estructura hacia afuera hasta que quede completamente extendida. 76N6P6T4 (115323)-AmazonBasics-IM-V05 (Global).indb 65 2/7/18 2:39 PM...
- Seite 66 Montaje Paso 3: • Tira de las barras deslizantes de las esquinas hacia arriba hasta que queden encajadas. 76N6P6T4 (115323)-AmazonBasics-IM-V05 (Global).indb 66 2/7/18 2:39 PM...
- Seite 67 Montaje Paso 4: • Extienda las patas hasta que queden fijadas de forma segura en su lugar. • La altura de las patas puede ajustarse. 76N6P6T4 (115323)-AmazonBasics-IM-V05 (Global).indb 67 2/7/18 2:39 PM...
- Seite 68 Montaje Paso 5: • Utilice el gancho y las tiras afianzadoras adjuntas a la lona para que la lona quede bien amarrada a la estructura, y las esquinas de la lona a la esquina de cada pata. 76N6P6T4 (115323)-AmazonBasics-IM-V05 (Global).indb 68 2/7/18 2:39 PM...
- Seite 69 Montaje Paso 6: • Puede utilizar estacas para amarrar las 4 patas al suelo con el fin de estabilizar la estructura si se dan condiciones de viento. 76N6P6T4 (115323)-AmazonBasics-IM-V05 (Global).indb 69 2/7/18 2:39 PM...
- Seite 70 Montaje Paso 7: • Ate un extremo de la cuerda al toldo y el otro extremo a una piqueta. Clave la piqueta al suelo. 76N6P6T4 (115323)-AmazonBasics-IM-V05 (Global).indb 70 2/7/18 2:39 PM...
- Seite 71 Montaje Paso 8: • Presione las clavijas situadas en las patas para desbloquearlas y plegarlas. 76N6P6T4 (115323)-AmazonBasics-IM-V05 (Global).indb 71 2/7/18 2:39 PM...
- Seite 72 Montaje Paso 9: • Tire de la clavija para soltar la barra deslizante. 76N6P6T4 (115323)-AmazonBasics-IM-V05 (Global).indb 72 2/7/18 2:39 PM...
- Seite 73 Montaje Paso 10: • Pliegue la estructura con la lona (tal y como se muestra más arriba). 76N6P6T4 (115323)-AmazonBasics-IM-V05 (Global).indb 73 2/7/18 2:39 PM...
- Seite 74 Montaje Paso 11: • Asegúrese de que la lona está seca y limpia. Coloque la estructura con la lona dentro de la bolsa de almacenamiento. 76N6P6T4 (115323)-AmazonBasics-IM-V05 (Global).indb 74 2/7/18 2:39 PM...
- Seite 75 Seguridad y Cumplimiento • Lea este manual de instrucciones cuidadosamente y guárdelas para su futura referencia. Si le presta o regala este producto a un tercero, por favor, hágale llegar este manual de instrucciones. • Asegúrese de que el embalaje contiene todos los componentes necesarios antes de empezar con el montaje.
-
Seite 76: Limpieza Y Mantenimiento
Limpieza y Mantenimiento Componente Limpieza Lona Limpie el producto con un detergente suave y permita que se seque por completo. Retire las manchas de moho con un jabón suave. No utilice nunca detergentes con disolvente. Podrían decolorar el material y dañar el tejido. No utilice detergentes alcalinos o ácidos, o arenado con vapor para limpiar el producto. - Seite 77 Comentarios ¿Le encanta? ¿No le gusta nada? Escriba una opinión como cliente. En AmazonBasics nos comprometemos a proveer productos pensados para satisfacer a nuestros clientes y que estén a la altura de sus elevados estándares de calidad. Le animamos a que escriba una opinión sobre su experiencia con el producto.
- Seite 78 ウェルカムガイド • 日本語 ポップアップキャノピーテント - 3m x 3m 内容: スタートする前に、パッケージに以下のものが含まれていることを必ず確認してくだ さい。 パーツ 数量 カンバス 保存バッグ ロープ ペグ 76N6P6T4 (115323)-AmazonBasics-IM-V05 (Global).indb 78 2/7/18 2:39 PM...
- Seite 79 組み立て ステップ 1: • • 選択した組み立てエリアに、カンバスがついた状態のフレームを置きます。 76N6P6T4 (115323)-AmazonBasics-IM-V05 (Global).indb 79 2/7/18 2:39 PM...
- Seite 80 組み立て ステップ 2: • • 注意しながらフレームを、完全に広がった状態になるまで外側に引っ張ります。 76N6P6T4 (115323)-AmazonBasics-IM-V05 (Global).indb 80 2/7/18 2:39 PM...
- Seite 81 組み立て ステップ 3: • • 正しい位置でカチッと音がするまでコーナーのスライダーを上に引っ張ります。 76N6P6T4 (115323)-AmazonBasics-IM-V05 (Global).indb 81 2/7/18 2:39 PM...
- Seite 82 組み立て ステップ 4: • • 正しい位置でしっかりロックするまで脚を広げます。 • • 脚の高さは調節可能です。 76N6P6T4 (115323)-AmazonBasics-IM-V05 (Global).indb 82 2/7/18 2:39 PM...
- Seite 83 組み立て ステップ 5: • • カンバスについているホックとループファスナーを使ってカンバスがフレームに、またカン バスの四隅をがそれぞれの脚にしっかりとまるようにします。 76N6P6T4 (115323)-AmazonBasics-IM-V05 (Global).indb 83 2/7/18 2:39 PM...
- Seite 84 組み立て ステップ 6: • • 風が強い場合、ペグを使って4本の脚を更にしっかり地面に固定することができます。 76N6P6T4 (115323)-AmazonBasics-IM-V05 (Global).indb 84 2/7/18 2:39 PM...
- Seite 85 組み立て ステップ 7: • • ロープの片側をカノピーに、もう片側をペグに結びつけます。ペグを地面にしっかり差し 込みます。 76N6P6T4 (115323)-AmazonBasics-IM-V05 (Global).indb 85 2/7/18 2:39 PM...
- Seite 86 組み立て ステップ 8: • • 脚のピンを押してロックを外し、脚を縮めます。 76N6P6T4 (115323)-AmazonBasics-IM-V05 (Global).indb 86 2/7/18 2:39 PM...
- Seite 87 組み立て ステップ 9: • • ピンを引いて、コーナースライダーをはずします。 76N6P6T4 (115323)-AmazonBasics-IM-V05 (Global).indb 87 2/7/18 2:39 PM...
- Seite 88 組み立て ステップ 10: • • カンバスごとフレームをたたみます(上図参照)。 76N6P6T4 (115323)-AmazonBasics-IM-V05 (Global).indb 88 2/7/18 2:39 PM...
- Seite 89 組み立て ステップ 11: • • カンバスが乾燥し、汚れのないことを確認してください。カンバスがついた状態のフレーム を保存バッグに入れます。 76N6P6T4 (115323)-AmazonBasics-IM-V05 (Global).indb 89 2/7/18 2:39 PM...
- Seite 90 安全および守るべきこと • • 取扱説明書をしっかりお読みになり、将来また見ることができるように保管してください。 製品を第3者に貸すまたは譲る場合は、取扱説明書も含めて貸すまたはお譲りください。 • • 組み立てる前に全てのパーツがパッケージに含まれていることをご確認ください。 • • 組み立て中は、組み立てエリアにお子様やペットが近寄らないようにしてください。 • • 製品は屋外のみでご使用ください。屋内で組み立てないでください。 • • 製品の中または近くで火をたかないでください。 • • キャノピーの屋根に錘(おもり)を取り付けないでください。 • • カンバスは常にしっかり広がり、しっかり張っていることをお確かめください。 • • 強風または強い雨の中でのご使用はおひかえください。 • • 屋根に水がたまった場合は製品の破損を防ぐため、すぐに水を取り除くか、製品を分解し てください。 • • この製品は短期間の使用に合せて作られています。しばらくご使用にならない場合は、製品 を分解してください。 • • ご使用にならない間、製品はお子様の手の届かない所に保管してください。 • • 製品の保管用に、製品をお届けしたパッケージングを保管してください。 •...
- Seite 91 掃除およびメンテナンス パーツ 掃除のしかた カンバス 中性洗剤で清掃し、完全に乾燥させます。白カビ・黒カビのシミは刺激の少な い石鹸で取り除きます。 溶剤ベースの洗剤は絶対に使わないでください。それらは素材を漂白し、生地 をいためる恐れがあります。 掃除にはアルカリ性や酸性洗剤またはスチームブラスターを使わないでくだ さい。 漂白しないでくだ アイロンをかけないでく さい。 ださい。 回転式乾燥機での ドライクリーニングは避け 乾燥は避けてくだ てください。 さい。 保証について この製品の保証書のコピーを入手するには: ホームページ: amazon.jp/AmazonBasics/Warranty -•または•- カスタマーサービス 0120-899-276 にご連絡ください。 76N6P6T4 (115323)-AmazonBasics-IM-V05 (Global).indb 91 2/7/18 2:39 PM...
- Seite 92 フィードバック 気に入っていただけましたか?お気に召しませんでしたか? カスタマーレビューでお知らせください。 Amazonベーシック•は、皆様の高い水準に答えることのできるような消費者志向型の製品をお 届けするのを旨としています。この製品についてのレビューで製品についてのご意見をお聞か せください。 レビューはこちらへ:•amazon.jp/review/review-your-purchases# 更なるサービスについては: こちらのリンクへ•amazon.jp/gp/help/customer/contact-us -•または•- カスタマーサービス•0120-899-276•にご連絡ください。 76N6P6T4 (115323)-AmazonBasics-IM-V05 (Global).indb 92 2/7/18 2:39 PM...
- Seite 93 欢迎指南 • 中文 速开尖顶帐篷 - 3 米 x 3 米 内装物: 在开始组装之前,确保包装内包含以下组件: 部件 数量 帆布 储存袋 绳子 地钉 76N6P6T4 (115323)-AmazonBasics-IM-V05 (Global).indb 93 2/7/18 2:39 PM...
- Seite 94 组装 步骤 1: • 将带帆布的支架放在选定的装配区域内。 76N6P6T4 (115323)-AmazonBasics-IM-V05 (Global).indb 94 2/7/18 2:39 PM...
- Seite 95 组装 步骤 2: • 将支架小心地向外拉,直到其完全展开。 76N6P6T4 (115323)-AmazonBasics-IM-V05 (Global).indb 95 2/7/18 2:39 PM...
- Seite 96 组装 步骤 3: • 向上拉撑角滑块,直至它们卡到位。 76N6P6T4 (115323)-AmazonBasics-IM-V05 (Global).indb 96 2/7/18 2:39 PM...
- Seite 97 组装 步骤 4: • 完全展开支腿,直到它们被牢固锁定。 • 支腿的高度可以调整。 76N6P6T4 (115323)-AmazonBasics-IM-V05 (Global).indb 97 2/7/18 2:39 PM...
- Seite 98 组装 步骤 5: • 用固定在帆布上的钩环型搭扣将帆布固定在支架上,将帆布角固定在每条支腿的弯角处。 76N6P6T4 (115323)-AmazonBasics-IM-V05 (Global).indb 98 2/7/18 2:39 PM...
- Seite 99 组装 步骤 6: • 在刮风时可以用短桩将4条支腿固定在地面上,以使帐篷结构更稳定。 76N6P6T4 (115323)-AmazonBasics-IM-V05 (Global).indb 99 2/7/18 2:39 PM...
- Seite 100 组装 步骤 7: • 将绳子的一端系紧到顶篷上,并将另一端系紧到固定钉上。将固定钉敲入地面。 76N6P6T4 (115323)-AmazonBasics-IM-V05 (Global).indb 100 2/7/18 2:39 PM...
- Seite 101 组装 步骤 8: • 按下支腿上的销以进行解锁和缩回。 76N6P6T4 (115323)-AmazonBasics-IM-V05 (Global).indb 101 2/7/18 2:39 PM...
- Seite 102 组装 步骤 9: • 拉动此销断开与撑角滑块的连接。 76N6P6T4 (115323)-AmazonBasics-IM-V05 (Global).indb 102 2/7/18 2:39 PM...
- Seite 103 组装 步骤 10: • 折叠带帆布的支架(如上图所示)。 76N6P6T4 (115323)-AmazonBasics-IM-V05 (Global).indb 103 2/7/18 2:39 PM...
- Seite 104 组装 步骤 11: • 确保帆布干燥且洁净。将带帆布的支架放入储存袋中。 76N6P6T4 (115323)-AmazonBasics-IM-V05 (Global).indb 104 2/7/18 2:39 PM...
- Seite 105 安全和注意事项 • 仔细阅读本说明书并妥善保管以备日后查阅。如果打算将本产品借赠他人使用,请务必附送 本说明书。 • 组装前请确保包装内包含所有零部件。 • 组装本产品期间让儿童和宠物远离组装区。 • 本产品仅限室外使用。切勿在室内组装。 • 切勿在本产品内部或附近生火。 • 切勿在尖顶上施加外力。 • 确保帆布充分展开并拉紧。 • 切勿在刮风或雨天使用本产品。 • 如果雨水在顶部积聚,立即清除雨水或拆卸本产品以防止损坏。 • 本产品仅限临时使用。如果不打算长期使用本产品,应将其拆卸。 • 不使用本产品时,请将其存放在儿童接触不到的地方。 • 保留原包装以备日后存放本产品。 • 当预判风速超过 40 千米/小时(凛冽风感、大树枝和树木摇摆晃动、风声可被明显听到) 时,拆卸帐篷。 • 帐篷间留出至少 3 米的空间。 • 不可将几个帐篷组合、连接。 76N6P6T4 (115323)-AmazonBasics-IM-V05 (Global).indb 105 2/7/18 2:39 PM...
- Seite 106 清洁和保养 部件 清洁方法 帆布 用温和的清洁剂擦拭帆布,然后让其彻底干燥。用温和的肥皂水清除霉菌。 切勿使用含溶剂的清洁剂。这样会漂白材料并损坏纤维。 切勿使用任何碱性或酸性清洁剂或蒸气喷射器清洁本产品。 不可漂白 不可熨烫 不可用烘干机烘干 不可干洗 保修信息 如需获得此产品的保修信息: 访问 amazon.cn/AmazonBasics/Warranty — 或 — 拨打 400-810-5666 联系客服人员 76N6P6T4 (115323)-AmazonBasics-IM-V05 (Global).indb 106 2/7/18 2:39 PM...
- Seite 107 反馈 喜欢这款产品?不喜欢这款产品? 让我们通过客户评论了解您的想法和意见。 亚马逊倍思以客户为导向,致力于供应满足客户高标准的产品。我们邀请您填写评论,分享您使 用产品的体验。 请访问:amazon.cn/review/review-your-purchases 如需更多服务: 访问 amazon.cn/gp/help/customer/contact-us — 或 — 拨打 400-810-5666 联系客服人员 76N6P6T4 (115323)-AmazonBasics-IM-V05 (Global).indb 107 2/7/18 2:39 PM...
- Seite 108 amazon.com/AmazonBasics MADE IN CHINA 76N6P6T4 (115323)-AmazonBasics-IM-V05 (Global).indb 108 2/7/18 2:39 PM...