Herunterladen Inhalt Inhalt Diese Seite drucken
APLIC 303956 Kurzanleitung

APLIC 303956 Kurzanleitung

Mini camera - night vision recording

Werbung

Verfügbare Sprachen
  • DE

Verfügbare Sprachen

  • DEUTSCH, seite 1
User Manual
MINI CAMERA
Mod.-Nr.: 303956/20191029SZ262

Werbung

Inhaltsverzeichnis
loading

Inhaltszusammenfassung für APLIC 303956

  • Seite 1 User Manual MINI CAMERA Mod.-Nr.: 303956/20191029SZ262...
  • Seite 2: Inhaltsverzeichnis

    Table of contents 1. Deutsch ......................3 2. English ......................12 3. Français ......................21 4. Italiano ......................30 5. Español ......................39 Deutsch...
  • Seite 3: Deutsch

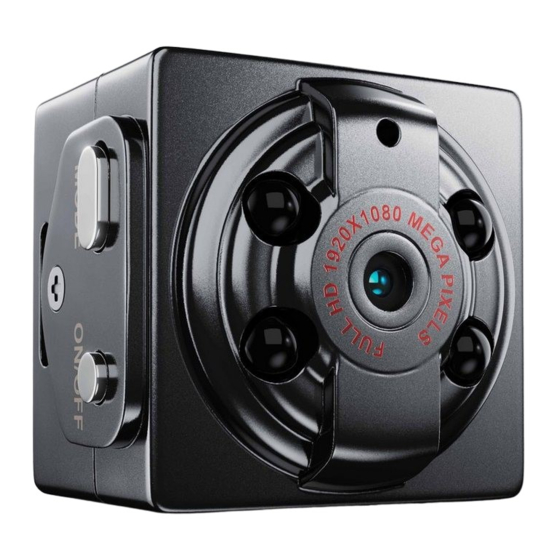
    Vielen Dank, dass Sie sich für ein Produkt von aplic entschieden haben. Damit Sie Freude mit dem erworbenen Gerät haben, lesen Sie sich bitte die nachfolgende Kurzanleitung aufmerksam durch. 1. Lieferumfang • Schnellladegerät • Kurzanleitung 2. Technische Daten Eingangsspannung 5V DC •...
  • Seite 4: Einsetzen Einer Microsd-Karte

    4. Benutzung - Erste Schritte 4.1 Aufladen Das Gerät besitzt einen eingebauten, wiederaufladbaren Lithium-Akku. Laden Sie vor der ersten Verwendung den Akku bitte vollständig auf. Ein vollständiger Ladevorgang dauert etwa 2 Stunden. Das Gerät kann sich während des Ladevorgangs möglicherweise etwas erwärmen. Schließen Sie ein microUSB -Kabel an den microUSB Anschluss der Kamera an.
  • Seite 5 4.3 Speicherkarte formatieren. ACHTUNG! Durch das Formatieren werden alle Daten auf der MicroSD-Karte gelöscht. Speichern Sie vor dem Formatieren alle wichtigen Informationen auf einem anderen Speichermedium ab. Setzen Sie die Karte in den microSD-Karten-Einschub ein. Sofern nötig, formatieren Sie anschließend die Karte und verwenden Sie dazu das FAT32-Dateisystem.
  • Seite 6 5. Betriebsmodi 5.1. 720p Video-Modus Gehen Sie wie folgt vor, wenn Sie eine Aufnahme in 720p vornehmen möchten: Drücken Sie die ON/OFF-Taste für ca. 1-2 Sekunden, um die Kamera ein- zuschalten. Die blaue LED leuchtet durchgehend im Standby-Modus. Drücken Sie die ON/OFF-Taste kurz, um die 720p-Aufnahme zu starten. Das blaue Licht blinkt dreimal und es handelt sich um ein 720p-Video.
  • Seite 7 5.3 Foto-Modus Drücken Sie die ON/OFF-Taste für ca. 1-2 Sekunden, um die Kamera ein- zuschalten. Die blaue LED leuchtet durchgehend im Standby-Modus. Drücken Sie bitte zweimal auf die MODE-Taste. Das rote Licht für den Fotomodus leuchtet. Drücken Sie einmal auf die ON/OFF-Taste, um ein Foto aufzunehmen. Das rote Licht blinkt während der Fotoaufnahme einmal.
  • Seite 8 7. Bewegungserkennung 7.1. 720p-Bewegungserkennung Drücken Sie die ON/OFF-Taste für ca. 1-2 Sekunden, um die Kamera ein- zuschalten. Die blaue LED leuchtet durchgehend im Standby-Modus. Drücken und halten Sie im Standby-Modus (blaues Licht leuchtet dauer- haft) die MODE-Taste ca. 3 Sekunden lang gedrückt. Das blaue Licht bleibt an und das rote Licht blinkt dreimal.
  • Seite 9 8. Manuelles Ausschalten Sie können das Gerät abschalten, indem Sie die ON/OFF-Taste für 6 Sekunden drücken und halten. Alternativ schaltet sich das Gerät ohne Nutzung im Stand- by-Modus nach 1 Minute Inaktivität ab. 9. Kabel-Funktionen Kann an dem Computer angeschlossen werden, um das Gerät aufzuladen und es für die Datenübertragung zu nutzen.
  • Seite 10 11. Entsorgungshinweise Elektrische und elektronische Geräte dürfen nach der europäischen WEEE Richtlinie nicht mit dem Hausmüll entsorgt werden. Deren Bestandteile müssen getrennt der Wiederverwertung oder Entsorgung zugeführt werden, weil giftige und gefährliche Bestandteile bei unsachgemäßer Entsorgung die Umwelt nachhaltig schädigen können. Sie sind als Verbraucher nach dem Elektro- und Elektronikgerätegesetz (ElektroG) verpflichtet, elektrische und elektronische Geräte am Ende ihrer Lebensdauer an den Hersteller, die Verkaufsstelle oder an dafür eingerichtete,...
  • Seite 11 WEEE Richtlinie: 2012/19/EU WEEE Register-Nr: DE 67896761 Hiermit erklärt die Firma WD Plus GmbH, dass sich das Gerät 303956/20191029SZ262 in Übereinstimmung mit den grundlegenden Anforderungen und den übrigen einschlägigen Bestimmungen befindet. Eine vollständige Konformitätserklärung erhalten Sie bei: WD Plus GmbH, Wohlenbergstraße 16, 30179 Hannover...
  • Seite 12: English

    Thank you for choosing an aplic product. Please read the following user manual carefully so as to get the most from the product you have purchased. 1. Scope of delivery • Mini camera • User manual 2. Technical data Input voltage 5V DC •...
  • Seite 13: Inserting A Microsd Card

    4. Use – First steps 4.1 Charging The device has an inbuilt rechargeable lithium battery. Charge the battery completely before using it for the first time. The battery requires about 2 hours to charge completely. The device may become slightly hot while charging. Connect a microUSB cable to the micro USB port on the camera.
  • Seite 14: Formatting The Memory Card

    4.3 Formatting the memory card CAUTION! Formatting will delete all the data on the microSD card. Before formatting, save all the important information on another storage medium. Insert the card into the microSD card slot. Then format the card if necessary and use the FAT32 file system for this purpose.
  • Seite 15 5. Operating modes 5.1. 720p Video mode Proceed as follows if you want to record in 720p: Press the ON/OFF button for about 1-2 seconds to switch on the camera. The blue LED glows continuously in standby mode. Press the ON/OFF button briefly to start the 720p recording. If the blue light flashes three times, then it is a 720p video.
  • Seite 16: Photo Mode

    5.3 Photo mode Press the ON/OFF button for about 1-2 seconds to switch on the camera. The blue LED glows continuously in standby mode. Please press the MODE button twice. The red light for the photo mode starts glowing. Press the ON/OFF button once to take a photo. The red light will flash once when taking a photo.
  • Seite 17 7. Motion detection 7.1. 720p motion detection Press the ON/OFF button for about 1-2 seconds to switch on the camera. The blue LED glows continuously in standby mode. Press and hold the MODE button for about 3 seconds in standby mode (blue light glows continuously).
  • Seite 18 8. Manual switching off You can switch off the device by pressing and holding the ON/OFF button for 6 seconds. Alternatively, the device switches off automatically after 1 minute of inactivity in standby mode. 9. Cable functions Can be connected to the computer to charge the device and for data trans- mission.
  • Seite 19 11. Disposal instructions In line with the European WEEE directive, electrical and electronic devices should not be disposed of along with domestic waste. Their components have to be sent separately for recycling or disposal, as improper disposal of toxic and dangerous components may permanently damage the environment.
  • Seite 20 WEEE directive: 2012/19/EU WEEE Register no.: DE 67896761 The company WD Plus GmbH hereby certifies that the devices 303956/20191029SZ262 complies with the fundamental requirements and all other relevant stipulations. A com- plete conformity statement can be obtained from: WD Plus GmbH, Wohlenbergstraße 16,...
  • Seite 21: Français

    Nous vous remercions d'avoir acheté un produit aplic. Pour que vous puissiez profiter de l'appareil acquis, veuillez lire attentivement le mode d'emploi suivant. 1. Contenu de la livraison • Mini-caméra • Mode d’emploi 2. Caractéristiques techniques Tension d'entrée 5 V CC •...
  • Seite 22: Insertion D'une Carte Microsd

    4. Utilisation - Premières étapes 4.1 Recharger L'appareil possède une batterie intégrée rechargeable. Veuillez recharger la batterie complètement avant la première utilisation. Une recharge complète dure environ 2 heures. L’appareil peut éventuellement chauffer un peu pendant la recharge. Connectez un câble microUSB au port microUSB de la caméra. Ensuite, branchez-le sur un port USB d’un ordinateur OU bien sur un adaptateur secteur 5 V CC.
  • Seite 23 4.3 Formater la carte mémoire. ATTENTION ! Le formatage fait effacer toutes les données sur la carte microSD. Avant le formatage, enregistrez toutes les informations importantes sur un autre support de stockage. Insérez la carte dans la fente à cartes microSD. Si nécessaire, formatez ensuite la carte et utilisez pour cela le système de fichiers FAT32.
  • Seite 24 5. Modes de fonctionnement 5.1. Mode vidéo 720p Veuillez procéder comme suit si vous souhaitez effectuer une prise en 720p. Appuyez sur la touche ON/OFF pendant env. 1-2 secondes pour allumer la caméra. La LED rouge s'allume en permanence en mode veille. Appuyez brièvement sur la touche ON/OFF pour démarrer la prise 720p.
  • Seite 25: Mode Photo

    5.3 Mode photo Appuyez sur la touche ON/OFF pendant env. 1-2 secondes pour allumer la caméra. La LED rouge s'allume en permanence en mode veille. Veuillez appuyer deux fois sur la touche MODE. La lumière rouge pour le mode photo s’allume. Appuyez une fois sur la touche ON/OFF pour prendre une photo.
  • Seite 26 7. Détection de mouvement 7.1. Détection de mouvement 720p Appuyez sur la touche ON/OFF pendant env. 1-2 secondes pour allumer la caméra. La LED rouge s'allume en permanence en mode veille. Appuyez et maintenez la touche MODE pendant env. 3 secondes en mode veille (la lumière bleue reste allumée en permanence).
  • Seite 27 Appuyez une touche au choix pour quitter le mode de détection de mouve- ment. 8. Arrêt manuel Vous pouvez éteindre l'appareil en maintenant enfoncée pendant 6 secondes environ la touche ON/OFF. Alternativement, l’appareil inutilisé s’éteint au bout de 1 minute d’inactivité en mode veille. 9.
  • Seite 28 de l'appareil peuvent être modifiées sans indication préalable. 11. Informations sur la mise au rebut de vos appareils Les appareils électriques et électroniques ne doivent pas, selon la directive européenne DEEE, être jetés dans les ordures ménagères. Leurs composants doivent être éliminés ou recyclés séparément, car des composants toxiques ou dangereux pourraient endommager l'environnement à...
  • Seite 29 Directive DEEE : 2012/19/UE DEEE Numéro de registre : DE 67896761 La société WD Plus GmbH déclare par la présente que l’appareil 303956/20191029SZ262 est conforme aux exigences fondamentales et aux autres dispositions pertinentes de la di- rective. Pour obtenir une déclaration de conformité complète, adressez-vous à : WD Plus GmbH, Wohlenbergstraße 16, 30179 Hanovre...
  • Seite 30: Italiano

    Grazie per aver scelto un prodotto aplic. Per utilizzare con soddisfazione l'appa- recchio acquistato, si prega di leggere attentamente le seguenti brevi istruzioni per l’uso. 1. Contenuto della confezione • Mini videocamera • Istruzioni per l’uso 2. Dati tecnici Tensione d'ingresso 5V DC •...
  • Seite 31: Inserimento Di Una Scheda Microsd

    4. Uso - Primi passi 4.1 Ricarica Il dispositivo è dotato di una batteria al litio ricaricabile. Caricare completamen- te la batteria prima del primo utilizzo. Un ciclo di ricarica completo della batteria dura circa 2 ore. Il dispositivo potreb- be riscaldarsi leggermente durante la ricarica.
  • Seite 32 4.3 Formattazione della scheda di memoria. ATTENZIONE! La formattazione cancella tutti i dati sulla scheda MicroSD. Prima della formattazione, salvare tutte le informazioni importanti su un altro supporto di memorizzazione. Inserire la scheda nello slot per schede microSD. Se necessario, formattare la scheda utilizzando il file system FAT32. Per ulteriori informazioni sulla formattazione di un disco, consultare le istru- zioni per l’uso del computer.
  • Seite 33 5. Modalità operative 5.1. Modalità video 720p Seguire la procedura descritta nel seguito per effettuare una registrazione a 720p: Premere e tenere premuto il tasto "ON/OFF" per ca. 1 -2 secondi per ac- cendere la videocamera. Il LED blu è sempre acceso in modalità standby. Premere brevemente il tasto ON/OFF per avviare la registrazione a 720p.
  • Seite 34: Modalità Foto

    5.3 Modalità foto Premere e tenere premuto il tasto "ON/OFF" per ca. 1 -2 secondi per ac- cendere la videocamera. Il LED blu è sempre acceso in modalità standby. Premere quindi due volte il tasto MODE. La luce rossa per la modalità foto si accende. Premere una volta il tasto "ON/OFF"...
  • Seite 35 7. Rilevamento del movimento 7.1. Rilevamento del movimento a 720p Premere e tenere premuto il tasto "ON/OFF" per ca. 1 -2 secondi per ac- cendere la videocamera. Il LED blu è sempre acceso in modalità standby. Premere e tenere premuto il tasto MODE tasto per circa 3 secondi in modalità...
  • Seite 36 8. Spegnimento manuale Per spegnere l'apparecchio, tenere premuto il tasto "ON/OFF" per 6 secondi. In alternativa dopo circa 1 minuto di inattività il dispositivo torna in modalità standby. 9. Funzioni via cavo Il cavo serve per collegare la videocamera a un computer per caricarla ed eseguire la trasmissione dei dati.
  • Seite 37 11. Indicazioni per lo smaltimento Secondo la direttiva europea RAEE, le apparecchiature elettriche ed elettro- niche non possono essere smaltite con i rifiuti domestici. I loro componenti devono essere consegnati separatamente al centro di riciclaggio o smaltimento, in quanto gli eventuali componenti tossici e pericolosi possono inquinare per- manentemente l'ambiente in caso di smaltimento improprio.
  • Seite 38 Direttiva RAEE: 2012/19/UE Numero reg. RAEE: DE 67896761 Con la presente la ditta WD Plus GmbH dichiara che l'apparecchio 303956/20191029SZ262 è conforme ai requisiti essenziali e alle rimanenti disposizioni in materia. Una dichiarazione di conformità completa è disponibile presso: WD Plus GmbH, Wohlenbergstraße 16, 30179...
  • Seite 39: Español

    Gracias por escoger un producto de aplic. Para que pueda disfrutar de su ad- quisición, le rogamos que lea atentamente las siguientes instrucciones de uso. 1. Volumen de suministro • Minicámara • Instrucciones de uso 2. Datos técnicos Tensión de entrada 5 V CC •...
  • Seite 40 4. Uso - Primeros pasos 4.1 Cargar El aparato cuenta con una batería de litio integrada y recargable. Cargue com- pletamente la batería antes de usar la cámara por primera vez. La carga completa del aparato dura unas 2 horas. El aparato puede calentarse un poco durante la carga.
  • Seite 41 4.3 Formatear la tarjeta de memoria. ¡ATENCIÓN! Al fomatearla se eliminan todos los datos en la tarjeta MicroSD. Antes de proceder, guarde toda la información importante en otro dispositivo de memoria. Inserte la tarjeta en la ranura prevista para ello. Si es necesario, formatee luego la tarjeta y utilice para ello el sistema de archivos FAT32.
  • Seite 42 5. Modos de funcionamiento 5.1. Modo de grabación 720p Proceda como se describe a continuación si desea realizar vídeos en 720p: Presione el ON/ POWER durante unos 1-2 segundos para encender la cámara. El LED azul permanece encendido en el modo de espera. Pulse brevemente el botón ON/OFF para comenzar la grabación en 720p.
  • Seite 43: Modo Fotografía

    5.3 Modo Fotografía Presione el ON/ POWER durante unos 1-2 segundos para encender la cámara. El LED azul permanece encendido en el modo de espera. Luego, pulse dos veces el botón MODE. La luz roja para el modo Fotografía se ilumina. Pulse una vez el botón ON/OFF para tomar una fotografía.
  • Seite 44 7. Detección de movimiento 7.1. Detección de movimiento 720p Presione el ON/ POWER durante unos 1-2 segundos para encender la cámara. El LED azul permanece encendido en el modo de espera. En el modo de espera (luz azul encendida), pulse y mantenga pulsado el botón MODE durante unos 3 segundos.
  • Seite 45 8. Apagado manual Puede apagar el aparato pulsando el botón ON/OFF durante unos 6 segundos. De forma alternativa, el aparato se apaga de forma automática transcurrido 1 minuto sin actividad en el modo de espera. 9. Funciones del cable Se puede conectar al ordenador para cargar el aparato o para transferir datos.
  • Seite 46 11. Indicaciones de eliminación Los dispositivos eléctricos y electrónicos no deben eliminarse con los residuos domésticos según la directiva europea WEEE. Los componentes deben reciclar- se o eliminarse por separado porque una eliminación indebida de las piezas tóxicas y peligrosas puede dañar de forma significativa el medio ambiente. Como usuario, está...
  • Seite 47 Directiva WEEE: 2012/19/UE Número de registro WEEE: DE 67896761 La empresa WD Plus GmbH declara por la presente que el aparato 303956/20191029SZ262 satisface los requisitos esenciales y el resto de disposiciones pertinentes. Solicite una declaración de conformidad completa en: WD Plus GmbH, Wohlenbergstraße 16, 30179 Hannover (Alemania) Español...
  • Seite 48 WD Plus GmbH Wohlenbergstraße 16 · 30179 Hannover Germany...

Inhaltsverzeichnis