KingSlim D4 Benutzerhandbuch
Vorschau ausblenden
Andere Handbücher für D4:
- Bedienungsanleitung (118 Seiten) ,
- Benutzerhandbuch (43 Seiten)
Inhaltsverzeichnis
Werbung
Verfügbare Sprachen
Verfügbare Sprachen
Werbung
Kapitel
Inhaltsverzeichnis

Verwandte Anleitungen für KingSlim D4


Inhaltszusammenfassung für KingSlim D4
- Seite 1 USER MANUAL KingSlim D4 Dash Cam v1.0...
- Seite 2 English 01 - 19 Deutsch 20 - 38 Español 39 - 57 Français 58 - 76 Italiano 77 - 95 日本語 96 - 114 115 - 133 한국어...
-
Seite 3: Inhaltsverzeichnis
CONTENTS What’s in the Box Camera Overview Installation Formatting the microSD Card Starting Video Recording Icon Introduction Setup Menu Gestures Switching Recording Display Modes Using the "Roadcam" App Specifications Caution Contact Us... -
Seite 4: What's In The Box
WHAT'S IN THE BOX Waterproof D4 Dual Dash Cam * 1 GPS Bracket * 1 Rear Camera * 1 7m Rear Camera Car Charger with 3.5m Static Sticker * 2 Extension Cable * 1 Power Cable * 1 Double-sided Adhesive... -
Seite 5: Camera Overview
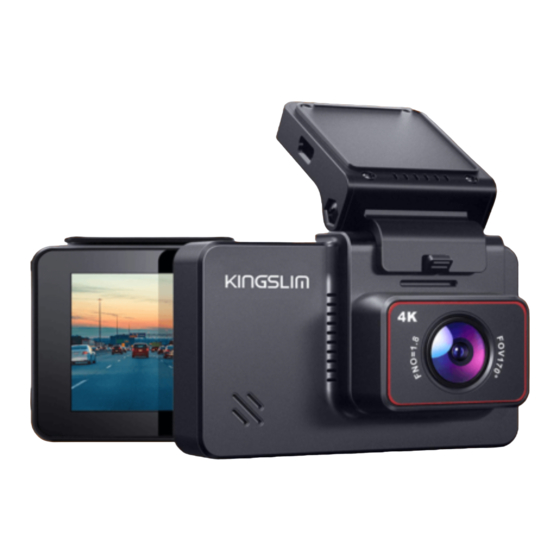
CAMERA OVERVIEW Bracket Slot Rear Camera IN Front Camera Speaker Mini USB Power Port (for data transmission) microSD Card Slot Working Indicator Power Button... - Seite 6 Vent Mini USB Power Port (for connecting GPS) Screen...
-
Seite 7: Installation
INSTALLATION 1. Insert the microSD card. Warm Tips: A Class 10 or above microSD card is highly recommended for the D4 dash cam (microSD card is not included). D4 dash cam supports an up to 256GB microSD card. Please format your card in the camera before using this dash cam. - Seite 8 D4 dash cam. ④ Peel off the other film on the adhesive tape, press the D4 dash cam to secure it on the static sticker. (If you want to remove the dash cam, please take off the static sticker.)
- Seite 9 7. Install the Rear Camera. Position 1: Install the rear camera on the rear windshield. The installation is easier. Position 2: Install the rear camera near the license plate. Position 2 is highly recommended. The rear image is crisp and clear for both rear viewing and reversing guide.
-
Seite 10: Formatting The Microsd Card
Note: ① Pay attention to the connector position when connecting the rear camera with the extension cable, please refer to the below details. ② Please clean the position to ensure the adhesive quality before installing the rear camera. ③ Please clean the rear windshield regularly to ensure the image quality if you choose the position 1. -
Seite 11: Starting Video Recording
2. Loop recording is already enabled on the D4 dash cam, the default setting is 3 mins. 3. G-sensor is already enabled on the D4 dash cam, the default setting is low. If an impact or sudden braking is detected, it will automatically start recording and save footage to either the "Front Urgent Album"... -
Seite 12: Setup Menu
SETUP MENU 1. Resolution You can choose front camera resolution. Options: 4K25/2K30 Default Setting: 4K25 The rear camera resolution is 1080P. 2. Video Encode H.265 can minimize the footage size, meaning you can store more video files in the microSD card. H.264 has better compatibility. Options: H.264/H.265 Default Setting: H.264 3. - Seite 13 6. Parking The camera will be turned on automatically and start the 20s recording and lock if there is an impact to the car during parking. The higher level you select, the easier it is to trigger the recording. Options: Off/Low/Middle/High Default Setting: Off...
- Seite 14 10. Loop Recording The files will be saved every 3 MIN if you choose the 3 MIN option. When the microSD card is full, the new files will cover the old one if loop recording is on. If it is off, the camera will not record anymore when the card is full. You will then need to format the SD card or change to a new one.
- Seite 15 14. Format SD Format the microSD card. Note: ① All data will be deleted. Before formatting your microSD card, please remember to back up your important data on your other devices. ② When the microSD card is inserted for the first time, please format it in the camera to ensure that the microSD card is compatible with the camera.
-
Seite 16: Gestures
17. About Check the version of the camera. 18. Album You can check your videos and photos. If you want to download content, please use the "RoadCam" app, or back up data on your computer. GESTURES Taking a Photo In the video recording mode, slide from left to right to take photos. 00:00:34 2020-07-17 13:47... -
Seite 17: Switching Recording Display Modes
SWITCHING RECORDING DISPLAY MODES Click the right side of the screen to switch recording display modes. 00:00:34 2020-07-17 13:47 USING THE "ROADCAM" APP CONNECT WITH ON THE APP 1. Stop video recording on the dash cam. 2. Tap the Wifi icon on the dash cam. 00:00:34 2020-07-17 13:47 WiFi Info WiFi SSID:... - Seite 18 6. Tap the switch icon to switch to the front or rear camera display. Exit KINGSLIM840AAF Recording instrument 2020 07 17 13:47 Video Photo Connecting camera Video Add Recorder DOWNLOAD OR DELETE VIDEOS AND PHOTOS 1. Tap the icon to stop the recording. Video 2.
- Seite 19 Exit KINGSLIM840AAF Movie Select Movie Select Loop video Emergency video Loop video Emergency video 2020/07/17 14:00 2020/07/17 14:00 13:32:26 13:35:47 13:32:26 13:35:47 150.00MB 81.00MB 150.00MB 81.00MB 2020 07 17 13:47 Video Photo Video CHANGE RECORDING SETTINGS You can change recording settings in the app. Settings Microphone Cycle record time...
-
Seite 20: Specifications
SPECIFICATIONS Front Camera: 5MP, f/1.8, 170° FOV Rear Camera: 2MP, f/2.0, 150° FOV Video: 4K+1080P@25fps/2.5k+1080P@30fps Screen: 3-inch IPS touchscreen Video Coding: H.264/H.265 Input: 5V DC Working Temperature: -20°C~60°C (-4°F~140°F) If your dashcam does not appear to be working properly, please follow these troubleshooting steps: 1. -
Seite 21: Caution
3. Avoid leaving the device in direct sunlight for extended periods of time. 4. Do not dismantle or expose the internal battery. CONTACT US For any inquiries with KingSlim products, please feel free to contact us, we will respond within 24 hours. Email: cs@kingslim.net Tel: 888-811-1140 (US) Mon-Fri (except holiday) 9am-5pm (EST) Official website: www.kingslim.net... - Seite 22 INHALT Was ist in der Box Kamera Übersicht Installation microSD-Karte formatieren Videoaufnahme starten Symbol Einführung Einstellungen Gestures Aufnahmemodus wechseln Mit der "RoadCam"-App fahren Technische Daten Warnung Kontaktiere Uns...
-
Seite 23: Was Ist In Der Box
WAS IST IN DER BOX Wasserdichte D4 Dual Dashcam * 1 GPS Halterung * 1 Rückfahrkamera * 1 7m Rückfahrkamera Kfz-Ladegerät mit 3,5 m Statischer Aufkleber * 2 Verlängerungskabel * 1 Anschlusskabel * 1 Doppelseitiges Klebeband Doppelseitiges Klebeband Schrauben * 2 für die Rückfahrkamera * 4... -
Seite 24: Kamera Übersicht
KAMERA ÜBERSICHT Halterungssteckplatz Rückfahrkamera IN Frontkamera Lautsprecher Mini-USB Anschluss (Zur Datenübertragung) microSD Kartensteckplatz Betriebsanzeige Mikrofon Power-Taste... - Seite 25 Entlüftung Mini-USB Anschluss (Zum Verbinden von GPS) Bildschirm...
-
Seite 26: Installation
INSTALLATION 1. Die microSD-Karte einsetzen. Tipps: Eine microSD-Karte der Klasse 10 oder höher wird ausdrücklich für die D4 Dashcam empfohlen (microSD-Karte ist nicht im Lieferumfang enthalten). Die D4 Dashcam unterstützt eine microSD-Karte mit bis zu 256 GB. Bitte formatieren Sie Ihre Karte in der Kamera, bevor Sie die Dashcam verwenden. - Seite 27 ③ Ziehen Sie die Folie auf einer Seite des doppelseitigen Klebebands ab und kleben Sie den Klebstreifen auf die Dashcam D4. ④ Ziehen Sie die zweite Folie des Klebebands ab, drücken Sie die D4-Dashcam an und befestigen die Kamera auf dem statischen Aufkleber. (Wenn Sie die Dashcam entfernen möchten, entfernen Sie bitte den statischen Aufkleber.)
- Seite 28 7. Befestigen Sie die Rückfahrkamera. Position 1: Befestigen Sie die Rückfahrkamera an der hinteren Windschutzscheibe. Die Befestigung ist einfacher. Position 2: Befestigen Sie die Rückfahrkamera in der Nähe des Nummernschilds. Position 2 wird ausdrücklich empfohlen. Das hintere Bild ist sowohl für die Rückansicht als auch für die Rückfahrhilfe gestochen scharf.
-
Seite 29: Microsd-Karte Formatieren
Hinweis: ① Achten Sie auf die Position des Anschlusses beim Verbinden der Rückfahrkamera mit dem Verlängerungskabel, siehe folgende Details. ② Bitte reinigen Sie die Position vor der Befestigung der Rückfahrkamera, um die Klebequalität zu gewährleisten. ③ Bitte reinigen Sie die hintere Windschutzscheibe regelmäßig um die optimale Bildqualität zu gewährleisten falls Sie Position 1 auswählen. -
Seite 30: Videoaufnahme Starten
2. Die Loop-Aufnahme ist bei der Dashcam D4 bereits aktiviert, die Standardeinstellung ist 3 Min. 3. Der G-Sensor ist bei der Dashcam D4 bereits aktiviert, die Standardeinstellung ist niedrig. Im Falle eines Aufpralls oder einer plötzlichen Bremsung beginnt die Kamera automatisch mit der Aufnahme und speichert das Bildmaterial entweder im Ordner "Front Urgent Album"... -
Seite 31: Einstellungen
EINSTELLUNG 1. Auflösung Sie können die Auflösung der Frontkamera auswählen. Optionen: 4K25/2K30 Standardeinstellung: 4K25 Die Auflösung der Rückfahrkamera beträgt 1080P. 2. Video Kodierung H.265 kann die Aufnahmegröße minimieren, d. h. Sie können mehr Videodateien auf der microSD-Karte speichern. H.264 hat eine bessere Kompatibilität. Optionen: H.264/H.265 Standardeinstellung: H.264 3. - Seite 32 6. Parken Wenn das Fahrzeug beim Einparken angefahren wird, schaltet sich die Kamera automatisch ein und startet die 20s-Aufnahme und Sperre. Die Aufnahme wird umso leichter ausgelöst, je höher Sie die Stufe wählen. Optionen: Aus/Niedrig/Mittler/Hoch Standardeinstellung: Aus Hinweis: Im Parkmodus wird der Bildschirm nicht angezeigt und die Betriebsanzeige blinkt, während die Aufnahme läuft.
- Seite 33 10. Loop-Aufnahme Die Dateien werden alle 3 MIN gespeichert, wenn Sie die Option 3 MIN wählen. Wenn die MicroSD-Karte voll ist, überschreiben die neuen Dateien die alten bei eingeschalteter Loop-Aufnahme. Ist sie ausgeschaltet, zeichnet die Kamera nicht mehr auf, sobald die Karte voll ist. In diesem Fall müssen Sie die SD-Karte formatieren oder auf eine neue Karte wechseln.
- Seite 34 14. Formatierung der SD-Karte Formatieren Sie die microSD-Karte. Hinweis: ① Alle Daten werden gelöscht. Bevor Sie Ihre microSD-Karte formatieren, achten Sie bitte darauf, dass Sie wichtige Daten auf Ihren anderen Geräten sichern. ② Wenn die microSD-Karte zum ersten Mal eingesetzt wird, sollten Sie diese in der Kamera formatieren um sicherzustellen, dass die microSD-Karte mit der Kamera kompatibel ist.
-
Seite 35: Gestures
17. Informationen Überprüfen Sie die Version der Kamera. 18. Album Sie können Ihre Videos und Fotos einsehen. Wenn Sie Inhalte herunterladen möchten, verwenden Sie bitte die App "RoadCam", oder sichern Sie Daten auf Ihrem Computer. GESTEN Ein Foto aufnehmen Streichen Sie im Videoaufnahmemodus von links nach rechts, um Fotos aufzunehmen. -
Seite 36: Aufnahmemodus Wechseln
AUFNAHMEMODUS WECHSELN Klicken Sie auf die rechte Seite des Bildschirms, um den Anzeigemodus für die Aufnahme zu wechseln. 00:00:34 2020-07-17 13:47 MIT DER „ROADCAM” APP FAHREN VERBINDEN SIE SICH MIT IN DER APP 1. Stoppen Sie die Videoaufnahme auf der Dashcam. 2. - Seite 37 6. Tippen Sie auf das Wechselsymbol, um zur Anzeige der Front-oder Rückfahrkamera zu wechseln. Exit KINGSLIM840AAF Recording instrument 2020 07 17 13:47 Video Photo Connecting camera Video Add Recorder VIDEOS UND FOTOS HERUNTERLADEN ODER LÖSCHEN 1. Tippen Sie auf das Symbol , um die Aufnahme zu stoppen.
- Seite 38 Exit KINGSLIM840AAF Movie Select Movie Select Loop video Emergency video Loop video Emergency video 2020/07/17 14:00 2020/07/17 14:00 13:32:26 13:35:47 13:32:26 13:35:47 150.00MB 81.00MB 150.00MB 81.00MB 2020 07 17 13:47 Video Photo Video AUFNAHMEEINSTELLUNGEN ÄNDERN Sie können die Aufnahmeeinstellungen in der App ändern. Settings Microphone Cycle record time...
-
Seite 39: Technische Daten
TECHNISCHE DATEN Frontkamera: 5MP, f/1.8, 170° FOV Rückfahrkamera: 2MP, f/2.0, 150° FOV Video: 4K+1080P@25fps/2.5k+1080P@30fps Bildschirm: 3-Zoll-IPS-Touchscreen Video Kodierung: H.264/H.265 Eingang: 5V DC Betriebstemperatur: -20°C~60°C (-4°F~140°F) Wenn Ihre Dashcam nicht richtig zu funktionieren scheint, befolgen Sie bitte die folgenden Schritte zur Fehlerbehebung: 1. -
Seite 40: Warnung
3. Lassen Sie das Gerät nicht für längere Zeit in direktem Sonnenlicht liegen. 4. Die interne Batterie darf nicht ausgebaut oder freigelegt werden. KONTAKTIERE UNS Bei Problemen mit KingSlim-Produkten können Sie sich gerne an uns wenden. Wir werden Ihnen innerhalb von 24 Stunden antworten. Email: cs@kingslim.net Offizielle website: www.kingslim.net... - Seite 41 CONTENIDOS Contenidos del embalaje Descripción de la cámara Instalación Formatear la tarjeta microSD Iniciar la grabación de video Introducción a los íconos Menú de configuración Gestos Cambiar los modos de la pantalla de grabación Utilización de la aplicación "Roadcam" Especificaciones ¡Precaución! Contáctenos...
-
Seite 42: Contenidos Del Embalaje
CONTENIDOS DEL EMBALAJE Cámara trasera D4 Dual Dash Cam * 1 Soporte de GPS * 1 impermeable * 1 Cable de extensión Cargador de automóvil con Pegatina estática * 2 de cámara trasera cable de alimentación de 7m * 1 de 3.5 m * 1... -
Seite 43: Descripción De La Cámara
DESCRIPCIÓN DE LA CÁMARA Ranura para el soporte Cámara trasera adentro Cámara delantera Altavoz Puerto de alimentación mini USB (para transmisión de datos) Ranura para tarjeta microSD Indicador de funcionamiento Botón de encendido... - Seite 44 Ventilación Puerto de alimentación mini USB (para conectar el GPS) Pantalla...
-
Seite 45: Instalación
1. Inserte la tarjeta microSD. Consejos prácticos: Es altamente recomendado para la D4 Dash Cam utilizar una tarjeta clase 10 o superior (tarjeta microSD no incluida). La D4 Dash Cam es compatible con tarjetas microSD de hasta 256GB. Formatee la tarjeta en la cámara antes de usar esta Dash Cam. - Seite 46 ③ Retire la película en un lado de la cinta adhesiva de doble cara y coloque la cinta adhesiva en la D4 Dash Cam. ④ Retire la otra película de la cinta adhesiva, presione la D4 Dash Cam para fijarla a la pegatina estática. (Si desea remover la Dash Cam, quite la pegatina estática).
- Seite 47 7. Instale la cámara trasera. Posición 1: Instale la cámara trasera en el parabrisas trasero. La instalación es más fácil. Posición 2: Instale la cámara trasera cerca de la matricula. La posición 2 es altamente recomendada. La imagen trasera es nítida y clara tanto para la visión trasera como para la guía de marcha atrás.
-
Seite 48: Formatear La Tarjeta Microsd
Nota: ① Preste atención a la posición del conector cuando conecte la cámara trasera con el cable de extensión, ver detalles a continuación. ② Limpie el área de posicionamiento, para asegurar la calidad de la adhesión antes de instalar la cámara trasera. ③... -
Seite 49: Iniciar La Grabación De Video
2. La grabación en bucle ya está habilitada en la D4 Dash Cam, la configuración predeterminada es de 3 min. 3. El sensor-G ya está habilitado en la D4 Dash Cam, la configuración predeterminada es Bajo. -
Seite 50: Menú De Configuración
MENÚ DE CONFIGURACIÓN 1. Resolución Puede elegir la resolución de la cámara frontal. Opciones: 4K25/2K30 Configuración predeterminada: 4K25 La resolución de la cámara trasera es de 1080P. 2. Codificación de video H.265 puede minimizar el tamaño del metraje, lo que significa que se pueden guardar más archivos de video en la tarjeta microSD. - Seite 51 Opciones: Apagado/Bajo/Medio/Alto Configuración predeterminada: Bajo 6. Estacionamiento La cámara se encenderá automáticamente y comenzará los 20 s de grabación, y se bloqueará si ocurre un impacto con otro automóvil durante el estacionamiento. A mayor nivel seleccionado, será más fácil activar la grabación. Opciones: Apagado/Bajo/Medio/Alto Configuración predeterminada: Apagado Nota: En el modo de Estacionamiento, la pantalla no se mostrará...
- Seite 52 9. Volumen Ajuste el volumen en la reproducción de video. Opciones: Silencio/Bajo/Medio/Alto Configuración predeterminada: Medio 10. Grabación en bucle Los archivos serán guardados cada 3 min si elije la opción de 3 min. Cuando la tarjeta microSD esté llena, los nuevos archivos sobrescribirán los anteriores si la opción de grabación en bucle está...
- Seite 53 14. Formatear SD Formatee la tarjeta microSD. Nota: ① Todos los datos serán borrados. Antes de formatear la tarjeta microSD, recuerde hacer una copia de los datos importantes en otros dispositivos. ② Cuando la tarjeta microSD se inserta por primera vez, formatéela en la cámara para asegurarse que la tarjeta microSD es compatible con la cámara.
-
Seite 54: Gestos
17. Acerca de Chequee la versión de la cámara. 18. Álbum Puede chequear sus videos y fotos. Si desea descargar contenido, utilice la aplicación "RoadCam", o haga una copia de seguridad de los datos en una computadora. GESTOS Tomar una foto En el modo de Grabación de video, deslice de izquierda a derecha para tomar fotos. -
Seite 55: Cambiar Los Modos De La Pantalla De Grabación
CAMBIAR LOS MODOS DE LA PANTALLA DE GRABACIÓN Haga clic en el lado derecho de la pantalla para cambiar los modos de la pantalla de grabación. 00:00:34 2020-07-17 13:47 UTILIZACIÓN DE LA APLICACIÓN "ROADCAM" CONECTARSE CON LA APLICACIÓN 1. Detenga la grabación de video en la Dash Cam. 2. - Seite 56 6. Toque el ícono de Interruptor para cambiar a la pantalla de la cámara delantera o trasera. Exit KINGSLIM840AAF Recording instrument 2020 07 17 13:47 Video Photo Connecting camera Video Add Recorder DESCARGAR O ELIMINAR VIDEOS Y FOTOS 1. Toque el ícono para detener la grabación.
- Seite 57 Exit KINGSLIM840AAF Movie Select Movie Select Loop video Emergency video Loop video Emergency video 2020/07/17 14:00 2020/07/17 14:00 13:32:26 13:35:47 13:32:26 13:35:47 150.00MB 81.00MB 150.00MB 81.00MB 2020 07 17 13:47 Video Photo Video CAMBIAR LA CONFIGURACIÓN DE LA GRABACIÓN Puede cambiar la configuración de la grabación en la aplicación. Settings Microphone Cycle record time...
-
Seite 58: Especificaciones
ESPECIFICACIONES Cámara delantera: 5MP, f/1.8, 170° FOV Cámara trasera: 2MP, f/2.0, 150° FOV Video: 4K+1080P@25fps/2.5k+1080P@30fps Pantalla: pantalla táctil IPS de 3 pulgadas Codificación de video: H.264/H.265 Entrada: 5V DC Temperatura de funcionamiento: -20°C~60°C (-4°F~140°F) Si su Dash Cam no parece estar funcionando adecuadamente, siga los pasos para la solución de problemas a continuación: 1. -
Seite 59: Precaución
3. Evite dejar el dispositivo bajo la luz solar directa por periodos prolongados. 4. No desmonte o exponga la batería interna. CONTÁCTENOS Para cualquier consulta sobre los productos KingSlim, contáctenos, le responderemos en las siguientes 24 horas. Correo electrónico: cs@kingslim.net Sitio web oficial: www.kingslim.net... - Seite 60 CONTENU Qu’y a-t-il dans la boîte Aperçu des caméras Installation Formatage de la carte microSD Démarrage de l'enregistrement vidéo Introduction des icônes Menu de configuration Gestes Changement de mode d'affichage des enregistrements Utilisation de l'application «Roadcam» Caractéristiques Avertissement Contactez-nous...
-
Seite 61: Qu'y A-T-Il Dans La Boîte
QU'Y A-T-IL DANS LA BOÎTE Support GPS * 1 D4 Caméra Dual Dash * 1 Caméra arrière étanche * 1 Câble de rallonge de Chargeur de voiture avec Autocollant statique * 2 7m pour la caméra câble d'alimentation arrière * 1... -
Seite 62: Aperçu Des Caméras
CAMERA OVERVIEW Fente pour support Caméra arrière IN Caméra frontale Haut-parleur Mini port d'alimentation USB (pour la transmission de données) Fente pour carte microSD Indicateur de travail Microphone Bouton d'alimentation... - Seite 63 Ventilation Mini port d'alimentation USB (Pour la connexion du GPS) Écran...
-
Seite 64: Installation
1. Insérez la carte microSD. Conseils pratiques: Une carte microSD de classe 10 ou supérieure est fortement recommandée pour la dashcam voiture D4 (la carte microSD n'est pas incluse). La D4 dashcam voiture supporte une carte microSD jusqu'à 256 Go. Veuillez formater votre carte dans l'appareil photo avant d'utiliser cette dashcam voiture. - Seite 65 ③ Décollez le film sur un côté du ruban adhésif double face et appliquez le ruban adhésif sur la dashcam voiture D4. ④ Décollez l'autre film du ruban adhésif, appuyez sur la D4 dashcam voiture pour la fixer sur l'autocollant statique. (Si vous souhaitez retirer la dashcam voiture, veuillez enlever l'autocollant statique.)
- Seite 66 7. Installer la caméra arrière. Position 1: Installez la caméra arrière sur le pare-brise arrière. L'installation est plus facile. Position 2: Installez la caméra arrière près de la plaque d'immatriculation. La position 2 est fortement recommandée. L'image arrière est nette et claire, tant pour la vision arrière que pour le guide de marche arrière.
-
Seite 67: Formatage De La Carte Microsd
Remarque: ① Faites attention à la position du connecteur lorsque vous connectez la caméra arrière avec le câble d'extension, veuillez-vous référer aux détails ci-dessous. ② Veuillez nettoyer l'emplacement pour assurer la qualité de l'adhésif avant d'installer la caméra arrière. ③ Veuillez nettoyer régulièrement le pare-brise arrière pour assurer la qualité de l'image si vous choisissez la position 1. -
Seite 68: Démarrage De L'enregistrement Vidéo
2. L'enregistrement en boucle est déjà activé sur la D4 dashcam voiture, le réglage par défaut est de 3 minutes. 3. Le capteur G est déjà activé sur la dashcam voiture D4, le réglage par défaut est faible. Si un impact ou un freinage brusque est détecté, il démarre automatiquement l'enregistrement et sauvegarde les images dans le dossier «Album Urgent de l'avant»... -
Seite 69: Menu De Configuration
MENU DE CONFIGURATION 1. Résolution Vous pouvez choisir la résolution de la caméra frontale. Options: 4K25/2K30 Réglage par défaut: 4K25 La résolution de la caméra arrière est de 1080P. 2. Encodage Vidéo H.265 peut réduire la taille des images, ce qui signifie que vous pouvez stocker davantage de fichiers vidéo sur la carte microSD. - Seite 70 Options: Arrêt/Bas/Moyen/Haut Réglage par défaut: Bas 6. Surveillance du Stationnement La caméra s'allumera automatiquement et commencera l'enregistrement des 20 secondes et se verrouillera s'il y a un impact sur la voiture pendant le stationnement. Plus vous sélectionnez un niveau élevé, plus il est facile de déclencher l'enregistrement.
- Seite 71 9. Volume Ajustez le volume de la vidéo de lecture. Options: Muet/Bas/Moyen/Haut Réglage par défaut: Moyen 10. Enregistrement en boucle Les fichiers seront sauvegardés toutes les 3 MIN si vous choisissez l'option 3 MIN. Lorsque la carte microSD est pleine, les nouveaux fichiers couvriront l'ancien si l'enregistrement en boucle est activé.
- Seite 72 13. Langage Options: English/简体中文/Français/日本語/Español/Deutsch/Italiano Réglage par défaut: English 14. Format SD Formatez la carte microSD. Remarque: ① Toutes les données seront supprimées. Avant de formater votre carte microSD, n'oubliez pas de sauvegarder vos données importantes sur vos autres appareils. ② Lorsque la carte microSD est insérée pour la première fois, veuillez la formater dans la caméra pour vous assurer qu'elle est compatible avec la caméra.
-
Seite 73: Gestes
16. Réinitialisation du système La dashcam voiture sera restaurée aux paramètres d'usine. Notice Reset factory at once? Cancel Confirm Back 17. À propos de Vérifiez la version de la caméra. 18. Album Vous pouvez consulter vos vidéos et vos photos. Si vous souhaitez télécharger du contenu, veuillez utiliser l'application «RoadCam», ou sauvegarder les données sur votre ordinateur. -
Seite 74: Changement De Mode D'affichage Des Enregistrements
COMMUTATION DES MODES D'AFFICHAGE DES ENREGISTREMENTS Cliquez sur le côté droit de l'écran pour changer de mode d'affichage des enregistrements. 00:00:34 2020-07-17 13:47 UTILISER L'APPLICATION «ROADCAM» SE CONNECTER À L'APPLICATION 1. Arrêtez l'enregistrement vidéo sur la dashcam voiture. 2. Appuyez sur l'icône Wifi sur la dashcam voiture. 00:00:34 2020-07-17 13:47 WiFi Info WiFi SSID:... - Seite 75 5. Touchez l'icône vidéo ou photo pour contrôler la dashcam voiture, que ce soit pour enregistrer des vidéos ou prendre des photos. 6. Touchez l'icône de l'interrupteur pour passer à l'affichage de la caméra avant ou arrière. Exit KINGSLIM840AAF Recording instrument 2020 07 17 13:47 Video Photo...
- Seite 76 Exit KINGSLIM840AAF Movie Select Movie Select Loop video Emergency video Loop video Emergency video 2020/07/17 14:00 2020/07/17 14:00 13:32:26 13:35:47 13:32:26 13:35:47 150.00MB 81.00MB 150.00MB 81.00MB 2020 07 17 13:47 Video Photo Video MODIFIER LES PARAMÈTRES D'ENREGISTREMENT Vous pouvez modifier les paramètres d'enregistrement dans l'application. Settings Microphone Cycle record time...
-
Seite 77: Caractéristiques
CARACTÉRISTIQUES Caméra avant: 5MP, f/1.8, 170° FOV Caméra arrière: 2MP, f/2.0, 150° FOV Vidéo: 4K+1080P@25fps/2.5k+1080P@30fps Écran: Écran tactile IPS de 3 pouces Codage video: H.264/H.265 Entrée: 5V DC Température de fonctionnement: -20°C~60°C (-4°F~140°F) Si votre dashcam ne semble pas fonctionner correctement, veuillez suivre les étapes de dépannage suivantes: 1. -
Seite 78: Avertissement
3. Évitez de laisser l'appareil à la lumière directe du soleil pendant de longues périodes. 4. Ne pas démonter ni exposer la batterie interne. CONTACTEZ-NOUS Pour toute demande de renseignements sur les produits Kingslim, n'hésitez pas à nous contacter, nous vous répondrons dans les 24 heures. Email: cs@kingslim.net Site official: www.kingslim.net Les marques et logos microSD, microSDHC, microSDXC et SD sont des marques déposées de SD-3C, LLC. - Seite 79 CONTENUTI Contenuto del pacco Panoramica videocamera Installazione Formattare la scheda microSD Iniziare a registrare video Introduzione icone Menu configurazione Gesture Modificare modalità schermata registrazione Usare app "Roadcam" Specifiche AVVERTENZE Contattarci...
-
Seite 80: Contenuto Del Pacco
CONTENUTO DEL PACCO Videocamera posteriore D4 dual dash cam * 1 Supporto GPS * 1 impermeabile * 1 Cavo di estensione Caricatore auto con Adesivo statico * 2 videocamera cavo da 3,5m * 1 posteriore da 7m * 1 Adesivo a doppio strato per... -
Seite 81: Panoramica Videocamera
PANORAMICA VIDEOCAMERA Slot supporto Ingresso videocamera posteriore Videocamera frontale Altoparlante Porta di alimentazione mini USB (per trasmissione dati) Slot per scheda microSD Indicatore funzionamento Pulsante di alimentazione... - Seite 82 Ventola Porta di alimentazione mini USB (per collegare GPS) Schermo...
-
Seite 83: Installazione
1. Inserire la scheda microSD. Suggerimento: È consigliata una scheda microSD classe 10 o superiore per la dash cam D4 (scheda microSD non inclusa). La dash cam D4 supporta scheda microSD fino a 256GB. Formattare la scheda prima di usarla nella dash cam. - Seite 84 D4. ④ Rimuovere la pellicola dall'altro lato dell'adesivo a doppio strato, premere la dash cam D4 per fissare sull'adesivo statico. (Per rimuovere la dash cam, si prega di rimuovere l'adesivo statico). Nota: È possibile collegare la dash cam sul parabrezza senza l'adesivo statico.
- Seite 85 7. Installare la videocamera posteriore. Posizione 1: Installare la videocamera posteriore sul parabrezza posteriore. L'installazione è più semplice. Posizione 2: Installare la videocamera posteriore vicino alla targa. La posizione 2 è consigliata. L'immagine è nitida e definita per visuale posteriore e guida in retromarcia.
-
Seite 86: Formattare La Scheda Microsd
Nota: ① Prestare attenzione alla posizione del connettore durante il collegamento della videocamera posteriore con il cavo di estensione, fare riferimento ai dettagli sotto. ② Pulire l'area per garantire un'adesione ottimale prima di installare la videocamera posteriore. ③ Scegliendo la posizione 1, pulire regolarmente il parabrezza posteriore per garantire qualità... -
Seite 87: Iniziare A Registrare Video
1. Al termine della formattazione, collegare un caricatore per auto e avviare il motore. Il dispositivo si accende automaticamente e inizia a registrare. 2. Il ciclo di registrazione è sempre attivo sulla dash cam D4 con Impostazione predefinita di 3 minuti. -
Seite 88: Menu Configurazione
MENU CONFIGURAZIONE 1. Risoluzione È possibile scegliere la risoluzione della videocamera frontale. Opzioni: 4K25/2K30 Impostazione predefinita: 4K25 La risoluzione della videocamera posteriore è 1080P. 2. Codifica video H.265 permette di minimizzare le dimensioni del video, in modo da poter salvare più... - Seite 89 6. Parcheggio La videocamera si accende automaticamente, inizia 20s di registrazione e blocca il video in caso di impatto sull'auto durante parcheggio. Maggiore il livello selezionato, più è facile attivare la registrazione. Opzioni: Off/basso/Medio/Alto Impostazione predefinita: Off Nota: In modalità parcheggio lo schermo non mostra nulla e l'indicatore di funzionamento lampeggia per indicare la registrazione in corso.
- Seite 90 10. Ciclo di registrazione I file vengono salvato ogni 3 MIN scegliendo l'opzione 3 MIN. Quando la scheda microSD è piena, i nuovi file sostituiscono i meno recenti nel caso in cui venga attivato il ciclo di registrazione. Se è disattivato, la videocamera non registra più in caso di card piena.
- Seite 91 14. Formattare SD Formattare la scheda microSD. Nota: ① Tutti i dati verranno eliminati. Prima di formattare la scheda microSD, eseguire il backup dei dati importanti su un altro dispositivo. ② Inserendo la scheda microSD per la prima volta, formattarla per assicurarsi che sia compatibile con la videocamera.
-
Seite 92: Gesture
17. Informazioni Permette di verificare la versione della videocamera. 18. Album Permette di verificare video e foto. Per scaricare i contenuti, usare l'app "RoadCam" o salvare i file sul computer. GESTURE Scattare una foto In modalità registrazione video, scorrere da sinistra verso destra per scattare una foto. -
Seite 93: Modificare Modalità Schermata Registrazione
MODIFICARE MODALITÀ SCHERMATA REGISTRAZIONE Cliccare sulla parte destra dello schermo per modificare la modalità della schermata di registrazione. 00:00:34 2020-07-17 13:47 USARE L'APP "ROADCAM" COLLEGARE ALL'APP 1. Interrompere la registrazione sulla dash cam. 2. Cliccare l'icona Wifi sulla dash cam. 00:00:34 2020-07-17 13:47 WiFi Info WiFi SSID:... - Seite 94 6. Cliccare sul pulsante di modifica per passare da fotocamera anteriore a posteriore. Exit KINGSLIM840AAF Recording instrument 2020 07 17 13:47 Video Photo Connecting camera Video Add Recorder SCARICARE O ELIMINARE VIDEO E FOTO 1. Cliccare sull'icona per interrompere la registrazione. Video 2.
- Seite 95 Exit KINGSLIM840AAF Movie Select Movie Select Loop video Emergency video Loop video Emergency video 2020/07/17 14:00 2020/07/17 14:00 13:32:26 13:35:47 13:32:26 13:35:47 150.00MB 81.00MB 150.00MB 81.00MB 2020 07 17 13:47 Video Photo Video MODIFICARE IMPOSTAZIONI REGISTRAZIONE È possibile modificare le impostazioni di registrazione sull'app. Settings Microphone Cycle record time...
-
Seite 96: Specifiche
SPECIFICHE Videocamera frontale: 5MP, f/1.8, 170° FOV Videocamera posteriore: 2MP, f/2.0, 150° FOV Video: 4K+1080P@25fps/2.5k+1080P@30fps Schermo: Touchscreen IPS da 3 pollici Codifica video: H.264/H.265 Ingresso: 5V DC Temperatura di funzionamento: -20°C~60°C (-4°F~140°F) Se la dash cam non sembra funzionare correttamente, seguire gli step di risoluzione dei problemi sotto: 1. -
Seite 97: Avvertenze
3. Evitare di lasciare il dispositivo sotto luce diretta del sole per un periodo prolungato. 4. Non rimuovere o esporre la batteria interna. CONTATTARCI Per qualsiasi domanda sui prodotti KingSlim contattarci. Risponderemo entro 24 ore. Email: cs@kingslim.net Sito ufficiale: www.kingslim.net I loghi microSD, microSDHC, microSDXC e SD sono marchi commerciali di SD-3C, LLC. - Seite 98 目次 梱包内容 製品一覧 インストール SDカードをフォーマッ ト ビデオ録画を開始 アイコン紹介 設定説明 ジェスチャー 記録表示モードを切り替える アプリ 「ROADCAM」 を使用 製品仕様 注意事項 アフターサービス...
- Seite 99 7mリアカメラ延長 3.5m電源ケーブル付きカー スタティ ックステ ケーブル * 1 チャージャー * 1 ッカー *2 背面カメラ用両面 GPS用両面粘着 ネジ * 2 粘着テープ * 4 テープ * 2 Quick Start Guide KingSlim D4 Dash Cam V1.0 クローバー * 1 ケーブルクリップ * 5 クイックマニュアル * 1...
- Seite 100 製品一覧 ブラケッ トスロッ ト リアカメラ入力ポート フロントカメラ スピーカー ミニUSB電源ポート (データ転送用) microSDカードスロッ ト 作業インジケーター マイク 電源ボタン...
- Seite 101 排気口 ミニUSB電源ポート (GPS接続用) 画面...
- Seite 102 インストール 1、 マイクロSDカードを挿入します。 ご注意 : D4ドライブレコーダーにはClass10以上、 最大256GBのSDカードを強くお勧 めします (microSDカードは含まれていません) 。 製品を使用する前に、 カメラでSDカ ードをフォーマッ トしてください。 ドライブレコーダーがオンになっているときは、 SDカ ードを抜き差ししないでください。 SDカードが破損する恐れがあります。 microSD 2、 ブラケッ トをブラケッ トスロッ トに挿入します。...
- Seite 103 3、 D4ドライブレコーダーをフロントガラスに取り付けます。 ① フロントガラスを乾いた布で拭いてください。 ② 静的ステッカーのフィルムをはがし、 フロントガラスに貼り、 内部に空気がないこと を確認します。 ③ 両面テープの片面のフィルムをはがし、 ドライブレコーダーに貼り付けます。 ④ 粘着テープのもう一方のフィルムをはがし、 ドライブレコーダーを押してスタティ ッ クステッカーに固定します。 ( ドライブレコーダーを外したい場合は、 スタティックス テッカーをはがしてください。 ) ご注意 : 静的ステッカーがなく ても、 ドライブレコーダーをフロントガラスに貼り付 けることができます。 静電シール ケーブルクリップ 4、 運転に応じて視野角を調整します。 5、 USB電源ケーブルをドライブレコーダーのUSB電源ポートに接続し、 カーチャージャ ーを車のシガレッ トライターに接続します。 6、 リアカメラを延長ケーブルでドライブレコーダーに接続し、 リアカメラが正常に機能...
- Seite 104 7、 背面カメラを取り付けます。 位置1 : リアカメラをリアウインドシールドに取り付けます。 インストールが簡単です。 位置2 : ナンバープレートの近くに背面カメラを取り付けます。 位置2を強くお勧めします。 背面の画像は鮮明で、 ライブストリームの背面ビューと反転ガイドに対応できます。 車をバックするガイド機能を使用するには、 背面カメラを位置2に取り付け、 背面カメラ 延長ケーブルの赤いトリガーケーブルを車の反転ランプのプラスリードに接続します。 車をバックするガイド機能を使用するには、 背面カメラを位置2に取り付け、 背面カメラ 延長ケーブルの赤いトリガーケーブルを車の反転ランプのプラスリードに接続します。 リアカメラ リア 逆転ランプ正極リード 逆転ランプ...
- Seite 105 ご注意 : ① 背面カメラを延長ケーブルに接続する際、 コネクタの位置に注意してください。 以下 の詳細を参照してください。 ② 背面カメラを取り付ける前に、 接着剤の品質を確保するために位置を清掃してくだ さい。 ③ 位置1を選択した場合、 画質を確保するために定期的に後部フロントガラスを清掃 してください。 ④ 位置2を選択した場合、 付属のステッカーまたはスキュを使用して背面カメラを取り 付けることができます。 8、 クローバーを使用してケーブルを隠します。 SDカードをフォーマッ ト ドライブレコーダーを使用する前に、 カメラでSDカードをフォーマッ トし、 Class10以上 のSDカードを使用してください。 1、 アイコン 「設定」 をタップして設定モードに入ります。 2、 「 SDのフォーマッ ト]を選択し、 アイコン 「確認」 をタップします。 フォーマッ ト完了する まで数秒待つと、...
- Seite 106 ビデオ録画を開始 1、 フォーマッ トが完了したら、 カーチャージャーを接続して車のエンジンを始動すると、 デバイスが自動的にオンになり、 録音が開始されます。 2、 D4ドライブレコーダーにはループ録画機能が既に有効になっておりデフォルト設定 は3分です。 3、 D4ドライブレコーダーには Gセンサーが既に有効になっており、 デフォルト設定 は低です。 衝撃や急ブレーキが検出されると、 自動的に録画が開始され、 「 フロント 緊急アルバム」 または 「バック緊急アルバム」 フォルダに保存されます。 アイコン紹介 4 5 6 00:00:34 2020-08-28 13:47 ビデオインジケーター 電量ステータス ビデオ時間 設定 日付時刻 アルバム 緊急録音/Wifi マイクインジケーター 音声録音 (ミュート/ミュート解除)...
- Seite 107 設定説明 1、 解像度 フロントカメラの解像度を選択できます。 オプション : 4K25/2K30 デフォルト設定 : 4K/25 リアカメラの解像度は1080Pです。 2、 ビデオエンコード H.265はフッテージのサイズを最小化できるため、 より多くのビデオファイルを保存で きます。 H.264の方が良い互換性があります。 オプション : H.264 / H.265 デフォルト設定 : H.264 3、 スク リーンセーバー 時間を設定すると、 画面は自動的にオフになります。 オフにすると、 画面の消費電力が削減されます。 表示画面がオフのときにカメラはまだ 動作します。 画面をクリックするだけでオンになります。 オプション : オフ/ 1分/ 3分 デフォルト設定...
- Seite 108 6、 駐車監視モード 駐車中に車に衝撃があった場合、 カメラは自動的にオンになり、 20sの記録とロックを 開始します。 選択するレベルが高いほど、 録音をトリガーしやすくなります。 オプション : オフ/低/中/高 デフォルト設定 : オフ ご注意 : 駐車監視モードでは、 記録中に画面が表示されず、 作業インジケーターが点滅 します。 ドライブレコーダーがオンの場合、 メッセージボックスが画面に表示されます。 00:00:34 2020-08-28 13:47 You have paring files, please check! 7、 日付形式 お好みのフォーマッ トを設定してください。 オプション : YYYY-MM-DD/DD-MM-YY/MM-DD-YY デフォルト設定 : YY-MM-DD 8、...
- Seite 109 10、 ループ録画 オプション 「3分」 を選択した場合、 ファイルは3分ごとに保存されます。 SDカードがいっ ぱいになると、 ループ録画がオンになっていると、 新しいファイルが古いファイルをカ バーします。 ループ録画がオフの場合、 カードがいっぱいになるとカメラはそれ以上 記録しません。 次に、 SDカードをフォーマッ トするか、 新しいカードに変更する必要が あります。 オプション : オフ/ 1分/ 3分/ 5分 デフォルト設定 : 3分 11、 時間を設定 日付と時刻を手動で設定します。 ご注意 : 時間を手動で設定する場合は、 タイムゾーン設定をオフにしてください。 時間を設定 2020 キャンセル 確認 12、 タイムゾーンを設定 タイムゾーンを手動で選択します。...
- Seite 110 14、 SDカードをフォーマッ ト SDカードをフォーマッ トします。 ご注意 : ① すべてのデータが削除されます。 SDカードをフォーマッ トする前に、 他のデバイスに 重要なデータをバックアップすることを忘れないでください。 ② SDカードを初め挿入するときは、 SDカードがカメラと互換性があることを確認する ために、 まずカメラでフォーマッ トしてください。 15、 GPS情報 信号、 速度、 経度、 緯度など、 運転に関連する情報を確認してください。 ご注意 : GPSが必要ない場合は、 ミニUSB電源ポート1を接続してください。 ミニUSB ミニUSB 電源ポート2 電源ポート1 (GPS接続用) (データ送信用) 16、 システムをリセッ ト ドライブレコーダーは工場出荷時の設定に戻ります。 ご注意...
- Seite 111 17、 について カメラのバージョンを確認してください。 18、 アルバム ビデオや写真をチェックすることができます。 コンテンツをダウンロードしたい場合は、 アプリ 「RoadCam」 を使用するか、 コンピューターにデータをバックアップしてください。 ジェスチャー 写真を撮る 録画モードで、 左から右にスライドして写真を撮ります。 00:00:34 2020-07-17 13:47...
- Seite 112 記録表示モードを切り替える 画面の右側をクリックして、 記録表示モードを切り替えます。 00:00:34 2020-07-17 13:47 アプリ「ROADCAM」を使用 アプリで接続する 1、 ドライブレコーダーのビデオ録画を停止します。 2、 ドライブレコーダーのアイコン 「Wifi」 をタップします。 00:00:34 2020-07-17 13:47 WiFi Info WiFi SSID: KINGSLIM840AAF WiFi Password: 12345678 Press POWER key to quit wifi! 3、 スマホのWifi設定に移動し、 ドライブレコーダーに表示されているWifi名に接続し ます。 パスワードを入力し、 ネッ トワークを確認します。 4、 アプリ 「RoadCam」 を開き、 「 レコーダーの追加」 をタップし、 数秒待ってプレビューイ ンターフェイスに入ります。...
- Seite 113 5、 アイコン 「ビデオ」 または 「写真」 をタップして、 ビデオの録画または写真の撮影のい ずれかでドライブレコーダーを制御します。 6、 アイコン 「スイッチ」 をタップして、 前面または背面のカメラディスプレイに切り替え ます。 Exit KINGSLIM840AAF Recording instrument 2020 07 17 13:47 Video Photo Connecting camera Video Add Recorder ビデオや写真をダウンロード/削除 1.アイコン 「 」 をタップして、 録音を停止します。 Video 2.アイコン 「 」 または 「 」...
- Seite 114 Exit KINGSLIM840AAF Movie Select Movie Select Loop video Emergency video Loop video Emergency video 2020/07/17 14:00 2020/07/17 14:00 13:32:26 13:35:47 13:32:26 13:35:47 150.00MB 81.00MB 150.00MB 81.00MB 2020 07 17 13:47 Video Photo Video 録音設定を変更 アプリで録音設定を変更することができます。 Settings Microphone Cycle record time 5MIN G-Sensor sensitivity When the vehicle collides, the video is not covered...
- Seite 115 製品仕様 フロントカメラ : 5MP、 f/1.8、 170° FOV リアカメラ : 2MP、 f/2.0、 150° FOV ビデオ : 4K+1080P@25fps/2.5k+1080P@30fps 画面 : 3インチIPSタッチスクリーン ビデオコーディング : H.264/H.265 入力 : 5V DC 使用温度 : -20° C 60° C (-4° F 140° F) ドライブレコーダーが正常に動作しない場合は、 以下の手順に従ってトラブルシューテ ィングを行ってください。 1、 ドライブレコーダーは記録できません。 •...
- Seite 116 7、 カメラは自動的にオンとオフを繰り返します。 付属のカーチャージャーでカメラを充電してください。 他のアダプタと一緒にUSBデー タケーブルでバッテリーを充電しないでください。 注意事項 1、 デバイスを安全な場所に置き、 レンズに傷や汚れが付かないようにしてください。 2、 デバイスを雨、 湿気、 または水にさらさないでください。 3、 デバイスを直射日光に長時間さらさないでください。 4、 内蔵バッテリーを分解したり露出させたり しないでください。 アフターサービス 何かご不明な点がありましたら、 メールまたは電話でお気軽にお問い合わせください。 こちらは全力を尽く して対応いたします。 E-メール:cs@kingslim.net 公式サイ ト: www.kingslim.net The microSD, microSDHC, microSDXC and SD marks and logos are trademarks of SD-3C, LLC.
- Seite 117 목차 박스 내용물 카매라 개요 설치 microSD 카드 포맷 동영상 녹화 시작 아이콘 설명 설정 메뉴 제스쳐 녹화 화면 모드 변경 “Roadcam” 앱 사용 설명 사양 주의 사항 고객 센터...
- Seite 118 전원 케이블 * 1 후방 카메라용 양면 GPS용 양면 접착 나사 * 2 접착 테이프 * 4 테이프 * 2 Quick Start Guide KingSlim D4 Dash Cam V1.0 차량용 지렛대 * 1 케이블 클립 * 5 빠른 시작 가이드 * 1...
- Seite 119 카매라 개요 지지대 슬롯 후방 카메라 IN 전방 카메라 스피커 미니 USB 전원 포트 (데이터 전송용) microSD 카드 슬롯 작업 표시등 마이크 전원 버튼...
- Seite 120 환풍구 미니 USB 전원 포트 (GPS 연결용) 화면...
- Seite 121 설치 1. microSD 카드를 삽입합니다. 참고 사항: D4 차량용 블랙박스에는 Class 10 이상의 microSD 카드를 사용하는 것이 좋습니다 (microSD 카드는 내장되어 있지 않습니다). D4 차량용 블랙박스는 256GB microSD 카드까지 지원됩니다. 본 차량용 블랙박스를 사용하시기 전에 카메라 내부에 있는 카드를 포맷하시기 바랍니다. 차량용 블랙박스를 켠 상태에서...
- Seite 122 참조: 고정 스티커 없이 앞 유리에 차량용 블랙박스를 부착할 수 있습니다. 정전기 스티커 케이블 클립 4. 시야 각도를 조정합니다. 5. D4 차량용 블랙박스의 USB 전원 포트에 USB 전원 케이블을 연결한 후, 차량용 라이터에 자동차 충전기를 연결합니다. 6. 확장 케이블로 D4 차량용 블랙박스에 후방 카메라를 연결하여 후방 카메라가 잘 작동하는지 확인합니다.
- Seite 123 7. 후방 카메라를 설치합니다. 위치 1: 후방 유리창에 후방 카메라를 설치합니다. 더 쉽게 설치할 수 있습니다. 위치 2: 자동차 번호판 근처에 후방 카메라를 설치합니다. 위치 2에 부착하는 것을 추천합니다. 후면 시야 및 후진 가이드 모두 선명하고 깨끗하게 보입니다. 참조: ① 확장 케이블을 사용하여 후방 카메라를 연결할 때 연결 위치에 주의하십시오, 아래의...
- Seite 124 참조: ① 확장 케이블을 사용하여 후방 카메라를 연결할 때 연결 위치에 주의하십시오, 아래의 사진을 참조하시기 바랍니다. ② 후방 카메라를 설치하기 전, 잘 부착될 수 있도록 위치가 깨끗한지 확인합니다. ③ 위치 1에 설치하셨다면 이미지의 품질을 높이기 위해 후면 유리창을 규칙적으로 청소하십시오. ④...
- Seite 125 동영상 녹화 시작 1. 포맷이 완료된 후, 차량용 충전기를 연결하고 엔진의 시동을 겁니다. 블랙박스가 자동으로 실행되어 녹화를 시작합니다. 2. D4 차량용 블랙박스에 루프 녹화가 활성화되어 있으며, 3분으로 기본 설정되어 있습니다. 3. G-센서가 활성화되어 있으며, '저' 모드로 기본 설정되어 있습니다. 충격이나 급...
- Seite 126 설정 메뉴 1. 해상도 전방 카메라의 해상도를 선택할 수 있습니다. 옵션: 4K25/2K30 기본 설정값: 4K25 후방 카메라는 해상도 1080P입니다. 2. 동영상 부호 H.265는 화면 크기를 최소화할 수 있으므로 microSD 카드에 더 많은 동영상 파일을 저장할 수 있습니다. H.264는 호환성이 더욱 뛰어납니다. 옵션: H.264/H.265 기본...
- Seite 127 6. 주차 주차 중 차량에 충격이 가해지면 카메라가 자동으로 켜지고 20초 녹화가 시작되고 촬영된 동영상은 잠깁니다. 높은 단계를 선택할수록, 작은 충격에도 녹화가 시작됩 니다. 옵션: 끄기/저/중/고 기본 설정값: 끄기 참조: 주차 모드에서는 화면이 꺼져 있으며, 녹화가 진행되는 동안 작동 표시등이 깜박입니다.
- Seite 128 10. 루프 녹화 3분 옵션을 선택하는 경우 3분마다 파일이 저장됩니다. MicroSD 카드의 용량이 가득 찼는데, 루프 녹화가 켜져 있는 경우 기존 파일 중 하나에 신규 파일이 덮어 씌어 집니다. 루프 녹화를 끄면, microSD 카드의 용량이 가득 찼을 경우 카메라는 녹화하지 않습니다. 이후 SD 카드를 포맷하거나 새 카드로 변경해야 합니다. 옵션: 끄기/1분/3분/5분...
- Seite 129 14. SD 포맷 microSD 카드를 포맷하십시오. 참조: ① 모든 데이터가 삭제됩니다. microSD 카드를 포맷하기 전, 중요한 데이터는 다른 장치에 백업하세요. ② 최초로 microSD를 삽입할 때 microSD 카드가 카메라와 호환되는지 확인하기 위해 카메라에서 포맷을 진행하십시오. 15. GPS 정보 신호, 속도, 경도, 위도와 같은 주행과 관련된 정보를 확인하십시오. 참조: GPS가...
- Seite 130 17. 정보 카메라 정보를 확인합니다. 18. 앨범 동영상과 사진을 확인합니다. 콘텐츠를 다운로드하려면 “RoadCam" 앱을 다운로드 하거나, 컴퓨터에 데이터를 백업하십시오. 제스쳐 사진 촬영 동영상 녹화 모드에서 왼쪽에서 오른쪽으로 슬라이드하면 사진을 촬영할 수 있습 니다. 00:00:34 2020-07-17 13:47...
- Seite 131 녹화 화면 모드 변경 화면의 오른쪽을 눌러 녹화 화면의 모드를 변경할 수 있습니다. 00:00:34 2020-07-17 13:47 “ROADCAM” 앱 사용 설명 앱과 연결하기 1. 차량용 블랙박스의 동영상 녹화를 중단합니다. 2. 차량용 블랙박스의 Wifi 아이콘을 누릅니다. 00:00:34 2020-07-17 13:47 WiFi Info WiFi SSID: KINGSLIM840AAF WiFi Password: 12345678...
- Seite 132 5. 동영상 또는 사진 아이콘을 눌러 동영상을 녹화하거나 사진을 촬영하는 대시 캠을 제어합니다. 6. 전환 아이콘을 눌러 전방 또는 후방 카메라 화면을 전환합니다. Exit KINGSLIM840AAF Recording instrument 2020 07 17 13:47 Video Photo Connecting camera Video Add Recorder 동영상 및 사진 다운로드 또는 삭제 아이콘을...
- Seite 133 Exit KINGSLIM840AAF Movie Select Movie Select Loop video Emergency video Loop video Emergency video 2020/07/17 14:00 2020/07/17 14:00 13:32:26 13:35:47 13:32:26 13:35:47 150.00MB 81.00MB 150.00MB 81.00MB 2020 07 17 13:47 Video Photo Video 녹화 설정 변경 앱에서 녹화 설정을 변경할 수 있습니다. Settings Microphone Cycle record time...
- Seite 134 사양 전방 카메라: 5MP, f/1.8, 170° FOV 후방 카메라: 2MP, f/2.0, 150° FOV 동영상: 4K+1080P@25fps/2.5k+1080P@30fps 화면: 3-inch IPS 터치스크린 동영상 코딩: H.264/H.265 입력: 5V DC 작동 온도: -20°C~60°C (-4°F~140°F) 차량용 블랙박스가 제대로 작동하지 않을 경우 다음 문제 해결 단계에 따라 진행 하십시오.
- Seite 135 2. 어떠한 경우에도 장치가 비, 습기 또는 물에 노출되지 않도록 하십시오. 3. 장시간 렌즈가 직사광선에 노출되지 않도록 하십시오. 4. 내장 배터리를 분해하거나 드러나지 않도록 하십시오. 고객 센터 KingSlim 제품에 대한 문의 사항이 있으시면 고객 센터로 연락해주시기 바랍니다. 24시간 답변 가능합니다. Email: cs@kingslim.net 공식 웹사이트: www.kingslim.net...