Herunterladen Inhalt Inhalt Diese Seite drucken
laguna CFlux 3 Gebrauchsanweisung

laguna CFlux 3 Gebrauchsanweisung

Zyklon-absauganlage

Werbung

Verfügbare Sprachen
  • DE

Verfügbare Sprachen

  • DEUTSCH, seite 14
CFlux 3
EN Operating Instructions
(translation of the original instructions)
DE Gebrauchsanweisung
(Übersetzung der Originalgebrauch
sanweisung)
CZ Návod k obsluze
(překlad původního návodu)
SK Návod na obsluhu
(preklad pôvodného návodu)
HU Használati útmutató
(eredeti használati útmutató fordítása)
PL Instrukcja obsługi
(tłumaczenie oryginalnej instrukcji)
SF-351AX-LS
Cyclone Dust Collector
Zyklon-Absauganlage
Cyklonová odsávací jednotka
Cyklónová odsávacia jednotka
Ciklonos elszívó egység
Cyklonowe urządzenie odciągowe
Producer / Hersteller / Výrobce / Výrobca / Gyártó / Producent:
Laguna Tools Inc
2072 Alton Pkwy
Irvine, CA 92606,
USA
Phone: +1 800-234-1976
Website: www.lagunatools.com
Distributor / Distributor / Distributor / Distribútor / Forgalmazó / Dystrybutor:
IGM nástroje a stroje s.r.o.
Ke Kopanině 560, 252 67, Tuchoměřice, Praha-západ
Česká republika
Tel: 220 950 910
Email: prodej@igm.cz
www.igm.cz
2019-30

Werbung

Inhaltsverzeichnis
loading

Inhaltszusammenfassung für laguna CFlux 3

  • Seite 1 Cyclone Dust Collector Zyklon-Absauganlage Cyklonová odsávací jednotka CFlux 3 Cyklónová odsávacia jednotka Ciklonos elszívó egység Cyklonowe urządzenie odciągowe EN Operating Instructions (translation of the original instructions) DE Gebrauchsanweisung (Übersetzung der Originalgebrauch sanweisung) CZ Návod k obsluze (překlad původního návodu) SK Návod na obsluhu (preklad pôvodného návodu)
  • Seite 2: Ce Declaration Of Conformity

    Type number: SF-351AX-LS (400V) Laguna Brand: Manufacturer: Laguna Tools Inc 2072 Alton Pkwy, Irvine, CA 92606, USA Declare under our sole responsibility that this product is in conformity with the following directives: - Machinery Directive 2006/42/ES Designed in conformity with:...
  • Seite 3: Inhaltsverzeichnis

    Dear Woodworker, Thank you for your purchase and welcome to the Laguna Tools group of discerning woodworkers. We understand that you have a choice of where to purchase your machines and appreciate the confidence you have in the Laguna Tools brand.
  • Seite 4: General Rules

    • Do not use this machine for other than its intended use. If used for other purposes, LAGUNA TOOLS INC., disclaims any real or implied warranty • Turn off the machine before cleaning. Use a brush or compressed air to and holds itself harmless from any injury that may result from that use.
  • Seite 5: Motor Specifications

    Electrical Circuit Requirements by static electricity can cause explosions or fire. To reduce this risk, make You should use a separate electrical circuit for the Laguna CFlux. The sure all dust lines are thoroughly grounded by using a grounding wire.
  • Seite 6: Assembly

    Power Cord Motor Cord Hand held remote controller Hand held remote controller M. Canister cover plate N. Octagon drum foot peddle O. Inlet adapter ON button OFF button ON button OFF button P. Lower upright supports (3) Q. Drum insert Remote set button *Remote set button R.
  • Seite 7 Step Six: Secure the base with (3) lower upright support panels to the unit using (6) 5/16”*3/4” hex bolts and (6) 5/16”*OD18*2t flat washers. Pic. 8 (or triangles) Step 4: Install the foam tape to the upper and lower rims of the three components listed, Cyclone funnel, Cyclone barrel, and Intake cylinder.
  • Seite 8 Step Nine: Secure the lower triangular support plate to the base using 5/16”*3/4” hex bolts and (4) 5/16”*OD18*2t flat washers. Follow the same steps for the opposite side. Pic. 17 Pic. 14 Step 13: Attach the two ends of the Octagon foot pedal to the nut on the Step 10: Slide the Foot pedal bar into the opening on the lower upright foot pedal bar.
  • Seite 9 and right panels; do not assemble the incorrect sides. Refer to the next Step Twenty: Take the Octagon drum side panels and assemble together, step. secure with (40) M4*12mm sheet metal thread bolts. Take note of the left and right panels; do not assemble the incorrect sides. Refer to the next step.. Pic.
  • Seite 10 Step Twenty Three: Take the Octagon base panel with wheels and secure on to the bottom of the drum using M4*12mm sheet metal thread bolts. Step Twenty Six: Attach the handles to the top and bottom end on the front panel with the window display using (4) flat head Philip bolt, (4) 5/16”*OD23*2t flat washers and (4) 5/16”...
  • Seite 11 Step Twenty Nine: Place the drum insert inside over the plastic bag in the Octagon drum. Drum insert Step Thirty Two: Install the Remote Switch Box to the switch plate on the motor Drum insert using (4) 1/4”*3/4” hex bolts and (4) 1/4”*OD19*2t flat washers. Step Thirty Two: Install the Remote Switch Box to the switch plate on the motor using (4) 1/4”*3/4”...
  • Seite 12: Maintenance Procedures

    Step Thirty Six: Assemble the canister filter to the dust chute. Tighten the band clamp and adjust the tightness accordingly to ensure the canister filter is tightly Step Forty: Secure and tighten the (1) 5/16”*3/4” and (1) 5/16”*OD23*2t flat fitted onto the dust chute. washer on the rotation shaft base.
  • Seite 13: Troubleshooting Guide

    To keep your machine in good working condition, it is recommended that Pozn.: If the filter bag gets too full, the weight may force it to pull away you use the filter cleaner crank to clean the filter after every use. from the band clamp, exposing the user to potentially harmful particulates.
  • Seite 14: Ce-Konformitätserklärung

    CFlux3 Typnummer: SF-351AX-LS (400V) Laguna Marke: Hersteller: Laguna Tools Inc 2072 Alton Pkwy, Irvine, CA 92606, USA Hiermit erklären wir in unserer alleinigen Verantwortung, dass dieses Produkt den folgenden Richtlinien entspricht: - Maschinenrichtlinie 2006/42/EG Entworfen in Übereinstimmung mit: ** EN ISO 12100: 2010, EN 60204-1: 2006 / AC: 2010...
  • Seite 15 Sehr geehrter Kunde, Vielen Dank für Ihren Kauf und willkommen in der Familie der Besitzer der CFluxl Laguna Maschinen.Wir sind uns dessen bewusst, dass Sie derzeit auf dem Markt unzählige Marken von Holzbearbeitungsmaschinen finden und wir schätzen es, dass Sie sich gerade für die Marke Laguna Tools von IGM entschieden haben.
  • Seite 16: Allgemeine Sicherheitsregeln

    Anlage anders als bestimmungsgemäß verwendet wird, schließen die IGM Operation. nástroje a stroje s.r.o. sowie die Laguna Tools Inc. jegliche Gewährleistung aus und halten sich von jeglicher Haftung für Verletzungen, die bei solcher • Verwenden Sie das richtige Werkzeug mit der richtigen Geschwindigkeit Verwendung entstehen können, frei.
  • Seite 17: Zusätzliche Sicherheitsmaßnahmen

    Anforderungen an Versorgungskreis Kleine Tiere und Kinder stets von der Absaugöffnung halten. Für die Laguna CFlux Maschine sollte ein separater Stromkreis verwendet Funken vermeiden. Lassen Sie niemals zu, dass Stahl oder Steine den werden. Der Stromkreis sollte mit einem 16 A Leistungsschutzschalter Lüfter berühren - dadurch können Funken gebildet werden.
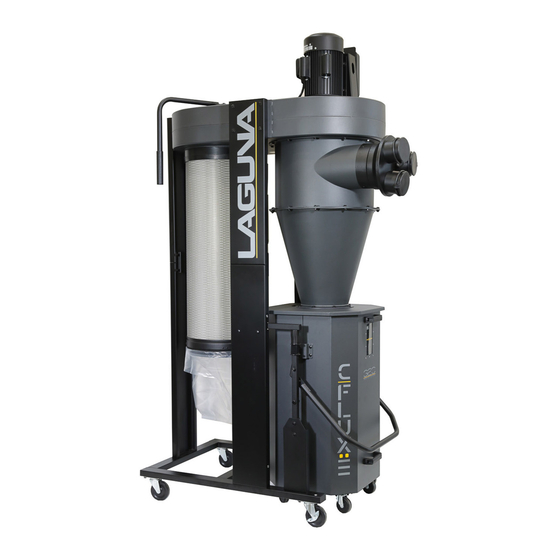
  • Seite 18: Allgemeine Beschreibung Der Maschine

    WARNUNG: VERGEWISSERN SIE SICH, DASS DIE STECKDOSE 3. Alle Teile aus dem oberen Polystyrol-Teil entfernen und auf die Seite ORDNUNGSMÄSSIG GEERDET IST. WENN SIE NICHT SICHER legen. SIND, LASSEN SIE DIE STECKDOSE VON EINER QUALIFIZIERTEN 4. Polystyrol-Verpackungsmaterial von dem oberen Teil der Maschine ELEKTROFACHKRAFT ÜBERPRÜFEN.
  • Seite 19 Schritt 5: Abscheidezylinder mit Schrauben (4) 8 mm*16 mm an den Staubtrichter (C) befestigen. Anschließend die Zyklontrommel mit Schrauben (12) 8 mm*19 mm und Unterlegscheiben (12) 8 mm*OD18*2T an den Staubtrichter aufsetzen. Danach den Zyklonkegel mit Schrauben (12) 8 mm*19 mm, Unterlegscheiben (24) und Muttern (12) 8 mm auf die Zyklontrommel aufsetzen.
  • Seite 20 Step Eight: With the help of another person, lift the unit up carefully to the right side up with the motor on top and the wheels at the bottom. Abb. 13 Abb. 16 Step Nine: Secure the lower triangular support plate to the base using Schritt 9: Untere Dreieck-Tragplatte mit Schrauben (4) 8 mm*19 mm und Schritt 12: Unteren Teil des Stabs an die Dreieck-Stützplatte mit 5/16”*3/4”...
  • Seite 21 Step Fifteen: Secure the topping with (2) M8*30mm hex bolts Schritt 15: Abdeckung mit Sechskantschrauben (2) M8*30 mm absichern. Step Eighteen: Secure the Octagon drum lid to the cyclone funnel using (8) 5/16”*3/4” hex bolts, (16) 5/16”*OD18*2t flat washers and (8) 5/16” hex nuts.. Make sure to first attach all the bolts on before tightening the bolts.
  • Seite 22 Step Twenty Five: Once completing the assembly, apply silicone to the inside of the drum including the base to seal and prevent air leakages and air flow loss. Schritt 22: Der rechte und der linke Teil sind mit 3 vorgebohrten Löchern Step Twenty Two: Both the left and right side lift panels have three bolt holes on versehen.
  • Seite 23 side lift plates are over the topping on the foot peddle bar assembly before lifting the foot peddle bar up. When not aligned, the drum will not be fully sealed and Step Twenty Eight: Insert the plastic bag inside the Octagon drum. Open and will interfere with the air flow.
  • Seite 24 Step Thirty Five: Insert the rotation shaft assembly into the canister filter. Slightly Step Thirty Nine: While holding the rotation shaft above the hole, insert the bend the paddles to get them into the canister filter. Schrauben (4) 6 mm*19 mm und Unterlegscheiben (4) 6 mm*OD19*2T bearing onto the rotation shaft and pushing it down to the canister cover plate.
  • Seite 25 Für Benutzer, die die Maschine oft verwenden, wird empfohlen, regelmäßig mit Druckluft zu reinigen, um eine maximale Filtrationseffizienz und lange Lebensdauer des Filters zu gewährleisten. FILTER HERAUSNEHMEN 1. Um das Filter herauszunehmen, ist nach Schritten 29-34 in umgekehrter Reihenfolge zu verfahren. 2.
  • Seite 26 Zyklon-Absauganlage saugt nicht (genügend) aus; schwache Leistung. Mögliche Lösung Mögliche Ursache 1. Filterbehälter entleeren. Filter reinigen. 1. Abfallbehälter oder Filterbehälter sind voll. Filter ist verstopft. 2. Anschlussstutzen reinigen. 2. Verstopfte Luftleitung. 3. Absauganlage näher an die abzusaugende Maschine bringen. Leitung 3.
  • Seite 27 CFlux3 Typové číslo: SF-351AX-LS (400V) Laguna Značka: Výrobce: Laguna Tools Inc 2072 Alton Pkwy, Irvine, CA 92606, USA Na vlastní zodpovědnost Tímto prohlašujeme, že tento produkt vyhovuje následujícím předpisům: - Směrnice o strojních zařízeních 2006/42/ES Konstruováno ve shodě s: ** EN ISO 12100: 2010, EN 60204-1: 2006 / AC: 2010...
  • Seite 28: 2200 W

    Vážený zákazníku, děkujeme za Váš nákup a vítejte ve skupině vlastníků strojů Laguna CFlux3. Rozumíme, že se na současném trhu nalézá nespočet dřevoobráběcích značek a vážíme si toho, že jste se rozhodli zakoupit právě stroj značky Laguna Tools od IGM.
  • Seite 29: Obecná Bezpečnostní Pravidla

    IGM nástroje a stroje s.r.o. • Údržbu strojů provádějte s opatrností. Dodržujte pokyny pro promazání a a Laguna Tools Inc. vypovídají jakoukoliv záruku a nenesou jakoukoliv údržbu příslušenství. zodpovědnost za zranění, která mohou při takovém použití vzniknout.
  • Seite 30: Specifika Motoru

    Požadavky na napájecí okruh odsavač, odpojte jej od napájení a počkejte, až se ventilátor zastaví—poté Pro stroj Laguna CFlux byste měli použít samostatný elektrický okruh. vyprázdněte sběrnou nádobu do vhodného vzduchotěsného kovového Okruh by měl by být chráněn 16A jističem vypínací charakteristiky C kontejneru.
  • Seite 31: Popis Částí Stroje

    IN ALL CASES, MAKE CERTAIN THE RECEPTACLE IN QUESTION IS PROPERLY GROUNDED. IF YOU ARE NOT SURE, HAVE A QUALIFIED ELECTRICIAN CHECK THE RECEPTACLE. 4. Popis částí stroje 240 VOLT Single-Phase Operation 4.1 Popis funkcí stroje The motor supplied with your machine is a 240 volt motor. It is shipped ready-to-run for 240volt operation.
  • Seite 32 mm*19 mm a podložek (16) 8 mm*OD18*2T. POZOR ZAROVNEJTE SVAŘENÉ LINKY NA KUŽELU CYKLONU A STŘEDNÍ ČÁSTI CYKLONU. Obr. 10 Obr. 7 Krok 6: Základnu připojte k jednotce třemi podpěrnými sloupky pomocí šroubů (6) 8 mm*19 mm a podložek (6) 8 mm*OD18*2T. Krok 3: Základnu (F) otočte a položte na 4 kolečka a připevněte k ní...
  • Seite 33 Step Nine: Secure the lower triangular support plate to the base using Krok 9: Připevněte spodní trojúhelníkovou nosnou desku k základně 5/16”*3/4” hex bolts and (4) 5/16”*OD18*2t flat washers. Follow the same steps pomocí šroubů (4) 8 mm*19 mm a podložek (4) 8 mm*OD18*2T. Totéž for the opposite side.
  • Seite 34 Krok 20: Sestavte dohromady boční panely odpadní nádoby pomocí šroubů s kovovým závitem (40) M4*12 mm. Poznamenejte si, který je levý a pravý panel; nesestavujte nesprávné strany panelu. Pokračujte dalším Step Twenty: Take the Octagon drum side panels and assemble together, krokem.
  • Seite 35 Step Twenty Three: Take the Octagon base panel with wheels and secure on to the bottom of the drum using M4*12mm sheet metal thread bolts. Step Twenty Six: Attach the handles to the top and bottom end on the front panel with the window display using (4) flat head Philip bolt, (4) 5/16”*OD23*2t flat washers and (4) 5/16”...
  • Seite 36 Step Twenty Nine: Place the drum insert inside over the plastic bag in the Octagon drum. Step Thirty Two: Install the Remote Switch Box to the switch plate on the motor Vnitřní část odpadní nádoby Drum insert using (4) 1/4”*3/4” hex bolts and (4) 1/4”*OD19*2t flat washers. Step Thirty Two: Install the Remote Switch Box to the switch plate on the motor using (4) 1/4”*3/4”...
  • Seite 37: Údržba Stroje

    Step Thirty Six: Assemble the canister filter to the dust chute. Tighten the band clamp and adjust the tightness accordingly to ensure the canister filter is tightly Step Forty: Secure and tighten the (1) 5/16”*3/4” and (1) 5/16”*OD23*2t flat fitted onto the dust chute. washer on the rotation shaft base.
  • Seite 38: Odstranění Problémů

    stroje použít čištění klikou. Pozn.: Pokud se plastový vak příliš zaplní, může se filtr hmotností vytáhnout z pásové svorky a vystavit tak uživatele potenciálně škodlivým Stačí jednoduše otočit klikou tam a zpět 4-5x. částicím. Použití stlačeného vzduchu 1. Uvolněte pružinovou sponu a vysypte odpadní pytel. Odpojte stroj od napájení! Pro uživatele, kteří...
  • Seite 39 CFlux3 Typové číslo: SF-351AX-LS (400V) Laguna Značka: Výrobca: Laguna Tools Inc 2072 Alton Pkwy, Irvine, CA 92606, USA Na vlastnú zodpovednosť týmto prehlasujeme, že tento produkt vyhovuje nasledujúcim predpisom: - Machinery Directive 2006/42/EC Konštruované v zhode s: ** EN ISO 12100: 2010, EN 60204-1: 2006 / AC: 2010 Technickú...
  • Seite 40 ďakujeme za Váš nákup a vitajte v skupine vlastníkov strojov Laguna CFlux3. Rozumieme, že sa na súčasnom trhu nachádza nespočetné množstvo drevoobrábacích značiek a vážime si toho, že ste sa rozhodli zakúpiť práve stroj značky Laguna Tools od IGM. Každý stroj Laguna Tools bol starostlivo navrhnutý s ohľadom na potreby zákazníka. Vďaka praktickým skúsenostiam spoločnosť...
  • Seite 41: Všeobecné Bezpečnostné Pravidlá

    IGM nástroje a stroje s. r. o. a Laguna Tools Inc. vypovedajú akúkoľvek záruku a nenesú akúkoľvek • Údržbu strojov vykonávajte opatrne. Dodržujte pokyny na premazanie a zodpovednosť za zranenia, ktoré môžu pri takomto použití vzniknúť.
  • Seite 42 alergickú reakciu. Uistite sa, že viete, akému druhu dreveného prachu Stroje je nastavený pre 400 voltov, 50HZ striedavý prúd. Pred budete vystavený v prípade, že môže nastať alergická reakcia. pripojením stroja k zdroju napájania sa uistite, že je spínač v polohe „VYPNUTÉ“.
  • Seite 43: Zostavenie Stroja

    IN ALL CASES, MAKE CERTAIN THE RECEPTACLE IN QUESTION IS PROPERLY GROUNDED. IF YOU ARE NOT SURE, HAVE A QUALIFIED ELECTRICIAN CHECK THE RECEPTACLE. 4. Popis častí stroja 240 VOLT Single-Phase Operation 4.1 Popis funkcií stroja The motor supplied with your machine is a 240 volt motor. It is shipped ready-to-run for 240volt operation.
  • Seite 44 Krok 2: Pripojte kolieska (4) 76 mm k základni (F) pomocou skrutiek (16) 8 mm*19 mm a podložiek (16) 8 mm*OD18*2T. POZOR ZAROVNAJTE ZVARENÉ LINKY NA KUŽELI CYKLÓNU A STREDNEJ ČASTI CYKLÓNU. Obr. 10 Obr. 7 Krok 6: Základňu pripojte k jednotke tromi podpernými stĺpikmi pomocou skrutiek (6) 8 mm*19 mm a podložiek (6) 8 mm*OD18*2T.
  • Seite 45 Step Nine: Secure the lower triangular support plate to the base using Krok 9: Pripevnite spodnú trojuholníkovú nosnú dosku k základni 5/16”*3/4” hex bolts and (4) 5/16”*OD18*2t flat washers. Follow the same steps pomocou skrutiek (4) 8 mm*19 mm a podložiek (4) 8 mm*OD18*2T. To for the opposite side.
  • Seite 46 Krok 20: Zostavte dohromady bočné panely odpadovej nádoby pomocou Step Twenty: Take the Octagon drum side panels and assemble together, skrutiek (40) M4*12 mm. Poznamenajte si, ktorý je ľavý a pravý panel; secure with (40) M4*12mm sheet metal thread bolts. Take note of the left and nezostavujte nesprávne strany panelu.
  • Seite 47 Step Twenty Three: Take the Octagon base panel with wheels and secure on to the bottom of the drum using M4*12mm sheet metal thread bolts. Step Twenty Six: Attach the handles to the top and bottom end on the front panel with the window display using (4) flat head Philip bolt, (4) 5/16”*OD23*2t flat washers and (4) 5/16”...
  • Seite 48 Step Twenty Nine: Place the drum insert inside over the plastic bag in the Octagon drum. Step Thirty Two: Install the Remote Switch Box to the switch plate on the motor Vnútorná časť odpadovej nádoby using (4) 1/4”*3/4” hex bolts and (4) 1/4”*OD19*2t flat washers. Drum insert Step Thirty Two: Install the Remote Switch Box to the switch plate on the motor using (4) 1/4”*3/4”...
  • Seite 49 Step Thirty Seven: Attach the canister cover plate to the dust chute using (12) Krok 37: Pripevnite veko na centrálnu separačnú časť pomocou skrutiek Krok 41: Kľučku pre otáčanie lopatkového systému pripevnite pomocou 3/16”*1/2” sheet metal thread bolts. (12) 5 mm*13. šesťhrannej skrutky (1) 8 mm*19 mm a podložky (1) 8 mm*OD30*3T na vrchnej časti hriadeľa.
  • Seite 50: Odstránenie Problémov

    odporúčame ho vyprázdniť. Pozn.: Ak sa plastové vrece príliš zaplní, môže sa filter hmotnosťou vytiahnuť z pásovej svorky a vystaviť tak používateľa potenciálne škodlivým časticiam. 1. Uvoľnite pružinovú sponu a vysypte odpadové vrece. 2. Vyprázdnite alebo vymeňte odpadové vrece a znovu ho upevnite pomocou pružinovej spony.
  • Seite 51: Ce-Megfelelőségi Nyilatkozat

    CFlux3 Típus szám: SF-351AX-LS (400V) Laguna Márka: Gyártó: Laguna Tools Inc 2072 Alton Pkwy, Irvine, CA 92606, USA Saját felelősségemre, kijelentem, hogy ez a termék megfelel a következő előírásoknak: - Machinery Directive 2006/42/EC A következőképpen tervezték: ** EN ISO 12100: 2010, EN 60204-1: 2006 / AC: 2010 A műszaki dokumentációt előkészítette:...
  • Seite 52 Köszönjük, hogy minket választott, és üdvözöljük a Laguna CFlux3 gépek tulajdonosainak csoportjában. Megértjük, hogy ma számtalan famegmunkáló gépet gyártó márka van a piacon, és nagyra értékeljük, hogy úgy döntött, hogy Laguna Tools gépet vásárol az IGM-től. Minden Laguna Tools gép az ügyfelek kívánsága szerint van megtervezve. A Laguna Tools a gyakorlati tapasztalatainak köszönhetően folyamatosan dolgozik az innovatív és professzionális gépek létrehozásán.
  • Seite 53: Általános Biztonsági Feltételek

    • Az elszívót csak a célnak megfelelően alkalmazza. Ha az elszívót nem a célnak megfelelően használja, az IGM nástroje a stroje s.r.o. és a Laguna • A gyártó által javasolt kiegészítőket használja, a nem megfelelő...
  • Seite 54: A Motor Tulajdonságai

    Tűzvédelmi intézkedések. Az elszívót csak tűzvédelemmel rendelkező Az áramkörre vonatkozó követelmények helyeken vagy a tűzvédelmi felszerelések közelségében, pld. tűzoltó A Laguna CFlux géphez ajánlott egyedülálló áramkör használata. Az készülék, használja. áramkör 16A-es biztosítékkal kell legyen védve, kapcsolási jellemző C (16/3/C). A gép tápkábelét a gyártásból egy 400V-os ipari csatlakozóval A pengeventilátorral kapcsolatos veszélyek.
  • Seite 55: Gép Részeinek Ismertetése

    IN ALL CASES, MAKE CERTAIN THE RECEPTACLE IN QUESTION IS PROPERLY GROUNDED. IF YOU ARE NOT SURE, HAVE A QUALIFIED ELECTRICIAN CHECK THE RECEPTACLE. 4. A gép részeinek ismertetése 240 VOLT Single-Phase Operation 4.1 A gép funkciójának ismertetése The motor supplied with your machine is a 240 volt motor. It is shipped ready-to-run for 240volt operation.
  • Seite 56 2. lépés A (16) 8 mm*19 mm csavarokkal és a (16) 8 mm*OD18*2T FIGYELEM: alátétekkel rögzítse a 76 mm (4) kerekeket a (F) alaphoz A CIKLON KÚPJÁNAK HEGESZTÉSI VARRATJA EGY VONALBAN KELL, HOGY LEGYEN A CIKLON KÖZÉPSŐ RÉSZ HEGSZTÉSI VARRATÁVAL. 10.
  • Seite 57 Step Nine: Secure the lower triangular support plate to the base using 9. lépés A (4) 8 mm*19 mm csavarokkal és a (4) 8 mm*OD18*2T 5/16”*3/4” hex bolts and (4) 5/16”*OD18*2t flat washers. Follow the same steps alátétekkel rögzítse az alaphoz a háromszögű hordozó lapot. Ugyan ezt for the opposite side.
  • Seite 58 20. lépés A (40) M4*12 mm csavarok segítségével szerelje össze a hulladék tartály oldalait. Győződjön meg, hogy melyik a jobb illetve a bal oldali panel, ne cserélje fel őket. Folytassa a következő lépéssel. Step Twenty: Take the Octagon drum side panels and assemble together, secure with (40) M4*12mm sheet metal thread bolts.
  • Seite 59 Step Twenty Three: Take the Octagon base panel with wheels and secure on to the bottom of the drum using M4*12mm sheet metal thread bolts. Step Twenty Six: Attach the handles to the top and bottom end on the front panel with the window display using (4) flat head Philip bolt, (4) 5/16”*OD23*2t flat washers and (4) 5/16”...
  • Seite 60 Step Twenty Nine: Place the drum insert inside over the plastic bag in the Octagon drum. A hulladék tartály belső része Drum insert Step Thirty Two: Install the Remote Switch Box to the switch plate on the motor using (4) 1/4”*3/4” hex bolts and (4) 1/4”*OD19*2t flat washers. Step Thirty Two: Install the Remote Switch Box to the switch plate on the motor using (4) 1/4”*3/4”...
  • Seite 61 Step Thirty Six: Assemble the canister filter to the dust chute. Tighten the band clamp and adjust the tightness accordingly to ensure the canister filter is tightly Step Forty: Secure and tighten the (1) 5/16”*3/4” and (1) 5/16”*OD23*2t flat fitted onto the dust chute. washer on the rotation shaft base.
  • Seite 62 A gép jó állapotban tartása érdekében, javasoljuk, minden használat után a szűrő karral való tisztítását. Megjegyzés: Ha a műanyag zsák megtelik, a szűrőt a súlya kihúzhatja leszorítóból, és a felhasználót potenciálisan káros részecskék hatásának Elegendő 4-5-ször elforgatni a kart egy majd a másik irányba. teheti ki.
  • Seite 63 CFlux3 Numer seryjny: SF-351AX-LS (400V) Laguna Marka: Producent: Laguna Tools Inc 2072 Alton Pkwy, Irvine, CA 92606, USA Z pełną odpowiedzialnością oświadczamy, że produkt, który został opisany w niniejszej instrukcji obsługi jest zgodny z następującymi przepisami: - Machinery Directive 2006/42/EC...
  • Seite 64: Montaż Maszyny

    Szanowny Kliencie, Dziękujemy za zakup i witamy Cię wśród właścicieli i użytkowników maszyn Laguna CFlux3 od firmy IGM. Zdajemy sobie sprawę, że na rynku istnieje obecnie niezliczona ilość maszyn przeznaczonych do obróbki drewna i dlatego dziękujemy za zaufanie, które nam okazałeś...
  • Seite 65: Ogólne Zasady Bezpieczeństwa

    OSTRZEŻENIE: NIEZASTOSOWANIE SIĘ DO NINIEJSZYCH ZASAD MOŻE SPOWODOWAĆ POWAŻNE OBRAŻENIA. zaprojektowane. Jeśli urządzenie będzie używane w sposób niezgodny z przeznaczeniem, firma IGM narzędzia i maszyny s.r.o. oraz Laguna Tools SPRAWDŹ USZKODZONE CZĘŚCI MASZYNY. Przed ponownym Inc. zrzekają się jakiejkolwiek gwarancji i nie ponoszą odpowiedzialności za obrażenia, które mogą...
  • Seite 66 Noś respirator. Drobny pył, którego filtr nie może zachwycić, będzie 3.5 Specyfikacja silnika podczas pracy wdmuchiwany do warsztatu. Dlatego, aby zmniejszyć Urządzenie jest ustawione na 400 woltów, 50 HZ prądu przemiennego. ryzyko trwałego uszkodzenia układu oddechowego należy podczas pracy Przed podłączeniem urządzenia do źródła zasilania upewnij się, że zawsze nosić...
  • Seite 67: Opis Części Urządzenia

    podłączona do odpowiedniego gniazda przemysłowego lub może być montażem urządzenia, należy zapoznać się z poniższymi instrukcjami również podłączona do listwy zaciskowej i okablowania odpowiadającego dotyczącymi rozpakowania. zalecanemu zabezpieczeniu. 1. Ostrożnie odetnij i wyrzuć pasy transportowe. UWAGA! PODŁĄCZENIE MOŻE BYĆ WYKONANE WYŁĄCZNIE 2.
  • Seite 68 Rys. 6 Krok 2: Przymocuj kółeczka 76 mm (4) do podstawy (F) za pomocą śrub (16) 8 mm * 19 mm (16) i podkładek (16) 8 mm * OD18 * 2T. Rys. 9 Krok 5: Przymocuj walec separacyjny do centralnej separacyjnej części za pomocą...
  • Seite 69 Step Seven: Secure the (3) upright support reinforcement plates (T) using (12) 5/16”*3/4” hex bolts and (12) 5/16”*OD18*2t flat washers. Rys. 12 Rys. 15 3HP Mobile Dust Cyclone Manual Step Eight: With the help of another person, lift the unit up carefully to the Krok 8: Z pomocą...
  • Seite 70 Krok 17: Zabezpiecz za pomocą śrub (2) 9 mm * 21 mm. Upewnij się, że łeb śruby znajduje się na wewnętrznej stronie systemu podnoszącego. Ostrożnie dokręć śrubę. Jeśli śruba jest zbyt mocno dokręcona to system podnoszący nie będzie działał płynnie. Jeśli natomiast jest zbyt luźna, nie podniesie pojemnika odpadowego.
  • Seite 71 Step Twenty Three: Take the Octagon base panel with wheels and secure on to Step Twenty: Take the Octagon drum side panels and assemble together, the bottom of the drum using M4*12mm sheet metal thread bolts. secure with (40) M4*12mm sheet metal thread bolts. Take note of the left and right panels;...
  • Seite 72 Step Twenty Nine: Place the drum insert inside over the plastic bag in the Step Twenty Six: Attach the handles to the top and bottom end on the front Octagon drum. panel with the window display using (4) flat head Philip bolt, (4) 5/16”*OD23*2t Wewnętrzna część...
  • Seite 73 Step Thirty Six: Assemble the canister filter to the dust chute. Tighten the band clamp and adjust the tightness accordingly to ensure the canister filter is tightly fitted onto the dust chute. Step Thirty Two: Install the Remote Switch Box to the switch plate on the motor using (4) 1/4”*3/4”...
  • Seite 74: Opróżnianie Pojemnika Na Odpady

    6. Konserwacja Krok 40: Zabezpiecz i dokręć śrubę (1) 8 mm * 19 mm oraz podkładkę (1) Step Forty: Secure and tighten the (1) 5/16”*3/4” and (1) 5/16”*OD23*2t flat 8 mm * OD23 * 2T na podstawie wału. washer on the rotation shaft base. CZYSZCZENIE FILTRA Aby cyklonowe urządzenie odciągowe działało prawidłowo należy zapewnić...
  • Seite 75: Rozwiązywanie Problemów

    7. Rozwiązywanie problemów Maszyna nie uruchamia się lub wyłącznik automatycznywyłącza się. Możliwa przyczyna Możliwe rozwiązanie 1. Zasilanie jest wyłączone lub uszkodzone. 1. Upewnij się, że zasilanie jest włączone i ma prawidłowe napięcie. 2. Ścienny bezpiecznik / wyłącznik automatyczny jest 2. Wyposaż w odpowiedni wyłącznik automatyczny, wymień słaby wyłącznik przepalony / wyłączony.
  • Seite 76 Parts Breakdown Parts breakdown / Ersatzteilliste / Seznam součástek / Zoznam súčiastok / Alkatrész lista / Lista komponentów 山富機械公司 2016.11.15 出圖章 www.igm.cz -76-...
  • Seite 77 SECTION A SECTION A (Close up view) (Close up view) 山富機械 2016. 出圖 www.igm.cz -77-...
  • Seite 78 SECTION B (Close up view) SECTION B (Close up view) MDC CF32201 SPARE PARTS LIST REV. C www.igm.cz -78-...
  • Seite 79 SECTION C (Close up view) SECTION C (Close up view) MDC CF32201 SPARE PARTS LIST REV. C www.igm.cz -79-...
  • Seite 80 SECTION D SECTION D (Close up view) (Close up view) MDC CF32201 SPARE PARTS LIST REV. C www.igm.cz -80-...
  • Seite 81 Part list / Ersatzteilliste / Seznam součástek / Zoznam súčiastok / Alkatrész lista / Lista komponentów Ref No Part Name Description Ref No Part Name Description 16H OCTAGON DRUM BACK PANEL 1 MOTOR 3HP/415V/50Hz/3Phase 16I OCTAGON DRUM RIGHT PANEL 1A MOTOR GASKET 16J OCTAGON DRUM LEFT PANEL 2 MOTOR SUPPORT BASE 16K LEFT SIDE PLATE...
  • Seite 82 IGM nástroje a stroje s.r.o., Ke Kopanině 560, Tuchoměřice, 252 67, Czech Republic, E.U. +420 220 950 910, www.igm.cz © 2021 IGM nástroje a stroje s.r.o.

Inhaltsverzeichnis