RADEMACHER 9492 Gebrauchsanleitung Zur Inbetriebnahme
Quelle: rademacher.de

Inhaltszusammenfassung für RADEMACHER 9492
- Seite 1 Bridge Gebrauchsanleitung zur Inbetriebnahme..............1 Bridge Translation of the commissioning instruction manual ........25 Artikel-Nr. / Item no.: 3400 00 19 Typ / Type: 9492 VBD 708-1 (06.20)
-
Seite 2: Inhaltsverzeichnis
Inhalt Diese Anleitung..............3 Anwendung dieser Anleitung ............3 Gefahrensymbole ...............4 Verwendete Darstellungen und Symbole ........4 Sicherheitshinweise ............5 Bestimmungsgemäße Verwendung ..........6 Nicht bestimmungsgemäßer Gebrauch ........7 Glossar - Begriffserklärung ..............8 Lieferumfang ...............9 Anschlüsse und Taster der Bridge ........ 10 Die Kontrollleuchten der Bridge ..........11 Funktionsbeschreibung .......... -
Seite 3: Diese Anleitung
Dritte bei. ◆ Bei Schäden die durch Nichtbeachtung dieser Anleitung und der Sicherheitshinweise entstehen, erlischt die Garantie. Für Folgeschäden, die daraus resultieren, übernehmen wir keine Haftung. Weitere zugehörige Informationen Weitere Informationen zur Konfiguration finden Sie im Servicebereich unserer Internetseite: www.service.rademacher.de... -
Seite 4: Gefahrensymbole
2. Gefahrensymbole In dieser Anleitung verwenden wir folgende Gefahrensymbole: Lebensgefahr durch Stromschlag Gefahrenstelle / gefährliche Situation 2.1 Verwendete Darstellungen und Symbole Darstellung Beschreibung Handlungsabläufe Aufzählung ◆ 1) oder a) Listen weitere nützliche Informationen... -
Seite 5: Sicherheitshinweise
◆ Die Verwendung eines Netzteils mit einer anderen Spannung als in dem zum Lieferumfang gehörenden Netzteil, kann zu Schäden an der Bridge oder zu einem Kurzschluss führen. ◆ Verwenden Sie nur Original-Zubehör von RADEMACHER. Die Netzsteckdose und das Netzteil müssen immer frei zugänglich sein. -
Seite 6: Bestimmungsgemäße Verwendung
◆ Installieren Sie die Bridge nicht während eines Gewitters. 3.1 Bestimmungsgemäße Verwendung Verwenden Sie die Bridge ausschließlich zur Einstellung und Steuerung von RADEMACHER Geräten. Einsatzbedingungen ◆ Betreiben Sie die Bridge nur in trockenen Räumen. ◆ Zum Anschluss vor Ort ist eine 230 V/50 Hz Netzsteckdose erforderlich. -
Seite 7: Nicht Bestimmungsgemäßer Gebrauch
3.2 Nicht bestimmungsgemäßer Gebrauch Die falsche Verwendung kann zu Personen oder Sachschaden führen. ◆ Verwenden Sie das vorhandene Funksystem (z. B. das DuoFern Funksystem) und seine Komponenten nie zur Fernsteuerung von Geräten und Anlagen mit erhöhten sicherheitstech- nischen Anforderungen oder erhöhter Unfallgefahr. Dies bedarf zusätzlicher Sicherheitseinrichtungen. -
Seite 8: Glossar - Begriffserklärung
◆ Zentrale Steuereinheit für RADEMACHER Funk-Produkte ◆ Die Konfiguration und Steuerung kann per Smartphone, Tablet oder PC erfolgen LAN (Local Area Network) ◆ Abkürzung für ein kabelgebundenes, lokales Computer-Netzwerk WR Connect ◆ RADEMACHER Internetdienst zum Fernzugriff auf die Bridge von jedem internetfähigen Endgerät aus... -
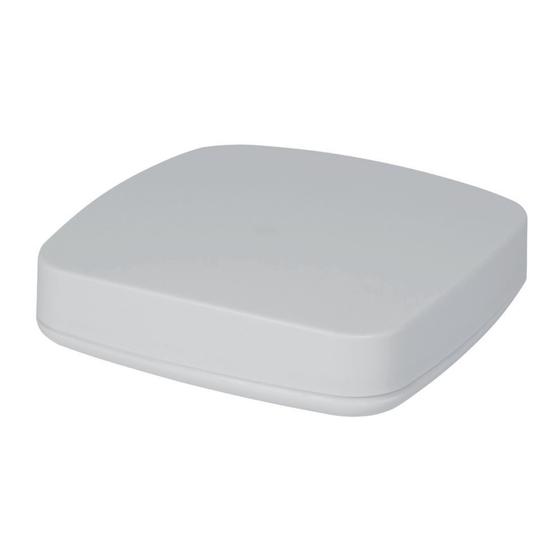
Seite 9: Lieferumfang
4. Lieferumfang Lieferumfang: a) Bridge b) Steckernetzteil c) LAN-Kabel d) Gebrauchsanleitung Vergleichen Sie nach dem Auspacken den Packungsinhalt mit diesen Angaben. Das Typenschild der Bridge befindet sich auf der Unterseite des Geräts. -
Seite 10: Anschlüsse Und Taster Der Bridge
5. Anschlüsse und Taster der Bridge DC 5 V / 3 A Anschluss des Netzteils (LAN) Anschluss an das lokale Netzwerk 3) Reset Resettaste * Bei einem Reset werden alle Daten gelöscht und die Werkseinstellungen werden geladen. Das Gerät ausschalten, dazu die Stromzufuhr unter- brechen. -
Seite 11: Die Kontrollleuchten Der Bridge
5.1 Die Kontrollleuchten der Bridge LEDs Beschreibung Status Einschalten rot + grün leuchten blinkt Bootvorgang grün leuchtet Betriebsbereit grün leuchtet Softwareupdate verfügbar grün blinkt Softwareupdate rot + grün blinken leuchtet Reset wird durchgeführt grün aus für 2 s... -
Seite 12: Funktionsbeschreibung
Internetbrowser Ihres Computers aufrufen. Die Smart-Home-App HomePilot® für Android oder iOS Produkte erhalten Sie im entsprechenden App-Store. Aufruf der Benutzeroberfläche über den RADEMACHER- Dienst „WR Connect“. Zusätzlich kann die Benutzeroberfläche der Bridge von jedem internetfähigen Endgerät weltweit aufgerufen werden. Dazu ist eine kostenlose Anmeldung und Registrierung auf dem RADEMACHER Server erforderlich. - Seite 13 6. Funktionsbeschreibung Hinweis zur Internetverbindung RADEMACHER empfiehlt Ihnen, die Bridge dauerhaft mit dem Internet zu verbinden, um Ihnen Updates für Neuprodukte und neue Funktionen bereitstellen zu können. Zudem stellen Sie mit der Internetverbindung sicher, dass wir Ihnen den optimalen Service und sicherheitsrelevante Updates zur Verfügung stellen können.
-
Seite 14: Technische Daten
7. Technische Daten Bridge: Versorgungsspannung: 5 V / 3 A (DC) Nennleistung: max. 15 W Min. Leistungsaufnahme: ca. 2 W LAN: 1 x 100 Mbit Ethernet Sendefrequenz: 434,5 MHz Sendeleistung: max. 10 mW Reichweite: - im Gebäude: bis zu 20 m (je nach Bausubstanz) - im Freien: bis zu 60 m Maximale Anzahl... -
Seite 15: Systemvoraussetzungen
7.1 Systemvoraussetzungen Zur Ersteinrichtung der Bridge benötigen Sie: ◆ Einen Internetzugang ◆ Einen Router mit DHCP-Server und einem freien LAN-Anschluss ◆ Eine frei zugängliche Netzsteckdose (230 V / 50 Hz) ◆ Ein mobiles Endgerät (Smartphone / Tablet) mit einem aktuellen Android- oder iOS-Betriebssystem und / oder einen handelsüblichen Standard-Computer mit einem aktuellen Internetbrowser Aufstellort... -
Seite 16: Die Bridge In Betrieb Nehmen
8. Die Bridge in Betrieb nehmen 8.1 Den Router anschließen Systemvoraussetzungen am Router ◆ Der Router muss über einen DHCP-Server verfügen. ◆ Der DHCP-Server des Routers muss aktiviert sein. Zuweisung von IP-Adressen im Router In einem Netzwerk bekommen alle am Router angeschlossenen Netzwerkgeräte (z.B. - Seite 17 8.1 Den Router anschließen Stecken Sie das beiliegende LAN-Kabel in den LAN-Anschluss der Bridge und verbinden Sie es mit einem freien LAN-Anschluss Ihres Routers. LAN1 LAN2 LAN3 LAN4 Nach Anschluss des Steckernetzteils (s. Kap. 8.2) wird bei korrektem Anschluss die grüne LED am LAN- Anschluss leuchten.
-
Seite 18: Das Netzteil Anschließen
8.2 Das Netzteil anschließen Schließen Sie das beiliegende Netzteil an den Stromeingang [ DC 5 V/3 A ] der Bridge an und stecken Sie das Netzteil an- schließend in eine freie 230 V / 50 Hz Netzsteckdose. Nach dem Einschalten der Stromversorgung beginnt die LED grün zu blinken und die rote LED blinkt während des Bootvorgangs. -
Seite 19: Die Benutzeroberfläche Aufrufen
Sie müssen sich dazu mit dem Smartphone im sel- ben Netzwerk wie die Bridge befinden. 9.1 Navigation und Bedienung Die Navigation und die Bedienung auf der Benutzeroberfläche werden in den FAQs, Tutorials (Videos) etc. im Servicebereich auf unserer Homepage erklärt. www.service.rademacher.de... -
Seite 20: Was Tun, Wenn Die Bridge Nicht Erkannt Wird
9.2 Was tun, wenn die Bridge nicht erkannt wird Je nach verwendetem Routertyp kann es vorkommen, dass die Bridge in der App nicht automatisch erkannt wird oder die Eingabe des Hostnamens im Browser nicht funktioniert. Wenn das der Fall ist, müssen Sie eventuell die IP-Adresse der Bridge eingeben. -
Seite 21: Softwareupdate
9.3 Softwareupdate Mit Hilfe von Firmware-Updates wird die Bridge fortlaufend aktuali- siert. Ob ein Update verfügbar ist, erkennen Sie an der grün blinkenden LED oder in der Smart-Home-App HomePilot® bzw. Benutzeroberfläche im Browser an einem roten Update-Icon. Während des Softwareupdates darf die Spannungs- versorgung nicht unterbrochen werden. -
Seite 22: Was Tun, Wenn
Wenden Sie sich bitte an unseren Service, falls das Problem nicht behoben wurde, s. Seite 24. 11. Vereinfachte EU-Konformitätserklärung Hiermit erklärt die RADEMACHER Geräte-Elektronik GmbH, dass die Bridge der Richtlinie 2014/53/EU (Funkanlagenrichtlinie) entspricht. Der vollständige Text der EU-Konformitätserklärungen ist unter der folgenden Internetadresse verfügbar:... -
Seite 23: Garantiebedingungen
Fachhändler erworben wurde. Dies ist durch Vorlage einer Rechnungskopie nachzuweisen. Innerhalb der Garantiezeit auftretende Mängel beseitigt RADEMACHER kostenlos entweder durch Reparatur oder durch Ersatz der betreffenden Teile oder durch Lieferung eines gleich- wertigen oder neuen Ersatzgerätes. Durch Ersatzlieferung oder Reparatur aus Garantiegründen tritt... - Seite 24 RADEMACHER Geräte-Elektronik GmbH Buschkamp 7 46414 Rhede (Deutschland) info@rademacher.de www.rademacher.de Service: * 30 Sekunden kostenlos, danach Hotline 01807 933-171* 14 ct/Minute aus dem dt. Festnetz Telefax +49 2872 933-253 bzw. max. 42 ct/Minute aus dem service@rademacher.de dt. Mobilfunknetz.
- Seite 25 Bridge Gebrauchsanleitung zur Inbetriebnahme..............1 Bridge Translation of the commissioning instruction manual ........25 Item no.: 3400 00 19 Type: 9492 VBD 708-1 (06.20)