Infraworld HOTLINE V2 Gebrauchs- Und Montageanleitung

Inhaltszusammenfassung für Infraworld HOTLINE V2
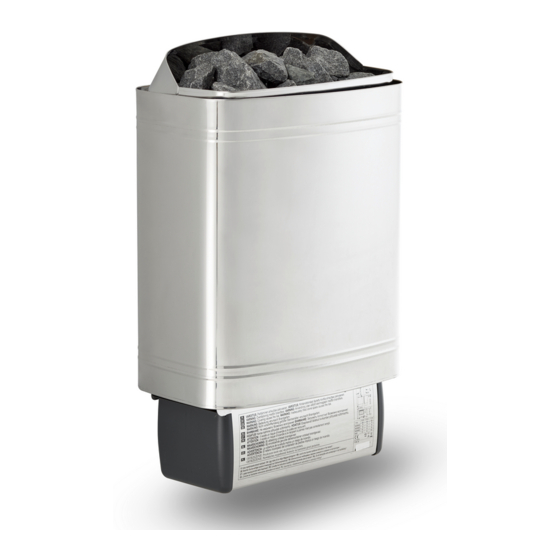
- Seite 1 HOTLINE V2 6 kW, 8 kW, 9 kW Instructions for Installation and Use of Electric Sauna Heater Gebrauchs- und Montageanleitung des Elektrosaunaofens HOTLINE V2 TPI GmbH 6,0 kW Art. Nr. B6760 HOTLINE V2 8,0 kW Art. Nr. B6761 HOTLINE V2 9,0 kW Art.
-
Seite 2: Inhaltsverzeichnis
These instructions for installation and use are Diese Montage- und Gebrauchsanleitung richtet intended for the owner or the person in charge of sich an den Besitzer der Sauna oder an die für die the sauna, as well as for the electrician in charge Pflege der Sauna verantwortliche Person, sowie an of the electrical installation of the heater. -
Seite 3: Instructions For Use
1. INSTRUCTIONS FOR USE 1. BEDIENUNGSANLEITUNG 1.1. Piling of the Sauna Stones 1.1. Aufschichten der Saunaofensteine The piling of the sauna stones has a great effect on Die Schichtung der Ofensteine hat eine große Aus- the functioning of the heater (figure 1). wirkung auf die Effizienz des Ofens (Abb. -
Seite 4: Heating Of The Sauna
1.2. Heating of the Sauna 1.2. Erhitzen der Saunakabine When operating the heater for the first time, both the Beim ersten Erwärmen sondern sich von Saunaofen heater and the stones emit smell. To remove the smell, und Steinen Gerüche ab. Um diese zu beseitigen, the sauna room needs to be efficiently ventilated. -
Seite 5: Warnings
1.6. Warnings 1.6. Warnungen Staying in the hot sauna for long periods of Ein langer Aufenthalt in einer heißen Sauna • • time makes the body temperature rise, which führt zum Ansteigen der Körpertemperatur, may be dangerous. was gefährlich sein kann. Keep away from the heater when it is hot. -
Seite 6: Störungen
1.7. Troubleshooting 1.7. Störungen All service operations must be done by profes- Alle Wartungsmaßnahmen müssen von quali- sional maintenance personnel. fiziertem technischem Personal durchgeführt werden. The heater does not heat. Check that the fuses to the heater are in good Der Ofen wärmt nicht. -
Seite 7: Sauna Room
2. SAUNA ROOM 2. SAUNAKABINE 2.1. Sauna Room Structure 2.1. Struktur der Saunakabine Figure 2. Abbildung 2. A. Insulation wool, thickness 50–100 mm. The A. Isolierwolle, Stärke 50–100 mm. Die Saunaka- sauna room must be insulated carefully so that bine muss sorgfältig isoliert werden, damit der the heater output can be kept moderately low. -
Seite 8: Sauna Room Ventilation
2.2. Sauna Room Ventilation 2.2. Belüftung der Saunakabine The air in the sauna room should change six times Die Saunaluft sollte sechsmal pro Stunde ausge- per hour. Figure 3 illustrates different sauna room tauscht werden. Abb. 3 zeigt verschiedene Optio- ventilation options. -
Seite 9: Instructions For Installation
Seitenfläche zur Wand, zur oberen Bank oder von der Vorderfläche zur oberen Bank oder zum zum oberen Geländer oberen Geländer Hotline V2 6kW 50 Hotline V2 8kW 100 Hotline V2 9kW 120 Figure 4. Safety distances (all dimensions in millimeters) -
Seite 10: Connecting The Connecting Cable To The Heater
Figure 5. Removal of the end-piece fastening screws Abbildung 5. Lösen der Befestigungsschrauben der Stirnstücke Figure 6. Connecting the connection cable Abbildung 6. Befestigung des Anschlußkabels 3.1.1. Connecting the connecting cable to the 3.1.1. Befestigung des Anschlußkabels am Saunaofen heater Die Befestigung des Anschlußkabels geschieht am leich- It is simplest to connect the heater connecting cable testen, wenn der Saunaofen nicht fest montiert ist. -
Seite 11: Electrical Connections
3. Lift the heater to angebracht werden. D min. mm the rack on the Heben Sie den Hotline V2, 6 kW wall so that the Saunaofen so auf Hotline V2, 8 kW fastening hooks das Gestell an der Hotline V2, 9 kW of the lower part Wand, daß... - Seite 12 Figure 8. Installing the sensor (all dimensions in millimeters) Abbildung 8. Installation der Fühler (alle Abmessungen in Millimetern) N L1 L2 L3 400 V 3N~ Figure 9. Electrical connections of heater Abbildung 9. Elektroanschlüsse des Saunaofens...
-
Seite 13: Spare Parts
4. SPARE PARTS 4. ERSATZTEILE 1 2 3 4 Heating element 1500 W/230 V Heizelement 1500 W/230 V ZSK-690 Heating element 2000 W/230 V Heizelement 2000 W/230 V ZSK-700 Heating element 2670 W/230 V Heizelement 2670 W/230 V ZSK-710 Heating element 3000 W/230 V Heizelement 3000 W/230 V 9 kW ZSK-720...