Herunterladen Inhalt Inhalt Diese Seite drucken

Werbung

Verfügbare Sprachen
  • DE

Verfügbare Sprachen

  • DEUTSCH, seite 13
AGPTEK
C101B1
Quick Start Guide
Pulse Oximeter

Werbung

Inhaltsverzeichnis
loading

Inhaltszusammenfassung für AGPtek C101B1

  • Seite 1 AGPTEK C101B1 Quick Start Guide Pulse Oximeter...
  • Seite 2 EN>DE>FR>IT>ES>NL English 01 - 09 Deutsch 10 - 19 Français 20 - 30 Italiano 31 - 40 41 - 50 Español 51 - 60 Nederland...
  • Seite 3: Inhaltsverzeichnis

    Content 1.Introduction ........1 2.How to Use Properly ......2 3.Customize Settings ......3 4.Important Notice ....... 7 5.Safety Instructions ......7 6.Procuct Classification ......7 7.Maintenance & Preservation ..7 8.Product Declaration ......7 9.Problems & Solutions ....... 7 10.Contact Us ........
  • Seite 4: Introduction

    Introduction Pulse Oximeters are considered a suitable alternative, though by no means equal to, blood gas testing. It can be applied for Fitness Monitoring and High Altitude Sports. If you want to use for disease surveillance such as COPD Management, Asthma Patient Care and Piece of Mind for Pulmonary Patients, please consult your doctor.
  • Seite 5: How To Use Properly

    Power Indication SpO2 Value Pulse Bar Graph Pulse Power Rate Button/ Value Setting How to Use Properly 1. Press the bottom to open the...
  • Seite 6: Customize Settings

    probe. 2. Insert the finger. 3. Press button to activate the oximeter. You will need to wait for 5 more seconds for the pulse oximeter to stabilize its readings. Customize Settings Non-professionals are advised not to customize the settings and use the default mode. After power on, long press button (>2s)
  • Seite 7 parameter setting interface. And short press the button ( < 1s) for selecting parameter. Then, just wait parameter stabilize confirm. Long press button (>2s).  It will enter parameter setting interface. As the display as Pic.1: You can select the SpO2 parameter from 85 to 99 for warning.
  • Seite 8 button ( > 2s) to select the PRbpm parameter from 100 to 140 for the highest setting warning (Pic.2). At last, long press button ( > 2s) again to select the PRbpm parameter from 50 to 80 for the lowest setting warning (Pic.3).
  • Seite 9 Sound Setting. Continue to  long press ( > 2s) button As the display as Pic.4 and Pic.5,“OFF”and“ON”will be selected to turn on or off the buzzer. Pic.4 Pic.5 Normal Range Healthy Individuals in a Quiet State: SpO2% >94 60<PR<120...
  • Seite 10: Important Notice

    Display Direction Change.  When the panel shows the readings, short press button twice to change the display direction. Short press button once again to return to the original display direction. Important Notice To get the best reading possible,...
  • Seite 11 you should NOT: Test with your painted fingers  toenails which obstruct proper readings – use an earlobe instead in this case. Test under bright overhead  lighting, including sunlight, can effect readings – take your readings in rooms with normal low-light conditions.
  • Seite 12: Contact Us

    Contact Us For the detailed instruction of this product, please visit: http://www.agptek.com. If you have any problem or suggestions, please contact support@agptek.com.
  • Seite 13 Inhalt 1.Einführung ........10 2.Richtige Verwendung ..... 11 3.Einstellungen anpassen ....12 4.Wichtiger Hinweis ......17 5.Sicherheitshinweise ......17 6.Produkt Klassifikation ..... 17 7.Wartung & Erhaltung ..... 17 8.Produktdeklaration ......17 9.Probleme & Lösungen ....17 10.Probleme & Lösungen ....19 NOTE: Informationen zu Teil 5.
  • Seite 14: Einführung

    Einführung Pulsoximeter werden geeignete Alternative angesehen, sind jedoch keineswegs gleichbedeutend mit Blutgastests. Es kann für Fitness-Monitoring Hochsport angewendet werden. Wenn Sie zur Überwachung von Krankheiten COPD-Management, Asthma-Patientenversorgung Geisteszustand für Lungenpatienten verwenden...
  • Seite 15: Richtige Verwendung

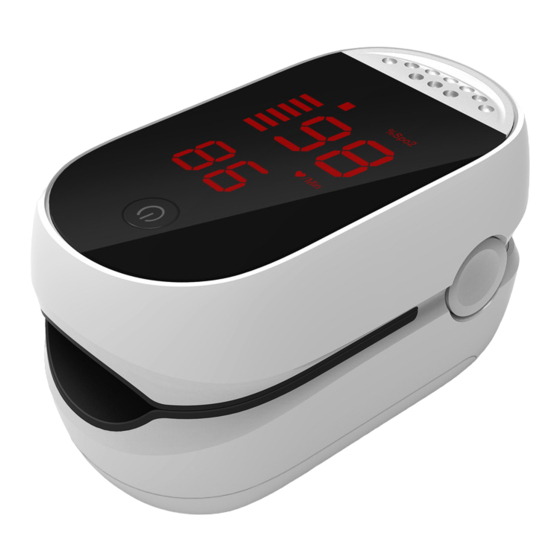
    möchten, wenden Sie sich bitte an Ihren Arzt. Betriebs- anzeige SpO2- Pulsbalk Wert Diagram Pulsfrequ Ein/Auss enz-wert -chalter /Einstellen Richtige Verwendung...
  • Seite 16: Einstellungen Anpassen

    1. Drücken Sie auf den Unten, um es zu öffnen. 2. Führen Sie den Finger ein. 3. Drücken Sie die Taste , um das Oximeter zu aktivieren. Sie müssen 5s warten, bis Pulsoximeter seine Messwerte stabilisiert hat. Einstellungen anpassen Nicht-Profis wird empfohlen, Einstellungen...
  • Seite 17 Drücken nach Einschalten lange die Taste (>2s) um die Einstellungs -schnittstelle aufzurufen. Drücken Sie kurz die Taste ( < 1s), um den Parameter auszuwählen. Warten Sie, bis sich der Parameter stabilisiert und bestätigt hat. Drücken Sie die Taste (>  2s).
  • Seite 18 können den SpO2-Parameter 85-99 Warnung auswählen. Drücken Sie dann die Taste  2s), > PRbpm-Parameter 100 - 140 für die Warnung mit dem höchsten Wert einstellen (Bild 2). Drücken Sie weiter die Taste ( > 2s), um den PRbpm-Parameter 50 - 80 für Warnung niedrigsten Wert einstellen (Bild 3).
  • Seite 19 Bild 3 Bild 2 Bild 1 Toneinstellung. Drücken Sie  die Taste (>2s), als Bild 4 und 5 wird ”OFF”und “ON” ausgewählt, ein-/auszuschalten.
  • Seite 20 Bild 4 Bild 5 Normalbereich für gesunde Personen in einem ruhigen Zustand: SpO2% >94 60<PR<120 Anzeigerichtungsänderung.  Wenn auf dem Bedienfeld die Messwerte angezeigt werden, drücken zweimal Taste...
  • Seite 21 Anzeigerichtung zu ändern. Drücken Taste erneut, ursprünglichen Anzeigerich- tung zurückzukehren. Wichtiger Hinweis Um die bestmögliche Lesbarkeit zu erzielen, sollten Sie NICHT: Testen Ihren  lackierten Fingern...
  • Seite 22 Zehennägeln, korrekten Messwerte beeinträchtigen können. Verwenden Sie in diesem Fall stattdessen ein Ohrläppchen. Tests unter heller  Deckenbeleuchtung, einschließlich Sonnenlicht, können Messwerten führen. Nehmen Ihre Messwerte in Räumen mit normalen oder schlechten Lichtverhältnissen vor. Bewegen Sie sich während ...
  • Seite 23: Kontaktieren Sie Uns

    Testens, Körperbewegungen Zittern, Niesen usw. können korrekten Messwerte beeinträchtigen. Kontaktieren Sie uns Eine ausführliche Anleitung zu diesem Produkt finden Sie unter: http://www.agptek.com. Wenn Probleme oder Vorschläge haben, wenden Sie sich bitte support@agptek.com.
  • Seite 24 Contenu 1.Introduction ........20 2.Comment Utiliser Correctement .. 21 3.Personnaliser les Paramètres ..22 4.Remarque Important ...... 28 5.Consignes de Sécurité ....28 6.Classification des Produits .... 28 7.Maintenance & Preservation ..28 8.Déclaration de Produit ....28 9.Problèmes & Solutions ....28 10.Contactez Nous ......
  • Seite 25: Introduction

    Introduction Les oxymètres de pouls sont considérés comme une option appropriée, bien qu'ils ne soient tout équivalents à l'analyse des gaz du sang. Il peut être utilisé pour surveillance condition physique et les sports de haute altitude. vous souhaitez l'utiliser pour la surveillance de maladies telles que la gestion de la BPCO, les soins aux asthmatiques et la tranquillité...
  • Seite 26: Comment Utiliser Correctement

    d'esprit patients pulmonaires, veuillez consulter votre médecin. Indication Puissance Valeur SpO2 Graphique à Barres Valeur d'Impulsion du Taux Bouton d' d'Impul Alimentation -sion /Réglage Comment Utiliser Correctement...
  • Seite 27: Personnaliser Les Paramètres

    1. Appuyez sur le bas pour ouvrir la sonde. 2. Insérez le doigt. Appuyez bouton pour activer l'oxymètre. Vous devrez attendre 5 secondes de plus pour que l'oxymètre de pouls stabilise ses relevés. Personnaliser les...
  • Seite 28 Paramètres conseillé non-professionnels de ne pas personnaliser les paramètres et d'utiliser le mode par défaut. Après d’allumer, appuyez longuement sur le bouton ( > 2s) pour accéder à l'interface de paramétrage. appuyez brièvement bouton ( < 1s) pour sélectionner paramètre. Attendez ensuite paramètre...
  • Seite 29 confirmez. Appuyez longuement sur le  bouton ( > 2s). Il entrera dans l'interface paramétrage. Comme Fig.1 : Vous pouvez sélectionner le paramètre SpO2 de 85 à 99 pour l'avertissement. Ensuite, continuez d'appuyer  longuement sur le bouton ( > 2s) pour sélectionner le paramètre PRbpm de 100 à...
  • Seite 30 réglage le plus élevé (Fig.2). Enfin, appuyez de nouveau longuement sur le bouton ( > 2s) pour sélectionner le paramètre PRbpm de 50 à 80 pour l'avertissement réglage le plus bas (Fig.3). Fig.3 Fig.2 Fig.1 Réglage du Son. Continuez à ...
  • Seite 31 bouton ( > 2s) . Comme Fig.4 et Fig.5, “OFF” et “ON”seront sélectionnés pour activer ou désactiver le buzzer. Fig.5 Fig.4 Gamme normale pour individus en bonne santé dans un état calme : SpO2% >94 60<PR<120...
  • Seite 32 Affichage du changement de  direction. Lorsque le panneau affiche les valeurs, appuyez brièvement deux fois sur le bouton pour changer la direction d'affichage. Appuyez à nouveau brièvement sur le bouton pour revenir à la direction d'affichage d'origine.
  • Seite 33: Remarque Important

    Remarque Important Pour obtenir le meilleur relevé possible, vous ne devez PAS: Testez avec les ongles et les  orteils enduits de vernis à ongles qui peuvent entraver les relevés correctes - dans ce cas, utilisez le lobe d'oreille. Tester sous éclairage ...
  • Seite 34: Contactez Nous

    Bouger pendant les tests, les  mouvements corps, compris frissons, éternuements, etc, tous peuvent affecter les relevés corrects. Contactez Nous Pour les instructions détaillées de ce produit, veuillez visiter : http://www.agptek.com.
  • Seite 35 Si vous avez un problème ou suggestions, veuillez contacter support@agptek.com.
  • Seite 36 Contento 1. Introduzione ........31 2. Come usare correttamente ..32 3. Personalizza le impostazioni ..33 4. Avviso Importante ......38 5. Istruzioni di sicurezza ....38 6. Classificazione del prodotto ..38 7. Manutenzione e conservazione 38 8. Dichiarazione del prodotto ..38 9.
  • Seite 37 Introduzione I pulsossimetri sono considerati un'alternativa adatta, anche se non uguale al test dei gas nel sangue. Può essere applicato per il monitoraggio del fitness e gli sport d'alta quota. Se si desidera utilizzare sorveglianza delle malattie come la gestione della BPCO, la cura del paziente asmatico e il pezzo d'animo per i pazienti polmonari, consultare il proprio...
  • Seite 38 Energia Indicazion SpO2 Impulso Valore Istogram Pulsazioni Energia Valore Pulsante/ Ambien tazione Come usare correttamente 1. Premere il fondo per aprire la...
  • Seite 39 sonda. 2. Inserire il dito. 3. Premere il pulsante attivare l'ossimetro. Dovrai attendere altri secondi affinché pulsossimetro stabilizzi le sue letture. Personalizza le impostazioni Si consiglia ai non professionisti personalizzare impostazioni utilizzare modalità predefinita. Dopo l'accensione, premere a...
  • Seite 40 lungo il pulsante (>2s) per accedere all'interfaccia impostazione dei parametri. E premere brevemente il pulsante ( < 1s) per selezionare il parametro. Quindi, attendi che il parametro stabilizzi confermi. Premere a lungo il pulsante  2s). Entrerà > nell'interfaccia impostazione dei parametri. Come il display come in Fig.1:...
  • Seite 41 è possibile selezionare parametro SpO2 da 85 a 99 per avvertenza. TQuindi, continuare  premere a lungo il pulsante ( > 2s) per selezionare il parametro PRbpm da 100 a l'avviso impostazione più alto (Fig.2). Alla fine, premere a lungo il pulsante ( >...
  • Seite 42 (Fig.3). Fig.3 Fig.2 Fig.1 Impostazione audio.  Continuare premere lungo il pulsante ( > 2s). Come display come Fig.4 e Pic.5, “ OFF ” e “ ON ” saranno selezionati attivare o disattivare il buzzer...
  • Seite 43 Fig.5 Fig.4 Gamma normale per soggetti sani in uno stato di quiete: SpO2% >94 60<PR<120 Visualizza cambio  direzione. Quando il pannello mostra le letture, premere brevemente volte pulsante cambiare...
  • Seite 44 direzione display. Premere nuovo brevemente il pulsante per tornare alla direzione visualizzazione originale. Avviso IMPORTANTE Per ottenere la migliore lettura possibile, NON dovresti: Testare con le dita e le unghie ...
  • Seite 45 dei piedi dipinte che possono ostruire le letture corrette - utilizzare invece lobo dell'orecchio in questo caso. Il test in condizioni di luce  ambientale intensa, compresa la luce solare, può influire sulle letture: eseguire le letture in ambienti con condizioni di luce normale o scarsa.
  • Seite 46 Contattaci Per le istruzioni dettagliate di questo prodotto, visitare: http://www.agptek.com. caso problemi suggerimenti, contattare support@agptek.com.
  • Seite 47 Contenito 1. Introducción ........41 2. Cómo Usar Correctamente ..42 3. Personalizar la Configuración ..43 4. Noticia Importante ......48 5. Instrucciones de Seguridad ..48 6. Clasificación del Producto .... 48 7. Mantenimiento & Preservacion .. 48 8.
  • Seite 48: Introducción

    Introducción oxímetros de pulso se consideran alternativa adecuada, aunque de ninguna manera igual a las pruebas de gases en sangre. Se puede aplicar para Monitoreo estado físico y Deportes de alta altitud. Si desea utilizarlo para la vigilancia enfermedades como el manejo de la EPOC, el cuidado del paciente con asma tranquilidad pacientes pulmonares, consulte...
  • Seite 49: Cómo Usar Correctamente

    a su médico. Indicación Potencia Valor de Gráfico de SpO2 Barras de pulso Botón de Valor de Encendido Frecuencia /Configu del Pulso -ración Cómo Usar Correctamente...
  • Seite 50: Personalizar La Configuración

    1. Presione la parte inferior para abrir la sonda. 2. Inserte el dedo. 3. Presione el botón para activar oxímetro. Deberá esperar 5 segundos más para oxímetro pulso estabilice sus lecturas. Personalizar la Configuración aconseja profesionales personalicen la configuración y...
  • Seite 51 usen modo predeterminado. Después encendido, mantenga presionado el botón ( > 2s) para ingresar a la interfaz de configuración de parámetros. presione brevemente el botón (<1s) para seleccionar el parámetro. Luego, solo espere a que el parámetro estabilice confirme. Mantenga presionado ...
  • Seite 52 botón (> 2s). Ingresará a la interfaz de configuración parámetros. Como muestra en la imagen 1: puede seleccionar parámetro SpO2 de 85 a 99 para advertencia. Luego, continúe presionando  prolongadamente el botón ( > 2s) para seleccionar el parámetro PRbpm de 100 a 140 para la advertencia de ajuste más alto (Imagen 2).
  • Seite 53 nuevo el botón ( > 2s) para seleccionar el parámetro PRbpm de 50 a 80 para la advertencia de ajuste más bajo (Imagen 3). Pic.3 Pic.1 Pic.2 Configuración Sonido.  Continúe presionando prolongadamente el botón . Como la pantalla como...
  • Seite 54 Pic.4 y Pic.5, se seleccionarán "OFF" y "ON" para encender o apagar el timbre. Pic.5 Pic.4 Rango normal para individuos sanos en un estado tranquilo: SpO2% >94 60<PR<120 Cambio Dirección  Pantalla. Cuando el panel muestra las lecturas, presione...
  • Seite 55: Noticia Importante

    brevemente el botón veces para cambiar dirección visualización. Presione brevemente botón una vez más para volver dirección visualización original. Noticia Importante Para obtener la mejor lectura posible, NO debe:...
  • Seite 56 Realice la prueba con los  dedos y las uñas de los pies pintados que pueden obstruir las lecturas adecuadas; - en este caso, use un lóbulo de la oreja. La prueba bajo una luz de  techo brillante, incluida la luz solar, puede afectar...
  • Seite 57: Contacta Con Nosotros

    Contacta con Nosotros Para obtener instrucciones detalladas de este producto, visite: http://www.agptek.com. tiene algún problema sugerencia, comuníquese con support@agptek.com.
  • Seite 58 Inhoud 1.Invoering ........... 51 2.Correct gebruik ........ 52 3.Instellingen aanpassen ....53 4.Belangrijke mededeling ....58 5.Veiligheidsinstructies ..... 58 6.Product classificatie ......58 7.Onderhoud en conservering ..58 8.Productverklaring ......58 9.Problemen en oplossingen ... 58 10.Neem contact op ......60 OPMERKING: Lees de gedetailleerde gebruikershandleiding voor de informatie van deel 5.
  • Seite 59: Invoering

    Invoering Pulsoxymeters worden beschouwd als een geschikt alternatief, maar zeker niet gelijk aan bloedgastesten. Het kan worden toegepast voor fitnessbewaking en sporten op grote hoogte. Raadpleeg uw arts als u wilt gebruiken voor ziektebewaking, zoals COPD-management, astmapatiëntenzorg gemoedsrust voor longpatiënten.
  • Seite 60: Correct Gebruik

    Stroomin -dicatie SpO2- Pulsbalk waarde diagram Hartslag- Aan-/ waarde uitknop /instelling Correct gebruik 1. Druk op de onderkant om het...
  • Seite 61: Instellingen Aanpassen

    te openen. 2. Steek uw vinger in. 3. Druk op de knop om de oximeter te activeren. U moet 5s wachten voordat pulsoximeter gemeten waarden stabiliseert. Instellingen aanpassen Niet-professionals wordt geadviseerd de instellingen niet passen standaardmodus te gebruiken. Druk na het inschakelen lang op...
  • Seite 62 de toets ( > 2s) om de interface voor parameterinstelling roepen. Druk kort op de knop ( < 1s) om de parameter te selecteren. Wacht vervolgens parameter gestabiliseerd en bevestigd. Druk op de knop ( > 2s).  Het zal de interface voor parameter-instelling openen.
  • Seite 63 85~99 selecteren waarschuwing. Druk vervolgens  knop ( > 2s) om de PRbpm-parameter 100~140 stellen voor waarschuwing hoogste waarde (Pic.2). Blijf op de knop ( > 2s) drukken PRbpm-parameter 50~80 in stellen voor waarschuwing met de laagste waarde (Pic.3).
  • Seite 64 Pic.3 Pic.1 Pic.2 Tooninstelling. Druk op de  knop ( > 2s), "OFF" en "ON" zijn geselecteerd als Pic. 4 en 5 om het geluid in/ uit te schakelen.
  • Seite 65 Pic.4 Pic.5 Normaal bereik voor gezonde mensen rustige toestand: SpO2% >94 60<PR<120 Verandering  weergaverichting. Wanneer meetwaarden worden weergegeven bedieningspaneel, drukt...
  • Seite 66: Belangrijke Mededeling

    tweemaal op de knop weergaverichting wijzigen. Druk nogmaals op de knop om terug te keren naar de oorspronkelijke weergaverichting. Belangrijke mededeling Om de best mogelijke aflezing te krijgen, mag u NIET:...
  • Seite 67 Test met uw geverfde vingers  en teennagels die de juiste metingen kunnen belemmeren - gebruik in dit geval een oorlel. Testen onder felle  bovenverlichting, inclusief zonlicht, kan de metingen beïnvloeden meet metingen kamers normale weinig lichtomstandigheden. Bewegen tijdens het testen, ...
  • Seite 68: Neem Contact Op

    Neem contact op Voor gedetailleerde instructies over dit product gaat u naar: http://www.agptek.com. probleem suggesties hebt, neem contact support@agptek.com.

Inhaltsverzeichnis