
Verwandte Anleitungen für Blaupunkt VIO-BX20


Inhaltszusammenfassung für Blaupunkt VIO-BX20
- Seite 1 Quick Start Guide Outdoor IP Camera | DuoCam VIO-BX20 Enjoy it. Home Security IP Camera...
- Seite 3 Quick Start Guide Outdoor IP Camera VIO-BX20 Schnellstart-Anleitung Outdoor IP Camera VIO-BX20 Mode d’emploi Caméra IP extérieure VIO-BX20 Manual de usuario Cámara IP para exteriores VIO-BX20 Snelstartgids IP-buitencamera VIO-BX20...
- Seite 4 English | Manual 1. Kit Content VIO-BX20 IP Camera Power supply EU type 3x wall screws / 3x plastic anchors Mounting map sticker Safety Information: Please read this manual carefully before using it for the first time and keep it for future reference to look up.
-
Seite 5: Product Description
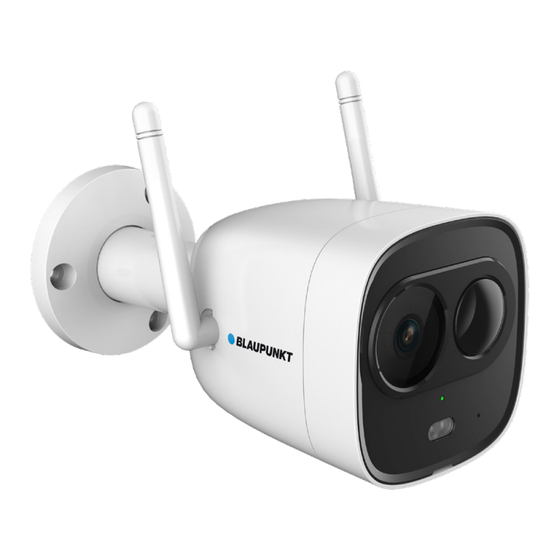
2. Product Description 1. Camera Lens 4. Wifi Antennas 7. Micro SD-Card slot 2. Indicator LED 5. Motion detector 8. Reset Button 3. Spotlight 6. Built-in microphone 9. Speaker Indicator LED status: Camera status: • Powered off/LED turned off • Rebooting after reset Red light on •... - Seite 6 3. Learn in a Camera Step 1: Download and install the “Cam4Home Plus” APP to your smartphone from the App Stores. Step 2: Connect your smartphone to your Wi-Fi network. NOTE: If you are using a dual-band router, make sure that your smartphone is connected to a 2.4 GHz WiFi Network and not to a 5GHz Wifi Network.
- Seite 7 Camera settings: To access the camera settings go to the camera dasboard and tap the settings icon at the top right. Share your camera with others: A camera can be shared to other Cam4Home Plus accounts for live streaming only. To modify the camera settings please use the account where the camera was registered.
- Seite 8 Motion detection zones To adjust the detection area which is enabled for motion detection go to: Camera dashboard --> settings icon --> Arm Setting --> Detection region setting By default the motion zone covers the camera vision field completely. To delete all the previously selected detection zones, tap on the “Clear”...
-
Seite 9: Installation
5. Installation Check your WiFi signal strength and make sure that the WiFi signal is strong at the location of your camera. For best performance, the smartphone needs to be connected to a Wi-Fi network. 5.1. Micro SD installation (optional) Locate the Micro SD-Card compartment of the camera. - Seite 10 Step 6: • Place the camera on the installation surface. Step 7: • Take out the installation screws. Tighten the screws to fix the device onto the installation surface. 1. Camera 2. Adjustment screw 3. Plastic anchors 2. Self-tapping Screw 4.
-
Seite 11: Customer Support
If you want to learn more details of the Cam4Home Plus APP, download the Main APP manual, with the following steps: Visit: https://www.blaupunkt.com/service 1. On the 1st dropdown menu select your language 2. On the 2nd dropdown menu select “VIO-Series”... -
Seite 12: Technical Specifications
7. Technical Specifications Description Outdoor FULL HD IP Camera VIO-BX20 Image sensor: 1/2.7” 2Megapixel progressive CMOS Resolution Full HD (1920 x 1080) Video Compression H.265 / H.264 Angle of View 114.7°(H), 62°(V), 135°(D) Night Vision 30m distance Minimum illumination 0.1Lux(Color), 0Lux(B/W) - Seite 13 Declaration of conformity: Hereby Security Brand Pro GmbH declares that the radio equipment type “Blaupunkt VIO-BX20” complies with the directive 2014/53 / EU. The full text of the EU Declaration of Conformity is available at the following Internet address: https://www.blaupunkt.
- Seite 14 Deutsch | Schnellstart-Anleitung 1. Lieferumfang VIO-BX20 IP-Kamera Netzteil EU-Typ 3x Wandschrauben Montage-Schablone 3x Kunststoffdübel Sicherheitsinformation: Bitte lesen Sie dieses Handbuch sorgfältig durch, bevor Sie die IP Kamera zum ersten Mal verwenden, und bewahren Sie es zum späteren Nachschlagen auf. Die hier beschriebenen Sicherheitsvorkehrungen verringern die Gefahr von Feuer, einem Stromschlag und Verletzungen, wenn sie ordnungsgemäß...
- Seite 15 2. Geräteübersicht 1. Kamera 4. Wifi-Antennen 7. Micro-SD-Kartensteckplatz 2. Status LED 5. Bewegungsmelder 8. Reset-Taste 3. Lampe 6. Eingebautes Mikrofon 9. Lautsprecher LED-Statusanzeige: Kamerastatus: - Ausgeschaltet / LED ausgeschaltet - Neustart nach dem Zurücksetzen Rote LED an - Kamera wird hochgefahren - Gerätestörung Grüne LED blinkt Startvorgang abgeschlossen, Warten auf WLAN...
-
Seite 16: Einlernen Der Kamera
3. Einlernen der Kamera Schritt 1: Laden Sie die „Cam4Home Plus“ App aus dem App Store auf Ihr Smartphone herunter und installieren Sie diese. Schritt 2: Verbinden Sie Ihr Smartphone mit Ihrem WLAN Netzwerk. HINWEIS: Wenn Sie einen Dualband-Router verwenden, stellen Sie sicher, dass Ihr Smartphone mit einem 2,4-GHz-WLAN-Netzwerk und nicht mit einem 5-GHz-WLAN-Netzwerk verbunden ist. - Seite 17 Kameraeinstellungen: Um auf die Kameraeinstellungen zuzugreifen, gehen Sie zur Kamera-Instumententafel und tippen Sie auf das Einstellungssymbol oben rechts. Teilen Sie Ihre Kamera mit anderen: Eine Kamera kann für das Live-Streaming mit anderen Cam4Home Plus-Konten geteilt werden. Um die Kameraeinstellungen zu ändern, verwenden Sie das Konto, unter dem die Kamera registriert wurde.
- Seite 18 Bewegungserkennungszonen Um die Bereiche einzustellen, in denen ein Bewegungsereignis ausgelöst wird, gehen Sie zu: Kamera-Instrumententafel ->Einstellungssymbol ->Bewegungserkennungs Einstellungen -> Erkennungsregion einstellen. Standardmäßig deckt die Alarmzone das Sichtfeld der Kamera vollständig ab. Um die Alarmzonen zu löschen, tippen Sie auf “Speichern”. Um aktivierte Detektionszonen zu löschen, tippen Sie auf das Symbol “Löschen”.
-
Seite 19: Installation Der Micro-Sd-Karte (Optional)
5. Installation • Überprüfen Sie die Stärke Ihres WLAN-Signals und stellen Sie sicher, dass das WLAN- Signal am Standort Ihrer Kamera stark genug ist. Für eine optimale Leistung muss das Smartphone mit einem WiFi-Netzwerk verbunden sein. 5.1. Installation der Micro-SD-Karte (optional) Sie finden den Micro-SD-Kartensteckplatz an der Unterseite der Kamera Schritt 1: (siehe Kapitel 2 Punkt... - Seite 20 Schritt 6: • Platzieren Sie die Kamera auf der Installationsfläche. Schritt 7: • Entfernen Sie die Wandschraube. Ziehen Sie die Schrauben fest, um das Gerät auf der Installationsfläche zu befestigen. 1. Kamera 2. Einstellschraube 3. Kunststoffdübel 2. Wandschraube 4. Installationsfläche Schritt 8: •...
-
Seite 21: Kundenservice & Rücksendung
6.2 Cam4Home Plus Anleitung Wenn Sie mehr über die Cam4Home Plus-App erfahren möchten, laden Sie die Anlei- tung der Cam4Home Plus-App mit den folgenden Schritten herunter: Besuchen Sie: https://www.blaupunkt.com/service 1. Wählen Sie im 1.Dropdown-Menü Ihre Sprache aus 2. Wählen Sie im 2.Dropdown-Menü “VIO-Series”... -
Seite 22: Technische Spezifikationen
7. Technische Spezifikationen Beschreibung FULL HD IP Außenkamera VIO-BX20 Bildsensor 1 / 2,7 ”2 Megapixel progressives CMOS Auflösung Full HD (1920 x 1080) Video-Kompression H.265 / H.264 Betrachtungswinkel 114,7 ° (H), 62 ° (V), 135 ° (D) Nachtsicht 30m Entfernung... - Seite 23 Konformitätserklärung: Hiermit erklärt die Security Brand Pro GmbH, dass der Funkgerätetyp „Blaupunkt VIO-BX20“ der Richtlinie 2014/53 / EU entspricht. Der vollständige Text der EU- Konformitätserklärung ist unter folgender Internetadresse abrufbar: https://www. blaupunkt.com/eu-declarations/ Entsorgen: Altgeräte dürfen nicht mit dem normalen Hausmüll entsorgt werden. Gemäß...
-
Seite 24: Contenu Du Kit
Français | Mode d’emploi 1. Contenu du kit Caméra IP VIO-BX20 Alimentation électrique type EU 3x vis pour le mur / Autocollant plan de montage IP 3x ancrages en plastique Informations sur la sécurité : Veuillez lire attentivement ce manuel avant de l’utiliser pour la première fois et conservez-le pour pouvoir le consulter ultérieurement. -
Seite 25: Description Du Produit
2. Description du produit 1. Objectif de la caméra 4. Antennes Wifi 7. Fente pour carte Micro SD 2. Témoin LED 5. Détecteur de 8. Bouton de réinitialisation 3. Projecteur mouvement 9. Haut-parleur 6. Microphone intégré Témoin LED d’indication État de la caméra : d’état : Activation •... - Seite 26 3. Enregistrer une caméra Etape 1 Téléchargez et installez l’app “Cam4Home Plus” sur votre smartphone depuis votre magasin d’applications Etape 2 Connectez votre téléphone à votre réseau WiFi. NOTE : Si vous utilisez un routeur dual-band, vérifiez que votre smartphone est connecté...
- Seite 27 Réglages de la caméra : Pour accéder aux réglages de la caméra, allez dans le tableau de bord de la caméra et appuyez sur l’icône paramètres en haut à droite. Partagez votre caméra avec d’autres personnes : Une caméra peut être partagée avec d’autres comptes Cam4Home Plus pour la diffusion en direct uniquement.
- Seite 28 Zones de détection de mouvement Pour régler la zone de détection sur laquelle la détection de mouvement est activée, allez à : Tableau de bord de la caméra --> icône des paramètres ->Réglage armement -> Zone de détection. Par défaut, la zone de mouvement couvre complètement le champ de vision de la caméra.
- Seite 29 5. Installation Vérifiez la puissance de votre signal WiFi et assurez-vous que le signal WiFi est fort à l’emplacement de votre caméra. Pour de meilleures performances, le smartphone doit être connecté à un réseau WiFi. 5.1. Micro SD installation (optional) Cherchez le compartiment Micro SD de la caméra.
- Seite 30 Étape 6 : • Placez la caméra sur la surface de montage. Étape 7 : • Retirez les vis d’installation. Serrez les vis pour fixer l’appareil sur la surface d’installation. 1. Caméra 2. Vis de réglage 3. Ancrages en plastique 2.
- Seite 31 Pour une aide additionnelle, contactez notre support technique. Pour trouver le support technique de votre pays, allez sur : http://security.blaupunkt-service.com Retours: Si vous souhaitez retourner votre appareil photo, nous vous conseillons for- tement de supprimer tout appareil photo jumelé à votre compte avant de renvoyer l’appareil photo.
-
Seite 32: Caractéristiques Techniques
7. Caractéristiques techniques Description Caméra IP PLEINE HD extérieur VIO-BX20 Capteur d’image : CMOS progressif 1/2,7” 2 mégapixels Résolution Haute définition (1920 x 1080) Compression vidéo H.265 / H.264 Angle de vue 114,7°(H), 62 °(V), 135°(D) Vision nocturne Distance de 30 m Éclairage minimal 0,1 lux (Couleur), 0 lux (N/B) Méthode de détection de... - Seite 33 Déclaration de conformité : Par la présente, Security Brand Pro GmbH déclare que l’équipement radio de type « Blaupunkt VIO-BX20 » est conforme à la directive 2014/53 / UE. Le texte intégral de la déclaration de conformité de l’UE est disponible à l’adresse Internet suivante : https://www.blaupunkt.com/eu-declarations/...
- Seite 34 Español | Manual 1. Contenido del Kit Cámara IP VIO-BX20 Alimentación tipo EU 3x tornillos / 3x tacos de plástico Pegatina/Mapa de montaje Información de Seguidad: Por favor, lea cuidadosamente este manual antes de usarlo por primera vez y guardelo para futura referencia.
- Seite 35 2. Decripción del Producto 1. Lente de la cámara 4. Antenas Wifi 7. Ranura Micro SD 2. Indicador LED 5. Detector de movimiento 8. Botón Restablecimiento 3. Foco/Luz 6. Micrófono incorporado 9. Altavoz Indicador LED de estado: Estado de la cámara: Apagado •...
- Seite 36 3. Añadir Cámara Paso 1: Descargue e instale la app “Cam4Home Plus” desde la App Store correspondiente. Paso 2: Conecte su móvil a la red Wifi de 2.4GHz. NOTA: Si esta usando un router de doble banda, asegúrese de que su móvil está...
- Seite 37 Ajustes de la Cámara: Para acceder a los ajustes de la cámara, ve al menú de la cámara y aprieta el icono de ajustes en la parte superior derecha. Comparte su Cámara con Otros: Se puede compartir una cámara con otras cuentas Cam4Home Plus, pero solo para la visualización en vivo.
- Seite 38 Zonas de detección de movimiento Para ajustar el area de detección que está habilitado para la detección de movimiento, ve a: Menú de la cámara --> icono de configuración --> Config Armado/Activado --> Config de Detección por Zona Por defecto, la zona de detección cubre todo el campo de visión de la cámara.
-
Seite 39: Instalación
5. Installacion Compruebe la intensidad de la señal Wifi y asegúrese de tener una buena conexión en la ubicación de la instalación. El teléfono debe estar conectado a una red Wifi para hacer la comprobación. 5.1. Insertar tarjeta Micro SD (opcional) Localice el compartimento de la tarjeta Micro SD Paso 1: (véase el apartado 2 punto... - Seite 40 Paso 6: • Coloque la cámara en la supercifie de instalación. Paso 7: • Inserte y atornille los tornillos para fijar el dispositivo a la supercifie de instalación. 1. Cámara 2. Tornillo de ajuste 3. Tacos de plástico 2. Tornillo penetrante 4.
-
Seite 41: Soporte Técnico
Para obtener más ayuda, póngase en contacto con nues- tro soporte técnico. Para encontrar el soporte técnico de su país, visite: http://security.blaupunkt-service.com Devoluciones: Si desea devolver su cámara, le recomendamos encarecídamente que primero elimine cualquier cámara ligada a su cuenta antes de devolverlo. -
Seite 42: Especificaciones Técnicas
7. Especificaciones Técnicas Descripción Cámara IP FULL HD para exterior VIO-BX20 Sensor de Imagen 1/2.7” 2Megapixel CMOS progresivo Resolución Full HD (1920 x 1080) Compresión de Video H.265 / H.264 Ángulo de Visión 114.7°(Horizontal), 62°(Vertical), 135°(Diag.) Visión Nocturna Iluminación Mínima 0.1Lux(Color), 0Lux(B/N) - Seite 43 Declaración de conformidad: Por la presente, Security Brand Pro GmbH declara que el equipo de radio tipo “Blaupunkt VIO-BX20” cumple con la directiva 2014/53/EU. El texto completo de la Declaración de conformidad de la UE está disponible en la siguiente dirección de Internet: https://www.blaupunkt.com/eu-declarations/...
- Seite 44 Nederlands | Handleiding 1. Inhoud van de kit VIO-BX20 IP camera Voeding EU-type 3x muurschroeven / 3x plastic ankers Sticker met montagekaart Veiligheidsinformatie: Lees deze handleiding zorgvuldig door voordat u hem voor het eerst gebruikt en bewaar hem zodat u hem later kunt opzoeken.
-
Seite 45: Productomschrijving
2. Productomschrijving 1. Cameralens 4. Wifi-antennes 7. Micro SD-kaartsleuf 2. Indicator LED 5. PIR-detector 8. Resetknop 3. Spotlight 6. Ingebouwde microfoon 9. Luidspreker Indicator LED-status: Camerastatus: - Uitgeschakeld / LED uitgeschakeld - Herstarten na reset Rood licht op - Opstarten - Apparaatstoring Groen lampje knippert Opstarten voltooid, wachtend op wifi-... - Seite 46 3. Leer in een camera Stap 1: Download en installeer de “Cam4Home Plus” app op uw smartphone vanuit de appwinkel. Stap 2: Verbind uw smartphone met uw wifi-netwerk. OPMERKING: Als u een dual-band router gebruikt, zorg er dan voor dat uw smartphone is verbonden met een 2,4 GHz wifi-netwerk en niet met een 5 GHz wifi-netwerk.
- Seite 47 Camera instellingen: Om toegang te krijgen tot de camera-instellingen, gaat u naar het camerascherm en tikt u op het instellingenpictogram rechtsboven. Deel uw camera met anderen: A camera can be shared to other Cam4Home Plus accounts for live streaming only. To Een camera kan alleen worden gedeeld met andere Cam4Home Plus-accounts voor livestreaming.
- Seite 48 Bewegingsdetectiezones Om het detectiegebied aan te passen dat is ingeschakeld voor bewegingsdetectie, gaat u naar: Cameradashboard -> pictogram Instellingen -> Arminstelling -> Detectie regio-instelling Standaard bedekt de bewegingszone het gezichtsveld van de camera volledig. Tik op het pictogram “Wissen” om alle eerder geselecteerde detectiezones te verwijderen.
- Seite 49 5. Installatie • Controleer de sterkte van uw wifi-signaal en zorg ervoor dat het wifi-signaal sterk is op de locatie van uw camera. Voor de beste prestaties moet de smartphone zijn verbonden met een wifi-netwerk. 5.1. Micro SD installatie (optioneel) U vindt de micro SD-kaartsleuf aan de onderkant van de camera Stap 1: (zie hoofdstuk 2 punt...
- Seite 50 Stap 6: • Plaats de camera op het installatieoppervlak. Stap 7: • Verwijder de installatieschroeven. Draai de schroeven vast om het apparaat op het installatieoppervlak te bevestigen. 1. Camera 2. Stelschroef 3. Kunststof ankers 2. Zelftappende schroef 4. Montage oppervlak Stap 8: •...
-
Seite 51: Fabrieksinstellingen
6.2 Cam4Home Plus-handleiding Als u meer informatie wilt over de Cam4Home Plus-app, downloadt u de handleiding van de hoofd-APP, met de volgende stappen: Bezoek: https://www.blaupunkt.com/service 1. Selecteer uw taal in het 1e vervolgkeuzemenu 2. Selecteer “VIO-Series” in het 2e vervolgkeuzemenu 3. -
Seite 52: Technische Specificaties
7. Technische specificaties Beschrijving FULL HD-camera voor buiten VIO-BX20 Beeldsensor: 1 / 2.7 ”2 Megapixel progressieve CMOS Resolutie Full HD (1920 x 1080) Video compressie H.265 / H.264 Kijkhoek 114,7 ° (H), 62 ° (V), 135 ° (D) Nachtzicht 30m afstand Minimale verlichting 0.1Lux (kleur), 0Lux (B / W) - Seite 53 Conformiteitsverklaring: Hierbij verklaart Security Brand Pro GmbH dat het type radioapparatuur “Blaupunkt VIO-BX20” voldoet aan de richtlijn 2014/53 / EU. De volledige tekst van de EU- conformiteitsverklaring is beschikbaar op het volgende internetadres: https://www.blaupunkt.com/eu-declarations/ Gooi: Oude apparaten mogen niet met het normale huisvuil worden weggegooid.