Audio Physic CLASSIC 30 Bedienungsanleitung
Classic line
Inhaltsverzeichnis
Verfügbare Sprachen
Verfügbare Sprachen
Inhaltsverzeichnis

Verwandte Anleitungen für Audio Physic CLASSIC 30


Inhaltszusammenfassung für Audio Physic CLASSIC 30
- Seite 1 Owner´s Manual Bedienungsanleitung CLASSIC Line...
-
Seite 2: Inhaltsverzeichnis
Welcome page General Tips page Unpacking and Assembly of the CLASSIC 10 | CLASSIC 20 | CLASSIC 30 page Unpacking and Assembly of the CLASSIC Compact | CLASSIC Center page Connecting the Loudspeakers page Setting Up the CLASSIC 10 | CLASSIC 20 | CLASSIC 30... - Seite 3 Your new loudspeakers are delivered in two separate boxes. One box contains one loudspeaker and one front grille, as well as your „Welcome to the Audio Physic Family“ package containing this Owner‘s Manual, the Final Inspection Certificate and accessories. In the second box you will find the other loudspeaker and one front grille.
-
Seite 4: Willkommen
Diese Maßnahmen tragen dazu bei, dass Sie zuhause in den vollen Genuss der hohen Material-, Fertigungs- und Klangqualität von AUDIO PHYSIC-Lautsprechern kommen. Im Regelfall wird Ihnen der kompetente AUDIO PHYSIC-Fachhändler die Lautsprecher liefern und installieren. Sollten Sie dies selbst tun wollen, helfen Ihnen die auf den folgenden Seiten beschriebenen Tipps und Schritte bei der siche- ren Inbetriebnahme. -
Seite 5: Allgemeine Tipps
Sonnenlicht aus. Eloxalflächen reagieren empfindlich auf Laugen wie auf UV-Licht und bleichen unter Umständen aus. Die Chassis dieser AUDIO PHYSIC-Boxen-Serie verfügen über eine einzigartige Befestigungstechnik. Statt direkt mit dem Korpus verschraubt zu werden, befinden sich in den Montagebohrungen der Lautsprecher spezielle Neopren- dübel. -
Seite 6: Auspacken Und Zusammenbau - Classic 10 | Classic 20 | Classic 30
Kreises zur Ruhe kommen). Sichern Sie die Spikes mit den Kontermuttern. Ein etwa handfestes Anziehen der Muttern genügt. Von Werk sind die Modelle CLASSIC 10, CLASSIC 20 und CLASSIC 30 mit einer soliden Frontblende ohne Stoffbespannung versehen. Diese Blende können Sie nach Ihrem persönlichen Geschmack gegen die beilie- genden Blenden mit Frontbespannung austauschen. -
Seite 7: Auspacken Und Zusammenbau Classic Compact | Classic Center
Schließen Sie nun die Kabel an Ihren Verstärker an und beachten bitte ebenso die Polarität. Jetzt können Sie beginnen, Ihre neuen AUDIO PHYSIC Lautsprecher optimal auf den Hörplatz auszurichten. Tipps hierzu finden Sie im folgenden Kapitel „Aufstellung“ und besonders ausführlich Hinweise auf der... -
Seite 8: Aufstellen Der Lautsprecher Classic 10 | Classic 20 | Classic 30
Aufstellen der Lautsprecher CLASSIC 10 | CLASSIC 20 | CLASSIC 30 Ideal ist es, wenn Sie Ihre neuen Lautsprecher im Raum so positionieren, dass sie mit Ihrem Hörplatz ein gedachtes, gleichschenkliges Dreieck bilden. Der Abstand zwischen den Boxen sollte etwa das 0,8- bis 1,2-fache des Abstandes zum Hörplatz betragen. - Seite 9 6. genannt, zu frühen Reflexionen an den Seitenwänden des Schranks aber unter Um- ständen auch zu einer Störung der ungehinderten Schallabstrahlung. Ausrichten der Lautsprecher CLASSIC 10 | CLASSIC 20 | CLASSIC 30 Stehen die Lautsprecher parallel zu den Seitenwänden, drehen Sie die Boxen nun so nach innen, dass eine gedachte Linie vom Hochtöner jeder Box auf Ihren bevorzugten Hörplatz zeigt.
-
Seite 10: Aufstellen Der Lautsprecher Classic Compact
Aufstellen der Lautsprecher CLASSIC Compact Grundsätzlich empfehlen wir Ihnen, die Lautsprecher auf passenden Standfüßen, wie beispielsweise den AUDIO PHYSIC SHERPA II (Abbildung rechts) zu betreiben. Klanglich ist die Verwendung von passenden Boxenfüßen dem Betrieb auf einem Regal in aller Regel deutlich überlegen. Zum einen wird sichergestellt, dass sich die Hochtöner auf einer idealen Position (Höhe) zu Ihrem Hörplatz... - Seite 11 Eine Aufstellung der Lautsprecher in den Raumecken bringt eine breitbandige Anhebung unterer Frequenzen. Diese können dabei über sechs Dezibel ansteigen. Testen Sie mit bassbetonter Musik einfach aus, wie Ihnen der Klang in den Ecken gefällt. Empfinden Sie Bässe aufgebläht und Stimmen unkonturiert, ziehen Sie die Boxen um einige Zentimeter aus den Ecken, bis tiefe Töne klar konturiert und Stimmen körperhaft klingen.
-
Seite 12: Aufstellen Des Classic Center
Aufstellen des CLASSIC Center Die Rückseite des Lautsprechers sollte gut eine Handbreit von der Rückwand entfernt sein, damit die angeschlossenen Kabel nicht geknickt werden. Eine noch nähere Aufstellung an einer Wand kann sich auch akustisch nachteilig auswirken. Der Center sollte möglichst mittig zwischen den Hauptlautsprechern stehen, auf jeden Fall direkt unterhalb des Flat-TVs oder der Leinwand. -
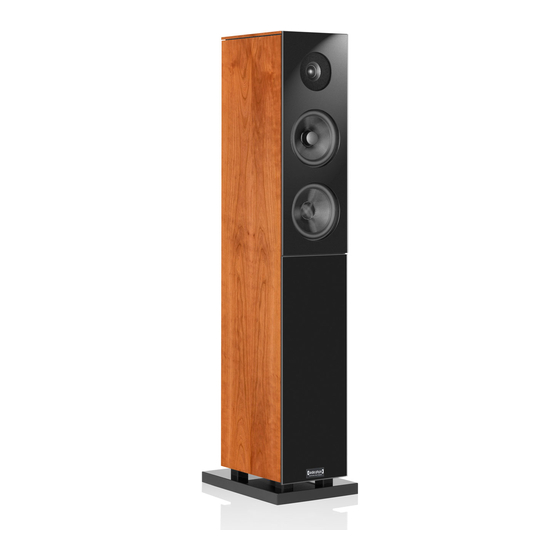
Seite 13: Technische Spezifikationen
CLASSIC 10 CLASSIC 20 CLASSIC 30 Technische Spezifikationen Höhe 105,5 cm 105,5 cm 105,5 cm Breite 17,0 cm 17,0 cm 17,0 cm Tiefe 24,0 cm 29,0 cm 41,0 cm Breite x Tiefe 21,0 x 30,0 cm 21,0 x 35,0 cm... - Seite 24 AUDIO PHYSIC GmbH Almerfeldweg 38 59929 Brilon / Deutschland Germany Tel. +49(0)2961/9617-0; Fax +49(0)2961/51640 info@audiophysic.de / www.audiophysic.de...