Herunterladen Inhalt Inhalt Diese Seite drucken
Kamino 22038 Gebrauchs- Und Montageanleitung

Kamino 22038 Gebrauchs- Und Montageanleitung

Kugelgrill mit klappscharnier

Werbung

Verfügbare Sprachen
  • DE

Verfügbare Sprachen

  • DEUTSCH, seite 1
Gebrauchs- und
Montageanleitung
KUGELGRILL MIT
KLAPPSCHARNIER
132517_132662_Kamino_BBQ_Anleitung_A4_DE_EN_FR_IT_ES_40S.indd 1
22.11.19 14:08

Werbung

Inhaltsverzeichnis
loading

Inhaltszusammenfassung für Kamino 22038

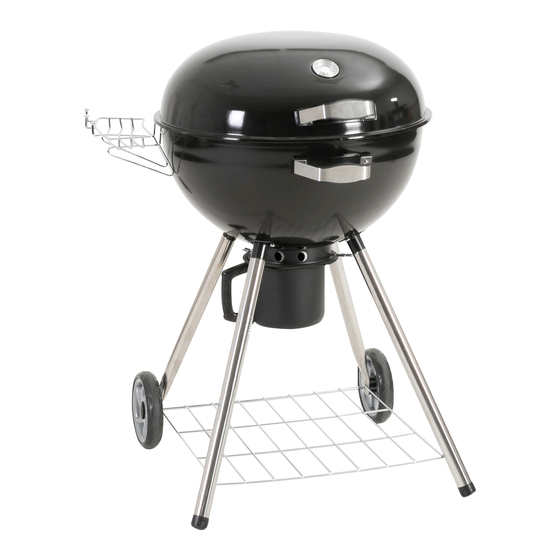
  • Seite 1 Gebrauchs- und Montageanleitung KUGELGRILL MIT KLAPPSCHARNIER 132517_132662_Kamino_BBQ_Anleitung_A4_DE_EN_FR_IT_ES_40S.indd 1 22.11.19 14:08...
  • Seite 2: Sicherheitshinweise

    Sicherheit DE Gebrauchs-/Montageanleitung BITTE LESEN SIE DIESE ANLEITUNG VOR DEM ZUSAMMENBAU UND DER INBETRIEBNAHME SORGFÄLTIG DURCH UND BEWAHREN SIE DIESE FÜR DIE WEITERE VERWENDUNG AUF! NUR FÜR DEN PRIVATEN ANWENDUNGSBEREICH GEEIGNET. Bei Weitergabe des Artikels geben Sie bitte auch diese Anleitung mit. Betreiben Sie den Grill nicht in geschlossenen und/oder bewohnbaren Räu- men, z.
  • Seite 3: Vor Gebrauch Unbedingt Beachten

    Sicherheit / Lieferumfang DE VOR GEBRAUCH UNBEDINGT BEACHTEN • Achten Sie bei der Standortwahl auf einen sicheren, standfesten und ebenen Untergrund und darauf, dass der Platz zum Grillen mit Holzkohle geeignet ist. • Der Grill darf nicht transportiert werden solange er noch heiß ist! • A us Sicherheitsgründen darf der Grill nicht mit flüssigem Brennstoff betrieben werden.
  • Seite 4: Bestimmungsgemässer Gebrauch

    Lieferumfang / Montage DE GEBRAUCHS- UND MONTAGEANLEITUNG GEBRAUCHS- UND MONTAGEANLEITUNG LIEFERUMFANG: Verbindungselemente: 25 8 x M6 x 20 26 23 x M6 27 4 x M6 28 1 x M5 x 10 29 1 x M5 Lieferumfang: Lieferumfang: Verbindungselemente: Verbindungselemente: 2 x Kontermutter = a 2 x Kontermutter = a 3 x Schraube M6 x 25 = b...
  • Seite 5 Montage DE MONTAGESCHRITTE Schritt 1 Schritt 2 ×1 ×4 ×1 ×4 ×1 ×2 ×2 ×2 ×2 ×2 ×3 ×3 ×2 1. Befestigen Sie den Hitzeschutz den Griff außen am Deckel mit 2 ×3 Schrauben M6 × 20 und sichern Sie ihn von innen mit Unterlegscheiben M6 1.
  • Seite 6 Montage DE Schritt 3 Schritt 4 ×8 ×2 ×8 ×2 1. Hängen Sie das Ablagegitter mit den ×8 Haken in die Bohrungen der langen Stand- beine 2. Schieben Sie je ein kurzes Standbein mit der Bohrung über die Gewinde des 1.
  • Seite 7 Montage DE Schritt 6 Schritt 7 ×4 ×4 ×4 1. Montieren Sie den Deckel an den Scharnieren indem Sie die Schrauben M6 × 12 von innen durch die Scharniere stecken, den Deckel dann mit den Bohrungen über die Gewinde setzten und diesen mit Unterlegscheiben M6 und Muttern M6 sichern.
  • Seite 8: Wartung Und Reinigung

    Wartung / Reinigung / Umwelthinweise und Entsorgungsmaßnahmen WARTUNG UND REINIGUNG Ihr Grill ist aus hochwertigen Materialien gefertigt. Um die Oberflächen zu reinigen und zu pflegen, beachten Sie bitte die folgenden Hinweise: • Vergewissern Sie sich, dass der Grill vollständig abgekühlt ist, bevor Sie ihn reinigen. Entsorgen Sie niemals heiße Asche oder noch glühende Holzkohle. Es besteht Brandgefahr! Entsorgen Sie erst die Asche und Kohlereste wenn diese vollständig erloschen und abgekühlt sind.
  • Seite 9 User and assembly instructions KETTLE GRILL WITH FOLDING HINGE 132517_132662_Kamino_BBQ_Anleitung_A4_DE_EN_FR_IT_ES_40S.indd 9 22.11.19 14:08...
  • Seite 10: Safety Information

    Safety User/assembly instructions BEFORE ASSEMBLY AND INITIAL USE PLEASE READ THROUGH THIS GUIDE CAREFULLY AND RETAIN IT FOR FUTURE REFERENCE! FOR PRIVATE USE ONLY. When passing this item on to a third party, please also include these instructions. Do not use the grill in enclosed and/or habitable spaces e.g. buildings, tents, caravans, mobile homes, boats.
  • Seite 11 Safety / Contents EN IMPORTANT NOTICE BEFORE USE • When deciding where to use the grill ensure it is placed on a safe, stable and even surface and that the chosen location is suitable for grilling with coal. • The grill must not be moved while still hot! •...
  • Seite 12: Connecting Components

    Components included / assembly EN GEBRAUCHS- UND MONTAGEANLEITUNG GEBRAUCHS- UND MONTAGEANLEITUNG CONTENTS: Connecting components: 25 8 x M6 x 20 26 23 x M6 27 4 x M6 28 1 x M5 x 10 29 1 x M5 Lieferumfang: Lieferumfang: Verbindungselemente: Verbindungselemente: 2 x Kontermutter = a...
  • Seite 13 Assembly EN ASSEMBLY STAGES Step 1 Step 2 ×1 ×4 ×1 ×4 ×1 ×2 ×2 ×2 ×2 ×2 ×3 ×3 ×2 1. Attach the heat protector and the han- to the outside of the lid with 2 ×3 M6 × 20 screws and secure it from the inside with M6 washers and M6 wing...
  • Seite 14 Assembly EN Step 3 Step 4 ×8 ×2 ×8 ×2 1. Use the hooks to hang the table grid ×8 from the holes of the long leg supports 2. Slide the short leg supports so that the holes are over the threads of the table grid 1.
  • Seite 15 Assembly EN Step 6 Step 7 ×4 ×4 ×4 1. Mount the lid on the hinges by inserting the M6 × 12 screws through the hinges from the inside, then place the lid with the holes over the threads and secure it with M6 washers and M6 nuts A second person can be helpful for this.
  • Seite 16: Maintenance And Cleaning

    Assembly / Maintenance / Cleaning EN MAINTENANCE AND CLEANING Your grill is manufactured using high-grade materials. Please note the following information while cleaning and maintaining the surfaces of the grill: • Ensure that the grill has fully cooled down before cleaning it. Never dispose of hot ash or charcoal which is still burning. This poses a risk of fire! Only dispose of the ashes and coal when they have stopped burning and have cooled down fully.
  • Seite 17 Instructions d‘utilisation et de montage BARBECUE BOULE AVEC COUVERCLE À CHARNIÈRES 132517_132662_Kamino_BBQ_Anleitung_A4_DE_EN_FR_IT_ES_40S.indd 17 22.11.19 14:08...
  • Seite 18: Consignes De Sécurité

    Sécurité FR Instructions d’utilisation/de montage VEUILLEZ LIRE ATTENTIVEMENT CES INSTRUCTIONS AVANT D’ASSEMBLER ET D’UTILISER LE PRODUIT, ET CONSERVEZ-LES SOIGNEUSEMENT POUR TOUTE AUTRE UTILISATION ! UTILISATION DU PRODUIT UNIQUEMENT RÉSERVÉE À UN CADRE PRIVÉ. Veuillez remettre ce mode d’emploi à un tiers, dès que vous lui transmettez cet appareil. Ne faites pas fonctionner le barbecue dans des pièces fermées et / ou habi- tées, par exemple des bâtiments, tentes, caravanes, camping-cars, bateaux.
  • Seite 19: Contenu De Livraison

    Sécurité / Contenu de livraison FR POINTS À OBSERVER IMPÉRATIVEMENT AVANT UTILISATION • Lors du choix du lieu d’utilisation, veillez à ce que le sol soit plan, sécurisé et stable, et que du charbon de bois se trouve à l’endroit du barbecue. •...
  • Seite 20: Contenu De La Livraison

    Contenu de livraison / Montage FR GEBRAUCHS- UND MONTAGEANLEITUNG GEBRAUCHS- UND MONTAGEANLEITUNG CONTENU DE LA LIVRAISON : Éléments de raccord : 25 8 x M6 x 20 26 23 x M6 27 4 x M6 28 1 x M5 x 10 29 1 x M5 Lieferumfang: Lieferumfang:...
  • Seite 21: Étapes De Montage

    Montage FR ÉTAPES DE MONTAGE Étape 1 Étape 2 ×1 ×4 ×1 ×4 ×1 ×2 ×2 ×2 ×2 ×2 ×3 ×3 ×2 1. Fixez la protection thermique et la poi- gnée sur l‘extérieur du couvercle à ×3 l‘aide de 2 vis M6 x 20 et assurez leur fixation de l‘intérieur au moyen de rondelles 1.
  • Seite 22 Montage FR Étape 3 Étape 4 ×8 ×2 ×8 ×2 aux trous 1. Suspendez la grille de dépôt ×8 de forage des longs pieds d‘appui à l‘aide des crochets. 2. Faites passer chaque pied d‘appui court dans chaque filetage de la grille de 1. Fixez les 4 attaches des pieds d‘appui dépôt , en utilisant les trous de forage.
  • Seite 23 Montage FR Étape 6 Étape 7 ×4 ×4 ×4 1. Montez le couvercle sur les charnières ; pour ce faire, insérez les vis M6 x 12 à travers les charnières en passant par l‘intérieur, faites ensuite passer les filetages de ces vis dans les trous de forage du couvercle et fixer 1.
  • Seite 24: Entretien Et Nettoyage

    Montage / Entretien / Nettoyage FR ENTRETIEN ET NETTOYAGE Votre barbecue est fabriqué dans des matériaux de qualité. Afin de nettoyer et préserver les surfaces, veuillez respecter les indications suivantes : • Assurez-vous que le barbecue est entièrement refroidi avant de le nettoyer. Ne jetez jamais de cendres chaudes ou de braises encore incandescentes. Risque d’incendie ! Jetez uniquement les cendres et les restes de charbon lorsqu’ils sont complètement éteints et refroidis.
  • Seite 25 Istruzioni per l’uso e il montaggio GRIGLIA A SFERA CON CERNIERA PIEGHEVOLE 132517_132662_Kamino_BBQ_Anleitung_A4_DE_EN_FR_IT_ES_40S.indd 25 22.11.19 14:08...
  • Seite 26: Avvertenze In Materia Di Sicurezza

    Sicurezza IT Istruzioni per l’uso e il montaggio SI PREGA DI LEGGERE INTEGRALMENTE E ATTENTAMENTE LE PRESENTI ISTRUZIONI PRIMA DELL’ASSEMBLAGGIO E DELLA MESSA IN FUNZIONE DELL’APPARECCHIO E CONSERVARLE PER USI FUTURI! ADATTO SOLO PER UN UTILIZZO PRIVATO. In caso di cessione dell’articolo si prega di allegare anche le istruzioni. Non utilizzare il barbecue in spazi chiusi e/o abitabili, come ad es.
  • Seite 27: Singoli Componenti

    Sicurezza / Fornitura IT DA OSSERVARE ASSOLUTAMENTE PRIMA DELL’USO • Nella scelta del luogo di installazione fare attenzione che il terreno sia sicuro, stabile e in piano e che il posto sia autorizzato per la cottura alla brace. • Il barbecue non deve essere trasportato se ancora caldo! •...
  • Seite 28: Uso Conforme Alla Destinazione D'uso

    Fornitura / Montaggio IT GEBRAUCHS- UND MONTAGEANLEITUNG GEBRAUCHS- UND MONTAGEANLEITUNG FORNITURA: Elementi di raccordo: 25 8 x M6 x 20 26 23 x M6 27 4 x M6 28 1 x M5 x 10 29 1 x M5 Lieferumfang: Lieferumfang: Verbindungselemente: Verbindungselemente: 2 x Kontermutter = a...
  • Seite 29 Montaggio IT FASI DEL MONTAGGIO Passaggio 1 Passaggio 2 ×1 ×4 ×1 ×4 ×1 ×2 ×2 ×2 ×2 ×2 ×3 ×3 ×2 1. Fissare la protezione termica e il ma- nico sulla parte esterna del coperchio ×3 con 2 viti M6 x 20 e assicurarli dall’interno con le rondelle M6 e i dadi...
  • Seite 30 Montaggio IT Passaggio 3 Passaggio 4 ×8 ×2 ×8 ×2 inse- 1. Appendere la grata di appoggio ×8 rendo i ganci nei fori delle gambe di appog- gio lunghe 2. Spingere sui filetti della grata di appoggio una gamba d’appoggio corta alla 1. Fissare i 4 quattro supporti per gambe volta attraverso il rispettivo foro.
  • Seite 31 Montaggio IT Passaggio 6 Passaggio 7 ×4 ×4 ×4 1. Montare il coperchio sulle cerniere inserendo le viti M6 x 12 dall’interno attraverso le cerniere , collocare quindi il coperchio sui filetti attraverso i fori e assicurarlo con rondelle M6 e dadi A tal fine, potrebbe essere d’aiuto una seconda 1.
  • Seite 32: Manutenzione E Pulizia

    Manutenzione / Pulizia IT MANUTENZIONE E PULIZIA Il barbecue è realizzato con materiali di alta qualità. Per pulire e curare le superfici si prega di seguire le seguenti indicazioni: • Assicurarsi che il barbecue si sia completamente raffreddato prima di pulirlo. Non smaltire mai le ceneri calde o la carbonella ancora ardente. Sussiste il pericolo di incendio! Smaltire le ceneri e i residui di carbonella solamente quando sono totalmente spenti e freddi.
  • Seite 33 Instrucciones de uso y montaje BARBACOA ESFÉRICA CON BISAGRA DE LIBRO 132517_132662_Kamino_BBQ_Anleitung_A4_DE_EN_FR_IT_ES_40S.indd 33 22.11.19 14:08...
  • Seite 34: Indicaciones De Seguridad

    Seguridad ES Instrucciones de uso y montaje ¡LEA DETENIDAMENTE ESTAS INSTRUCCIONES ANTES DE COMENZAR EL MONTAJE Y LA PUESTA EN FUNCIONAMIENTO Y CONSÉRVELAS PARA FUTURAS CONSULTAS! SOLO APTO PARA USO PRIVADO. En caso de que entregue el aparato a otra persona, no se olvide de adjuntar también estas instrucciones.
  • Seite 35: Volumen De Suministro

    Seguridad / Volumen de suministro ES ANTES DE UTILIZAR EL PRODUCTO TENGA EN CUENTA LO SIGUIENTE • Asegúrese de colocar la barbacoa en un lugar seguro, estable y plano, que sea apto para hacer barbacoas con carbón. • ¡No debe mover la barbacoa mientras esté caliente! •...
  • Seite 36: Elementos De Conexión

    Volumen de suministro / Montaje ES GEBRAUCHS- UND MONTAGEANLEITUNG GEBRAUCHS- UND MONTAGEANLEITUNG VOLUMEN DE SUMINISTRO: Elementos de conexión: 25 8 x M6 x 20 26 23 x M6 27 4 x M6 28 1 x M5 x 10 29 1 x M5 Lieferumfang: Lieferumfang: Verbindungselemente:...
  • Seite 37: Pasos De Montaje

    Montaje ES PASOS DE MONTAJE Paso 1 Paso 2 ×1 ×4 ×1 ×4 ×1 ×2 ×2 ×2 ×2 ×2 ×3 ×3 ×2 1. Fije el protector térmico y el mango en la parte exterior de la tapa ×3 2 tornillos M6 x 20 y fíjelos por dentro con arandelas M6 y tuercas de maripo-...
  • Seite 38 Montaje ES Paso 3 Paso 4 ×8 ×2 ×8 ×2 con los 1. Cuelgue la bandeja de rejilla ×8 ganchos en los orificios de las patas de apoyo largas 2. Introduzca cada pata de apoyo corta con el orificio por la rosca de la bandeja de 1. Fije los 4 soportes de las patas con los rejilla tornillos M6 ×...
  • Seite 39 Montaje ES Paso 6 Paso 7 ×4 ×4 ×4 1. Monte la tapa en las bisagras introduciendo los tornillos M6 × 12 en las bisagras desde dentro; a continuación, coloque la tapa los orificios en la rosca y fíjela con las arandelas M6 y las tuercas M6 Para este paso puede ser útil contar con una...
  • Seite 40: Mantenimiento Y Limpieza

    Mantenimiento / Limpieza ES MANTENIMIENTO Y LIMPIEZA Su barbacoa está fabricada con materiales de gran calidad. Para limpiar y cuidar las superficies, tenga en cuenta las siguientes indicaciones: • Asegúrese de que la barbacoa se haya enfriado por completo antes de limpiarla. Nunca tire las cenizas calientes ni las brasas. ¡Existe riesgo de incendio! Tire las cenizas y los restos de carbón una vez que se hayan apagado y enfriado por completo.

Inhaltsverzeichnis