Werbung
Verfügbare Sprachen
Verfügbare Sprachen
Quicklinks
Werbung

Verwandte Anleitungen für FLAEM Olly Vaporizer P0413ED

Inhaltszusammenfassung für FLAEM Olly Vaporizer P0413ED
- Seite 2 ‡...
- Seite 3 ‡ 10 cm...
- Seite 4 FLAEM o dal Vs. rivenditore di fiducia. assistenza autorizzato FLAEM o dal Vs. rivenditore di fiducia al fine di evitare situa- zioni pericolose. sicurezza, questo apparecchio non deve essere alimentato tramite un dispositivo...
- Seite 5 venga acceso e spento regolarmente dal fornitore di energia. sotto la stretta supervisione di un adulto che abbia letto le istruzioni seguenti e familiarizzato con esse. Non utilizzate in prossimità di bambini, persone non au- VAPORE BOLLENTE! con capacità fisiche, sensoriali o mentali ridotte, oppure non in possesso dell’e- ricevuto le informazioni necessarie all’utilizzo sicuro del dispositivo e che siano in grado di comprendere i rischi inerenti, oppure che utilizzino l’apparecchiatura sotto supervisione.
- Seite 6 serbatoio. zione prima dell’accensione. di rifornire il serbatoio. di riporlo. in conformità alle istruzioni d’uso; b) l’impianto elettrico dell’ambiente in cui l’ap- parecchio viene utilizzato è conforme alle leggi vigenti. riparazioni non autorizzate invalidano la garanzia e potrebbero generare un poten- ziale rischio elettrico.
- Seite 7 5. ATTENZIONE: per non compromettere il funzionamento dell’umidificatore NON VERSATE le essenze aromatiche direttamente nel serbatoio dell’acqua (1). Versate le essenze aromatiche solamente nella vaschetta porta essenze (2.2) (fig. E), facendo attenzione a non tracimare, riempire fino al livello segnato nella vaschetta (2.2).
- Seite 8 Pulizia/manutenzione settimanale: 2- Pulite l’unità riscaldante. Immergete l’unità riscaldante per 10 minuti in 10 cm di soluzione con il 50% di acqua ed il 50% di aceto bianco. Infine risciacquate abbondantemente con acqua calda (circa 40°C) vedi (Fig. H). Pulizia/manutenzione di fine stagione: 2- Disincrostate la resistenza (2.6), staccando il tappo dell’unità...
- Seite 9 L’apparecchio è adatto a spazi fino a 25 m Leggere le Corrente In conformità istruzioni vapore alternata alla direttiva d’uso caldo 2006/95 CE e successivi aggiornamenti L’umidificatore è stato studiato per soddisfare i requisiti attualmente richiesti per la compatibilità elettromagnetica. In ogni caso, se avete il sospetto che il funzionamento dell’apparecchio interferisca con il normale funzionamento del vostro televisore, radio o altro apparecchio elettrico provate a posizionare diversamente l’apparecchio fino a che l’interferenza sparisce, oppure collegate l’apparecchio ad una presa elettrica...
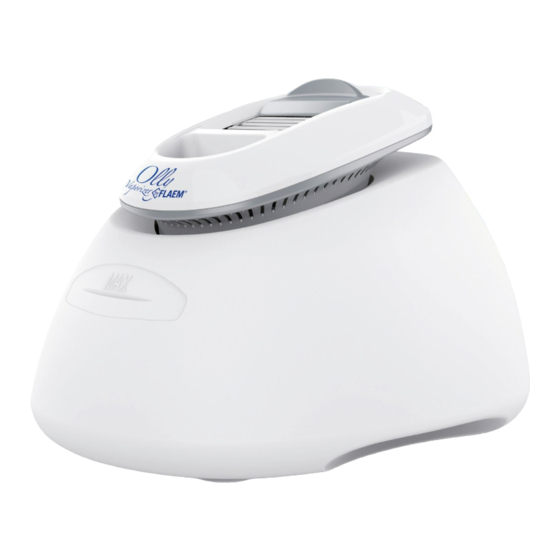
- Seite 10 Please note that the full range of Flaem products is available on the web- remove the packaging. Refer to the page instructions 1-2 1 - Tank 2 - Heating unit 1.1 - MAX. level indicator 2.1 - Power cable 1.2 - IN-OUT slits...
- Seite 11 read and is familiar with the instructions. Do not use near children, non-self-suffi- children without supervision. around the device. Do not touch the power cable with wet hands. Do not move and the water. Do not use it again until it has been inspected or repaired at an author- ised service centre.
- Seite 12 fore storage. instructions for use b) the wiring where the device is being used is in compliance with current laws. INSTRUCTIONS FOR USE 2. To remove the heating unit (2) see (fig. B), press it downwards (B1), simultane- 3. Fill the tank (1) with running water up to the Maximum level indicator on the tank (1.1) (Max.
- Seite 13 the tank runs out of water or if the unit runs in dry operation. - To restart the humidifier, disconnect the plug and wait 5 minutes for it to cool down. Top up with water and restart from (point 4). ATTENTION: Presence of excessive scale may be found on the resistance due to lack of or poor maintenance and cleaning operations.
- Seite 14 PROBLEM CAUSE SOLUTION The ON/OFF night light The device is not con- Insert the plug into the (2.7) fails to switch on nected to socket. and the humidifier fails to the socket. produce steam. Check the operation of the socket. the socket with another device.
- Seite 15 stops, or connect the appliance to a different power socket. This marking indicates that this product should not be disposed with other household wastes throughout the EU. To prevent possible harm to the environ-...
- Seite 16 Toute autre utilisation peut générer un incendie ou de choc électrique. de vie, vérifiez l'intégrité de la structure de l'appareil et du câble d'alimentation pour et amenez immédiatement le produit à un centre de service agréé Flaem ou à votre revendeur de confiance.
- Seite 17 familier avec les instructions. Ne l'utilisez pas près des enfants, des personnes non- CHAUDE ! d'expérience et de connaissance si on leur a donné des instructions ou s'ils sont sur- veillés à garantie d'une utilisation sure de l'appareil et qu'ils peuvent bien comprendre l'entretien de l'utilisateur ne doit en aucun cas être fait par des enfants sans supervision.
- Seite 18 réservoir. férence avant le stockage. avec les instructions d'utilisation b) le câblage où le dispositif est utilisé est en conformité avec la législation actuelle en la matière. annule la garantie et peut constituer un risque potentiel électrique. et / ou de connaissances, sauf s'ils sont suivis ou qu'ils ont reçu des instructions sur l'utilisation de l'appareil par la personne responsable de leur sécurité.
- Seite 19 NOTES : Pendant le fonctionnement, vous pouvez entendre un léger bruit de bouil- lonnement. - L'humidificateur comprend également un interrupteur de sécurité qui éteint l'appareil lorsque le réservoir manque d'eau ou si l'appareil fonctionne en mode sec. - Pour redémarrer l'humidificateur, débranchez la prise et attende 5 minutes pour qu'elle refroidisse.
- Seite 20 PROBLÈME CAUSES SOLUTION La veilleuse ON / OF Le dispositif ne est pas Insérez la fiche dans la (2.7) ne parvient pas à connecté à la douille. prise. se mettre en marche et Aucune alimentation Vérifiez le fonctionnement l'humidificateur ne par- n'atteint la prise.
- Seite 21 Lisez Courant Selon la direc- le mode Vapeur alternatif tive 2006/95 CE d'emploi d'eau et les modifica- chaude tions ultérieures Le vaporisateur de vapeur ambiant est conçu pour répondre aux exigences actuelle- ment définie en matière de compatibilité électromagnétique. Toutefois, si vous sus- pectez que le fonctionnement de cet appareil interfère avec le fonctionnement normal position différente jusqu'à...
- Seite 22 die Verpackung entfernen. Siehe Seite 1-2 der Anleitung 1 - Behälter 2 - Heizeinheit 2.1 - Stromkabel 1.2 - Spalten zum Einsetzen und Herausnehmen des Behälters 2.3 - Dampfabgabeklappe und Herausnehmen des Behälters 2.5 - Deckel der Heizeinheit 2.6 - Heizwiderstand 2.7 - Nachtlicht - ON/OFF (EIN/AUS) diesem Handbuch enthaltenen Anweisungen entsprechend verwenden.
- Seite 23 aufbewahren. hältern verwenden oder Feuchtigkeit oder Regen aussetzen. Die Heizeinheit (2) vorkommen. Vor jeder Verwendung sicherstellen, dass der Behälter nicht beschä-...
- Seite 24 ben eingebaut werden. ben ist, es sollte vorzugsweise trocken sein. ziehen. cken (B1), sie dabei gleichzeitig gegen den Uhrzeigersinn drehen (B2) und sie schließlich aus dem Tank (1) herausziehen (B3). 4. Die Heizeinheit 2 in den Behälter 1 einsetzen. 4.2 Nun im bis zum Anschlag im Uhrzeigersinn drehen. 5.
- Seite 25 6. Den Netzstecker in die Steckdose mit der angemessenen Spannung stecken, um das Nachtlicht einzuschalten (2.7). 7. Den Dampfstrahl durch Bewegen der Dampfabgabeklappe (2.3) nach vorn und hinten regulieren (Abb. F). hensweise begonnen wird. - Der Luftbefeuchter verfügt auch über einen Sicherheitsschalter, der das Ge- rät ausschaltet, wenn das Wasser zu Ende geht oder das Gerät während des Betriebs trocken läuft.
- Seite 26 ben reinigen. Reinigung/Wartung am Ende der Anwendungssaison: 2- Den Heizwiderstand (2.6) entkalken. Hierzu den Deckel der Heizeinheit (2.5) durch Dre- hen gegen den Uhrzeigersinn abnehmen (Abb. I). Mit einem Haushaltsschwamm die URSACHE MAßNAHME Die ON/OFF (EIN/AUS) Der Netzstecker des Den Netzstecker in die Nachtlicht-Funktion (2.7) Steckdose stecken.
- Seite 27 geeignet. Bitte die In Übereinstim- Bedienungs- selstrom mung mit der anleitung serdampf EU-Richtlinie lesen 2006/95 EU und den folgenden Änderungen derzeit geltenden Vorschriften zur elektromagnetischen Verträglichkeit entwickelt. kommt, oder an eine andere Steckdose anschließen.
- Seite 28 Bij schade mag u het snoer niet aansluiten op het stopcontact, maar moet u het toestel on- middellijk naar een erkend FLAEM dienstencentrum of naar uw verkoper brengen. stencentrum of door een persoon met gelijkwaardige kwalificatie worden vervan- gen, om ongevallen te voorkomen.
- Seite 29 aanwezigheid van een volwassene die de instructies heeft gelezen en vertrouwd is met de toepassingen. Niet gebruiken in de buurt van kinderen, personen die HETE DAMPEN! be perkte lichamelijke, zintuiglijke of geestelijke capaciteiten of zonder ervaring of kennis indien zij onder toezicht staan of instructies hebben gekregen hoe zij het toestel veilig moeten gebruiken en de gevaren begrijpen die daarmee gepaard houd mag niet door kinderen worden uitgevoerd als ze niet onder toezicht staan.
- Seite 30 spoel na vooraleer de tank opnieuw te vullen. vooraleer het toestel op te bergen. de gebruiksinstructies en b) de bekabeling waar het toestel wordt gebruikt in over- eenstemming is met de geldende wetgeving. paraties door onbevoegden doen de garantie nietig worden en kunnen een gevaar vormen voor mogelijke elektrocutie.
- Seite 31 uitgeschakeld. Haal de stekker uit het stopcontact en wacht 10 minuten tot het toestel is afgekoeld vooraleer een nieuwe handeling uit (punt 1) uit te voeren. - Het bevochtigingssysteem heeft eveneens een veiligheidsschakelaar die het toestel uitschakelt wanneer het water in de tank op raakt of als de groep droog zou werken.
- Seite 32 2- Om de weerstand (2.6) te ontkalken, moet u de kap van de verwarmingsgroep (2.5) kalkaanslag weg te nemen (afb. L). PROBLEEM Het nachtlampje AAN/UIT De stekker van het toestel Steek de stekker in het (2.7) kan niet inschakelen zit niet in het stopcontact. stopcontact.
- Seite 33 Dit toestel is geschikt voor ruimtes tot 25 m Lees de In overeen- werkingsin- stroom stemming met structies terdampen de richtlijn en volgende amendementen Deze verdamper is ontworpen om te beantwoorden aan de vereisten die momenteel van kracht zijn inzake elektromagnetische compatibiliteit. Indien u echter vermoedt dat de werking van het toestel interferentie veroorzaakt met de normale werking van uw televisie, radio of andere elektrische apparatuur, probeer dan om het toestel op een andere plaats te zetten tot de interferentie ophoudt, of sluit het toestel op een...
- Seite 34 Tenga en cuenta que toda la gama de productos Flaem está disponible en nuestro sitio web www.flaemnuova.it. Lea atentamente estas instrucciones antes los fines indicados en estas instrucciones. Respete las advertencias de seguridad importantes. Retire el embalaje adecuadamente.
- Seite 35 personas no autosuficientes ni animales domésticos, para evitar el riesgo de que- manos mojadas. No mueva ni encienda el aparato si está descalzo. ni lo exponga a la humedad o a la lluvia. No sumerja completamente la unidad de en la parte inferior del aparato (datos de la placa). No encienda el dispositivo con corriente continua (CC).
-
Seite 36: Instrucciones De Uso
la primera puesta en marcha. enjuague el tanque antes de volver a llenarlo. seco antes de guardarlo. potencial riesgo eléctrico. sobre el uso del dispositivo por parte de una persona responsable de su seguridad. rato. INSTRUCCIONES DE USO 2. Para sacar la unidad calefactora (2) consulte (fig. B), presione la unidad calefac- 3. - Seite 37 7. Ajuste el flujo de vapor moviendo el obturador de flujo de vapor (2.3) hacia delan- burbujeo. - El humidificador incluye también un interruptor de seguridad que apaga la unidad cuando el tanque se queda sin agua o si la unidad funciona en seco. - Para reiniciar el humidificador, desconecte el enchufe y espere 5 minutos para que se enfríe.
- Seite 38 Limpieza / mantenimiento de fin de temporada: (2.5) girándola en sentido antihorario (fig. I). Use una esponja normal para eliminar el PROBLEMA CAUSA El indicador luminoso de El aparato no está conec- Inserte el enchufe en la ON / OFF (2.7) no se en- tado a toma de corriente.
- Seite 39 De acuerdo Leer las Corriente con la directiva instrucciones Vapor de alterna de uso agua caliente sucesivas mo- dificaciones patibilidad electromagnética actualmente establecidos. Sin embargo, si sospecha que el funcionamiento de este aparato interfiere con el normal funcionamiento de su hasta que la interferencia se detenga, o conecte el aparato a otra toma de corriente.
- Seite 47 .www.flaemnuova.it Flaem - 1.2 - 2.2 - 3.2 - 1.1 - 4.2 - 2.1 - 5.2 - 3.1 - 6.2 - 7.2 ‡ FLAEM ‡ ‡ ‡ ‡...
- Seite 48 ‡ ‡ ‡ ‡ ‡ ‡ ‡ ‡ ‡ ‡ ‡ ‡ ‡ ‡ ‡ ‡...
- Seite 49 (1.2) (B2) (B1) .(1) (B3) ) (1.1) (2.1) (4.2) (2.2) .(1) .(2.2) .(7.2) (3.2) .]ph .(7.2)
- Seite 50 (1.2) (7.2) ) (3.1) (5.2) (6.2) (7.2) " " (1.1)
- Seite 51 P0413ED 240-260 220-240 104° - 50°) 40° ) x 22 ( ) x 29 ( ) 27 2006/95...
- Seite 70 No caso de danos não ligar o cabo e levar imediatamen- te o produto para a um centro de assistência autorizado FLAEM ou o seu vendendor de confiança.
- Seite 71 não auto-suficientes e animais doméstico para prevenir o risco de queimaduras. seguro e compreendam os riscos envolvidos. Crianças não poderão brincar com o aparelho, a limpeza e a manutenção não devem ser realizadas por crianças sem a devida supervisão. das crianças. alimentação em redor do aparelho.
- Seite 72 seco antes de armazenamento. em conformidade com as leis atuais. elétrico. aparelho pela pessoa responsável pela sua segurança. - Crianças devem ser vigiadas para se ter a certeza que não brincam com o aparelho. 1. Desconectar sempre o cabo de alimentação (2.1) antes de encher o dispositivo. 2.
- Seite 73 - O humidificador também inclui um interruptor de segurança que desliga a unidade quando os tanques ficam sem água ou se a unidade está a funcio- nar a seco. - Para reiniciar o humidificador desconectar a tomada e esperar 5 minutos para que esta arrefeça.
- Seite 74 PROBLEMA CAUSA SOLUÇÃO A luz noturna ON/OFF (2.7) O aparelho não está co- Inserir a ficha na tomada. não se liga e o humidifica- nectado à dor não produz vapor. tomada. Tomada sem alimentação. Verificar o funcionamento da tomada com um outro aparelho.
- Seite 75 O aparelho é adequado para espaços até 25 m Ler as ins- Corrente De acordo Vapor de alternada com a diretiva utilização água quente 2006/95 EC e posteriores O Vaporizador De Vapor é projetado para satisfazer as exigências atualmente estabe- lecidas para compatibilidade eletromagnética.
-
Seite 76: Condizioni Di Garanzia
La garanzia copre qualsiasi difetto derivato dai materiali o dalla fabbricazione, a condizione che l’apparecchio non abbia subito manomissioni da parte del cliente o da personale non autorizzato da FLAEM NUOVA S.p.A., o che sia stato utilizzato in modo diverso dalla sua destinazione d’uso. La garanzia copre inoltre la sostituzione o la riparazione dei componenti con vizi di fab- bricazione.