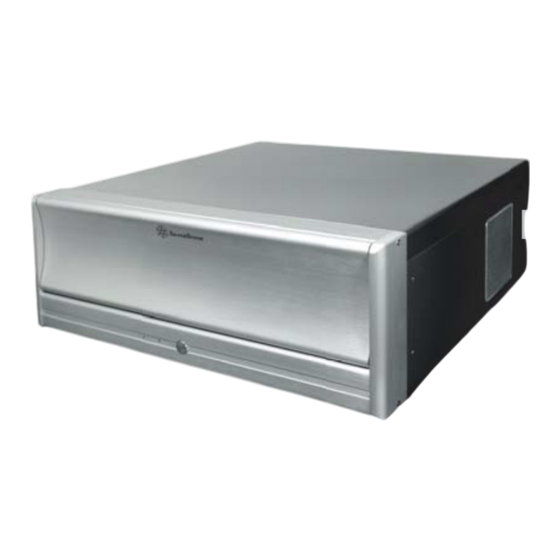
SilverStone Lascala Serie Bedienungsanleitung
Vorschau ausblenden
Andere Handbücher für Lascala Serie:
- Bedienungsanleitung (12 Seiten) ,
- Bedienungsanleitung (15 Seiten) ,
- Bedienungsanleitung (12 Seiten)

Verwandte Anleitungen für SilverStone Lascala Serie


Inhaltszusammenfassung für SilverStone Lascala Serie
- Seite 3 80 x 80 x 25mm FAN*2 80mm FAN OPTION TOP COVER 5.25" BAY*2 FRONT I/O (USB2.0*2,MIC,AUDIO,IEEE1394) RESET BUTTON 3.5" BAY*3 HIDDEN INTERNAL 80 x 80 x 25mm or 92 x 92 x 25mm FAN OPTION 3.5" BAY*2 EXTERNAL 3.5" BAY*1 HIDDEN INTERNAL FRONT I/O Pin Definition AC'97 CONNECTOR IEEE 1394 CONNECTOR...
- Seite 4 Открутите 4 шурупа на верхней панели, Please remove the 4 screws on the top затем потяните верхнюю панель назад panel, then pull toward the back and и выньте ее из корпуса. remove outward from the chassis Bitte entfernen Sie die 4 Schrauben an 請依圖示取下鎖固上蓋的4顆螺絲後,...
- Seite 5 Выньте шурупы, расположенные на Remove the screw on the 5.25” device кронштейне 5,25-дюймового bracket устройства. Entfernen Sie die Schrauben an der 請依圖示卸下鎖固5.25"裝置架螺絲 Halterung für 5.25” Laufwerke Retirez le vis fixant le casier de la 请依图标卸下锁固5.25”装置架螺丝 baie 5.25” Quite el tornillo en el soporte de 5.25 ドライブブラケッ...
- Seite 6 Открутите шурупы на крышке Remove the screws on the 5.25” device 5,25-дюймового устройства и выньте cover and remove the covers from the ее из кронштейна. bracket Entfernen Sie die Schrauben an den 請依圖示將鎖固5.25"裝置擋板螺絲 Blenden der 5.25” Einschübe und 卸下,並將檔板自裝置架中取下 entfernen Sie die Blenden Retirez les vis du cache de la baie 请依图标将锁固5.25”装置挡板螺丝...
- Seite 7 Открутите 4 шурупа на средней Remove the 4 screws on the middle 3.5” hard drive cage and pull it toward the корзине для 3,5-дюймового жесткого диска, затем потяните корзину назад back to remove it outward from the и выньте ее из корпуса. chassis Entfernen Sie die 4 Schrauben an der 請依圖鎖固中間3.5"硬碟架螺絲卸下,...
- Seite 8 Открутите 4 шурупа на левой корзине Remove the screw on the left 3.5” hard для 3,5-дюймового жесткого диска, drive cage, then pull it toward the back затем потяните корзину назад и выньте and remove it outward the chassis. ее из корпуса. После этого выньте Having removed it outward the chassis, шурупы...
- Seite 9 Вставьте 3,5-дюймовый жесткий Insert your 3.5” hard drive into the left диск в левую корзину и закрепите hard drive cage and secure with шурупами. screws Setzen Sie ihre 3.5” Laufwerke in die 將您的3.5"硬碟裝入左邊硬碟架, linke Halterung ein und befestigen Sie 並以螺絲鎖固 die Laufwerke mit Schrauben Insérez votre disque dur 3.5”...
- Seite 10 Fasten and secure motherboard stands Надежно закрепите опоры материнской платы. as required Plazieren Sie die Abstandshalter für 請依需求鎖固主機板螺柱 das Mainboard wie erforderlich Serrez et fixez les plots selon les 请依需求锁固主板螺柱 besoins de votre carte mère Sujete y asegure los soportes de la マザーボードの必要に合わせてスペ...
- Seite 11 Сняв заглушку слота, установите Remove the slot cover then install the плату расширения. expansion card as required Bitte entfernen Sie die Abdeckungen 請依需求將擴充槽檔片取下後安裝擴 an den Einschüben für 充卡 Erweiterungskarten entsprechend ihren Ansprüchen Retirez les équerres PCI et ensuite 请依需求将扩充槽档片取下后安装扩 installez votre carte d'extension selon 充卡...
- Seite 12 Reinstall the 3.5” hard drive cages into Вставьте в корпус корзины для 3,5-дюймовых жестких дисков и chassis and secure with screws закрепите шурупами (шаг 8 и 10). (step 8 and 10) Setzen Sie die 3.5” Halterungen wieder 將3.5"硬碟架裝回機箱並以螺絲鎖固 in das Gehäuse ein und schrauben Sie (步驟8與步驟10) es fest (Schritt 8 und 10) Réinstallez les casier à...
- Seite 13 Установите замок и закрепите Install the lock pad and secure with прилагаемым шурупом. included screw Befestigen Sie das Schloss-Plätchen 請依圖示安裝鎖頭片並以內附螺絲鎖固 mit den beiliegenden Schrauben Installez le lock pad et fixez-le avec 请依图示安装锁头片并以内附螺丝锁固 les vis incluses Instale el cojín de la cerradura y lo ロックパッ...
- Seite 14 Reinstall the top panel and secure with Установите на место верхнюю панель и закрепите ее шурупами. screws Setzen Sie die obere Abdeckung 將上蓋裝回並以螺絲鎖固 wieder ein und schrauben Sie sie fest Réinstallez le panneau supérieur et 将上盖装回并以螺丝锁固 fixez-le avec des vis Reinstale el panel superior y asegúrelo 上部パネルを取り付け、...