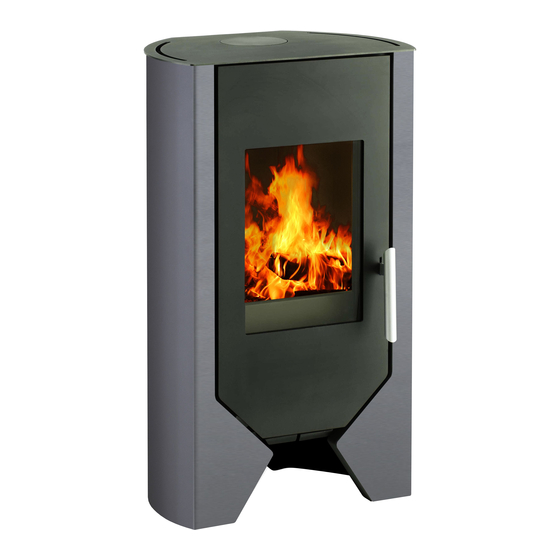
Seite 1
Bedienungs- und Aufstellanleitung Fireplace user instruction Cheminée, mode d’emploi Istruzioni per uso e installazione Kandalló használati útmutató M-LINE 111 50 BOSTON 111 51 CHICAGO 111 53 MANHATTAN...
Vorwort Sehr verehrter Kunde, wir beglückwünschen Sie zum Erwerb unseres Kaminofens. Sie haben die richtige Wahl getroffen. Mit dem Kauf dieses Produktes haben Sie die Garantie für: Hohe Qualität durch Verwendung bester und bewährter Materialien • Funktionssicherheit durch ausgereifte Technik, die streng nach •...
SICHERHEITSHINWEISE Die Geräte sind nach DIN EN 13240 geprüft (Typenschild). Bei der Aufstellung und dem abgasseitigen Anschluss sind die anwendbaren nationa- len und europäischen Normen, örtliche und baurechtliche Vorschriften/Normen (z.B. DIN 18896, DIN 4705, DIN EN 13384, DIN 18160, DIN EN 1856-2, DIN EN 15287 u.a.) sowie feuerpolizeiliche Bestimmungen (z.B.
Seite 4
14. Im Heizbetrieb können alle Oberflächen und besonders die Sichtscheiben sowie die Griffe und Bedieneinrichtungen sehr heiß werden. Machen sie Kinder und Jugendli- che, ältere Menschen und Tiere auf diese Gefahren aufmerksam, und halten sie Sie während des Heizbetriebes von der Feuerstätte fern. Verwenden Sie zur Bedienung den beigelegten Schutzhandschuh oder das Hilfswerkzeug.
1.2 Inbetriebnahme Brennstoffe Das Gerät ist ausschließlich für den Betrieb mit nachfolgend aufgeführten Brennstoffen geeignet. Nur damit ist ein raucharmer und störungsfreier Betrieb gewährleistet. Ver- wenden Sie nur natur belassenes, trockenes Scheitholz mit einer Restfeuchte von max. 20% und Braunkohlenbriketts. Brennstoffart Heizwert ca.
Seite 7
OFFEN Erstes Anheizen Vor Inbetriebnahme sind alle Transportsicherungen (Papier) sowie brennbaren • Gegenstände; auf der Umlenkplatte über dem Feuerraum, dem Brennraum und Aschekasten herauszunehmen. Eventuelle Aufkleber auf der Sichtscheibe rückstandsfrei entfernen. Die Heiztür öffnen durch Heben des Griffes nach oben (Bild 2). Bei heißem Gerät ist dazu der Schutzhandschuh zu benutzen.
Den Brennstoff nicht in den Brennraum einwerfen, sondern einlegen, da sonst die Ausmauerung beschädigt werden kann. Achtung! Beim Öffnen der Heiztür kann es bei Fehlbedienung oder bei nicht ausreichendem Schornsteinzug zu Rauchaustritt kommen. Es ist unbedingt zu beachten, dass die Heiztür nur langsam, zuerst einen Spalt und nach ein paar Sekunden ganz geöff- net werden darf.
1.5 Reinigung und Pflege Mit richtigem Betrieb/Bedienung und guter Pflege/Wartung erhöhen Sie die Wertstabili- tät und Lebensdauer Ihrer Geräte. Sie sparen wertvollen Ressourcen und schonen unsere Umwelt und Ihren Geldbeutel. Zur Reinigung, sind die Umlenkplatten (Bild 6+7) auszubauen (komplett) oder durch leichtes und vorsichtiges abrütteln nach oben (Bild 7) von dem Russ zu befreien.
1.6 Störungsursachen, Behebung Art der Störung mögliche Ursache Behebung Geruchbildung: Austrocknung der angewen- Den Ofen entsprechend der deten Schutzfarbe. Verdamp- Bedienungsanleitung mehrere fung von Ölresten Stunden mit geringer Menge Brennstoff betreiben. Danach für mehrere Stunden auf ma- ximale Leistung heizen. Zu geringe Wärmeab- Geräteleistung zu klein •...
2. Aufstellung 2.1 Vorschriften Bei der Aufstellung und dem abgasseitigen Anschluss sind die anwendbaren nationalen und europäischen Normen, örtliche und baurechtliche Vorschriften/Normen (z.B. DIN 18896, DIN 4705, DIN EN 13384, DIN 18160, DIN EN 1856-2, DIN EN 15287) sowie feuerpolizeiliche Bestimmungen (u.a. FeuVo) zu beachten. Lassen Sie das Gerät nur von einem qualifizierten Fachmann aufstellen und anschließen.
Belag aus nicht brennbaren Baustoffen, z.B. Keramik, Stein, Glas oder einer Bodenplatte aus Stahl, ersetzt oder geschützt werden. 2.4 Schornsteinanschluss Die M-Line Serie kann wahlweise mit Ø 120 oder Ø 150 mm an den Schornstein ange- schlossen werden. Bei Anschluss Ø 120 mm ist der Anschluss-Adapter vom Gerät ab- zunehmen.
Seite 14
Richtig Falsch mind. 50 cm Querschnittverengung im Kamin durch zu weit eingeschobene Abgasrohre Stau durch sich ge- genseitig behin- mind. 30 cm dernde Abgasströ- Falschluft durch offene Türen an nicht benutzten Feuerstätten Falschluft durch of- fenen Rohranschluß Falschluft durch undichten Rohr- anschluß...
2.5 Verbrennungsluft Die Geräte arbeiten raumluftabhängig. Eine ausreichende Verbrennungsluftversor- gung ist zwingend notwendig. Unterdrücke im Aufstellraum sind nicht zulässig. Daher sind bei der Kombination mit raumlufttechnischen Anlagen (z.B. Lüftungsanlagen, Dunstabzugshauben, pneumatische Fördereinrichtungen etc.) die einschlägigen techni- schen Regeln / Vorschriften zu beachten (u.a. in Deutschland Kombination Lüftung - Feuerstätte nur in Ausführung nach §4 FeuVo zulässig).
Seite 16
266mm 111 51 CHICAGO 266mm 111 53 MANHATTAN 266mm Die M-Line Serie kann wahlweise mit Ø 120 oder Ø 150 mm an den Schornstein angeschlossen wer- den. Bei Anschluss Ø 120 mm ist der Anschluss-Adapter vom Gerät abzunehmen und direkt anzu- schließen.
3. Technische Daten 3.1 Maßzeichnungen, Daten 111 50 BOSTON Gewichte brutto / netto: Die angeführten Abmessungsangaben sind nur zur Information! Wir behalten uns das Recht von Konstruktionsänderungen vor, falls diese das technische Niveau erhöhen, oder die Qualität verbessern!
Seite 18
111 51 CHICAGO Gewichte brutto / netto: Die angeführten Abmessungsangaben sind nur zur Information! Wir behalten uns das Recht von Konstruktionsänderungen vor, falls diese das technische Niveau erhöhen, oder die Qualität verbessern!
Seite 19
111 53 MANHATTAN Gewichte brutto / netto: Die angeführten Abmessungsangaben sind nur zur Information! Wir behalten uns das Recht von Konstruktionsänderungen vor, falls diese das technische Niveau erhöhen, oder die Qualität verbessern!
Wamsler Haus- und Küchentechnik GmbH, Gutenbergstr. 25, D-85748 Garching Produktbezeichnung: Kaminofen Typ: M-LINE, Typ 111 50 - 111 60 Die bezeichneten Produkte stimmen mit den Vorschriften folgender Europäischer Richt- linien überein: 89/106/EWG: Bauprodukten- Richtlinie Der Nachweis erfolgt nach DIN EN 13240 durch den Prüfbericht Nr. 247491 der staat- lich akkreditierten TÜV Süd Prüfstelle H-Budapest (notified body number 1420) vom...
Foreword Dear Customer! Thank you for choosing our product! By purchasing this product you receive guarantee for good quality originating from the usage of the finest and proven materials, • operating security which is controlled according to German and European •...
SAFETY INSTRUCTIONS This equipment has been certified under the requirements of standard EN 13240 (see the model plate). For setting purposes and connection to the chimney, the fire protection requirements as prescribed in the given locations, as well as standards DIN 4705, DIN 18160, DIN 18896, EN 13384, EN 1856-2 and EN 15287 should be complied with.
Seite 25
12. When opening the furnace chamber door, any incorrect handling or insuf- ficient draught may induce smoke. Always ensure that the furnace cham- ber door may be opened only slowly, first just to a small extent, and then fully after a few seconds. In addition, if you intend to put additional fuel into the fire, before the opening of the door only there may be only ember bed in the burning space, i.e.
1. Usage 1.1 Structure of the equipment Smoke tube end Model plate on the rear wall Outside air intake Smoke tube end Furnace chamber door Furnace chamber walling Door knob Ash bin Fuel selector Primary air regulator...
closed open Filling quantities - Split billet: max. Length: 25 cm, Ø 5 - 12 cm, max. 2 billet per filling, max. 1.2 kg - Lignite briquette: max. 1.4 kg 1.2 Installation Fuels The equipment can be used with fuels detailed in the followings. This way the “low-smoke”...
Adjustment: Setting of the Setting of the primary Fuel fuel selector “A” air regulator “B” Warning up, OPEN OPEN kindling Nominal heating Wood OPEN CLOSED performance Nominal heating Brown-coal CLOSED OPEN performance Putting out of working CLOSED CLOSED order Table 2 IT IS NOT ALLOWED to burn waste, fine chipping, bark, wood handled with preventive chemicals, furthermore paper and cardboard.
1.3 Putting out of operation • Let the glowing ember burn to ashes and the fire-place get cold. • Empty the furnace chamber and the ash bin. • Close the doors, and shut off the primary air regulator and the fuel switch. 1.4 Heating instructions The fireplace should be operated only with closed furnace chamber door.
1.5 Cleaning and maintenance After the heating season, it is recommended to clean the fireplace and the flue gas pipes carefully. Any dropping heating performance is almost always the conse- quence of the strong contamination of the flues. For cleaning, the baffle plate (Pic- ture 6+7) is to be pulled forward.
Seite 31
closed open pic. 2 pic. 3 pic. 4 pic. 5 pic. 6 pic. 7...
1.6 Potential problems and how to tackle them Kind of operating Possible reasons Solution problem Odour formation Curing of the applied pre- Operate the fire-place on a ventive lacquer. low heating level according Steaming oil remains. to the instructions manual for a few hours.
2. Placing 2.1 Prescriptions For setting purposes and connection to the chimney, the fire protection re- quirements as prescribed in the given locations, as well as standards DIN 4705, DIN 18896, DIN 18160, EN 13384, EN 1856-2 and EN 15287 should be complied with.
Floor in front of and under the fireplace Floors made from combustible materials, such as carpets, parquet floors or cork is to be protected by a shield of non-combustible material – for example ceramics, stone, glass or steel – placed under the fireplace so that it should reach out to 50 cm in front and 30 cm besides.
Seite 35
Right Not right min.50cm Tightening cross section of the chimney because the smoke tube is pushed into the chimney too much Obstruction because the smoke tubes are led as facing each other min.30cm Faulty draught because a fire-place’s door (not in use) is open False air because of an open tube joint...
CO (relating to 13% O 1069 / 825 mg/m Efficiency 82,2 / 79,4 % The M-Line series can be con- nected to the chimney in a Ø 120 Ø 120 mm mm or a Ø 150 mm design. In case of a Ø...
Seite 40
111 53 MANHATTAN The specified dimensions and weights are approximate values, and thus have only informative purposes. We reserve the right to modify the designs as required in terms of technology or quality!
Wamsler Haus- und Küchentechnik GmbH, Gutenbergstr. 25, D-85748 Garching Description of the product: Fireplace Type: M-LINE, Typ 111 50 - 111 60 The said products are compliant with the specifications of the following European direc- tives: 89/106/EEC Requirements for construction products This is attested by test reports No.
Préambule Cher Client, Nous vous félicitons d’avoir acheté un poêle Wamsler. Vous avez fait le bon choix car ce produit est pour vous une garantie - de grande qualité, grâce à l’emploi de matériaux excellents et éprouvés - de sécurité de fonctionnement, grâce à une technique parfaitement au point et sévèrement contrôlée selon la norme européenne EN 13240.
Pour les préserver il faut veiller à respecter les quantités maximum de bois (indiquées dans cette notice) et éviter les chocs lors de l'introduction des bû- ches. Ainsi vous pourrez profiter de votre poêle plusieurs saisons sans les remplacer. La pierre ollaire est un produit naturel avec des nuances de couleur et des veines, en aucun cas l'aspect de la pierre est un motif de réclamation.
CONSIGNES DE SECURITE Les appareils ont été examinés suivant les normes EN 13240 (tableau définis- sant le type de l’appareil). En ce qui concerne l’installation et le raccordement de l’appareil à la cheminée, il faut respecter les dispositions nationales relatives au chauffage et les dispo- sitions des normes DIN 4705, DIN 18160, DIN 18896, EN 13384, EN 1856-2 et EN 15287.
Seite 45
13. En mode de chauffage, la surface de l’appareil, les fenêtres et les poignées peuvent devenir très chaudes. Il faut informer les enfants de ce danger et veil- ler à ce qu’ils ne puissent pas toucher à la cheminée. 14. Il faut vérifier que le cendrier est mis à sa place correctement, il faut faire une attention particulière à...
fermé ouvert 1.2 Mise en service Combustible Ce poêle à bois convient aux combustibles suivants : Bois bûches de longueur au maximum 25cm TOUT COMBUSTIBLE AUTRE QUE LE BOIS EN BUCHEs EST INTERDIT. Les feuillus durs (chêne, hêtre, frêne, châtaignier, charme, noyer, fruitiers, etc.) fournissent un bois de chauffage de meilleure qualité, qui dégage plus de chaleur en brûlant plus longtemps que les résineux.
Seite 48
Le bois de chauffage fraîchement abattu, conditionné en 1 m, doit être stocké au minimum 3 ans. Coupé à 50 cm, fendu et conservé sous abri dans un endroit bien ventilé, le bois sèche plus vite et le délai minimum est ramené à 2 ans. Toute combustion de bois "souillé"...
L'allumage ● vérifier que votre prise d'air extérieure est ouverte. ● ouvrir la porte en basculant la poignée vers le haut (voir fig. 2) ● ouvrir la prise d’air primaire (voir fig. 3) ● disposez un peu de papier ou d’allume feu conseillé pour le bois (sans soufre), sur la grille puis un peu de petit bois et ensuite du bois plus gros.
Seite 50
Nettoyage de la vitre Le combustible bois produit naturellement de la suie, ce qui entraîne la salissure de la vitre. Vous devez utiliser des produits spéciaux pour vitre d'appareil de chauffage au bois. Ces produits lave vitres ne doivent être utilisés que pour le nettoyage de la partie intérieure de la vitre.
1.6 Anomalies Problèmes Cause Solution Dégagement Durcissement de la peinture et Chauffez le poêle comme décrit d’odeur évaporation des résidus pendant quelques heures sur la d’huile. position minimum. Ensuite le faire chauffer au maximum pendant quelques heures. Dégagement de Capacité de chauffage Faites contrôler le dégagement de chaleur insuffisante.
2. Installation 2.1 Prescriptions d’installation Le bon fonctionnement de votre poêle est fortement lié à la qualité de son ins- tallation. L'installation doit être effectuée par un professionnel ou une personne qualifiée. Cette notice comprend des recommandations propres à votre poêle. Il est im- pératif de suivre ces recommandations pour bénéficier des meilleures perfor- mances mais aussi de la garantie sur cet appareil.
2.3 Distances minimum Tous les matériaux de construction combustibles, meubles, ou tissus de décoration doivent être protégés contre la chaleur à proximité du poêle. Pour cela vous devez prendre en compte les distances de sécurité décrits ci-dessous: Distance de sécurité dans la zone de rayonnement (fig 8). Dans la zone visible du feu (zone de rayonnement) une distance minimum de 80 cm (mesure A) doit être respectée entre les matériaux combustibles, (meubles, tissus de décoration, etc) et la façade du poêle.
2.4 Raccordement au conduit de cheminée Le conduit: Le poêle doit être raccordé à un conduit qui convient pour des combustibles solides conformément à la norme française DTU 24.1 P1 / 51-201 relative aux travaux de fumisterie. Pour un bon fonctionnement il est impératif que votre conduit de fumée soit compatible avec votre poêle.
- CO à 13% O² 1069 / 825 mg/m - particules fines à 13% O² < 40 mg/m³ La série M-Line peut être raccor- dée sur la cheminée, au choix, avec un Ø de 120 ou de 150 mm, Ø 120 mm en fonction de la construction.
3.1 Plans avec les dimensions 111 50 BOSTON La taille apparaitre et les donnée informer de caractères! Notre firmée la structure modification entretenir doit, en tant qu’ils levent technique niveau ou ils améliorent la qualité!
Seite 59
111 51 CHICAGO La taille apparaitre et les donnée informer de caractères! Notre firmée la structure modification entretenir doit, en tant qu’ils levent technique niveau ou ils améliorent le qualité!
Seite 60
111 53 MANHATTAN La taille apparaitre et les donnée informer de caractères! Notre firmée la structure modification entretenir doit, en tant qu’ils levent technique niveau ou ils améliorent le qualité!
Wamsler Haus- und Küchentechnik GmbH, Gutenbergstr. 25, D-85748 Garching Dénomination du produit: Cheminée Types: M-LINE, Typ 111 50 - 111 60 Les produits ci-dessus indiqués sont en conformité avec les dispositions des direc- tives européennes. 89/106/CEE Directive concernant les produits de bâtiment La preuve est donnée conformément à...
Gentilissimo Cliente, ci complimentiamo con Lei per aver acquistato questa stufa da riscaldamento e per l’ottima scelta effettuata! Questo prodotto Le garantisce qualità elevata grazie all’utilizzo di ottimi materiali testati • funzionamento sicuro grazie alle avanzate tecnologie verificate in modo •...
AVVERTENZE DI SICUREZZA L’ apparecchio e i suoi dispositivi sono stati testati sulla base della norma EN 13240 (vedi targa di identificazione). Per un funzionamento ottimale della Sua stufa è fondamentale che la canna fumaria alla quale volete effettuare il collegamento sia in condizioni perfette. L’installazione e l’uso delle apparecchiature, deve avvenire esclusivamente in •...
Seite 64
Aprendo lo sportello del focolare potrebbe verificarsi un’uscita di fumo dovuta ad un utilizzo improprio o ad uno scarso tiraggio della canna fumaria. Si rac- comanda pertanto, di aprire lo sportello lentamente e solo di qualche centime- tro, prima di aprirlo completamente. Prima di aprire lo sportello per la ricarica di combustibile, assicurarsi che nel focolare vi sia solo il letto di brace e che le fiamme siano tutte spente.
Seite 65
Poiché i combustibili solidi bruciando producono fuliggine, sul vetro della stufa potrebbero formarsi depositi; ciò non è da considerarsi un difetto dell’apparecchio. Essendo la pietra ollare/arenaria pietre naturali, eventuali alterazioni cromati- che sono normali e non costituiscono motivo di reclamo. L’apparecchiatura deve essere impiegata solo per l’uso per il quale è...
Chiuso Aperto 1.2 Accensione Combustibili Per garantire un corretto funzionamento della stufa e una formazione minima di fumo devono essere utilizzati esclusivamente i combustibili elencati di seguito: legna secca allo stato naturale con umidità massima del 20% e mattonelle di lignite.
Seite 68
È vietato bruciare i seguenti combustibili: Rifiuti, minuzzoli di legna, corteccia, polverino di carbone, trucioli, legna umida e trattata con antisettici, carta, cartone e simili. Per l’accensione utilizzare bric- chetti di legno o accendi fuoco da grill. N.B. Per l’ accensione non utilizzare mai : alcool, benzina, o altri combu- stibili liquidi.
Aprire lo sportello del focolare sollevando la maniglia verso l’alto (fig. 2). Se l’apparecchio è caldo, utilizzare un guanto di protezione isolato. Impostare l’aria primaria e la scelta di combustibile (fig. 3) secondo quanto indicato dalla tabella 1. Posizionare sulla griglia focolare bricchetti di legno o accendi fuoco e aggiungervi sopra dei trucioli di legno.
e fuliggine garantendo il rispetto dell’ambiente. Qualora la stufa venga utilizzata nei periodi di mezza stagione è necessario prima controllare il tiraggio della canna fumaria, che potrebbe essere scarso se la temperatura esterna è elevata. A questo scopo avvicinare un fiammifero acceso allo sportello del focolare leggermente a- perto.
Seite 71
Prima del primo utilizzo pulire il vetro ROBAX S della stufa con un panno umi- do e pulito e aggiungere poi delle gocce di detergente per vetroceramica su entrambi i lati del vetro mediante carta da cucina. La pregiata superficie di ROBAX S è rivestita con una pellicola invisibile che consente di mantenere il vetro pulito e che agevola le operazioni di pulizia se queste sono svolte regolarmente.
1.6 Cause e risoluzione anomalie Tipo di anomalia Cause possibili Rimedi Formazione di odori: Asciugatura della vernice Lasciare la stufa in funzione per utilizzata ed evaporazione diverse ore sulla posizione mi- dei residui di olio. nima così come indicato nelle istruzioni per l’uso.
2. Installazione 2.1 Prescrizioni e norme Leggere attentamente il contenuto del presente manuale, in quanto forni- • sce importanti indicazioni ed istruzioni riguardanti l’installazione, l’uso, la manutenzione e soprattutto la sicurezza del prodotto. L’installazione e l’uso delle apparecchiature, deve avvenire esclusivamente •...
2.2 Distanze di sicurezza Proteggere dall’effetto del calore tutti gli elementi costruttivi, mobili o tessuti di arredamento infiammabili situati nelle vicinanze della stufa. Oggetti all’interno della zona di irraggiamento Per gli elementi costruttivi, i mobili e i tessuti di arredamento infiammabili situati nella zona di irraggiamento della stufa è...
Se il tiraggio è scarso la stufa do- vrebbe essere collegata alla canna fumaria mediante un tubo di scarico fumi verticale. La serie M-Line può essere Ø 120 mm collegata al camino con Ø da 120 o da 150 mm, a piacere.
Seite 77
Montaggio dell'attacco posteriore del tubo con Ø 120 mm: 1. Smontare la canna fumaria superiore e la piastra di copertura del lato posteriore. 2. Montare dall'alto stringendo forte il coperchio di chiusura posteriore dell'apertura di scarico del fumo. 3. Collocarvi sopra dall'alto la piastra di rivestimento allegata (nella scatola di raccolta ceneri).
Seite 78
E’ consigliato che il condotto fumario sia dotato di una camera per rac- − colta materiali solidi ed eventuali condense, situata sotto l’imbocco del canale da fumo, in modo da essere facilmente apribile ed ispezionabile da sportello a tenuta d’aria. In caso di incendio della canna fumaria munirsi di adeguati sistemi per −...
Seite 79
Inclinazione del tetto Altezza della zona di reflusso Z (m) C (° ) 1,85 1,00 0,50 1,50 1,30 0,80 1,30 2,00 1,50 1,20 2,50 2,10...
Seite 80
REALIZZAZIONE DELL’ALLACCIAMENTO ALLA CANNA FUMARIA Eseguire il collegamento dell’apparecchio alla canna fumaria del camino esi- • stente, assicurandosi che il tubo di uscita fumi non occupi la sezione libera del- la canna fumaria. Utilizzare esclusivamente tubi adatti allo smaltimento dei fumi della combustio- •...
NOTA : Il locale di installazione non deve essere messo in depressione da appa- recchiature quali ad esempio: cappe di aspirazione,camini, canne fumarie,ecc.., presenti nel locale stesso o nei locali adiacenti posti in comunicazione. D’aria bocchettone Ø 98 mm „A“ 111 50 BOSTON 266mm 111 51 CHICAGO 266mm 111 53 MANHATTAN 266mm 3.
3.1 Disegni dimensionali e dati 111 50 BOSTON Queste dimensioni sono indicate a solo scopo informativo! Ci riserviamo il diritto di apportare eventuali modifiche strutturali a vantaggio del pro- gresso tecnologico o del miglioramento qualitativo!
Seite 83
111 51 CHICAGO Queste dimensioni sono indicate a solo scopo informativo! Ci riserviamo il diritto di apportare eventuali modifiche strutturali a vantaggio del pro- gresso tecnologico o del miglioramento qualitativo!
Seite 84
111 53 MANHATTAN Queste dimensioni sono indicate a solo scopo informativo! Ci riserviamo il diritto di apportare eventuali modifiche strutturali a vantaggio del pro- gresso tecnologico o del miglioramento qualitativo!
Wamsler Haus- und Küchentechnik GmbH, Gutenbergstr. 25, D-85748 Garching Prodotto: Stufa Tipo: M-LINE, Typ 111 50 - 111 60 Si dichiara con la presente che i prodotti di cui sopra risultano in conformità a quanto previsto dalle seguenti direttive comunitarie: 89/106/CEE Direttiva prodotti da costruzione La prova è...
Előszó Tisztelt Vásárló! Köszönjük megtisztelő bizalmát, hogy a mi kandallónkat választotta! Helyesen döntött. Ezen termék megvásárlásával Ön garanciát kap: a legjobb és már bevált anyagok felhasználásával a jó minőségre • a működési biztonságra, amelyet a német és európai normák szerint •...
BIZTONSÁGI ELŐÍRÁSOK 1. A készülékek a EN 13240 vagy a EN 12815 norma alapján bevizsgálásra kerültek (készülék típusát meghatározó tábla). 2. A beállításhoz és a kéménycsatlakoztatáshoz az adott ország tüzvédemi rendelkezéseit kell betartani. A készülék tökéletes működéséhez a kéménynek, amelyre a készüléket akarja csatlakoztatni, tökéletes állapotban kell lennie.
Seite 88
13. Fűtő üzemmódban a felületek, a betekintő ablakok és a fogók nagyon felforrósodhatnak. Figyelmeztesse a gyermekeket ezekre a veszélyekre és a fűtés idejére tartsa őket távol a kandallótól. 14. Ügyeljen rá, hogy a hamuláda mindig ütközésig be legyen tolva, és különösen ügyeljen arra, hogy a forró...
1.2 Üzembe helyezés kandalló üzemmódjai (begyújtás /üzemen kívül helyezés) illetve a tüzelőanyag kiválasztása (szén /fa), az „A” és „B” jelű szabályzókarok kihúzásával vagy betolásával állíthatók be. Figyelem! Ø120mm-es füstcső bekötés esetén a 120/150 füstcső adaptert el kell távolítani a készülékről! A füstcsonk hátsó...
Seite 91
Ha kémény csatlakozása150 mm-es, a mellékelt füstcső adaptert szerelje fel füstcsonkra, és rögzítse a használati útmutató tasakjában található csavarral. Tüzelőanyagok: A készülék az alábbiakban felsorolt tüzelőanyagokkal használható. Csak ez által biztosítható a „füstszegény” és zavarmentes üzemeltetés. Csak száraz fát használjon max. 20 % nedvességtartalommal. Tüzelőanyag-fajták Fűtőérték kb.
Az ajtót a fogantyú emelésével nyissa ki (2. kép). Amennyiben a készülék • forró, használjon hőálló kesztyűt. Állítsa be a primerlevegő szabályozót és tüzelőanyag választót (3. kép) a 2. • táblázat alapján Helyezzen gyújtóst vagy faforgácsot a rostélyra. Erre először kisebb, majd •...
Figyelem! A levegő tisztasága és a kandalló érdekében ne lépje túl a megadott maximális tüzelőanyag-mennyiségeket, különben fennáll túlhevülés veszélye, amely a készülék károsodásához vezethet. Az ilyen típusú károk esetén nem vállalunk garanciát. A kandallóknál csak egyrétegű tüzelőanyag-bekészítés megengedett. Alacsonyabb hőteljesítményt csak a tüzelőanyag mennyiségének csökkentésével, és ne az elsődleges levegő...
1.6 Üzemzavar-okok,elhárításuk: Üzemzavar fajtája Lehetőséges okai: Elhárítás: A kandallót a használati utasítás szerint A felhasznált védőfesték több órán át kis fokozaton üzemeltetni. Szagképződés: kikeményedése Ezek után több órára maximális Olajmaradékok kigőzölgése teljesítményre felfűteni. Túl kis készülékteljesítményt Szakemberrel vizsgáltassuk meg az Ön választottuk hősszükségletét.
2. Elhelyezés 2.1 Előírások Az elhelyezésnél és a füstcsőoldali becsatlakoztatásnál az egyes vonatkozó építési rendelkezések tűzvédelmi követelményeit kell figyelembe venni. Az Ön kandallójának kifogástalan működése érdekében a kéménynek, amibe a készülékét akarja becsatlakoztatni, kifogástalan állapotban kell lennie. 2.2 Elhelyezési helység Mivel a kandalló...
A kandalló alatti padlózat Az éghető anyagokból készült padlót, mint pl. szőnyeg, parketta, vagy parafa, a kandalló alatt, valamint a tűztér előtt 50 cm-re és oldalt 30 cm-re egy nem éghető anyagból készült burkolóval kell védeni, mint pl.: kerámia-, kő-, üveg-padló, vagy fém 2.4 Kéménycsatlakozás Figyelem!
Seite 98
Helyes Helytelen min.50cm Kémény keresztmetszet szűkítésa túlzottan betolt füstcső miatt. Torlódás az egymással szembe bevezetett füstcsövek miatt. min.30cm Hibás huzat a nem használt tűzhely nyitott ajtaja miatt. Fals levegő nyitott csőcsatlakozó miatt. Fals levegő tö- mítetlen csőcsat- lakozás miatt. Hamis levegő beáram- lása nyitott vagy tömítetlen kémény- tisztító...
Átmérőjű csőelemmel történhet. Az égéslevegő hozzávezetést a kályha közelében elzáró csappantyúval kell ellátni. Természetesen a helyiség levegőjével történő fűtés is lehetséges. Lásd ehhez a 2.2 pontot. „A“ Kandalló típus 111 50 BOSTON 266mm 111 51 CHICAGO 266mm 111 53 MANHATTAN...
3.2 Műszaki jellemzők Típus 111 50 / 51 / 53 Névleges teljesítmény 5 kW 18893/TAB 2 DIN szabvány szerinti fűtőképesség m³ -kedvező -kevésbé kedvező -kedvezőtlen fűtési feltételeknél Bükkfa/ BB7 Fűtőanyag: 5,6 / 5,4 g/s -füstgázáramlás: 234 / 320 -füstgázhőmérséklet: 12 Pa a névleges teljesítményhez szükséges huzatnyomás: <...
Seite 104
Innovation aus Tradition Haus – und Küchentechnik GmbH Gutenbergstr. 25 D – 85748 Garching bei München Telefon +49 (0)89 32084-0 Telefax +49 (0)89 32084-294 www.wamsler.eu Änderungen, die dem technischen Fortschritt dienen und / oder einer Qualitätsverbesserung bewir- ken, behalten wir uns vor. Für Druckfehler und Änderungen nach Drucklegung können wir keine Haftung übernehmen.