MASILY Hamilton Montage- Und Gebrauchsanleitung
Infrarotsauna
Inhaltsverzeichnis
Verfügbare Sprachen
Verfügbare Sprachen
Montage und
Gebrauchsanleitung
2 Person:
Hamilton
Ski
Ottawa
Mandal
NorthBay
Schweden
Sortland
Kemi
3 Person Corner:
Göteborg
Lohja
Saint John
Regina
Umea
2 Person Corner:
Quebec
Oslo
Stockholm
Vancouver
Malmö
Arendal
Lillesand
Motala
Halmstad
Falkenberg
Lidköping
4 Person:
Norwegen
Granby
Inhaltsverzeichnis
Fehlerbehebung

Verwandte Anleitungen für MASILY Hamilton

Inhaltszusammenfassung für MASILY Hamilton
- Seite 1 Montage und Gebrauchsanleitung 2 Person: 2 Person Corner: Hamilton Quebec Oslo Ottawa Stockholm Mandal Vancouver NorthBay Malmö Schweden Arendal Sortland Lillesand Kemi Motala ...
-
Seite 2: Inhaltsverzeichnis
Inhaltsverzeichnis Vorwort ................................6 Allgemeine Hinweise ............................6 Sicherheitshinweise ............................6 Aufbau ................................7 Vorbereitung ............................... 7 Verpackung..............................7 2 Personen Kabine ............................8 Schritt 1: Bodenplatte ..........................8 Schritt 2: Rückwand ..........................8 Schritt 3: Seitenwände ..........................8 Schritt 4: Wadenstrahler ......................... 9 Schritt 5: Verbinden des Wadenstrahlers .................... - Seite 3 4 Personen Kabine ............................. 17 Schaltplan ..............................17 Dachansicht ............................... 18 2 Personen Kabine ..........................18 Eckkabine............................... 18 4 Personen Kabine ..........................18 Nutzung ................................. 19 Gründe um die Infrarotkabine nicht zu benutzen ..................20 Display ................................21 Power ................................ 21 Temperatur + / - ............................
- Seite 4 Packaging ............................... 31 2 Person Cabin ............................31 Step 1: Base Plate ..........................31 Step 2: Back Wall ........................... 32 Step 3: Side walls ........................... 32 Step 4: Calf emitter ..........................33 Step 5: Connect the calf emitter ......................33 Step 6: Bench ............................
- Seite 5 Reasons to not use the infrared cabin ...................... 43 Display ................................44 Power ................................ 44 Temperature + / - ............................44 C° / F° ................................. 44 Time + / - ..............................44 The desired duration can be set here. If there are only 5 minutes left, an alarm is triggered....44 Inside / Outside Light ..........................
-
Seite 6: Vorwort
Vorwort Sehr geehrter Kunde, wir freuen uns, dass Sie sich für eines unserer Produkte entschieden haben. Bevor Sie die Infrarotkabine auspacken, überprüfen Sie die Verpackung auf eventuelle Schäden! Spätere Reklamationen werden nicht anerkannt. Vor der Montage sind auch alle Teile auf Schäden und Vollständigkeit zu prüfen. -
Seite 7: Aufbau
Aufbau Vorbereitung Auspacken und Aufbau der Infrarotkabine sollte von mindestens 2 Personen durchgeführt werden. Der Aufstellungsort muss eben und waagerecht sein. Der Abstand zu Wänden oder anderen Möbeln, etc. sollte mindestens 10cm betragen, um eine gute Luftzirkulation zu gewährleisten. ... -
Seite 8: Personen Kabine
2 Personen Kabine Schritt 1: Bodenplatte Platzieren Sie die Bodenplatte an der gewünschten Stelle. Achten Sie darauf, dass der „FRONT“ Aufkleber in die Richtung zeigt, in die die Front der Infrarotkabine gerichtet sein soll. Schritt 2: Rückwand Setzen Sie die Rückwand hinten an die Bodenplatte an. Richten Sie die Klickverschlüsse aneinander aus und befestigen Sie diese. -
Seite 9: Schritt 4: Wadenstrahler
Schritt 4: Wadenstrahler Nachdem beide Seitenwände aufgebaut sind, können Sie mit dem Einbau des Wadenstrahlerelements beginnen. Richten Sie dieses dafür an den Führungen an den Seitenwänden aus und schieben es nach unten. (Achten Sie darauf, dass Sie die Seitenwände nicht zerkratzen.) Der TOP Aufkleber muss beim Einbau nach oben zeigen und der Wadenstrahler muss nach Außen zeigen. -
Seite 10: Schritt 8: Frontpaneel
Schritt 8: Frontpaneel Platzieren Sie die Front der Kabine passend auf der Bodenplatte und richten Sie diese an den Seitenwänden aus. Anschließend befestigen Sie die Verschlüsse. Schritt 9: Dach Heben Sie nun das Dach auf die Kabine und passen dieses an den Ecken an. Achten Sie darauf, dass keine Kabel eingeklemmt werden und führen Sie diese durch die entsprechenden Öffnungen des Dachs. -
Seite 11: Schritt 11: Ionisator (Optional)
Schritt 11: Ionisator (optional) Schließen Sie den Ionisator an das Stromkabel an und hängen ihn anschließend an die vormarkierte Stelle in der Infrarotkabine. Befestigen Sie den Ionisator mit Hilfe der vorhandenen Schrauben. Schritt 12: Getränkehalter (optional) Bringen Sie die Getränkehalter in der linken und rechten vorderen Ecke an. Schritt 13: Türgriff Je nach Modell gibt es zwei unterschiedliche Methoden zum Einbau des Türgriffs. -
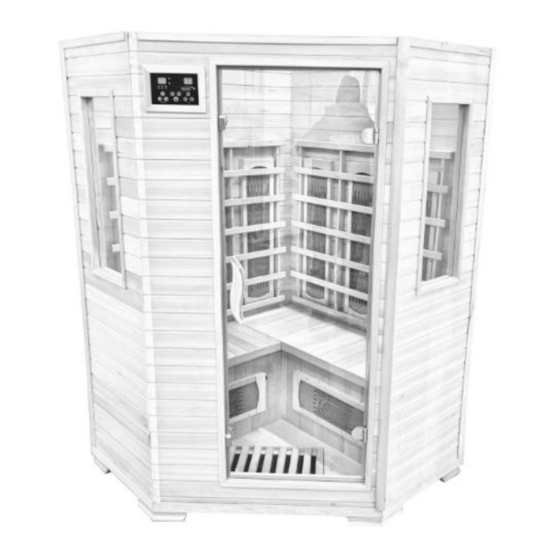
Seite 12: Eckkabine
Eckkabine Der Aufbau ist ähnlich zu dem der 2 Personen Kabine. Schritt 1: Bodenplatte Platzieren Sie die Bodenplatte an der gewünschten Stelle. Achten Sie darauf, dass der „FRONT“ Aufkleber in die Richtung zeigt, in die die Front der Infrarotkabine gerichtet sein soll. Schritt 2: Rückwände Richten Sie die Rückwände der Kabine an der Bodenplatte aus und befestigen Sie diese. -
Seite 13: Schritt 3: Sitzbänke
Schritt 3: Sitzbänke Als Nächstes installieren Sie die Sitzbänke mit den integrierten Heizelementen. Sie werden erkennen, dass die Sauna bereits installierte Schienen besitzt in die sich die Bank reibungslos einführen lässt. Nachdem Sie die Bänke eingebaut haben, müssen Sie die Kabel an die entsprechenden Anschlüssen an der Rückwand anschließen. -
Seite 14: Schritt 4.2: Frontpaneele, Bauweise Für Cp-Modelle
Schritt 4.2: Frontpaneele, Bauweise für CP-Modelle Verbinden Sie die seitlichen Paneele mit dem Front-Tür-Paneel, indem Sie diese passend an die Verschlüsse ansetzen und nach oben drücken. Schritt 5: Anbringen der Frontpaneele an der Kabine Setzen Sie im vorherigen Schritt zusammengesetzten Frontpanelle an der Bodenplatte an und richten diese passend an dieser und den Rückwänden aus. -
Seite 15: Schritt 6: Dach
Schritt 6: Dach Heben Sie nun das Dach auf die Kabine und passen dieses an den Ecken an. Achten Sie darauf, dass keine Kabel eingeklemmt werden und führen Sie diese durch die entsprechenden Öffnungen des Dachs. Wenn das Dach richtig platziert ist, drücken Sie es vorsichtig nach unten um es zu befestigen. Schritt 7: Verbindungen Verbinden Sie nun die Kabel für die Stromversorgung und die Steuerung des Bedienelements mit den entsprechenden Anschlüssen auf dem Dach der Kabine... -
Seite 16: Schritt 9: Getränkehalter (Optional)
Schritt 9: Getränkehalter (optional) Bringen Sie die Getränkehalter in der linken und rechten vorderen Ecke an. Schritt 10: Türgriff Je nach Modell gibt es zwei unterschiedliche Methoden zum Einbau des Türgriffs. Methode 1: Methode 2: Schritt 11: Strom Der letzte Schritt ist es, die Infrarotkabine an den Stromkreis anzuschließen. -
Seite 17: Personen Kabine
4 Personen Kabine Der Aufbau ist ähnlich zu dem der 2 Personen Kabine Das 4 Personen Modell hat 2 Sitzbänke. Die Schienen für horizontale Bänke befinden sich auf der Vorder- und Hinterseite der Saune. Schieben Sie die Platte so weit nach hinten, bis sie bündig ist. -
Seite 18: Dachansicht
Dachansicht Die ausgefüllten Kreise stellen Nagellöcher dar. 2 Personen Kabine Eckkabine 4 Personen Kabine... -
Seite 19: Nutzung
Nutzung Lesen Sie alle Informationen für Sicherheit und Gesundheit durch. Falls Sie unschlüssig sind, ob Sie die Infrarotkabine benutzen können konsultieren Sie bitte ihren Arzt. Falls Sie sich während der Benutzung schwindlig oder überhitzt fühlen, verlassen Sie die Infrarotkabine. Stellen Sie die Temperatur auf ein angenehmes Level ein, für gewöhnlich ca. -
Seite 20: Gründe Um Die Infrarotkabine Nicht Zu Benutzen
Lassen Sie keine Haustiere in die Infrarotkabine. Kinder dürfen die Infrarotkabine nur unter Aufsicht Erwachsener benutzen Gründe um die Infrarotkabine nicht zu benutzen Offene Wunden Augenkrankheit (schwere) Sonnenbrände Alter und Gebrechlichkeit Schwangerschaft Unter Einfluss von Alkohol, Drogen oder Medikamenten... -
Seite 21: Display
Display LED Light Temperatur + / - Zeit + / - Inside / Outside Light Power Power Mit dieser Taste schalten Sie die Infrarotkabine an oder aus. Nach Betätigen zeigt das linke Display die Temperatur und das rechte Display die Zeit an. Temperatur + / - Hiermit kann die Temperatur der Infrarotkabine eingestellt werden. -
Seite 22: Bedienungsanleitung Und Montage Ionisator
Bedienungsanleitung und Montage Ionisator Montage Der Ionisator wird mit 2 Kreuzschrauben am inneren Ihrer Kabinenwand befestigt. Anleitung 1 . Bitte drücken Sie den Pfeil „ion“, um den Ionisator zu starten. Das grüne Lämpchen leuchtet auf. 2. Bitte den Pfeil „O3“ drücken, um das Ozonreinigungs-System zu starten. Das rote Lämpchen leuchtet auf. -
Seite 23: Bedienungsanleitung Farblicht
Bedienungsanleitung Farblicht 1. Kabine einschalten 2. Um die Anzeige zu starten, drücken Sie POWER auf Ihrem Farbtherapielicht-Display. Das Farbtherapielicht fängt an zu rotieren. 3. Um die Farbe auszuwählen, warten Sie bis die gewünschte Farbe aufleuchtet, drücken Sie dann SELECT auf dem Display, um die Farbe auszuwählen. 4. -
Seite 24: Radio
Radio Grundfunktionen der Schalttafel 1. POWER Mit dieser Taste schalten Sie das Radio ein. Durch erneutes betätigen, schaltet sich das Radio wieder aus. 2. MODE Durch das Betätigen dieser Taste können Sie zwischen USB/SD, AUX oder Bluetooth wechseln. 3. BAND/AMS Durch kurzes Betätigen dieser Taste können Sie zwischen FM und AM wechseln. -
Seite 25: Mögliche Probleme Mit Dem Radio
6. NAVIGATIONSTASTEN Im Radio-Modus: Suchen Sie mit diesen Tasten automatisch nach Sendern, wenn Sie die Taste kurz drücken. Halten Sie die Taste für etwa 2 Sekunden um die Frequenz manuell einzustellen. Wenn Sie Musik über Bluetooth, einen USB-Stick, über den AUX- Anschluss oder einer SD-Card laufen lassen, können Sie mit den Navigationstasten vor und zurück schalten. -
Seite 26: Fernbedienung
Fernbedienung 1. POWER 11. Lautstärke - 2. MODE 12. Display 3. MUTE 13. PLAY/PAUSE 4. BAND 14. 2/INT 5. Lautstärke + 15. 3/RPT 6. AMS 16. 4/RDM 7. Navigationstaste “Zurück” 17. 5- 10dir- 8. Auswahl 18. 6- 10dir+ 9. Navigationstaste “Nächstes” 10.EQ Technische Daten ~1620KHZ... -
Seite 27: Problembehandlung
Problembehandlung Probleme mit Heizstrahlern Ein Strahler funktioniert nicht Überprüfen Sie, ob der Strahler Ausversehen mit dem Schalter ausgeschaltet wurde. Überprüfen Sie die Kabelverbindungen an Strahler und der Steuerbox auf dem Dach Wenn das nicht hilft, wechseln Sie den Strahler Wechseln eines Strahlers ACHTUNG: Bevor Sie die Strahler wechseln muss die gesamte Kabine vom Strom getrennt werden! 1. - Seite 28 Überprüfen Sie ob der Power-Schalter an ist und leuchtet. Wenn dieser nicht an ist, müssen Sie den Überspannungsschutz der Kabine resetten. Wir danken Ihnen für das Vertrauen in unser Produkt und wünschen Ihnen viel Vergnügen mit ihrer neuen Infrarotkabine.