Herunterladen Inhalt Inhalt Diese Seite drucken
Inhaltsverzeichnis

Werbung

Verfügbare Sprachen
  • DE

Verfügbare Sprachen

  • DEUTSCH, seite 4
NR.1
Gebrauchsanweisung
Instruction for use
Manuel d'utilisation
Istruzioni per l'uso
Manual de instruções
Instrucciones de uso
инструкции

Werbung

Inhaltsverzeichnis
loading

Inhaltszusammenfassung für MT.DERM artyst NR.1

  • Seite 1 NR.1 Gebrauchsanweisung Instruction for use Manuel d‘utilisation Istruzioni per l‘uso Manual de instruções Instrucciones de uso инструкции...
  • Seite 2 NR.1 artyst NR.1...
  • Seite 3 Магнитные поверхности Кнопка UP/ Кнопка RUN/ Гнездо для Металлическая для закрепления Гнездо для Гнездо для блока Дисплей DOWN (ВВЕРХ/ STOP (РАБОТА/ педального пластина устройства или минипулы питания ВНИЗ) СТОП) выключателя металлической пластины artyst NR.1...
  • Seite 4: Inhaltsverzeichnis

    5.1 Gerät aufstellen oder anheften .... 14 10.2 Konformitätserklärung........  23 5.2 Steckernetzteil anschließen...... 16 5.3 Fußschalter anschließen (optional) ....  17 NR.1 5.4 Handstück anschließen ........ 17 5.5 Equipment reinigen und desinfizieren .. 17 5.6 Equipment überprüfen........ 18 4 DE artyst NR.1...
  • Seite 5: Zu Dieser Gebrauchsanweisung

    Diese Gebrauchsanweisung gilt für das führen wird, wenn die Gefahr Permanent Make-Up (PMU)-Steuergerät SIGNALWORT nicht vermieden wird artyst NR.1 sowie für dessen Zubehör. Sie enthält wichtige Informationen, um kennzeichnet eine Gefahr, die Art der Gefahr das Gerät sicher und bestimmungs-...
  • Seite 6: Wichtige Sicherheitshinweise

    Verwende ausschließlich originale Na- fenden Hautstellen des Kunden mit gewohnt funktioniert oder Flüssig- delmodule, Zubehör- und Ersatzteile einem milden Reinigungs- und Desin- keiten ins Gerät oder Handstück ge- der Firma MT.DERM GmbH. fektionsmittel. Beachte bei der Aus- laufen sind. 6 DE artyst NR.1...
  • Seite 7 Gerät inklusive integrierter Hand- tragung von Krankheiten zur Folge mitteilen zu können. stückablage mit einer Schutzfolie haben. Suche im Falle von Verletzungen überzogen werden. Das Handstück mit einer kontaminierten Nadel umge- wird vor dem Anbringen des Nadelmo- hend einen Arzt auf artyst NR.1...
  • Seite 8: Kontraindikationen Und Nebenwirkungen

    Bis zu 6 Monate nach Filler-Injektionen sollten in den ersten zwei bis drei Tagen Heparin, Aspirin, Warfarin) im Behandlungsbereich nach der Behandlung vom Kunden ver- Unkontrollierter Diabetes mellitus mieden werden. Allergie auf topische Anästhetika (Lo- kalanästhesie) 8 DE artyst NR.1...
  • Seite 9: Erforderliche Qualifikationen (Benutzeranforderungen)

    Hauttypen, die jedoch inner- körperlichen, sensorischen oder geis- Häufig: halb weniger Wochen wieder voll- tigen Fähigkeiten noch von Kindern ver- ständig verschwindet lokale Blutungen im Bereich der be- wendet werden. Das Gerät einschließlich handelten Hautoberfläche seines Zubehörs darf nicht von Personen artyst NR.1...
  • Seite 10: Zweckbestimmung, Anwendungsbereich Und Bestimmungsgemäßer Gebrauch

    Gebrauch schließt auch ein, dass die vorliegende Gebrauchsanweisung, insbesondere das 2.5.2 Anwendungsbereich Kapitel  Wichtige Sicherheitshinweise, Die gebräuchlichsten Anwendungsbe- vollständig gelesen verstanden reiche für das Permanent Make-up wurde. (PMU) sind: Härchen-Zeichnung der Augenbrauen 10 DE artyst NR.1...
  • Seite 11: Symbole Am Produkt

    Gerät, dessen Zubehör oder der Verpa- ckung können die nachfolgend beschrie- Herstellungsdatum benen Symbole zu finden sein: Katalognummer, Bestell- Symbol Bedeutung nummer genügt den Anforderungen Seriennummer der Richtlinien 2014/35/EU (Niederspannungsrichtlinie) Lotnummer und 2014/30/EU (EMV-Richt- mit Ethylenoxid sterilisiert linie) artyst NR.1...
  • Seite 12: Lieferumfang

    Spannungsversorgung CB510699 50 bis 60 Hz artyst Produktinformationen E100601 * tatsächlicher Frequenzwert abhängig Fußschalter vom verwendeten artyst NR.1 Handstück. Artikelnummern Das Steuergerät artyst NR.1 ermöglicht der Nadelmodule Betriebsbedingungen die Spannungsversorgung der zugehö- artyst siehe Gebrauchs- rigen artyst PMU-Handstücke sowie eine +15°C bis +25°C...
  • Seite 13: Inbetriebnahme

    Ersatzteil Artikelnummer Stück/ ACHTUNG VORSICHT Schäden durch Kondenswasser Verletzungsgefahr und Gefahr von Fehl- artyst NR.1 E116503 Wird das Gerät z. B. beim Transport hohen funktionen des Geräts Steckernetzteil Temperaturunterschieden ausgesetzt, Ungeeignete Zubehör- und Ersatzteile artyst NR.1 EU: E-1154-W kann im Inneren Kondenswasser ent- können die Funktion und Sicherheit des...
  • Seite 14: Gerät Aufstellen Oder Anheften

    Geräte. es an metallische Flächen angeheftet werden (a und d), z.  B an einem Tisch- bein oder Rollwagen. Das Anheften des Geräts ist nicht nur in aufrechter Posi- tion, sondern auch um 90° gedreht mög- lich (c). 14 DE artyst NR.1...
  • Seite 15 Das Anheften des Geräts ist nicht nur in Stelle das Gerät niemals auf oder unter formten Aussparung abschließen. andere Geräte. aufrechter Position, sondern auch um 90° gedreht möglich. Angeschlossene Kabel zeigen somit nach unten und können einfacher verlegt werden. artyst NR.1...
  • Seite 16: Steckernetzteil Anschließen

    Das Gerät darf nur mit dem in der Ge- laufende Rechtecke signalisiert. brauchsanweisung des Geräts ausgewie- senen Steckernetzteil betrieben werden. Um den gewünschten länderspezifischen Adapter einzusetzen: Setze den länderspezifischen Adapter in die Vertiefung des Steckernetzteils ein wie unten abgebildet. 16 DE artyst NR.1...
  • Seite 17: Fußschalter Anschließen (Optional)

    Wische das Steuergerät, das An- Beachte bei der Auswahl von Reini- schlusskabel, das Handstück und die gungs- und Desinfektionsmitteln die Handstückablage mit einem weichen Materialverträglichkeiten (siehe Kapitel Tuch ab, das mit Reinigungsmittel be- 7.2 auf Seite 20). feuchtet ist. artyst NR.1...
  • Seite 18: Equipment Überprüfen

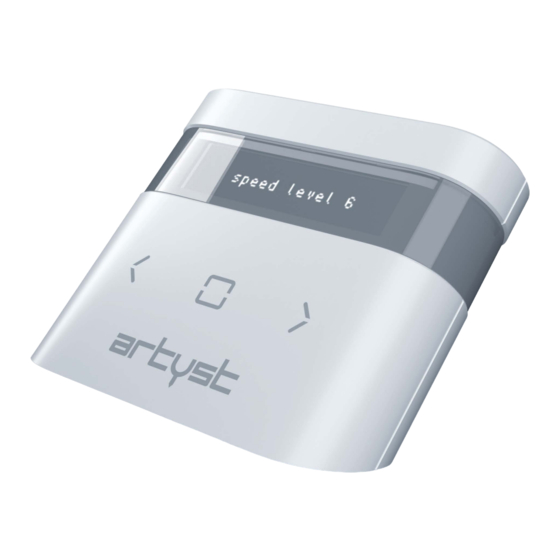
    Sie hören einen kurzen Signalton. räusche oder -lautstärke auffällig? Auf dem Display erscheint die vorein- Beachte bei Auffälligkeiten die Kapitel gestellte Stichgeschwindigkeit (SPEED 9 auf Seite 21 und 10.1 auf Seite 22. LEVEL 6). Stichgeschwindigkeit pulsiert (hell/dunkel) solange das Handstück ausgeschaltet ist. 18 DE artyst NR.1...
  • Seite 19: Stichgeschwindigkeit Einstellen

    (siehe Kapitel 6.1 auf Stelle sicher, dass das Steuergerät Seite 18). eingeschaltet (siehe 6.1  auf Seite 18). Stelle sicher, dass das Handstück kor- rekt angeschlossen ist (siehe Kapitel Drücke die Taste UP ( ), um die Stich- 5.4 auf Seite 17). geschwindigkeit zu erhöhen. artyst NR.1...
  • Seite 20: Reinigung Und Instandhaltung

    7.2 auf Seite 20). Schülke & Mikrozid Li- 1 bis 2 min Mayr quid Inspektion Anhand Materialverträglichkeit Eine Inspektion darf nur von autori- kannst Du außerdem beurteilen, welche sierten Fachhändlern durchgeführt weiteren Reinigungs- und Desinfektions- werden. mittel geeignet sind. 20 DE artyst NR.1...
  • Seite 21: Oberflächen Desinfizieren

    SYSTEM OVERLOAD erscheint: Übergib das Gerät zur Überprüfung an Aceton und Benzin Stelle sicher, dass ein Handstück an einen Fachhändler, wenn es sichtbare das Gerät angeschlossen ist (siehe Ka- Beschädigungen aufweist oder wenn pitel 5.4 auf Seite 17). es nicht normal funktioniert. artyst NR.1...
  • Seite 22: Funktionsstörungen Des Geräts Beheben

    Spannungsversorgung durch die neuesten Prüftechniken und wieder her. Zertifizierung gewährleistet. Wenn diese Störung häufiger auftritt, MT.DERM GmbH ist zertifiziert nach: führe alle Handlungsschritte des Kapi- DIN EN ISO 13485:2016 (Qualitätsma- tels 9.2 auf Seite 22 durch. nagementsystem für Medizinprodukte) 22 DE artyst NR.1...
  • Seite 23: 10.2 Konformitätserklärung

    Erstellen von Gebrauchsanleitungen – Gliederung, Inhalt und Darstellung – Teil 1: Allgemeine Grundsätze und ausführliche Anforderungen Bevollmächtigter für die Zusammenstellung der relevanten technischen Unterlagen: Dr. Andreas Pachten, MT.DERM GmbH, Dokumentationsbeauftragter Diese Erklärung wird verantwortlich für den Hersteller abgegeben durch: Berlin, den 31.10.2019, Jörn Kluge ___________________________________________________ (Unterschrift des Geschäftsführers oder dessen Bevollmächtigten)
  • Seite 24 English Instruction for use Version 1.1 – Table of Contents 31/10/2019 1 About this instruction for use .........  25 6 Using the device ............  36 1.1 Warning symbols and statements used in 6.1 Switching the control unit into operating Congratulations on your purchase of this this instruction for use........
  • Seite 25: About This Instruction For Use

    About this instruction for use Warning symbols and statements Signal word Meaning used in this instruction for use Indicates a hazard that will defi- Warning notices draw attention to the nitely lead to death or to serious This operating manual applies to the Hazard risk of personal injury and damage to injury if the hazard is not...
  • Seite 26: Important Safety Notices

    When se- function as usual or fluids have run accessories and spare parts from lecting an appropriate disinfectant, into the device or handpiece. MT.DERM GmbH. take note of the applicable regulations in your country. 26 EN artyst NO.1...
  • Seite 27 Only use PMU inks, which have been puncture-proof container (so-called ter 7.4  on page  39 and 7.2  on tested and approved for penetrating sharps container) according to the page  38 as well as chapter  2.2  on human skin, for the treatment. Ob- regulations in your country.
  • Seite 28: Contraindications And Side Effects

    Please advise your clients to avoid con- 2.4.1 Contraindications During chemotherapy, radiotherapy or tact with recently treated skin as much high-dosage corticosteroid therapy Permanent make-up treatment is not as possible. Recently treated areas of (recommendation: less than 4 weeks permitted in case of the following condi- skin should also be before the beginning until 4 weeks af- tions:...
  • Seite 29 Allergic reactions to components of Rare: 2.4.3 Required qualifications (user the aseptic pigment color requirements) Formation of blisters of the herpes- simplex virus type I (HSV-I) The device, including its accessories, may not be used by persons with re- Formation of small pimples or skin 2.4.2 Risks duced physical, sensory or mental capa-...
  • Seite 30: Purpose, Application Area And Intended Use

    Purpose, application area and 2.5.3 Intended use - requirements Symbols on the product intended use for safe use The symbols described below can be The treatment must take place in a dry, found in this operating manual, on the clean and smoke-free environment, and device, its accessories or packaging: 2.5.1 Purpose - Indications for use...
  • Seite 31: Scope Of Delivery

    Scope of delivery Weight Approx. 150 g Date of manufacture Input voltage 15 V DC Catalog number, order num- 1 control device with metal plate Power intake max. 10 W 1 Power supply plug Protection class Serial number 1 country-specific adapter (EU) IP protection class IP20 Lot number...
  • Seite 32: Parts And Accessories

    Parts and accessories Spare part Article description Pieces/ CAUTION packag- The accessories and spare parts listed ing unit Risk of injury and danger of malfunction below can be purchased from your local artyst NO.1 of the device specialist retailer. operating in- 7EDE10601 Unsuitable accessories and spare parts Accessories...
  • Seite 33: Setting Up Or Adhering The Device

    the device can be used to adhere it to NOTICE NOTICE metallic surface (a and d), e.g. on the leg Damage caused by condensation Device damage due to little stability of a table or cart. The device can be ad- If the device is exposed to significant varia- If the device is not placed securely, safe op- hered in a vertical arrangement or ro-...
  • Seite 34: Connecting The Power Supply

    Reach into the recess on the under- Position the device with the metal NOTICE side of the device and pull the metal plate on a clean, stable and level sur- Damage to cables and jacks plate off of the rear side of the device. face.
  • Seite 35: Connecting The Foot Switch (Optional)

    voltage must correspond to the device Press the adapter onto the holder until Connecting the handpiece voltage designated on the label of the it audibly engages. Insert the plug of the handpiece cable power supply. completely into the output socket on If a suitable country-specific adapter is the control unit.
  • Seite 36: Checking The Equipment

    Checking the equipment Using the device NOTICE Conduct a visual inspection of the Device damage caused by non-approved equipment: Switching the control unit into cleansers or disinfectants operating mode or standby mode – Are there any visible signs of exter- Cleansers or disinfectants that are not To switch the control unit into operating nal damage (e.g.
  • Seite 37: Setting The Piercing Speed

    To switch the control unit into standby Setting the Piercing Speed Switching the handpiece on and off mode: CAUTION CAUTION Press and hold the RUN/STOP button for more than 1.5 seconds until a short Risk of Injury due to High Piercing Speed Risk of injury when operating the hand- signal tone sounds twice and the dis- piece...
  • Seite 38: Cleaning And Maintenance

    Press the RUN/STOP button ( ) on the tions. All steps required for the inspec- NOTICE control unit. tion of the device can be found on the in- Damage caused by fluid spection sheet included in delivery. When the handpiece is on, the set If cleansers or disinfectants get inside the piercing speed stops pulsing and the Send the device at regular intervals of...
  • Seite 39: Disinfecting Surfaces

    The surfaces of the device are resistant Cleaning surfaces -10°C to +40°C Ambient tem- In the event of external contamination: perature +14°F to +104°F Weak acids (e.g. boric acid ≤  10%, Wipe the device and its accessories Relative hu- acetic acid ≤ 10%, citric acid ≤ 10%) 10% to 90% with a soft cloth moistened with a midity...
  • Seite 40: Eliminating Malfunctions Of The Device

    MT.DERM Damage arising from the ingress of Re-connect the voltage supply. GmbH is certified in acc. with:...
  • Seite 41: 10.2 Declaration Of Conformity

    Preparation of instructions for use - Structuring, content and presentation - Part 1: General principles and detailed requirements Authorized representative for compiling the relevant technical documentation: Dr. Andreas Pachten, MT.DERM GmbH, Documentation Officer This declaration is issued on behalf of the manufacturer by: Berlin, dated 31/10/2019, Jörn Kluge...
  • Seite 42 Français Manuel d'utilisation Version 1.1 – Sommaire 31/10/2019 1 À propos de ce manuel d'utilisation .....  43 5.6 Inspection de l'équipement......  55 1.1 Représentation des avertissements .. 43 Traduction de l'origi- 6 Utilisation................   56 nal du manuel d'utili- 2 Consignes de sécurité...
  • Seite 43: Propos De Ce Manuel D'utilisation

    À propos de ce manuel d'utili- Représentation des Mot-clé Signification avertissements sation identifie un risque qui, s'il n'est Les avertissements attirent l'attention Danger pas évité, entraîne la mort ou de sur un risque de dommages corporels ou graves blessures Le présent manuel d'utilisation concerne de dégâts matériels et sont conçus la Maquillage permanent (PMU)Appareil identifie un risque qui, s'il n'est...
  • Seite 44: Consignes De Sécurité Importantes

    (voir le chapitre  8  à la rité importantes rechange d'origine de l’entreprise page 59). MT.DERM GmbH. Confiez l’appareil à un revendeur pour Consignes de sécurité révision s'il présente des dommages générales Consignes de sécurité propres...
  • Seite 45 tion. Respectez les directives en vi- le numéro de lot des modules d’ai- Pendant l’utilisation, l’embout, le câble gueur dans votre pays pour le choix guilles utilisés dans le dossier client de l’embout et l’appareil, support pour des produits désinfectants. correspondant pour pouvoir le com- embout intégré...
  • Seite 46: Contre-Indications Et Effets Indésirables

    Les blessures dues aux aiguilles conta- les peelings abrasifs ou chimiques, prise d'anticoagulants (par ex. acide minées ou aux modules d’aiguilles salicylique, héparine, aspirine ou acide l’épilation aux endroits traités ou peuvent entraîner la transmission de salicylique) l’autobronzant maladies. En cas de blessure avec une diabète sucré...
  • Seite 47: Effets Indésirables

    jusqu'à douze mois après une opéra- 2.4.2 Effets indésirables formation de petites pustules ou d'ac- tion esthétique dans la zone de traite- né miliaire en cas de nettoyage impar- Dans certains cas, les effets indésirables ment fait de la peau avant le traitement mineurs suivants peuvent survenir pen- jusqu'à...
  • Seite 48: Objet, Domaine D'application Et Utilisation Conforme

    2.4.3 Qualifications nécessaires Connaissance des risques et effets in- 2.5.2 Domaine d’application (exigences utilisateur) désirables (voir les chapitres 2.4.1 à la Les domaines d’application les plus cou- page 46 et 2.4.2 à la page 47) L’appareil, accessoires inclus, ne doit rants pour le maquillage permanent pas être utilisé...
  • Seite 49: Symboles Sur Le Produit

    L'utilisation conforme inclut uniquement Embout Limite d'humidité les groupes de consommateurs sui- Pédale de commande vants : Adultes majeurs et en bonne san- Protéger contre l’humidité Branchement à courant continu/ té. broche intérieure côté plus Par utilisation non conforme on entend Utiliser uniquement à...
  • Seite 50: Informations Sur Le Produit

    Informations sur le produit Bloc d'alimentation E1165 Accessoires Référence Pièce/ 100 à 240 V CA Alimentation électrique Pédale de com- L'Appareil de commande artyst n° 1 per- 50 à 60 Hz mande E100601 met d’alimenter en tension les embouts artyst * Valeur de fréquence réelle en fonction artyst PMU correspondants, ainsi que de commander facilement la vitesse de pé- de l’embout utilisé...
  • Seite 51: Mise En Service

    Mise en service ATTENTION PRUDENCE Dommages liés à l'eau de condensation Risque de blessures et de dysfonctionne- PRUDENCE Si l'appareil est exposé à de fortes varia- ments de l’appareil tions de température, notamment pendant Les accessoires et pièces de rechange in- Risque de trébuchement sur les câbles le transport, de la condensation peut se appropriés peuvent mettre en danger le...
  • Seite 52: Installer Ou Accrocher L'appareil

    Installer ou accrocher l’appareil La plaque métallique fournie permet ATTENTION d’installer l’appareil sur une surface PRUDENCE Dommages de l’appareil en cas de stabi- plane  (b). Il peut être fixé au niveau des lité insuffisante surfaces métalliques à la zone aimantée Risque de court-circuit Si l’appareil n’est pas correctement posi- au dos de l’appareil (a et d), p.
  • Seite 53: Raccordement Du Bloc D'alimentation

    Attrapez l’évidement sur la partie infé- Installez l'appareil avec la plaque mé- ATTENTION rieure de l’appareil et retirez la plaque tallique sur une surface propre, solide Dommages sur les câbles et les prises métallique du dos de l’appareil. et plane. Si des câbles sont déjà...
  • Seite 54: Raccordement De La Pédale De

    tension secteur doit correspondre à la Enfoncez l'adaptateur sur le support Raccordement de la pédale de tension de l’appareil indiquée sur l’éti- jusqu'à ce que son enclenchement se commande (en option) quette du bloc d’alimentation. fasse entendre. Seule la pédale de commande indiquée Si aucun adaptateur approprié...
  • Seite 55: Nettoyage Et Désinfection De L'équipement

    Nettoyage et désinfection de Essuyez l’embout, l’appareil de com- ATTENTION l'équipement mande, le câble de raccordement et le Endommagement de l’appareil lié à des support pour embout avec un chiffon ATTENTION produits nettoyants ou désinfectants non doux, imprégné d'un produit désinfec- autorisés tant.
  • Seite 56: Utilisation

    Si l’appareil ne peut plus fonctionner Pour mettre l’appareil de commande en Réglage de la vitesse de sans présenter de risque, mettez-le mode veille : pénétration hors service et adressez-vous au re- Maintenez la touche RUN/STOP enfon- PRUDENCE vendeur agréé. cée pendant plus de 1,5  seconde jus- qu'à...
  • Seite 57: Démarrage Et Arrêt De L'embout

    Démarrage et arrêt de l’embout Appuyez sur la touche RUN/STOP ( ) ATTENTION de l'appareil de commande. PRUDENCE Endommagement par du liquide Lorsque l’embout est activé, la pulsa- Si un produit nettoyant ou désinfectant tion de la vitesse de pénétration réglée Risque de blessures lors du fonctionne- parvient à...
  • Seite 58: Compatibilité Du Matériel

    Il est recommandé de confier l’appareil à Les surfaces de l’appareil résistent à ce Désinfection des surfaces un revendeur pour inspection selon les qui suit : Désinfectez l'appareil de commande, instructions du fabricant à intervalles de acides faibles (par ex. acide borique ≤ la plaque métallique, le bloc d'alimen- 24 mois.
  • Seite 59: Conditions De Transport Et De Stockage

    Conditions de transport et de Stockez toujours l’appareil et ses ac- Si, lors du fonctionnement de l’embout, cessoires dans les conditions sui- un long signal sonore retentit et le mes- stockage vantes : sage CONNECT HANDPIECE ou SYSTEM OVERLOAD apparaît : -10°C à +40°C Température ATTENTION Veillez à...
  • Seite 60: Élimination Des Dysfonctionnements De L'appareil

    Vérifiez de nouveau les fonctions de tion. La société MT.DERM GmbH est cer- reil ou le bloc d'alimentation. l’appareil. tifiée selon : DIN EN ISO 13485:2016 (Système de...
  • Seite 61: 10.2 Déclaration De Conformité

    Établissement des instructions d'utilisation - Structure, contenu et présentation - Partie 1 : Principes généraux et exigences détaillées Personne mandatée pour la compilation des documents techniques pertinents : Dr. Andreas Pachten, MT.DERM GmbH, mandaté pour la documentation Cette déclaration a été établie pour le compte du fabricant par : Berlin, le 31/10/2019, Jörn Kluge...
  • Seite 62 10.1 Dichiarazione di garanzia........   80 5.3 Collegamento del comando a pedale 10.2 Dichiarazione di conformità......  81 NR.1 (opzionale)............ 74 5.4 Collegamento dell'utensile ...... 74 5.5 Pulire e disinfettare l'attrezzatura.... 75 5.6 Controllo dell'attrezzatura...... 75 62 IT artyst NR.1...
  • Seite 63: Istruzioni Per L'uso

    Trucco permanente (PMU)Cen- morte, qualora non venga evita- nel seguente modo: tralina artyst NR.1 nonché i relativi ac- cessori. Contengono importanti informa- PAROLA CHIAVE zioni per mettere in funzione, comandare contraddistingue un pericolo,...
  • Seite 64: Indicazioni Di Sicurezza Importanti

    Qualora presenti danni evidenti, non accessori e pezzi di ricambio originali funzioni come di solito o penetrino li- rezza importanti della ditta MT.DERM GmbH. quidi nel dispositivo o nell'utensile, consegna il dispositivo a scopo di con- Indicazioni generali di Indicazioni di sicurezza legate...
  • Seite 65 L'utensile viene coperto guenza la trasmissione di malattie. In ca- caso di problemi. con la pellicola di protezione prima so di lesioni causate da un ago contami- nato, rivolgiti immediatamente a un me- dico artyst NR.1...
  • Seite 66: Controindicazioni Ed Effetti Collaterali

    (per es. acido acetilsalicilico, eparina, Allergia all'anestesia topica (locale) del cliente, dovrebbero essere evitati. aspirina, warfarin) Sotto l'influsso di alcool e/o droghe Diabete mellito non controllato Gravidanza e allattamento Qualsiasi forma di acne attiva nell'area da trattare 66 IT artyst NR.1...
  • Seite 67: Effetti Collaterali

    (formazione). ematomi locali nell'area della superfi- Reazioni infiammatorie, ematomi, eri- cie cutanea trattata L'apparecchio può essere usato solo da temi o edemi persone in possesso delle seguenti cono- Dolori e malesseri nel giorno succes- scenze: sivo al trattamento artyst NR.1...
  • Seite 68: Destinazione D'uso, Campo D'applicazione E Uso Conforme

    L'apparecchio In virtù dell'iniezione minimamente inva- deve essere preparato, utilizzato e sotto- siva dell'epidermide (strato superiore posto a manutenzione come descritto della pelle) e del derma (strato centrale nelle presenti istruzioni per l'uso. In par- 68 IT artyst NR.1...
  • Seite 69: Simboli Sul Prodotto

    Limite di temperatura Standby/Funzionamento Informazioni sul prodotto Utensile Limite di umidità Comando a pedale La Centralina artyst NR.1 consente l'ali- proteggere dall'umidità Collegamento a corrente con- mentazione di tensione dei relativi uten- tinua/pin interno positivo impiegare solo in ambienti in- sili artyst PMU nonché...
  • Seite 70: Dati Tecnici

    E100601 UK: E-1155-W artyst NR.1 USA: E-1153-W * valore di frequenza effettivo in base Per i numeri di ar- all'utensile utilizzato artyst NR.1. Moduli agoarty- ticolo dei moduli ago, fare riferi- mento alle istru- 70 IT artyst NR.1...
  • Seite 71: Messa In Funzione

    Il dispositivo può essere danneggiato, guastarsi o presenta- re funzioni errate che possono mettere in pericolo le persone. Impiega solo i moduli aghi, gli accessori e i pezzi di ricambio riportati nel capito- lo 4.3 a pagina 70. artyst NR.1...
  • Seite 72: Installare O Fissare Il Dispositivo

    Posiziona il dispositivo su una superfi- cie pulita, resistente e piana. Mantieni i tasti e il display del dispositi- vo ben accessibili durante il comando. Non posizionare mai il dispositivo sopra o sotto altri dispositivi. 72 IT artyst NR.1...
  • Seite 73 È possibile fissare il dispositivo non sono magnetica ad una superficie metallica. in posizione diritta, ma anche ruotato di 90°C. I cavi collegati sono rivolti in tal modo verso il passo e possono essere posati con maggiore facilità. artyst NR.1...
  • Seite 74: Allacciare L'alimentatore A Spina

    Inserisci l'alimentatore a spina nella presa di rete. Il dispositivo si avvia e il display mo- stra il logo "artyst" per circa 3 secondi. Il passaggio alla modalità standby vie- ne segnalato da rettangoli che vanno da sinistra a destra. 74 IT artyst NR.1...
  • Seite 75: Pulire E Disinfettare L'attrezzatura

    Se il dispositivo non può più essere azionato in modo sicuro, mettila fuori Strofina l'utensile, la centralina, il cavo servizio e rivolgiti al tuo rivenditore di collegamento e il portautensile con specializzato di riferimento. un panno morbido, inumidito con disin- fettante. artyst NR.1...
  • Seite 76: Comando

    (vedi il 6.1 a pagina 76). Premere e tenere premuto il pulsante Premere il tasto UP ( ) per aumentare RUN/STOP per più di 1,5 secondi fino la velocità di penetrazione ago. a quando non viene emesso un breve 76 IT artyst NR.1...
  • Seite 77: Accendere E Spegnere L'utensile

    (vedi il capitolo 5.4  a rivenditori specializzati autorizzati. sussiste il pericolo di danni ai componenti pagina 74). elettrici. Scollega la centralina dall'alimentazio- ne di tensione prima dell'inizio di qual- siasi attività di pulizia e manutenzione. artyst NR.1...
  • Seite 78: Compatibilità Con I Materiali

    1 a 2 min Mayr quido con valore di pH > 7) idrocarburi aromatici/alogenati (ad es. Sulla base della compatibilità con i mate- fenolo, cloroformio) riali, puoi inoltre valutare quale deter- acetone e benzina gente e disinfettante sono più adatti. 78 IT artyst NR.1...
  • Seite 79: Condizioni Di Trasporto E Di Stoccaggio

    Come prima cosa scollega il dispositi- Conserva sempre il dispositivo e i suoi vo dall'alimentazione di tensione, dal accessori alle seguenti condizioni: comando pedale opzionale da -10°C a +40°C Temperatura dall'utensile. ambientale da +14°F a +104°F artyst NR.1...
  • Seite 80: Dichiarazioni Del Produttore

    è garantita dalle più recenti tecnologie di controllo e dalla certificazione. La MT.DERM GmbH è cer- tificata in conformità alla norma: DIN EN ISO 13485:2016 (Sistema di Gestione Qualità per Dispositivi Medici) Per il prodotto è...
  • Seite 81: 10.2 Dichiarazione Di Conformità

    Redazione delle istruzioni per l'uso – Suddivisione, contenuto e presentazione – Parte 1: Principi generali e requisiti di dettaglio Responsabile per la raccolta della documentazione tecnica pertinente: Dr. Andreas Pachten, MT.DERM GmbH, Incaricato della documentazione La presente dichiarazione è stata rilasciata a nome del produttore dal seguente responsabile: Berlino, 31/10/2019, Jörn Kluge...
  • Seite 82 5.2 Ligar a fonte de alimentação ...... 93 NR.1 5.3 Ligar o pedal (opcional) ........ 94 5.4 Ligar a peça de mão ........ 94 5.5 Limpeza e desinfeção do equipamento .. 95 5.6 Inspeção do equipamento...... 95 82 PT artyst NR.1...
  • Seite 83: Acerca Deste Manual Do Utilizador

    Aparelho de controlo Permanent Make- for evitado guinte maneira: Up (PMU)- artyst NR.1 e seus acessórios. Ele contém informações importantes pa- Identifica um perigo que poderá PALAVRA-SINAL ra colocar em funcionamento, operar e levar à...
  • Seite 84: Indicações Importantes De Segurança

    Utilize exclusivamente módulos das suave. Ao selecionar os produtos de ça de mão. agulhas, acessórios e peças sobresse- desinfeção adequados, tenha em con- lentes de origem da MT.DERM GmbH. ta as diretivas em vigor no seu país. 84 PT artyst NR.1...
  • Seite 85 A peça de mão é com uma agulha contaminada, consulte téreis de uso único (material de con- coberta com a película protetora antes imediatamente um médico sumo) e só devem ser utilizados uma da aplicação do módulo das agulhas vez! (vide capítulo ). artyst NR.1...
  • Seite 86: Contraindicações E Efeitos Secundários

    Diabetes Mellitus descontrolada sia local) os primeiros dois ou três dias após o tra- Qualquer forma de acne ativa na área tamento. Sob a influência de álcool e/ou drogas de tratamento Gravidez e período de amamentação 86 PT artyst NR.1...
  • Seite 87: Efeitos Secundários

    Dores e mal-estar durante o primeiro poucas semanas riência e conhecimentos insuficientes, dia após o tratamento salvo se elas estiverem a ser supervisio- Reações inflamatórias, hematomas, nadas ou instruídas (formação). eritemas e edemas artyst NR.1...
  • Seite 88: Finalidade Prevista, Campo De Aplicação E Utilização Adequada

    2.5.3 Utilização adequada netração minimamente invasiva de tintas O tratamento deve ocorrer num ambien- PMU estéreis ou asséticas de origem mi- te seco, limpo e isento de fumo, assim como sob condições de higiene. O apare- 88 PT artyst NR.1...
  • Seite 89: Símbolos No Produto

    Limite de temperatura Informações acerca do produto Standby/operação Limite de humidade Peça de mão O Aparelho de controlo artyst NR.1 per- Proteger da humidade Pedal mite a alimentação de tensão das peças de mão artyst PMUassociadas e um con- Ligação de corrente contínua/po- Utilizar apenas em recintos fe- trolo simples da frequência de penetra-...
  • Seite 90: Dados Técnicos

    50 a 60 Hz Números de artigo dos módulos de * valor de frequência real em função da artyst agulhas, vide Ma- peça de mão artyst NR.1 utilizada. Módulos das nual de instruções agulhas da peça de mão Condições de operação artyst utilizada +15°C a +25°C...
  • Seite 91: Colocação Em Funcionamento

    (+50°F a +95°F). ça do aparelho. O aparelho poderá sofrer danos, uma falha ou funções defeituosas, que poderão colocar pessoas em perigo. Utilize apenas módulos das agulhas, acessórios e peças sobresselentes in- dicados no capítulo 4.3 na página 90. artyst NR.1...
  • Seite 92: Colocar Ou Fixar O Aparelho

    Coloque o aparelho sobre uma superfí- cie limpa, firme e plana. Mantenha as teclas e o visor do apare- lho acessíveis durante a utilização. Nunca coloque o aparelho em cima ou por baixo de outros aparelhos. 92 PT artyst NR.1...
  • Seite 93: Nr.1 5.2 Ligar A Fonte De Alimentação

    90º. Os cabos ligados apontam para baixo e podem ser instala- Ligar a fonte de alimentação dos mais facilmente. O aparelho só deve ser operado com a fonte de alimentação indicada no manual do utilizador do aparelho. A tensão de re- artyst NR.1...
  • Seite 94: Ligar O Pedal (Opcional)

    A mudança para o modo de standby é sinalizada por retângulos que se des- locam da esquerda para a direita. Para colocar o adaptador desejado: Coloque o adaptador no recesso da fonte de alimentação, tal como ilustra- do abaixo. 94 PT artyst NR.1...
  • Seite 95: Limpeza E Desinfeção Do Equipamento

    (vide capítu- fora de serviço e entre em contacto controlo, o cabo de ligação e o suporte lo 7.2 na página 98). com o respetivo fornecedor especiali- da peça de mão com um pano macio zado. humedecido com produto de desinfe- ção. artyst NR.1...
  • Seite 96: Operação

    Certifique-se de que o aparelho de co- estiver desligada. mando está ligado (vide 6.1  na pági- na 96). Prima a tecla  UP ( ) para aumentar a velocidade de perfuração. 96 PT artyst NR.1...
  • Seite 97: Ligar E Desligar A Peça De Mão

    Certifique-se de que a peça de mão mentação de tensão antes de iniciar Inspeção está corretamente ligada (vide capítu- quaisquer trabalhos de limpeza e con- lo 5.4 na página 94). Inspeções só devem ser executadas por servação. fornecedores especializados autoriza- dos. artyst NR.1...
  • Seite 98: Compatibilidade Dos Materiais

    De acordo com a compatibilidade dos lor pH > 7) materiais, pode igualmente avaliar ou- Hidrocarbonetos aromáticos/haloge- tros produtos de limpeza e de desinfeção nados (por ex. fenol, clorofórmio) adequados. Acetona e gasolina 98 PT artyst NR.1...
  • Seite 99: Condições De Transporte E Armazenamento

    Eliminação de falhas de ções: funcionamento do aparelho -10°C a +40°C Temperatura Separe primeiro o aparelho da alimen- ambiente +14°F a +104°F tação de tensão, do pedal opcional e da peça de mão. artyst NR.1...
  • Seite 100: Declarações Do Fabricante

    é assegurada pelas técnicas de en- mentação. saio mais recentes e pela certificação. A MT.DERM GmbH está certificada em con- formidade com: DIN EN ISO 13485:2016 (sistema de gestão da qualidade para dispositivos médicos)
  • Seite 101: 10.2 Declaração De Conformidade

    Criação de manuais do utilizador – estrutura, conteúdo e apresentação – Parte 1: Princípios gerais e requisitos pormenorizados Responsável pela compilação dos documentos técnicos relevantes: Dr. Andreas Pachten, MT.DERM GmbH, Responsável pela Documentação Esta declaração é emitida de forma responsável para o fabricante por: Berlim, 31/10/2019, Jörn Kluge...
  • Seite 102 5.2 Conectar el adaptador de red.......  114 10.1 Declaración de garantía........  121 5.3 Conectar el interruptor de pedal 10.2 Declaración de conformidad ......  122 (opcional) .............  115 5.4 Conectar la unidad de mano ...... 115 102 ES artyst NR.1...
  • Seite 103: Acerca De Estas Instrucciones De Uso

    Permanent Make-Up (PMU)-Dis- se evita positivo de mando artyst NR.1, así como PALABRA DE ADVERTENCIA para sus accesorios. Contienen informa- caracteriza un peligro que po- Adverten- ción importante para poner en funciona-...
  • Seite 104: Advertencias De Seguridad Importantes

    Lleva el dispositivo a un comercio es- agujas, accesorios y piezas de repues- pecializado para que lo revisen en ca- seguridad impor- to originales de la empresa MT.DERM so de que éste haya sufrido daños visi- tantes S.L. bles, no funcione como de costumbre, o haya entrado líquido en el dispositivo...
  • Seite 105 Los memente antes de conectarla o depo- asegúrate de que el paquete no esté sítala en la bandeja de la unidad de dañado y de que no se haya pasado la mano. Si se conecta una unidad de artyst NR.1...
  • Seite 106: Contraindicaciones Y Efectos Secundarios

    (p. ej., hepatitis A, B, C, tada. Además, las áreas de la piel recién D, E, o F, o VIH) o infecciones cutáneas tratadas deben protegerse de agudas locales (p.  ej., herpes o rosá- la contaminación y cea) los rayos UV 106 ES artyst NR.1...
  • Seite 107: Efectos Secundarios

    Formación de costras que suelen de- Diferencias en la tonalidad saparecer en los primeros 5 días Pérdida de pigmentos artyst NR.1...
  • Seite 108: Finalidad Prevista, Área De Aplicación Y Utilización Conforme Al Uso

    Debido a que la punción de la epidermis lugar de trabajo y los materiales a utili- (capa superior de la piel) y de la dermis zar deben ser estériles. (capa media de la piel) es mínimamente invasiva, no se producen heridas abier- 108 ES artyst NR.1...
  • Seite 109: Símbolos En El Aparato

    II que se describen a continuación: Eliminar adecuadamente co- Fabricante mo residuo electrónico Fecha del fabricante artyst NR.1...
  • Seite 110: Volumen De Suministro

    CB510699 * el valor de la frecuencia real depende artyst PMU, así como un control sencillo de la unidad de mano artyst NR.1 utiliza- de la velocidad de punción durante la uti- Interruptor de E100601 lización.
  • Seite 111: Puesta En Servicio

    NR.1 No dobles nunca los cables del produc- PRECAUCIÓN Adaptador de E116503 Peligro de lesiones y peligro de mal fun- red artyst NR.1 cionamiento del dispositivo Adaptadores UE: E-1154-W Las piezas de repuesto y accesorios no ap- correspondien- Reino Unido: tos pueden dañar el funcionamiento y la...
  • Seite 112: Emplazar O Fijar El Dispositivo

    No coloques nunca el dispositivo enci- miento. ma o debajo de otros dispositivos. Utiliza el dispositivo solo a una tempe- ratura ambiente de entre +15°C y +25°C (entre +50°F y +95°F). 112 ES artyst NR.1...
  • Seite 113 Coloca el dispositivo sobre una base den tender más fácilmente. limpia, firme y plana. Mantén libre el acceso a las teclas y a la pantalla del dispositivo durante el funcionamiento. No coloques nunca el dispositivo enci- ma o debajo de otros dispositivos. artyst NR.1...
  • Seite 114: Conectar El Adaptador De Red

    ( Conectar el adaptador de red El dispositivo solo debe operarse con el adaptador de red descrito en las instruc- ciones de uso del dispositivo. La tensión 114 ES artyst NR.1...
  • Seite 115: Conectar El Interruptor De Pedal (Opcional)

    (véase el agente de limpieza. capítulo 7.2 en la página 119). artyst NR.1...
  • Seite 116: Comprobar El Equipamiento

    Conecta la unidad de mano y realiza una prueba auditiva: ¿Hay ruidos o el nivel de sonido es alto durante el fun- cionamiento? Ten en cuenta las anomalías del capí- tulo 9 en la página 120 y 10.1 en la pá- gina 121. 116 ES artyst NR.1...
  • Seite 117: Ajustar La Velocidad De Punción

    (véase vada puede cortar la piel. el capítulo 5.4 en la página 115). Selecciona la velocidad de punción de- pendiendo de la textura de la piel del cliente y observando que sea apta para la velocidad de trabajo. artyst NR.1...
  • Seite 118: Limpieza Y Mantenimiento

    Al elegir los agentes de limpieza o de- sinfectantes, ten en cuenta las compati- bilidades de los materiales (véase el capítulo 7.2 en la página 119). Inspección Solo los comercios especializados auto- rizados pueden realizar una inspección. 118 ES artyst NR.1...
  • Seite 119: Compatibilidad De Los Materiales

    > 7) de 1 a 2 min Mayr quid hidrocarburos aromáticos/halogena- dos (p. ej., fenol, cloroformo) Mediante la compatibilidad de los mate- acetona y gasolina riales, también podrás determinar qué otros agentes de limpieza y desinfectan- tes son apropiados. artyst NR.1...
  • Seite 120: Condiciones De Transporte Y Almacenamiento

    HANDPIECE o SYSTEM OVERLOAD: adaptador de red de la toma de co- Asegúrate de que haya una unidad de rriente. mano conectada al dispositivo (véase Restablece la alimentación de corrien- el capítulo 5.4 en la página 115). 120 ES artyst NR.1...
  • Seite 121: Solucionar Fallos De Funcionamiento Del Dispositivo

    9.2  en la pági- MT.DERM GmbH está certificado según: na 121. DIN EN ISO 13485:2016 (sistema de gestión de calidad para productos mé-...
  • Seite 122: 10.2 Declaración De Conformidad

    Elaboración de las instrucciones de uso - Organización, contenido y representación - Parte 1: Principios generales y requisitos detallados Encargado de la compilación de los documentos técnicos pertinentes: Dr. Andreas Pachten, MT.DERM GmbH, encargado de la documentación Esta declaración es realizada asumiendo la responsabilidad del fabricante por: Berlín, 31/10/2019, Jörn Kluge...
  • Seite 123 NR.1...
  • Seite 124 5 Ввод в эксплуатацию .......... 133 устройства ............  143 5.1 Установка или закрепление устройства 134 10 Заявления изготовителя .........   144 5.2 Подключение блока питания со 10.1 Гарантийные обязательства......  144 встроенной вилкой.........  136 10.2 Декларация о соответствии......  145 124 RU artyst NR.1...
  • Seite 125: Данном Руководстве По Эксплуатации

    стью может привести к ущерба или травм; они имеют следую- ции относится к Перманентный маки- смерти или серьезной щую структуру: яж (ПМ)- Блок управления (artyst NR.1) травме, если ее не избежать и его принадлежностям. Оно содержит СИГНАЛЬНОЕ СЛОВО важную информацию о безопасном...
  • Seite 126: Важные Указания По Безопасности

    гла- портировкой. Не допускайте попадания жидкости вы 7.1 на странице 141. При передаче устройства другому внутрь устройства или внутрь блока лицу приложите к нему настоящее питания со встроенной вилкой. руководство по эксплуатации. В процессе применения защищайте устройство защитной пленкой. 126 RU artyst NR.1...
  • Seite 127: Важные Предписания По Гигиене И Безопасности

    ным одноразовым продуктом (рас- щитной пленкой. Перед прикрепле- ства соблюдайте предписания, дей- ходный материал), и его разрешает- нием игольного модуля минипулу ствующие в вашей стране. ся использовать только один раз! необходимо закрыть защитной пленкой (см. главу  Насаживание ги- гиенического шланга). artyst NR.1...
  • Seite 128: Противопоказания И Побочные Явления

    модули, могут привести к передаче за- абразивный или химический пилинг, ный макияж: болеваний. В случае поражения за- удаление волос на обработанных Гемофилия или другие нарушения грязненной иглой немедленно обрати- участках или свертывания крови тесь к врачу. использование прибора для загара. 128 RU artyst NR.1...
  • Seite 129 формирование корки, которая обыч- щие проблемы: терапии или высокодозной терапии но проходит в первые 5 дней; кортикостероидами (рекомендация: различия окраски временное шелушение кожи, кото- отказаться от процедуры начиная с потеря пигмента рое обычно прекращается в течение 8 дней. artyst NR.1...
  • Seite 130: Назначение, Область Применения И Надлежащее Использование (Использование По Назначению)

    Базовые знания о выполнении ми- ний слой кожи) на коже не возникает Кроме того, возможно возникновение кропигментации (см. главу  Настрой- открытых ран. Поэтому кожа нуждается следующих проблем с нанесенной ми- ка частоты прокалывания и 6.3  на кропигментацией: странице 140) различия окраски, 130 RU artyst NR.1...
  • Seite 131: Символы На Изделии

    В данном руководстве по эксплуата- водством по эксплуатации. В частно- Защита двойной или уси- ции, на устройстве, его принадлежно- сти, необходимо соблюдать действую- ленной изоляции согл. клас- стях или упаковке могут иметься опи- су защиты II санные ниже символы: artyst NR.1...
  • Seite 132: Комплект Поставки

    Не допускать попадания Информация об изделии влаги Блок питания со встроенной вилкой E1165 Использовать только внутри Блок управления artyst NR.1 обеспечи- помещений от 100 до 240 В вает подачу питания на соответствую- Питающее напряже- перем. тока щую манипулу artyst ПМ, а также про- Хрупкое...
  • Seite 133: Условия Эксплуатации

    Люди могут споткнуться о неправильно це едини- проложенный кабель и получить трав- Блок управле- це DE10601 мы. ния artyst NR.1 CL100601X3 – Прокладывайте все кабели так, что- Манипула CL100699X3, Руководство бы никто не мог споткнуться о них artyst CB510601 –...
  • Seite 134: Установка Или Закрепление Устройства

    кабелей или кабельных разъемов суще- ствует угроза электрического удара и повреждения электронных узлов. Осмотрите устройство и кабели на предмет повреждений, например на нарушенное кабельное присоедине- ние. Ни в коем случае не перегибайте ка- бели в изделии. 134 RU artyst NR.1...
  • Seite 135 его можно закрепить на металличе- гие или под другие аппараты. ских поверхностях (a и d), например, на ножке стола или на тележке. Устрой- ство можно закреплять не только в вертикальном положении, но и с пово- ротом на 90° (c). artyst NR.1...
  • Seite 136: Подключение Блока Питания Со Встроенной Вилкой

    поворотом на 90°. При этом подклю- Подключение блока питания со ченные кабели направлены вниз, что встроенной вилкой упрощает их прокладку. Аппарат можно эксплуатировать толь- ко с указанным в руководстве по экс- плуатации блоком питания со встроен- ной вилкой. Сетевое напряжение 136 RU artyst NR.1...
  • Seite 137: Подключение Педального Выключателя (Опционально)

    плее на протяжении 3  секунд све- тится логотип «artyst». О переходе в режим ожидания сви- детельствует прямоугольник, кото- рый перемещается на дисплее слева направо. Для установки нужного переходника Вставьте переходник в углубление в блоке питания со встроенной вил- кой, как показано ниже. artyst NR.1...
  • Seite 138: Чистка И Дезинфекция Оборудования

    работе необычные звуки, устройство мягкой тканью, смоченной моющим работает с обычной громкостью? При выборе дезинфицирующих или средством. чистящих средств учитывайте совме- При отклонениях от обычного пове- стимость материалов (см. главу 7.2 на дения см. главу 9 на странице 143 и странице 141). 10.1 на странице 144. 138 RU artyst NR.1...
  • Seite 139: Управление

    Блок управления находится в режи- Настройка скорости ме ожидания. прокалывания ОСТОРОЖНО Угроза травм при слишком высокой скорости прокалывания При слишком высокой скорости прока- лывания возможны порезы кожи. Выбирайте скорость прокалывания в зависимости от состояния кожи кли- ента и от рабочей скорости. artyst NR.1...
  • Seite 140: Включение И Выключение Минипулы

    уменьшить скорость прокалывания. (РАБОТА/СТОП). Убедитесь, что имеется питающее напряжение (см. главу 5.2 на страни- це 136). Убедитесь, что блок управления включен (см. главу  6.1  на страни- це 139). Убедитесь, что манипула подключе- на корректно (см. Главу  5.4  на стра- нице 137). 140 RU artyst NR.1...
  • Seite 141: Чистка И Технический Уход

    ковых ваннах. При выборе дезинфицирующих или от 30 с до Bode Chemie Bacillol чистящих средств учитывайте совме- 1 мин стимость материалов (см. главу 7.2 на Ecolab Incidin Foam от 1 до 2 мин странице 141). Schülke & Mikrozid от 1 до 2 мин Mayr Liquid artyst NR.1...
  • Seite 142: Дезинфекция Поверхностей

    Для транспортировки закрепите ме- 50%, азотная кислота ≥ 15%); таллическую пластину устройства с обратной стороны устройства. кислотам-окислителям (например, перуксусная кислота); Храните устройство и его принад- лежности при следующих условиях щелочам (например, натровый ще- лок, аммиак и все вещества с pH> 7); 142 RU artyst NR.1...
  • Seite 143: При Наличии Вопросов И Проблем

    Отсоедините устройство от источни- КА СИСТЕМЫ): ка питания путем извлечения блока питания со встроенной вилкой из убедитесь, что к минипуле подклю- розетки. чена машина для нанесения татуи- ровок (см. главу  5.4  на страни- Снова обеспечьте подачу напряже- це 137); ния. artyst NR.1...
  • Seite 144: Заявления Изготовителя

    сбоев, связанных с дефектами материала или плохим качеством обработки. При поставке мы гарантируем стериль- ность игольных модулей в закрытой и неповрежденной упаковке. При рекла- мациях в отношении игольных модулей сообщите указанный на этикетке но- мер партии. 144 RU artyst NR.1...
  • Seite 145: 10.2 Декларация О Соответствии

    Составление руководств по эксплуатации. Структура, содержание и оформление. Часть 1: Общие принципы и подробные требова- ния Лицо, уполномоченное составлять соответствующую техническую документацию Д-р Андреас Пахтен, MT.DERM GmbH, имеющий право составлять техническую документацию Данная декларация выдана по поручению изготовителя: Берлин, 31.10.2019, Йорн Клуге...
  • Seite 146 Manufactured by: MT.DERM GmbH | Gustav-Krone-Str. 3 | 14167 Berlin fon +49 (0)30 845 88 54 | fax +49 (0)30 84 58 85 55 | info@mtderm.de | mtderm.de...

Inhaltsverzeichnis