Herunterladen Inhalt Inhalt Diese Seite drucken
Inhaltsverzeichnis

Werbung

Verfügbare Sprachen
  • DE

Verfügbare Sprachen

  • DEUTSCH, seite 78
PELER TOWER
IT
ISTRUZIONI PER INSTALLAZIONE, USO E MANUTENZIONE
EN
INSTRUCTIONS FOR INSTALLATION, USE AND MAINTENANCE
FR
INSTRUCTIONS POUR L'INSTALLATION, L'EMPLOI ET L'ENTRETIEN
DE
HANDBUCH FÜR INSTALLATION, GEBRAUCH UND WARTUNG
ES
INSTRUCCIONES PARA LA INSTALACIÓN, USO Y MANTENIMIENTO

Werbung

Inhaltsverzeichnis
loading

Inhaltszusammenfassung für Olimpia splendid PELER TOWER

  • Seite 1 PELER TOWER ISTRUZIONI PER INSTALLAZIONE, USO E MANUTENZIONE INSTRUCTIONS FOR INSTALLATION, USE AND MAINTENANCE INSTRUCTIONS POUR L’INSTALLATION, L’EMPLOI ET L’ENTRETIEN HANDBUCH FÜR INSTALLATION, GEBRAUCH UND WARTUNG INSTRUCCIONES PARA LA INSTALACIÓN, USO Y MANTENIMIENTO...
  • Seite 3 1. L’apparecchio può essere utilizzato da bambini di età non inferiore a 8 anni e da persone con ridotte capacità fisiche, sensoriali o mentali, o prive di esperienza o della necessaria conoscenza, purché sotto sorveglianza oppure dopo che le stesse abbiano ricevuto istruzioni relative all’uso sicuro dell’apparecchio e alla comprensione dei pericoli ad esso inerenti.
  • Seite 4 1. This appliance can be used by children aged from 8 years and above and person with reduced physical, sensory or mental capabilities or lack of experience and knowledge if they have been given supervision or instruction concerning use of the appliance in a safe way and understand the hazards involved.
  • Seite 5 1. Cet appareil peut être utilisé par des enfants âgés de moins de 8 ans et par des personnes dont les des capacités physiques, sensorielles ou mentales sont limitées, qui manquent d’expérience ou des connaissances nécessaires, à condition qu’elles soient sous surveillance ou après avoir reçu des instructions concernant l’utilisation en toute sécurité...
  • Seite 6 1. Kindern ab 8 Jahren und Personen mit eingeschränkten körperlichen, sinnlichen oder geistigen Fähigkeiten, von unerfahrenen oder unwissenden Personen können das Gerät benutzen, wenn diese überwacht werden oder Anleitungen zum sicheren Gebrauch des Geräts erhalten und dessen Gefahren verstanden haben. Kinder dürfen nicht mit dem Gerät spielen.
  • Seite 7 1. El aparato puede utilizarse por niños con una edad no inferior a los 8 años y por personas con reducidas capacidades físicas, sensoriales o mentales, o sin experiencia ni el necesario conocimiento, siempre y cuando bajo supervisión o después de que las mismas hayan recibido instrucciones relativas al uso seguro del aparato y a la comprensión de los peligros inherentes.
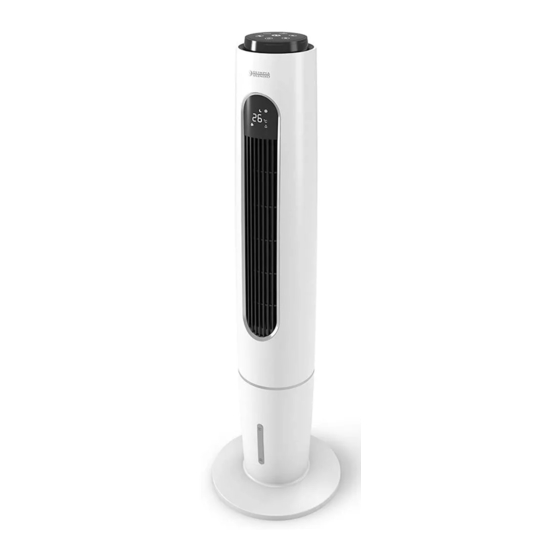
  • Seite 8 PELER TOWER...
  • Seite 9 m i n . 1 5 c m...
  • Seite 12 ILLUSTRAZIONI Le illustrazioni sono raggruppate nella seconda pagina e nella penultima pagina del manuale. INDICE GENERALE L’indice generale del presente manuale è riportato a pagina “IT-3” 0 - AVVERTENZE 0.1 - INFORMAZIONI GENERALI Desideriamo innanzitutto ringraziarVi per aver deciso di accordare la vostra preferenza ad un apparecchio di nostra produzione.
  • Seite 13: Tensione Elettrica Pericolosa

    • Indica che il personale di assistenza deve maneggiare l’apparecchio attenendosi al manuale di installazione. ATTENZIONE • Segnala che potrebbero esserci delle informazioni aggiuntive su manuali allegati. • Indica che sono disponibili informazioni nel manuale d’uso o nel manuale di installazione. ATTENZIONE Indica che il personale di assistenza deve maneggiare l’apparecchio attenendosi al manuale di installazione. IT - 2 PELER TOWER...
  • Seite 14: Inhaltsverzeichnis

    1. Documento riservato ai termini di legge con divieto di riprodu- zione o di trasmissione a terzi senza esplicita autorizzazione della ditta OLIMpIA SpLENDID. Le macchine possono subire aggiornamenti e quindi presen- tare particolari diversi da quelli raffigurati, senza per questo costituire pregiudizio per i testi contenuti in questo manuale.
  • Seite 15 10. Durante le operazioni di riempimento e pulizia, staccare la spina dalla presa di corrente. 11. In caso di sostituzione di componenti utilizzare esclusiva- mente ricambi originali OLIMpIA SpLENDID. 12. Non utilizzare detergenti liquidi o corrosivi per pulire l’appa- recchio, non spruzzare acqua o altri liquidi sull’apparecchio in quanto potrebbero danneggiare i componenti in plastica o, addirittura, provocare scosse elettriche.
  • Seite 16 14. Non scollegare la spina di alimentazione durante il funziona- mento. Rischio di incendio o scosse elettriche. 15. Non appoggiare oggetti pesanti o caldi sopra l’apparecchio. 16. prima di collegare elettricamente l’apparecchio accertarsi che i dati targa siano rispondenti a quelli della rete di distribuzione elettrica.
  • Seite 17 36. Non utilizzare l’apparecchio all’esterno o su superfici bagnate. Evitare il versamento di liquidi sull’apparecchio. Non utilizzare l’apparecchio vicino a lavelli o rubinetti. 37. Non immergere l’apparecchio in acqua o altri liquidi. 38. per mantenere l’apparecchio pulito, cambiare l’acqua di frequente. IT - 6 PELER TOWER...
  • Seite 18 39. Non esporre l’apparecchio a gocce o a spruzzi di acqua. 40. Non posizionare l’apparecchio in spazi ristretti, come ad esem- pio su una mensola o all’interno di un armadietto. 41. prima di procedere all’introduzione dell’acqua, spegnere l’ap- parecchio e staccare la spina dalla presa di corrente. Fare attenzione a non superare il livello massimo indicato con la scritta “MAX”.
  • Seite 19 Si raccomanda inoltre di rendere innocue quelle parti dell’apparecchio suscettibili di costituire un pericolo, spe- cialmente per i bambini che potrebbero servirsi dell’apparecchio fuori uso per i propri giochi. IT - 8 PELER TOWER...
  • Seite 20: Uso Previsto

    Questo apparecchio è destinato solo per un utilizzo domestico o similare. • Un uso improprio dell’apparecchio con eventuali danni causati a persone, cose o animali esulano OLIMpIA SpLENDID da ogni re- sponsabilità. 0.5 - ZONE DI RISCHIO • L’apparecchio non deve essere installato in ambienti con presenza di gas infiammabili, gas esplosivi, in ambienti molto umidi (lavan- derie, serre, ecc.), o in locali dove sono presenti altri macchinari...
  • Seite 21: Principali Caratteristiche Efunzionamento

    12 - Corpo apparecchio Base 13 - Libretto istruzioni Pompa acqua 14 - Telecomando Cavo di alimentazione 6 - Sportello serbatoio acqua 15 - Tappo scarico acqua del serbatoio 16 - Ice box (2) Indicatore livello acqua 17 - Ricevitore telecomando Impugnatura 9 - Filtro aria IT - 10 PELER TOWER...
  • Seite 22: Installazione

    2 - INSTALLAZIONE 2.1 - TRASpORTO DELL’AppARECCHIO • Il trasporto e la movimentazione dell’apparecchio deve avvenire in posizione verticale. • Ruotare l’apparecchio in posizione orizzontale e montare la base (3) come illustrato nella figura B1. AVVERTENZA Trasporto del raffrescatore su pavimenti delicati (es. pavimenti in legno): • Svuotare l’acqua dai serbatoi.
  • Seite 23: Collegamento Elettrico

    3 - USO DELL’AppARECCHIO Le modalità di funzionamento dell’apparecchio possono essere selezionate sia tramite il telecomando che dal pannello comandi. La ricezione della funzione selezionata viene confermata dall’emissione di un “beep” da parte del cicalino. IT - 12 PELER TOWER...
  • Seite 24 3.1 - pANNELLO COMANDI E TELECOMANDO (Fig.1) A1. Tasto ON/OFF B1. Temperatura ambiente rilevata (°C) A2. Tasto Raffreddatore/Umidificatore B2. LED modalità “normale” B3. LED modalità “naturale” e funzione ionizzante A3. Tasto velocità aria B4. LED modalità “riposo” A4. Tasto timer B5. LED Raffreddatore/Umidificatore A5. Tasto rotazione apparecchio B6. LED velocità bassa A6. Tasto modalità B7. LED velocità media A7. Tasto Raffreddatore/Umidificatore B8.
  • Seite 25: Uso Del Telecomando

    • Lampade elettroniche e fluorescenti possono interferire nelle trasmissioni tra tele- comando e l’apparecchio. • Estrarre le batterie di alimentazione nel caso di inutilizzo prolungato del telecomando. 3.2.a - Inserimento della batteria (fig. E - F) La batteria di alimentazione è compresa nella fornitura. La batteria è già installata nel telecomando. Nel caso occorra sostituirla: a. Premere la linguetta (14a) e estrarre il supporto batteria (14b). b. Inserire la batteria tipo DL2025 nel supporto con il segno “+” in alto. c. Riposizionare il supporto batteria (14b) nel telecomando. Rispettare scrupolosamente le polarità. 3.2.b - Sostituzione della batteria La batteria va sostituita se premendo uno dei tasti non si sente il “beep” di ricezione del segnale dell’apparecchio. IT - 14 PELER TOWER...
  • Seite 26: Utilizzo Dell'apparecchio

    Utilizzare sempre batterie nuove. L’utilizzo di batterie vecchie potrebbe generare un malfunzionamento del te- lecomando. Una volta scarica, la batteria van sostituita ed eliminata negli appositi centri di raccolta o come previsto dalle normative locali. • Se non si utilizza il telecomando per alcune settimane o anche più, togliere la batteria. Eventuali perdite della batteria potrebbe danneggiare il telecomando. Non ricaricare o smontare la batteria. Non gettate la batteria nel fuoco. Potrebbe bruciare o esplodere. Se il liquido delle batterie cade sulla pelle o sui vestiti, lavare con cura con acqua pulita. Non utilizzare il telecomando con batterie che hanno avuto perdite.
  • Seite 27 • Non collocare l’apparecchio direttamente su tappeti, asciugamani, coperte o altre superfici assorbenti. • Inserire la spina nella presa di corrente; l’apparecchio emette un “beep” e sul display si visualizza la temperatura ambiente in °C. Prima di collegare elettricamente l’apparecchio accertarsi che i dati targa siano rispondenti a quelli della rete di distribuzione elettrica. 3.3.b - Riempimento (fig. G) E’ necessario aggiungere acqua nel serbatoio prima che la funzione raffred- datore/umidificatore sia accesa. L’acqua può essere aggiunta aprendo lo sportello serbatoio (6). Assicurarsi che il tappo (fig.A - pos.15) sia correttamente posizionato. - Versare l‘acqua nel serbatoio. - Verificare il livello dell’acqua nel serbatoio tramite l’indicatore di livello (7) (fig.L). - Richiudere lo sportello (6). • Non riempire il serbatoio oltre il livello massimo indicato. • Utilizzare sempre acqua pulita. • L’apparecchio potrebbe produrre un leggero odore o l’acqua nel ser- batoio potrebbe essere leggermente colorita durante il primo utilizzo; questi eventi sono normali ed assolutamente non nocivi per la salute dell’utilizzatore. IT - 16 PELER TOWER...
  • Seite 28: Istruzioni Di Funzionamento

    3.4 - ISTRUZIONI DI FUNZIONAMENTO a. Inserire la spina nella presa di corrente. Quando l’apparecchio viene acceso per la prima volta emette un “beep” e si posiziona in stand-by; tutti i tasti sono disabilitati ad eccezione del tasto ON/OFF. Le funzioni possono essere abilitate o modificate sia dal pannello comandi che dal telecomando. b. Per accendere l’apparecchio premere il tasto ON/OFF (A1) (si sente un beep). c. Per spegnere l’apparecchio premere di nuovo il tasto ON/OFF (A1) (si sente un beep). Ad ogni pressione di un tasto si sente un beep. d. Sollevare manualmente i flap orizzontali come desiderato. 3.4.a - Tasto ON/OFF (A1) In modalità stand-by tutti i tasti sono disabilitati, ad eccezione del tasto ON/OFF.
  • Seite 29 0h (spento) ---> 1h ---> 2h ---> 3h ---> .. 12h ---> 0h (spento) ---> .. 3.4.f Tasto raffreddamento/umidificatore • Quando l’apparecchio è acceso, per avviare la funzione raffreddamento/ umidificazione: premere una volta il tasto “A2” sul pannello comandi dell’apparecchio oppure premere il tasto “A2” sul telecomando. Il led “B5” si accende. • Per spegnere la funzione: premere tre volte il tasto “A2” sul pannello comandi dell’apparecchio oppure premere una volta il tasto “A2” sul telecomando. Il led “B5” si spegne. IT - 18 PELER TOWER...
  • Seite 30 Non far funzionare la pompa (4) senza acqua nel serbatoio onde evitare di danneggiarla. 3.4.g - Tasto funzione “ionizzante” • Quando l’apparecchio è acceso, per avviare la funzione ionizzante: premere due volte il tasto “A7” sul pannello comandi dell’apparecchio oppure premere il tasto “A7” sul telecomando. Il led “B9” si accende. • Per spegnere la funzione: premere due volte il tasto “A7” sul pannello comandi dell’apparecchio oppure premere una volta il tasto “A7” sul telecomando. Il led “B9” si spegne. Le due funzioni “raffreddamento/umidificazione” e “ionizzante” possono essere uti- lizzante insieme premendo i tasti “A2” e “A7” sul telecomando oppure premenedo tre volte il tasto “A2/A7” sul pannello comandi. Entrambi i led “B5” e “B9” devono essere accesi. 3.4.i - Utilizzo dei contenitori Ice box (16) In dotazione con l’apparecchio sono forniti due “Ice box” (16) che possono essere utilizzati per raffrescare l’aria emessa dall’apparecchio. L’utilizzo della funzione “raffreddatore” con un “Ice box” (16) ghiacciato posizio- nato nel serbatoio acqua, permette di ridurre rapidamente la temperatura dell’aria emessa dall’apparecchio di circa 3°C. Per utilizzare questa funzione: a. Posizionare gli “Ice box” nel congelatore ed attendere che siano ghiacciati.
  • Seite 31: Manutenzione E Pulizia

    Utilizzare un panno asciutto per pulire l’apparecchio e il telecomando. b. E’ possibile utilizzare un panno inumidito con acqua fredda per pulire l’ap- parecchio se questo è molto sporco. Non utilizzare un panno trattato chimicamente o antistatico per pulire l’apparecchio. Non utilizzare, benzina, solvente, pasta per lucidare, o solventi similari. Questi prodotti potrebbero provocare la rottura o la deformazione della superficie in plastica. 4.1.b - Pulizia filtri Operare come segue: a. Con un cacciavite a stella (non fornito a corredo) rimuovere la vite (22) (fig. N). b. Premere i due fermi (25) per rimuovere il filtro aria (9) dal corpo apparecchio (fig.O). c. Estrarre il filtro carta (10) dal corpo apparecchio. d. Pulire entrambi i filtri (9 e 10) con acqua e detergente neutro. Sciacquare bene i filtri con acqua pulita. e. Se necessario utilizzare un pennello a setole morbide per pulire a fondo il filtro aria (9). IT - 20 PELER TOWER...
  • Seite 32: Prima Di Riporre L'apparecchio A Fine Stagione

    f. Far asciugare i filtri quindi riposizionarli nel corpo apparecchio (12) (fig.P). g. Fissare il filtro aria (9) con la vite (22) (fig.Q). Non usare l’apparecchio senza i filtri correttamente posizionati o se gli stessi sono danneggiati o consumati. 4.1.c - pulizia serbatoio Se non si intende utilizzare l’apparecchio per un periodo di tempo prolungato: a. Scollegare la spina dalla presa di corrente. b. Spostare con cautela l’apparecchio in una posizione idonea a scaricare l’acqua. c.
  • Seite 33: Smaltimento

    Per informazioni più dettagliate sul riciclaggio di questo prodotto, contattare l’ufficio comunale, il servizio locale di smaltimento rifiuti o il negozio in qui è stato acquistato il prodotto. Questa disposizione è valida solamente negli stati membri dell’UE. 7 - DATI TECNICI Per i dati tecnici consultare la targa dati (23) caratteristici applicata sul prodotto. IT - 22 PELER TOWER...
  • Seite 34: General Information

    ILLUSTRATIONS The illustrations are grouped on the initial pages of the manual MAIN INDEX The main index of this manual is given on page “EN-3” 0 - WARNINGS 0.1 - General information First of all, we would like to thank you for choosing our appliance. 0.2 - SYMBOLS The pictograms in the next chapter provide the necessary informa- tion for correct, safe use of the machine in a rapid, unmistakable...
  • Seite 35 • Indicates that the assistance personnel must handle the appliance following the installation manual. ATTENTION • Indicates that there may be additional information in attached manuals. • Indicates that information is available in the user manual or in the installation manual. ATTENTION Indicates that the assistance personnel must handle the appliance following the installation manual. EN - 2 PELER TOWER...
  • Seite 36: General Warnings

    1. This document is restricted in use to the terms of the law and may not be copied or transferred to third parties without the ex- press authorization of the manufacturer, OLIMPIA SPLENDID. Our machines are subject to change and some parts may ap- pear different from the ones shown here, without this affecting the text of the manual in any way.
  • Seite 37 For repair work contact solely the technical service centres au- thorised by the manufacturer and ask for original spare parts to be used. Failure to do this can affect the safety of the appliance. EN - 4 PELER TOWER...
  • Seite 38 14. Do not disconnect the power plug during functioning. Fire or electrical shocks hazard. 15. Do not place heavy or hot objects on top of the appliance. 16. Before electrically connecting the appliance, make sure the plate data correspond to those of the distribution network. The plate (23) is located on the sides of the appliance (Fig.C).
  • Seite 39 37. Do not immerse the appliance in water or in other liquids. 38. Change the water frequently to keep it clean. 39. This unit shall not be exposed to dripping or splashing water. EN - 6 PELER TOWER...
  • Seite 40 40. Do not install the unit in a confined space, such as a bookcase or built-in cabinet. 41. Switch OFF and unplug the unit before filling with water. Make sure the water is below the “MAX” water level line. 42. The unit should not be adjusted or repaired by anyone except specialized technicians.
  • Seite 41 Hazardous parts of the appliance must be rendered harmless, especially as there is a risk of chil- dren playing with it. EN - 8 PELER TOWER...
  • Seite 42: Proper Use

    • This appliance is only intended for a domestic use or similar. • An improper use of the appliance with possible damages caused to people, things or animals releases OLIMPIA SPLENDID from any responsibility. 0.5 - HAzARDOUS zONES • The appliance must not be installed in places with inflammable gas- es, explosive gases or excess humidity (laundries, greenhouses, etc.), or in places with other machines that generate a strong heat...
  • Seite 43: Main Features And Functioning

    13 - Instruction booklet Water pump 14 - Remote control Power cord 15 - Reservoir water drain cap Water door 16 - Ice box (2) Water level gauge 17 - Remote control receiver Handle 9 - Air filter EN - 10 PELER TOWER...
  • Seite 44: Installation

    2 - INSTALLATION 2.1 - HANDLING THE APPLIANCE • Transport and handling of the appliance must be carried out in ver- tical position. • Rotate the appliance into horizontal position and mount the base (3), as illustrated in figure B1. CAUTION Moving the cooler on delicate flooring (e.g.
  • Seite 45: Electrical Connection

    3 - USE OF THE APPLIANCE The appliance operating modes can be selected either using the remote control supplied or the control panel. The reception of the selected function is confirmed by the emission of a “beep” by the buzzer. EN - 12 PELER TOWER...
  • Seite 46 3.1 - CONTROL PANEL AND REMOTE CONTROL (Fig.1) A1. ON/OFF key B1. Room temperature detected (°C) A2. Cooler/Humidifier and ionizing B2. “Normal” mode LED B3. “Natural” mode LED function key A3. Air speed key B4. “Rest” mode LED A4. Timer key B5. Cooling/Humidifier LED A5. Appliance rotation key B6. Low speed LED A6. Mode key B7. Medium speed LED A7. Cooler/Humidifier and ionizing B8. High speed LED B9.
  • Seite 47: Use Of The Remote Control

    Re-position the battery support (14b) in the remote control. Scrupulously respect the polarities. 3.2.b - Replacement of the battery The battery must be replaced when you no longer hear a beep from the appliance when pressing any key on the remote control. EN - 14 PELER TOWER...
  • Seite 48 Always use new batteries. The use of old batteries could generate malfunctioning of the remote control. Once discharged, the battery must be replaced and eliminated in the relevant collection centres or as envisioned by local regulations. • If the remote control is not used for several weeks or longer, remove the battery.
  • Seite 49: A - Preliminary Operations

    • Always use clean water. • The appliance could produce a slight smell or the water in the tank could be slightly coloured during first use; this events are normal and absolutely harmless for the user’s health. EN - 16 PELER TOWER...
  • Seite 50: Instructions For Operation

    3.4 - INSTRUCTIONS FOR OPERATION a. Insert the plug in the power socket. When the appliance is switched on for the first time, you will hear a beep and it will go into stand-by. All buttons will be disabled, with the exception of the ON/OFF one. The functions can be enabled or modified either from the control panel or from the remote control.
  • Seite 51 When the appliance is on, press this key and the timer changes according to this sequence: 0h (off) ---> 1h ---> 2h ---> 3h ---> .. 12h ---> 0h (off) ---> 3.4.f Cooler/humidifier key • When the appliance is on, to start the cooling/humidification function: press the “A2” key on the appliance command panel once or press the “A2” key on the remote control. LED “B5” switches on. • To switch the function off: press the “A2” key on the appliance command panel three times or press the “A2” key on the remote control once. LED “B5” switches off. EN - 18 PELER TOWER...
  • Seite 52 Do not allow the pump (4) to operate without water in the reservoir in order to prevent damage to the same. 3.4.g - “Ionizing” function key • When the appliance is on, to start the ionizing function: press the “A7” key on the appliance command panel twice or press the “A7” key on the remote control. LED “B9” switches on. • To switch the function off: press the “A7” key on the appliance command panel twice or press the “A7” key on the remote control once. LED “B9” switches off. The two “cooling/humidification” and “ionizing” functions can be used together by pressing the “A2”...
  • Seite 53: Maintenance And Cleaning

    Do not use gasoline, solvent, polish or similar solvents. These products could cause the breakage or deformation of the plastic surface. 4.1.b - Cleaning the filters Operate as follows: a. Use a Phillips head screwdriver (not included) to remove the screws (22) (fig. N). b. Press the two catches (25) to remove the air filter (9) from the body of the appliance (fig.O). c. Remove the paper filter (10) from the body of the appliance. d. Clean both filters (9 and 10) with water and neutral soap. Rinse the filters well with clean water. e. If necessary, use a soft brush to clean the air filter more deeply (9). EN - 20 PELER TOWER...
  • Seite 54: Before Storing The Appliance

    Let the filters dry, then replace them into the body of the appliance (12) (fig.P). g. Fix the air filter (9) with the screw (22) (fig.Q). Do not use the appliance unless the filters are properly installed. Do not use the appliance if the filters are damaged or worn 4.1.c - Cleaning the reservoir If the appliance is not going to be used for a long period of time: a.
  • Seite 55: Disposal

    Further information about the recycling of this product can be obtained from your local town hall, your refuse collection service, or in the store at which you bought the product. This regulation is valid only in EU member states. 7 - SPECIFICATIONS For the technical data, consult the characteristics plate (23) affixed to the product. EN - 22 PELER TOWER...
  • Seite 56 IllUStRAtIoNS Les illustrations sont regroupées dans les pages initiales de la notice. tABlE DES MAtIÈRES GéNéRAlE La table des matières générales de cette notice figure à la page « FR-3 » 0 - MISES EN GARDE 0.1 - INFoRMAtIoNS GéNéRAlES Tout d’abord, nous tenons à...
  • Seite 57 • Il indique que des informations sont disponibles dans la notice d’utilisation ou dans la notice d’installation. AttENtIoN Indique que le personnel préposé à la réparation doit gérer l’appareil conformément à la notice d’installation. FR - 2 PELER TOWER...
  • Seite 58: Mises En Garde Générales

    1. Document réservé aux termes de la loi avec interdiction de reproduction ou de transmission à tiers sans l’autorisation ex- presse de la société olIMPIA SPlENDID. les machines peuvent subir des mises à jour et par consé- quent présenter des éléments différents de ceux qui sont re- présentés, sans que cela constitue pour autant un préjudice...
  • Seite 59 11. En cas de remplacement de composants, utiliser exclusive- ment des pièces de rechange originales olIMPIA SPlENDID. 12. N’utilisez pas de détergents liquides ou corrosifs pour net- toyer l’appareil, ne vaporisez pas d’eau ou d’autres liquides sur l’unité...
  • Seite 60 14. Ne pas débrancher la fiche secteur pendant le fonctionne- ment. Risque d’incendie ou de choc électrique. 15. Ne pas appuyer d’objets lourds ou chauds sur l’appareil. 16. Avant de connecter l’électroménager électriquement, assu- rez-vous que les données de la plaque signalétique corres- pondent à...
  • Seite 61 36. Ne pas utiliser l’appareil à l’extérieur ou sur des surfaces mouil- lées. éviter le déversement de liquides sur l’appareil. Ne pas uti- liser l’appareil à proximité d’éviers ou de robinets. 37. Ne pas immerger l’appareil dans de l’eau ou autres liquides. FR - 6 PELER TOWER...
  • Seite 62 38. Pour que l’appareil reste propre, changer l’eau fréquemment. 39. Ne pas exposer l’appareil aux gouttes ou aux jets d’eau. 40. Ne pas positionner l’appareil dans des espaces étroits comme, par exemple, sur une étagère ou dans une armoire. 41. Avant d’introduire l’eau, éteindre l’appareil et débrancher la fiche de la prise de courant.
  • Seite 63 Il est en outre recommander de rendre inoffensives les éléments de l’appareil susceptibles de constituer un danger, no- tamment pour les enfants, qui pourraient se servir de l’appareil hors d’usage pour jouer. FR - 8 PELER TOWER...
  • Seite 64: Utilisation Prévue

    0.4 - UtIlISAtIoN PRéVUE • L’appareil doit être utilisé exclusivement pour rafraichir, refroidir et humidifier, dans le seul but de rendre la température ambiante agréable. • Cet appareil est conçu UNIQUEMENT pour une utilisation domes- tique ou semblable. • Un usage impropre de l’appareil avec d’éventuels dommages cau- sés aux personnes, biens ou animaux déchargent olIMPIA SPlEN- DID de toute responsabilité.
  • Seite 65: Principales

    Pompe à eau 14 - Télécommande Câble d’alimentation 15 - Bouchon d’évacuation de l’eau Porte d’eau Auge du niveau d’eau du réservoir 16 - Bac à glace (2) Poignée Filtre à air 17 - Récepteur de télécommande FR - 10 PELER TOWER...
  • Seite 66: Installation

    2 - INStAllAtIoN 2.1 - tRANSPoRt DE l’APPAREIl • Le transport et la manutention de l’appareil doivent être effectués en position verticale. • tourner l’appareil sur la position horizontale et monter la base (3) de la façon illustrée sur la figure B1. Recommandation déplacement du refroidisseur sur sols délicats (ex.
  • Seite 67: Raccordement Electrique

    Les modes de fonctionnement de l’appareil peuvent être sélectionnés à partir de la télécommande ou du panneau de commande. La réception de la fonction sélectionnée est confirmée par l’émission d’un « bip » de l’avertisseur. FR - 12 PELER TOWER...
  • Seite 68 3.1 - PANNEAU DE CoMMANDES Et téléCoMMANDE (Fig.1) A1. Touche oN/oFF B2. Voyant mode « normal » A2. Touche Refroidisseur / B3. Voyant mode « naturel » B4. Voyant mode « repos » Humidificateur et fonction ionisante A3. Touche vitesse de l’air B5.
  • Seite 69 Repositionner le support de la pile (14b) dans la télécommande. Respecter scrupuleusement les polarités. 3.2.b - Remplacement de la pile La pile doit être remplacée en absence de bip sonore lorsque les touches sont appuyées, indiquant l’absence de réception du signal par l’appareil. FR - 14 PELER TOWER...
  • Seite 70 Utilisez toujours de nouvelles piles. L’utilisation des piles usagées pourraient provoquer un dysfonctionnement de la télécommande. Une fois déchargée, la pile doit être remplacée et jetée dans les centres de collecte appropriés ou conformément aux réglementations locales. • Si la télécommande n’est pas utilisée pendant quelques semaines ou plus, retirer la pile. Des éventuelles pertes de la pile pourraient endommager la télécommande. ne pas recharger ou ne pas démonter la pile. ne pas jeter la pile dans le feu.
  • Seite 71: A - Opérations Préliminaires

    L’eau peut être ajoutée en ouvrant la porte du réservoir (6). S’assurer que le bouchon (fig. A - pos.15) est bien positionné. Verser l’eau dans le réservoir. Vérifier le niveau de l’eau dans le réservoir à l’aide de la jauge (7) (fig.L). Refermer la porte (6). • Ne pas remplir le réservoir au-delà du niveau maximum indiqué. • Utiliser toujours de l’eau propre. • L’appareil pourrait émettre une légère odeur ou l’eau dans le réservoir pourrait être légèrement colorée au cours de sa première utilisation ; ces événements sont normaux et absolument pas nocifs pour la santé de l’utilisateur. FR - 16 PELER TOWER...
  • Seite 72: Consignes De Fonctionnement

    3.4 - CoNSIGNES DE FoNCtIoNNEMENt a. Insérer la fiche dans la prise de courant. Lors du premier allumage de l’appareil, celui-ci émet deux « bips » sonores et passe en mode veille. Toutes les touches sont désactivées à l’exception de la touche ON/ OFF. Les fonctions peuvent être activées ou modifiées à partir du panneau de commande et de la télécommande. b. Pour allumer l’appareil presser la touche oN/oFF (A1) (on entend un bip sonore). c. Pour éteindre l’appareil presser la touche oN/oFF (A1) (on entend un biiip sonore).
  • Seite 73 Pour désactiver la fonction : appuyer trois fois sur la touche « A2 » sur le panneau des commandes de l’appareil ou bien sur la touche « A2 » sur la télécommande. La led « B5 » s’éteint. FR - 18 PELER TOWER...
  • Seite 74 Ne pas faire fonctionner la pompe (4) sans eau dans le réservoir afin d‘éviter de l‘endommager. 3.4.g - touche de fonction « ionisante » • Quand l’appareil est allumé, pour mettre en marche la fonction ionisante : appuyer deux fois sur la touche « A7 » sur le panneau des commandes de l’appareil ou bien sur la touche « A7 » sur la télécommande. La led «...
  • Seite 75: Maintenance Et Nettoyage

    Nettoyer les deux filtres (9 et 10) avec de l’eau et un produit détergent neutre. Bien rincer les filtres avec de l’eau propre. e. Si nécessaire, utiliser une brosse à poils doux pour nettoyer le filtre à air (9) en profondeur. FR - 20 PELER TOWER...
  • Seite 76: Avant De Ranger L'appareil À La Fin De La Saison

    f. Laisser sécher les filtres puis les remettre dans le corps de l’appareil (12) (fig.P). g. Fixer le filtre à air (9) avec la vis (22) (fig.Q). Ne pas utiliser l’appareil sans que les filtres des réservoirs ne soient correctement installés ou s’ils sont endommagés ou usés. 4.1.c - Nettoyage du réservoir Si l’appareil ne doit pas être utilisé pendant une période prolongée : a.
  • Seite 77: Élimination

    été acheté. Cette disposition est uniquement valable dans les États-membres de l’UE. 7 - DoNNéES tECHNIqUES Pour des informations d’ordre technique, consulter la plaque signalétique (23) apposée sur le produit. FR - 22 PELER TOWER...
  • Seite 78 IllUSTRATIONEN Die Illustrationen sind auf den Anfangsseiten des Handbuchs zusammengefasst AllgEmEINES INHAlTSVERZEICHNIS Das allgemeine Inhaltsverzeichnis des Handbuchs finden Sie auf Seite “DE-3” 0 - HINWEISE 0.1 - AllgEmEINE HINWEISE Wir möchten uns zunächst dafür bedanken, dass Sie sich für ein Gerät unserer Herstellung entschieden haben. 0.2 - BIlDSYmBOlE Die im folgenden Kapitel aufgeführten Bildsymbole liefern schnell und eindeutig Informationen zum korrekten und sicheren Gebrauch...
  • Seite 79: Gefährliche Elektrische Spannung

    ACHTUNg • Weist auf mögliche Zusatzinformationen in den beiliegenden Handbüchern hin. • Zeigt an, dass im Gebrauchs- oder Installationshandbuch weiterer Informationen verfügbar sind. ACHTUNg Zeigt an, dass das Assistenzpersonal beim Umgang des Geräts auf die Anweisungen im Installationshandbuch zu achten hat. DE - 2 PELER TOWER...
  • Seite 80: Allgemeine Hinweise

    1. laut gesetz ist dies ein vertrauliches Dokument, daher gilt das Verbot der Vervielfältigung oder Übermittlung an Dritte ohne ausdrückliche genehmigung der firma OlImpIA SplENDID. An den geräten können technische Neuerungen vorgenommen werden, d.h. Einzelteile können u.U. anders aussehen als auf den Abbildungen, was jedoch die gültigkeit der Anweisungen in...
  • Seite 81: Die Herstellerfirma Übernimmt Keinerlei Verantwor

    10. Ziehen Sie beim Befüllen und Reinigen den Netzstecker aus der Steckdose. 11. Bei der Auswechslung von Einzelteilen bitte ausschließlich original OlImpIA SplENDID-Ersatzteile verwenden. 12. Zur Reinigung des Geräts weder flüssige oder korrosive Rei- niger verwenden; kein Wasser oder andere flüssigkeiten auf das Gerät spritzen, da diese die Kunststoffkomponenten be-...
  • Seite 82 14. Den Versorgungsstecker nicht während des Betriebs tren- nen. Brand- oder Stromschlaggefahr. 15. Keine schweren oder heißen gegenstände auf das gerät legen. 16. Bevor das gerät an die Stromversorgung angeschlossen wird, sicherstellen, dass die Angaben auf dem Typenschild mit denen des Stromnetzes übereinstimmen.
  • Seite 83 36. Das gerät nicht im freien oder auf nassen flächen benutzen. Vermeiden, dass flüssigkeiten auf das gerät gelangen. Das ge- rät nicht in der Nähe von Wasch-/Spülbecken oder Wasserhäh- nen benutzen. 37. Das gerät nicht in Wasser oder andere flüssigkeiten tauchen. DE - 6 PELER TOWER...
  • Seite 84 38. Um das gerät sauber zu halten, wechseln Sie das Wasser regelmäßig. 39. Setzen Sie das gerät keinem Tropf- oder Spritzwasser aus. 40. Stellen Sie das gerät nicht in engen Räumen auf, z. B. in einem Regal oder in einem Schrank. 41.
  • Seite 85 58. Das gerät weder zerlegen, noch abändern. 59. Es ist äußerst gefährlich, das gerät selbst zu reparieren. 60. Bei der Entsorgung des gerätes das Netzkabel durchschneiden und alle Teile entfernen, mit denen Kinder spielen und sich dabei verletzen können. DE - 8 PELER TOWER...
  • Seite 86: Bestimmungsgemässe Verwendung

    0.4 - BESTImmUNgS-gEmäSSE VERWENDUNg • Das Gerät darf ausschließlich zur Kühlung und Befeuchtung mit dem einzigen Zweck benutzt werden, die Raumtemperatur komfor- tabel zu gestalten. • Dieses Gerät ist nur für den Hausgebrauch oder ähnliche Zwecke bestimmt. • Der unsachgemäße Gebrauch des Geräts enthebt OLIMPIA SPLEN- DID von jeglicher Haftung für Schäden an personen, gegenständen und Tieren.
  • Seite 87: Wichtigste Eigenschaften Und Funktionsweisen

    10 - Papierfilter Display 11 - Luftleitlamellen Bedienfeld 12 - Gerätekörper Sockel 13 - Gebrauchsanweisung Wasserpumpe 14 - Fernbedienung Netzkabel 15 - Verschluss des Tankabflusses Wasserklappe 16 - Ice-Box (2) Wasserstandsanzeige 17 - Fernbedienungsempfänger Griff 9 - Luftfilter DE - 10 PELER TOWER...
  • Seite 88: Installation

    2 - INSTAllATION 2.1 - TRANSpORT DES gERäTS • Das Gerät muss in senkrechter Position bewegt und gehandhabt werden. • Das gerät in die waagerechte Stellung drehen und den Sockel (3) gemäß der Abbildung B1 montieren. Hinweis Transport des Kühler auf empfindlichen Fußböden (z.B. Holzfußböden.): •...
  • Seite 89: Stromanschluss

    Kühler dimensioniert ist. 3 - gEBRAUCH DES gERäTS Die Betriebsweisen des Geräts können sowie mit der Fernsteuerung als auch am Bedienfeld gewählt werden. Wurde die ausgewählte Funktion empfangen, dann sendet der Summer ein „Beep“ aus. DE - 12 PELER TOWER...
  • Seite 90: Bedienfeld Und Fernbedienung (Abb.1)

    3.1 - BEDIENfElD UND fERNBEDIENUNg (Abb.1) A1. Taste ON/Off B1. Gemessene Raumtemperatur (°C) A2. Taste Kühler bzw. Befeuchter und B2. LED Normalmodus B3. LED Natürlicher Modus Ionisierungs-Funktion A3. Taste Luftgeschwindigkeit B4. LED Ruhemodus A4. Timer-Taste B5. LED Kühler/Befeuchter A5. Taste Gerätedrehung B6. LED niedrige Geschwindigkeit A6. Modus-Taste B7. LED mittlere Geschwindigkeit A7.
  • Seite 91: Benutzung Der Fernbedienung

    Die Batteriehalterung (14b) wieder in die Fernbedienung einsetzen. Genau auf die Polarität achten. 3.2.b - Austausch des der Batterie Die Batterie ist zu ersetzen, wenn bei Drücken einer beliebigen Taste kein Piepton des Empfangs des Geräts zu hören ist. DE - 14 PELER TOWER...
  • Seite 92: C - Position Der Fernbedienung

    Immer neue Batterien verwenden. Die Verwendung alter Batterien kann den Betrieb der Fernbedienung beeinträchtigen. Ist die Batterie leer, ist sie zu ersetzen und an einer entsprechenden Sammelstelle oder gemäß den örtlichen Vorschriften zu entsorgen. • Wird die Fernbedienung für ein paar Wochen oder länger nicht benutzt, nehmen Sie die Batterie heraus.
  • Seite 93 • Immer sauberes Wasser verwenden. • Das Gerät kann einen leichten Geruch entwickeln oder das Wasser im Tank kann sich bei der ersten Benutzung leicht verfärben; dies ist normal und absolut nicht gesundheitsschädlich für den Benutzer. DE - 16 PELER TOWER...
  • Seite 94 3.4 - BETRIEBSANWEISUNgEN a. Den Stecker in die Steckdose stecken. Beim ersten Einschalten gibt das Gerät einen „Piepton“ von sich und wechselt in den Standby-Modus; alle Tasten bis auf die ON/OFF-Taste sind deaktiviert. Die Funktionen können sowohl vom Bedienfeld als von der Fernbedienung aus aktiviert bzw.
  • Seite 95 3.4.f Taste Kühlung bzw. Befeuchter • Um bei eingeschaltetem Gerät die Kühl- bzw. Befeuchterfunktion zu starten: Ein Mal die Taste „A2“ auf dem Bedienfeld des Geräts oder die Taste „A2“ auf der Fernbedienung drücken. Die Led „B5“ leuchtet auf. • Um die Funktion zu stoppen: Drei Mal die Taste „A2“ auf dem Bedienfeld des Geräts oder ein Mal die Taste „A2“ auf der Fernbedienung drücken. Die Led „B5“ erlöscht. DE - 18 PELER TOWER...
  • Seite 96 Die Pumpe (4) nicht ohne Wasser im Tank laufen lassen, um zu vermeiden, diese zu beschädigen. 3.4.g - Taste Ionisierungs-funktion • Um bei eingeschaltetem Gerät die Ionisierungs-Funktion zu starten: zwei Mal die Taste „A7“ auf dem Bedienfeld des Geräts oder die Taste „A7“ auf der Fernbedienung drücken. Die Led „B9“ leuchtet auf. • Um die Funktion zu stoppen: Zwei Mal die Taste „A7“ auf dem Bedienfeld des Geräts oder ein Mal die Taste „A7“ auf der Fernbedienung drücken. Die Led „B9“ erlöscht.
  • Seite 97: Wartung Und Reinigung

    4.1.b - Reinigung der filter Wie folgt vorgehen: a. Mit einem Kreuzschlitzschraubenzieher (nicht im Lieferumfang enthalten) die Schraube (22) entfernen (Abb. N). b. Die beiden Verriegelungen (25) drücken, um den Luftfilter (9) aus dem Gerä- tekörper zu nehmen (Abb. O). c. Den Papierfilter (10) aus dem Gerätekörper herausnehmen. d. Beide Filter (9 und 10) mit Wasser und neutralem Reinigungsmittel reinigen. Die Filter mit sauberem Wasser gut ausspülen. e. Falls erforderlich, einen Pinsel mit weichen Borsten verwenden, um den Luftfilter (9) gründlich zu reinigen. DE - 20 PELER TOWER...
  • Seite 98: Vor Der Einlagerung Des Gerätes Am Ende Der Saison

    f. Die Filter trocknen lassen und erneut in der Gerätekörper (12) platzieren (Abb.P). g. Die Luftfilter (9) mit der Schraube (22) befestigen (Abb. Q). Das Gerät nicht ohne die ordnungsgemäß eingesetzten Filter benutzen oder wenn diese beschädigt oder verbraucht sind. 4.1.c - Reinigung des Tanks Wenn man beabsichtigt, das Gerät für einen längeren Zeitraum nicht zu benutzen: a.
  • Seite 99: Entsorgung

    Gemeindestelle, Ihren örtlichen Entsorgungsdienst oder an die Verkaufsstelle, in der Sie das Produkt erworben haben. Diese Bestimmung gilt nur in den EU-Mitgliedstaaten. 7 - TECHNISCHE DATEN Die technischen Daten entnehmen Sie dem am Gerät angebrachten Typen- schild (23). DE - 22 PELER TOWER...
  • Seite 100: Informaciones Generales

    IlUSTRACIoNES Las ilustraciones están agrupas en las páginas iniciales del manual. ÍNDICE gENERAl El índice general de este manual se proporciona en la página “ES-3” 0 - ADVERTENCIAS 0.1 - INfoRmACIoNES gENERAlES En primer lugar, deseamos darle las gracias por haber elegido uno de nuestros aparatos.
  • Seite 101 • Indica que el personal de asistencia debe manejar el aparato ateniéndose al manual de instalación. ATENCIóN • Señala que puede haber información adicional en manuales adjuntos. • Indica que se encuentra disponible información en el manual de uso o en el manual de instalación. ATENCIóN Indica que el personal de asistencia debe manejar el aparato ateniéndose al manual de instalación. ES - 2 PELER TOWER...
  • Seite 102: Advertencias Generales

    1. Documento reservado según la ley con prohibición de reproduc- ción o transmisión a terceros sin la expresa autorización de la empresa olImpIA SplENDID. las máquinas pueden ser actualizadas y por lo tanto presentar de- talles distintos respecto a aquellos representados, sin constituir por ello, perjuicio para los textos contenidos en el presente manual.
  • Seite 103 11. En caso de substitución de componentes utilizar exclusiva- mente repuestos originales olImpIA SplENDID. 12. No utilice detergentes líquidos o corrosivos para limpiar la unidad ni pulverice agua u otros líquidos en ella, ya que es- tos productos pueden dañar los componentes de plástico o,...
  • Seite 104 para eventuales reparaciones diríjanse solamente a un cen- tro de asistencia técnica autorizado por el fabricante y soli- citen el empleo de piezas de recambio originales. la falta de respeto de todo lo antes expuesto puede poner en peligro la seguridad del aparato. 14. No desconecte el enchufe de alimentación durante el funcio- namiento. Riesgo de incendio o descargas eléctricas.
  • Seite 105 Evite la caída de líquidos sobre el aparato. No utilice el aparato cerca de lavamanos o grifos. 37. No sumerge el aparato en agua o en otros líquidos. 38. para mantener el aparato limpio, cambie el agua frecuentemen- ES - 6 PELER TOWER...
  • Seite 106 39. No exponga el aparato a gotas o chorros de agua. 40. No coloque el aparato en espacios reducidos (por ejemplo, una ménsula o un armario. 41. Antes de introducir agua, apague el aparato y extraiga el en- chufe de la toma de corriente. No supere el nivel máximo, indi- cado por la palabra “mAX”.
  • Seite 107 Se recomienda además inutilizar las partes del apara- to susceptibles de constituir un peligro, especialmente para los niños que podrían usar el aparato fuera de uso para sus propios juegos. ES - 8 PELER TOWER...
  • Seite 108: Zonas De Riesgo

    único propósito de hacer que la temperatura en el ambiente sea confortable. • Este aparato se destinará sólo para un utilizo doméstico o similares. • Un uso inapropiado del aparato con eventuales daños causados a personas, cosas o animales liberan olImpIA SplENDID de cual- quiera responsabilidad. 0.5 - ZoNAS DE RIESgo • El aparato no debe instalarse en ambientes con presencia de gases inflamables, gases explosivos o en ambientes muy húmedos (la- vanderías, invernaderos, etc.); tampoco deben instalarse en locales...
  • Seite 109: Características Principales Y Funcionamiento

    13 - Manual de instrucciones Bomba agua 14 - Mando a distancia Cable de alimentación 15 - Tapón de descarga agua del Compuerta agua Indicador nivel del agua tanque 8 - Mango 16 - Ice box (2) 9 - Filtro del aire 17 - Receptor mando a distancia ES - 10 PELER TOWER...
  • Seite 110: Instalación

    2 - INSTAlACIóN 2.1 - TRANSpoRTE DEl ApARATo • El trasporto y la manipulación del aparato deben ocurrir en posición vertical. • gire el aparato en posición horizontal y monte la base (3) como apare- ce en la figura B1. Advertencia Transporte del refrigerador sobre pavimentos delicados (por ejemplo, pavimentos de madera): • Vaciar el agua de los depósitos. • Preste particular atención durante los desplazamientos del refri- gerador, ya que las ruedas podrían marcar el pavimento. A pesar de ser pivotantes y de material rígido, las ruedas pueden estar...
  • Seite 111: Conexión Eléctrica

    3 - USo DEl ApARATo Los modos de funcionamiento del aparato se pueden seleccionar tanto con el mando a distancia suministrado como desde el panel de mandos. La recepción de la función seleccionada se confirma por la emisión de un “bip” por el zumbador ES - 12 PELER TOWER...
  • Seite 112 3.1 - pANEl DE mANDoS Y mANDo A DISTANCIA (fig.1) A1. Tecla oN/off B1. Temperatura ambiente detectada (°C) A2. Tecla enfriador/humidificador y B2. LED modalidad “normal” B3. LED modalidad “natural” función ionizante A3. Tecla velocidad aire B4. LED modalidad “reposo” A4. Tecla temporizador B5. LED velocidad baja A5. Tecla rotación aparato B6. LED velocidad media A6. Tecla modo B7.
  • Seite 113: Uso Del Control Remoto

    La batería ya está instalada en el control remoto. Si es necesaria, sostituir: a. Presione la lengüeta (14a) y extraiga el soporte de la batería (14b). b. Introduzca la batería DL2025 en el soporte con el símbolo “+” hacia arriba. c. Vuelva a colocar el soporte batería (14b) en el control remoto. Respete cuidadosamente los polos. 3.2.b - Sustitución de la batería La batería debe cambiarse cuando tras haber presionado las teclas no se escucha el “beep” de recepción del señal del aparato. ES - 14 PELER TOWER...
  • Seite 114 Siempre utilice baterías nuevas. El uso de baterías viejas podría generar un mal funcionamiento en el control remoto. Cuando la batería se descarga es necesario sustituirla y eliminarla a través de los centros de recogida específicos o tal y como lo prevén las normativas locales. • Si no va a utilizar el control remoto durante varias semanas o más, quite la batería. Eventuales pérdidas de la batería podría dañar el control remoto. No recargue ni desarme la batería. No arroje la batería al fuego. Podría quemarse o explotar. Si el líquido de las baterías cae sobre la piel o la ropa, lave con abun- dante agua limpia. No utilice el control remoto con baterías que hayan sufrido pérdidas. Los productos químicos de las baterías pueden provocar quemaduras u otros riesgos para la salud. 3.2.c - posición del control remoto Mantenga el control remoto en una posición desde la cual la señal pueda llegar al receptor del aparato (distancia máxima unos 6 metros - con las baterías cargadas) (Fig.D).
  • Seite 115: A - Operaciones Preliminares

    3.3.b - Llenado (fig. G) Es necesario añadir agua en el tanque antes de que la función refrigerador/ humidificador sea activada. Es posible adicionar el agua abriendo la compuerta del tanque (6). Compruebe que el tapón (fig.A - pos.15) esté correctamente colocado. Vierta el agua en el depósito. - Verifique el nivel de agua en el tanque a través del indi- cador de nivel (7) (fig.L). - Vuelva a cerrar la compuerta (6). • No llene el tanque más allá del nivel máximo indicado. • Siempre utilice agua limpia. • El aparato podría producir un ligero olor o el agua en el tanque podría ser ligeramente coloreada durante el primer utilizo; estos eventos son normales y absolutamente no peligrosos para la salud del usuario. ES - 16 PELER TOWER...
  • Seite 116 3.4 - INSTRUCCIoNES DE fUNCIoNAmIENTo a. Inserte el enchufe en la toma de corriente. Cuando el dispositivo se enciende por primera vez, emite un “bip” y pasa al modo de espera; todos los botones están desactivados excepto el botón ON/OFF. Las funciones pueden activarse o modificarse desde el panel de control o desde el mando a distancia. b. Para encender el aparato, presione la tecla oN/off (A1) (se oye un bip). c. Para apagar el aparato, presione la tecla oN/off (A1) (se oye un bip). Se oye un bip cada vez que se presiona una tecla. d. Levante manualmente los flaps horizontales como desee.
  • Seite 117 Cuando el aparato está encendido, presionando esta tecla el temporizador cambia según esta secuencia: 0h (apagado) ---> 1h ---> 2h ---> 3h ---> .. 12h ---> 0h (apagado) ---> 3.4.f Tecla enfriamiento/humidificador • Cuando el aparato está encendido, para activar la función de enfriamiento/ humidificación: presione una vez la tecla “A2” en el panel de mandos del aparato o mantenga presionado la tecla “A2” en el control remoto. El led “B5” se enciende. • Para apagar la función: presione tres veces la tecla “A2” en el panel de mandos del aparato o mantenga presionado la tecla “A2” en el control remoto. El led “B5” se apaga. ES - 18 PELER TOWER...
  • Seite 118 No haga funcionar la bomba (4) sin agua en tanque para evitar daños. 3.4.g - Botón función “ionizante” • Cuando el aparato está encendido, para activar la función ionizante: presione dos veces la tecla “A7” en el panel de mandos del aparato o mantenga presionado la tecla “A7” en el control remoto. El led “B9” se enciende. • Para apagar la función: presione dos veces la tecla “A7” en el panel de mandos del aparato o mantenga presionado la tecla “A7” en el control remoto. El led “B9” se apaga. Las dos funciones “enfriamiento/humidificación” y “ionizante” pueden usarse con- juntamente presionando las teclas “A2” y “A7” en el control remoto o presionando tres veces la tecla “A2/A7” en el panel de mandos. Ambos led “B5” y “B9” deben estar encendidos. 3.4.i - Uso de los recipientes del Ice box (16) Con el aparato se suministran dos “Ice box” (16) que sirven para refrigerar el aire emitido por el aparato. El uso de la función “refrigerador” con un “Ice box” (16) helado situado en el depósito de agua, permite reducir rápidamente la temperatura del aire emitido por el aparato en unos 3°C.
  • Seite 119: Mantenimiento Y Limpieza

    Se puede utilizar un paño humedecido con agua fría para limpiar el aparato si está muy sucio. No utilice un paño tratado químicamente o antiestático para limpiar el aparato. No utilice gasolina, solventes, pastas para limpiar ni solventes similares. Estos productos pueden provocar la rotura o la deformación de la su- perficie de plástico. 4.1.b - Limpieza de los filtros Proceda como se indica a continuación: a. Con un destornillador de estrella (no incluido en el suministro) afloje el tornillo (22) (fig. N). b. Presione los dos topes (25) para sacar el filtro del aire (9) del cuerpo del apa- rato (fig.O). c. Extraiga el filtro de papel (10) del cuerpo del aparato. d. Limpie ambos filtros (9 y 10) con agua y detergente neutro. Enjuague bien los filtros con agua limpia. e. Si es necesario, utilice un pincel de cerdas suaves para limpiar a fondo el filtro de aire (9). ES - 20 PELER TOWER...
  • Seite 120: Antes De Guardar El Aparato Al Final De La Temporada

    f. Seque los filtros luego vuelva a colocarlos en el cuerpo del aparato (12) (fig.P). g. Fije el filtro del aire (9) con el tornillo (22) (fig.Q). No use el aparato sin los filtros colocados correctamente o si están dañados o desgastados. 4.1.c - limpieza depósito Si no tiene intención de utilizar el dispositivo durante un período de tiempo pro- longado: a. Desconecte el enchufe de la toma de corriente. b. Mueva el aparato con cuidado en una posición adecuada para descargar el agua. c. Quite el tapón (15) para vaciar el tanque (fig.R). d. Vuelva a colocar correctamente el tapón (15) en el tanque. e.
  • Seite 121: Eliminación

    Esta disposición es válida solamente en los estados miembros de la UE. 7 - DAToS TÉCNICoS Para los datos técnicos consulte la placa de datos característicos (23) apli- cada en el producto. ES - 22 PELER TOWER...

Inhaltsverzeichnis