Herunterladen Inhalt Inhalt Diese Seite drucken
Inhaltsverzeichnis

Werbung

Verfügbare Sprachen
  • DE

Verfügbare Sprachen

  • DEUTSCH, seite 1
DAB 650
BEDIENUNGSANLEITUNG
UND SICHERHEITSHINWEISE
DAB+ INTERNET RADIO, STEREO
OPERATING AND
SAFETY INSTRUCTIONS
DAB+ INTERNET RADIO, STEREO
MODE D'EMPLOI ET
CONSIGNES DE SÉCURITÉ
RADIO INTERNET STÉRÉO DAB+
ISTRUZIONI PER L'USO E
AVVERTENZE DI SICUREZZA
RADIO STEREO INTERNET DAB+
MANUAL DE INSTRUCCIONES E
INDICACIONES DE SEGURIDAD
RADIO ESTÉREO INTERNET DAB+
COLOR
DISPLAY

Werbung

Inhaltsverzeichnis
loading

Inhaltszusammenfassung für Schwaiger DAB 650

  • Seite 1 DAB 650 BEDIENUNGSANLEITUNG UND SICHERHEITSHINWEISE DAB+ INTERNET RADIO, STEREO OPERATING AND SAFETY INSTRUCTIONS DAB+ INTERNET RADIO, STEREO MODE D‘EMPLOI ET CONSIGNES DE SÉCURITÉ RADIO INTERNET STÉRÉO DAB+ ISTRUZIONI PER L’USO E AVVERTENZE DI SICUREZZA RADIO STEREO INTERNET DAB+ MANUAL DE INSTRUCCIONES E INDICACIONES DE SEGURIDAD RADIO ESTÉREO INTERNET DAB+...
  • Seite 2 BEDIENUNGSANLEITUNG SICHERHEITSMASSNAHMEN • Lesen Sie bitte vor dem Gebrauch des Geräts alle Anweisungen und bewahren Sie sie zum späteren Nachschlagen auf. • Überprüfen Sie, ob die auf dem Typenschild angegebene Spannung mit Ihrer Netzspannung übereinstimmt. • Das Gerät muss auf eine flache stabile Oberfläche gestellt und darf keinen Vib- rationen ausgesetzt werden.
  • Seite 3: Störungen

    BEDIENUNGSANLEITUNG Netzteil • Vergewissern Sie sich, dass das Gerät nicht auf dem Kabel des Netzteils steht, denn durch das Gewicht des Geräts kann das Kabel beschädigt werden und ein Sicherheitsrisiko darstellen. • Wenn das Netzteil beschädigt ist, muss es durch den Hersteller, seinen Ser- vicepartner oder durch eine ähnlich qualifizierte Person ersetzt werden, um ein Risiko zu vermeiden.
  • Seite 4 BEDIENUNGSANLEITUNG RECYCLING Dieses Produkt trägt das Entsorgungssymbol für Elektromüll und elektronische Geräte (WEEE). Dies bedeutet, dass dieses Produkt unter Einhaltung der euro- päischen Richtlinie 2012/19/EU behandelt werden muss, damit es mit möglichst geringer Auswirkung auf die Umwelt recycelt oder zerlegt werden kann. Der Be- nutzer kann dieses Produkt einer zuständigen Recycling-Organisation übergeben, bzw.
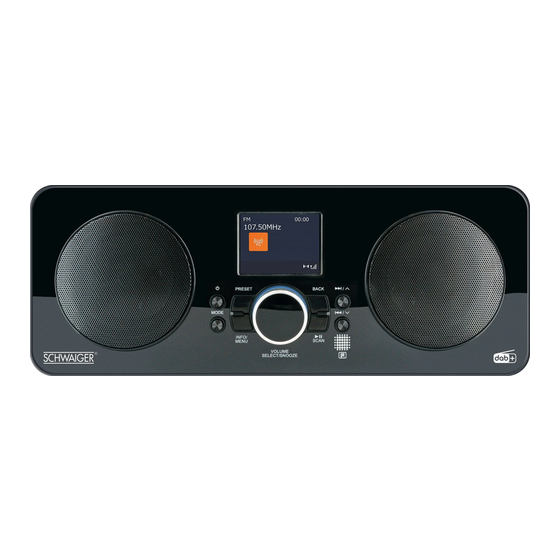
  • Seite 5 BEDIENUNGSANLEITUNG PRODUKTÜBERSICHT LAUTSPRECHER LAUTSTÄRKE/AUSWAHL/ SCHLUMMER-DREHKNOPF STANDBY-TASTE SUCHLAUF-TASTE SPEICHERTASTE -TASTE DISPLAY -TASTE ZURÜCK-TASTE 13. STABANTENNE FERNBEDIENUNGSSENSOR 14. KOPFHÖRERBUCHSE MODUS-TASTE 15. USB 5V 1A Ladebuchse INFO/MENÜ-TASTE 16. STROMVERSORGUNGSBUCHSE...
  • Seite 6: Austausch Der Batterie Für Die Fernbedienung

    BEDIENUNGSANLEITUNG FERNBEDIENUNG STANDBY-TASTE UHR-TASTE SCHLAF-TASTE MODUS-TASTE -TASTE -TASTE -TASTE EQUALIZER-TASTE LAUTSTÄRKETASTE + / − 10. ZIFFERNTASTEN 11. MONO/STEREO-TASTE 12. SCHLUMMERTASTE 13. SUCHLAUF-TASTE 14. ALARMTASTE 15. INFO-TASTE 16. AUSWAHLTASTE -TASTE 18. SPEICHERTASTE 19. MENÜ-TASTE 20. SPEICHER/ORDNER -TASTE 21. ZURÜCK-TASTE 22. STUMMSCHALTTASTE MUTE Austausch der Batterie für die Fernbedienung...
  • Seite 7: Handhabung Der Batterie

    BEDIENUNGSANLEITUNG Handhabung der Batterie » Falsche oder nicht ordnungsgemäße Verwendung der Batterien kann zu Korrosion oder Auslaufen der Batterien führen, was Brände, Verletzun- gen von Personen oder Sachschäden zur Folge haben kann. » Verwenden Sie nur Batterien des in diesem Handbuch angegebenen Typs.
  • Seite 8: Laden Über Den Usb-Ladeanschluss

    BEDIENUNGSANLEITUNG Laden über den USB-Ladeanschluss Sie können ein anderes Gerät über die USB-Buchse an diesem Radio mithilfe eines USB-Kabels (nicht im Lieferumfang enthalten) laden. • Der maximale Ladestrom beim USB-Laden beträgt 1 A. • Es wird nicht garantiert, dass alle Geräte für USB-Laden geeignet sind. Netzwerkverbindung Dieses Radio unterstützt nur (drahtlose) WLAN-Verbindung für den Zugriff auf das Netzwerk und keine kabelgebundene LAN-Verbindung.
  • Seite 9 BEDIENUNGSANLEITUNG 2. Drücken Sie die Taste auf dem Radio bzw. die Tasten auf der Fernbedienung, um eine der folgenden Optionen auszuwählen, und dann drücken Sie den Drehknopf VOLUME/SELECT/SNOOZE auf dem Radio bzw. die Taste SELECT auf der Fernbedienung, um Ihre Auswahl zu bestätigen: Datum/Zeit Einstellung der 12- oder 24-Stunden-Anzeige 12/24-Stunden-Format...
  • Seite 10: Erste Schritte

    BEDIENUNGSANLEITUNG 7. Drücken Sie den Drehknopf VOLUME/SELECT/SNOOZE auf dem Radio bzw. die Taste SELECT auf der Fernbedienung, um Ihre Auswahl zu bestätigen. Ihr Radio verbindet sich nun mit dem Router; dies kann ein paar Sekunden dau- ern. Verbindung mittels WLAN-Passwort Falls Ihr Router über keine WPS-Taste verfügt, werden Sie nun aufgefordert, Ihr WLAN-Passwort einzugeben.
  • Seite 11: Navigieren Durch Das Menü

    BEDIENUNGSANLEITUNG » Wenn das Radio in den Modi Internetradio, Podcasts, DAB oder Blue- tooth (bei getrenntem externem Gerät) für ca. 15 Minuten inaktiv ist, ® schaltet es automatisch in den Standby-Modus. Um das Radio vollstän- dig auszuschalten, ziehen Sie den Netzstecker aus der Steckdose. »...
  • Seite 12 BEDIENUNGSANLEITUNG Netzwerk 1. Drücken Sie im Systemeinstellungs-Modus die Tasten , um den Punkt Netzwerk auszuwählen, und dann SELECT, um Ihre Auswahl zu bestä- tigen. 2. Drücken Sie die Tasten , um eine der folgenden Optionen auszuwäh- len, und dann drücken Sie die Taste SELECT, um Ihre Auswahl zu bestätigen. Netzwerk- SSID –...
  • Seite 13: Inaktives Standby

    BEDIENUNGSANLEITUNG 1. Die Datumsziffern auf dem Display beginnen zu blinken. 2. Drücken Sie die Tasten , um den Tag einzustellen, und dann die Taste SELECT, um es zu bestätigen. 3. Wiederholen Sie Schritt (2), um Monat/Jahr/Stunden/Minuten einzustellen. 4. Die Datum- und Uhrzeit-Einstellung ist nun abgeschlossen. Für weitere Einstellungen unter Uhrzeit/Datum drücken Sie die Tasten , um eine der folgenden Optionen auszuwählen, und dann die Taste SELECT, um Ihre Auswahl zu bestätigen.
  • Seite 14: Software-Update

    BEDIENUNGSANLEITUNG Werks-Reset Es kann manchmal erforderlich sein, Ihr Gerät auf die Werkseinstellungen zurück- zusetzen, insbesondere nach einem Umzug. Wenn Sie Probleme beim Empfang haben, können Sie das Gerät zurücksetzen („Reset“) und es erneut versuchen. Wenn Sie in einen anderen Teil des Landes übersiedeln und die lokalen DAB-Sen- der in dieser Region empfangen möchten, sind Ihre zuvor eingestellten Kanäle womöglich nicht mehr verfügbar.
  • Seite 15: Datenschutzrichtlinien

    BEDIENUNGSANLEITUNG Datenschutzrichtlinien Um die Seite mit den Datenschutzrichtlinien anzuzeigen, drücken Sie die Taste MENU und gehen dann zu Systemeinstellungen – Datenschutzrichtlinien. Wenn Sie das Gerät auf die Werkseinstellungen zurückgesetzt haben, müssen Sie die Datenschutzrichtlinien erneut akzeptieren. Hintergrundbeleuchtung 1. Drücken Sie im Systemeinstellungs-Modus die Tasten , um den Punkt Hintergrundbeleuchtung auszuwählen und dann SELECT, um Ihre Auswahl zu bestätigen.
  • Seite 16 BEDIENUNGSANLEITUNG Senderliste Halten Sie im Internetradio-Modus die Taste INFO/MENU am Radio gedrückt oder drücken Sie die Taste MENU auf der Fernbedienung, um das Menü aufzu- rufen. Drücken Sie die Tasten , um den Punkt [Senderliste] auszuwählen und dann SELECT, um Ihre Auswahl zu bestätigen. Wenn das Internetradio erneut gestartet wird, wird automatisch der zuletzt ge- hörte Sender wieder gespielt.
  • Seite 17: Abrufen Eines Gespeicherten Senders

    BEDIENUNGSANLEITUNG Senderspeicher Gespeicherte Internetradiosender sind in Ihrem Radio gespeichert und können nicht von anderen Radios abgerufen werden. 1. Um einen Sender zu speichern, müssen Sie zuerst den Sender anhören, den Sie speichern möchten. Halten Sie die Taste PRESET ge- drückt, bis das Display „Speichern“ anzeigt. 2.
  • Seite 18: Speichern Und Abrufen Von Sendern

    BEDIENUNGSANLEITUNG Wenn das Radio erneut gestartet wird, wird automatisch der zuletzt gehörte Sen- der wieder gespielt. Um zur [Podcast-Liste] zurückzukehren, drücken Sie die Taste BACK. Wenn Sie zum ersten Mal Podcasts-Radio hören, zeigt das Radio die [Podcast- Liste] an. 1. Drücken Sie die Tasten , um eine der folgenden Optionen auszu- wählen, und dann SELECT, um Ihre Auswahl zu bestätigen.
  • Seite 19: Automatischer Sendersuchlauf

    BEDIENUNGSANLEITUNG Senderliste 1. Drücken Sie im DAB-Modus die Taste MENU um das DAB-Menü aufzurufen. 2. Drücken Sie die Tasten , um Senderliste auszuwählen und dann SELECT, um Ihre Auswahl zu bestätigen. 3. Es wird eine Liste von DAB-Sendern auf dem Display angezeigt. Automatischer Sendersuchlauf Drücken Sie die Taste MENU, dann die Tasten , um Sendersuchlauf aus-...
  • Seite 20 BEDIENUNGSANLEITUNG Programmtyp Dies beschreibt die „Stilrichtung“ bzw. das „Genre“ des ausgestrahlten Programms. Ensemblename/Frequenz Zeigt den Namen des Multiplexes an, das den Sender beinhaltet, den Sie hören, sowie die Frequenz. Ein Multiplex ist eine Sammlung von Radiosendern, die ge- bündelt auf einer Frequenz übertragen werden. Es gibt nationale und lokale Multi- plexe.
  • Seite 21 BEDIENUNGSANLEITUNG Senderreihenfolge Sie können die Anzeigereihenfolge der Sender beliebig ändern. MENU 1. Drücken DAB-Modus Taste Tasten , um Senderreihenfolge auszuwählen, dann drücken Sie die Taste SELECT, um Ihre Auswahl zu bestätigen. 2. Drücken Tasten Optionen Alphanumerisch/Ensemble zu wählen, und dann drücken Sie die Taste SELECT, um Ihre Auswahl zu bestätigen.
  • Seite 22: Suchlauf-Einstellung

    BEDIENUNGSANLEITUNG FM-Anzeigemodi Mit jedem Tastendruck auf INFO/MENU auf dem Radio bzw. auf INFO auf der Fernbedienung zeigt das Display die folgenden Anzeigemodi an: Radiotext - Programmtyp - Frequenz - Datum RDS (Radiotext) Dies ist ein scrollender Text mit Informationen über das aktuelle Programm. Programmtyp Dies beschreibt die „Stilrichtung“...
  • Seite 23: Bluetooth-Betrieb

    ® 3. Auf der Liste Ihrer Bluetooth -Geräte wird „DAB 650“ angezeigt. Wählen Sie ® „DAB 650“ und geben Sie das Passwort „0000“ ein, falls erforderlich. Wenn die Verbindung erfolgreich war, hört das Bluetooth -Logo auf dem Bildschirm auf ®...
  • Seite 24 BEDIENUNGSANLEITUNG NetRemote Das Gerät bietet eine NetRemote-Funktion über Smartphones oder Tablets mit iOS oder Andro- id-Betriebssystem. Durch Herunterladen einer speziellen App namens UNDOK können Sie alle Modi von Internetradio, Podcasts, DAB, FM und Bluetooth anzeigen. Suchen Sie UNDOK ® in Google Play oder im Apple Store nach der App UNDOK und installieren Sie sie auf Ihrem Smart- phone oder Tablet.
  • Seite 25 BEDIENUNGSANLEITUNG 5. Wenn Ihr gewünschter Schlaf-Timer aktiv ist, wird ein “ ” auf dem Display angezeigt. Außerdem wird neben dem Symbol auf dem Display die verbleiben- de Zeit bis zum Ausschalten angezeigt. 6. Wenn der Schlaf-Timer-Countdown Null erreicht, schaltet das Gerät in den Standby-Modus.
  • Seite 26: Verwendung Von Kopfhörern

    BEDIENUNGSANLEITUNG VERWENDUNG VON KOPFHÖRERN Sie können an die Kopfhörerbuchse an der Rückseite des Geräts Kopfhörer bzw. Ohrhörer anschließen (nicht im Lieferumfang enthalten). Regeln Sie die Laut- stärke vor Anschließen der Kopfhörer herunter. Erhöhen Sie dann langsam die Lautstärke bei aufgesetzten Kopfhörern, bis Sie den gewünschten Pegel erreicht haben.
  • Seite 27: Radio Dab/Fm

    BEDIENUNGSANLEITUNG ALLGEMEINES Problem Lösung Kein Betrieb. • Vergewissern Sie sich, dass der Netzstecker ein- gesteckt ist. • Vergewissern Sie sich, dass der Ein-Modus aus- gewählt ist. Das Gerät gibt keinen Bitte versuchen Sie eine der folgenden Lösungen: Ton aus. • Vergewissern Sie sich, dass das Gerät nicht stummgeschaltet ist.
  • Seite 28 • Nicht alle Radiosender senden mit derselben Lautstärke; möglicherweise müssen Sie den Lautstärkepegel erhöhen. BLUETOOTH ® Problem Lösung Ich finde „DAB 650“ nicht • Vergewissern Sie sich, dass die Bluetooth -Funk- ® auf meinem anderen tion auf Ihrem anderen Bluetooth -Gerät akti- ®...
  • Seite 29: Spezifikationen

    BEDIENUNGSANLEITUNG SPEZIFIKATIONEN Modell DAB650 513 Stromversorgung Input: Wechelspannung 100–240V ~50/60Hz, 1A Output: Gleichspannung 9 V / 3,0 A Leistungsaufnahme 27 W Lautsprecher-Aus- 2 × 5W RMS gangsleistung Betriebsumgebung – 0 ~ 35 °C Temperatur Nettogewicht ~ 1.800 g Abmessungen (B) × (T) 300,6 x 158,6 x 115,6 mm ×...
  • Seite 30: Vereinfachte Konformitätserklärung Nach Red-Richtlinie

    Betrieb wieder aufzunehmen. Änderungen der technischen Daten und der Funktionen ohne vorherige Ankündi- gung vorbehalten. Vereinfachte Konformitätserklärung nach RED-Richtlinie Hiermit erklärt die Firma Schwaiger GmbH, dass der beschriebene Funkanlagentyp der Richtlinie 2014/53/EU und den weiteren für das Produkt zutreffenden Richt-...
  • Seite 31: Haftungsausschluss

    Das Symbol auf dem Produkt, der Bedienungsanleitung bzw. der Verpackung weist auf diese Bestimmung hin. Haftungsausschluss Die Schwaiger GmbH übernimmt keinerlei Haftung und Gewährleistung für Schä- den die aus unsachgemäßer Installation oder Montage sowie unsachgemäßem Gebrauch des Produktes oder einer Nichtbeachtung der Sicherheitshinweise re- sultieren.
  • Seite 32: Safety Precautions

    USER GUIDE SAFETY PRECAUTIONS • Read all the instructions carefully before using the unit and keep them for future reference. • Check that the voltage marked on the rating label matches your mains voltage. • The unit must be placed on a flat stable surface and should not be subjected to vibrations.
  • Seite 33: Mains Adapter

    USER GUIDE Mains Adapter • Make sure the unit is not resting on top of the mains adapter cable, as the weight of the unit may damage the cable and create a safety hazard. • If the mains adapter is damaged it must be replaced by the manufacturer, its service agent, or similarly qualified persons in order to avoid a hazard.
  • Seite 34 USER GUIDE RECYCLING This product bears the selective sorting symbol for Waste electrical and electronic equipment (WEEE). This means that this product must be handled pursuant to European directive 2012/19/EU in order to be recycled or dismantled to minimize its impact on the environment. User has the choice to give his product to a com- petent recycling organization or to the retailer when he buys a new electrical or electronic equipment.
  • Seite 35: Product Overview

    USER GUIDE PRODUCT OVERVIEW SPEAKERS VOLUME/SELECT/SNOOZE DIAL STANDBY BUTTON SCAN BUTTON PRESET BUTTON BUTTON DISPLAY BUTTON BACK BUTTON 13. ROD ANTENNA REMOTE CONTROL SENSOR 14. EARPHONE JACK MODE BUTTON 15. USB 5V 1A Charging Port INFO/MENU BUTTON 16. DC IN SOCKET...
  • Seite 36: Remote Control

    USER GUIDE REMOTE CONTROL STANDBY BUTTON CLOCK BUTTON SLEEP BUTTON MODE BUTTON BUTTON BUTTON BUTTON EQ BUTTON VOLUME + / − BUTTON 10. Number BUTTONS 11. MONO/ST. BUTTON 12. SNOOZE BUTTON 13. SCAN BUTTON 14. ALARM BUTTON 15. INFO BUTTON 16.
  • Seite 37: Handling The Battery

    USER GUIDE Handling the Battery » Improper or incorrect use of batteries may cause corrosion or battery leakage, which could cause fire, personal injury or damage to property. » Only use the battery type indicated in this manual. » Do not dispose of the used battery as domestic waste. Dispose of it in accordance with local regulations.
  • Seite 38: Network Connection

    USER GUIDE Charging from the USB charging port You can charge your device through the USB socket on this unit with a USB cable (not supplied). • The maximum current for USB charging is 1A. • All devices for USB charging are not guaranteed. Network Connection This product only supports wireless network connection for network access and did not support wired LAN connection.
  • Seite 39 USER GUIDE Date/Time 12/24 hour Set 12 hours or 24 hours display format Auto Update Choose how you want the time to be automatically updated. Update from DAB/ Update from FM/ Update from Network/ No update Set timezone Select a time zone. (Only available when Auto update from Network is on.) Daylight savings Select daylight savings.
  • Seite 40: Getting Started

    USER GUIDE Connecting using your wireless network password If your router has not got a WPS button you will now be asked to enter your wireless network password, or you can select SKIP WPS which also take you to the password screen. 8.
  • Seite 41: Navigating The Menu

    USER GUIDE Navigating the Menu 1. Press and hold INFO/MENU button on the unit or press the MENU button on the remote control to access the menu. 2. Press the buttons on unit or press the buttons on the remote to select your choice. 3.
  • Seite 42 USER GUIDE Network 1. During System Settings mode, press the buttons to select Network and press the SELECT button to confirm. 2. Press the buttons to select from the following settings, and then press the SELECT button to confirm. Network wizard SSID –...
  • Seite 43: Inactive Standby

    USER GUIDE For the other settings under Time/Date, press the buttons to select from the following options and then press the SELECT button to confirm. Auto update Update from DAB/FM/Network/No update Set format 12 / 24 hour format. Set timezone Select a time zone.
  • Seite 44: Setup Wizard

    USER GUIDE Software update 1. During System settings mode, press the buttons to select Soft- ware update and then press the SELECT button to confirm. 2. Press the buttons to select „Auto-check setting“ or „Check now“, and then press the SELECT button to confirm. »...
  • Seite 45: Station List

    USER GUIDE Internet Radio To listen to internet radio your radio must be con- nected to the internet. Try to position your radio as close as possible to your router to get the best connection speeds. When Internet Radio mode is selected, the radio connects with the Frontier Si- licon Internet radio portal to download a list of stations.
  • Seite 46: Preset Stations

    USER GUIDE Preset Stations The preset Internet radio stations are stored in the radio and cannot be accessed from other radios. 1. To store a preset, you must first be listening to the station that you would like to save. Press and hold the PRESET button until the display shows the „Save to Preset“.
  • Seite 47: Dab Operation

    USER GUIDE If it is the first time listen Podcasts radio, the radio will in [Podcast List]. 1. Press the buttons to select from the following options, and then press the SELECT button to confirm. Countries You can search specifically for stations from your country. Within this scope,it will display local radio stations in your location.
  • Seite 48: Manual Tuning

    USER GUIDE Station List 1. During DAB mode, press the MENU button to access DAB menu. 2. Press the buttons to select Station list and then press the SELECT button to confirm. 3. A list of DAB stations will show on the display. Auto Scan Press the MENU button, and then press the buttons to select Scan.
  • Seite 49 USER GUIDE Programme Type This describes the „style“ or „genre“ of the programme that is being broadcast. Ensemble Name/Frequency This display the name of the multiplex that contains the station you are listening to and the frequency. A multiplex is a collection of radio stations that are bundled and transmitted on one frequency.
  • Seite 50: Station Order

    USER GUIDE Station Order You may wish to arrange the station listing order. 1. During DAB mode on the radio, press the MENU button and then press the buttons to select Station order, press SELECT button to confirm. 2. Press the buttons to select Alphanumeric/Ensemble and press the SELECT button to confirm the setting.
  • Seite 51: Fm Display Modes

    USER GUIDE FM Display Modes Every time you press the INFO/MENU button on unit or INFO button on the remote control , the display will show the following display modes: Radio Text – Programme Type – Frequency – Date RDS Radio Text This is a scrolling message information about the current programme.
  • Seite 52: Bluetooth Operation

    3. “DAB 650” will appear on your Bluetooth device list. ® 4. Select “DAB 650” and enter “0000” for the password if necessary. Once con- nected the Bluetooth logo on the screen will stop flashing. Your device is now ®...
  • Seite 53: Sleep Setting

    USER GUIDE NET REMOTE The device gives a feature of NetRemote by smartphone or tablet in iOS or Android system. By downloading the assigned app named UN- DOK, you can view all the modes of Internet radio, Podcasts, DAB, FM and Bluetooth ®...
  • Seite 54: Setting The Alarm

    USER GUIDE SETTING THE ALARM 1. Press the ALARM button on the remote control, the display shows “Alarm (1 or 2): Off [hh:mm]”. 2. Press the buttons to select the Alarm number (1 or 2) and then press the SELECT button to start the setting of the following parameters. Press the buttons to select then press the SELECT button to confirm...
  • Seite 55: Using Earphones

    USER GUIDE USING EARPHONES You can connect your earphones (not include) by plugging into the earphone so- cket at the rear of the unit. Turn down the volume before connecting earphones. Slowly raise the volume with the earphones on until you reach your desired level. »...
  • Seite 56 BLUETOOTH ® Problem Solution I cannot find • Ensure the Bluetooth function is activated on ® “DAB 650” on my Blue- your Bluetooth device. ® tooth device. ® • Repair the unit with your Bluetooth device.
  • Seite 57: Specification

    USER GUIDE SPECIFICATION Model DAB650 513 Power Supply Input: AC 100–240V ~50/60Hz, 1A Output: DC 9V 3.0A Power Consumption 27 W Speaker Output Power 2 × 5W RMS Working Environment - 0 ~ 35 °C Temperature Net Weight ~ 1.800 g Unit Dimension 300.6 x 158.6 x 115.6 mm (W) ×...
  • Seite 58: Manufacturer's Information

    Disclaimer Schwaiger GmbH does not accept any liability or warranty for damages that are sustained due to improper installation or mounting, improper use of the product or non-compliance with the safety instructions.
  • Seite 59: Mesures De Sécurité

    MODE D‘EMPLOI MESURES DE SÉCURITÉ • Lisez attentivement toutes les instructions avant d‘utiliser l‘appareil et conser- vez-les pour référence ultérieure. • Vérifiez que la tension indiquée sur la plaque signalétique correspond à celle du secteur. • L‘appareil doit être placé sur une surface plane et stable et ne doit pas être soumis à...
  • Seite 60: Adaptateur Secteur

    MODE D‘EMPLOI ATTENTION ! RISQUE DE CHOC ÉLECTRIQUE NE PAS OUVRIR Le symbole de l‘éclair avec une flèche à l‘intérieur d‘un triangle équilaté- ral vise à alerter l‘utilisateur de la présence d‘une „tension dangereuse“ non isolée à l‘intérieur du boîtier de l‘appareil qui peut être d‘une magni- tude suffisante pour constituer un risque de choc électrique.
  • Seite 61 MODE D‘EMPLOI Le symbole indique la tension continue Le symbole indique la polarité du connecteur d‘alimentation CC Le symbole indique un équipement de classe II Dieses Symbol bedeutet Geräte der Klasse II. Pour usage intérieur uniquement RECYCLAGE Ce produit porte le symbole du tri sélectif des déchets d‘équipements électriques et électroniques (DEEE).
  • Seite 62 MODE D‘EMPLOI DÉBALLAGE Nehmen Sie alle Teile aus ihrer Verpackung. Bewahren Sie die Verpackung auf. Falls Sie sie entsorgen, befolgen Sie bitte die örtlichen Vorschriften für die Mül- lentsorgung. Folgende Teile sind enthalten: Unité principale Adaptateur secteur Mode d‘emploi Télécommande...
  • Seite 63 MODE D‘EMPLOI PRODUKTÜBERSICHT HAUT-PARLEURS BOUTON VOLUME/SELECT/SNOOZE STANDBY 10. TOUCHE SCAN TOUCHE PRESET 11. TOUCHE ÉCRAN 12. TOUCHE TOUCHE BACK 13. TIGE ANTENNE CAPTEUR TÉLÉCOMMANDE 14. PRISE JACK ÉCOUTEURS TOUCHE MODE 15. Port de recharge USB 5V TOUCHE INFO/MENU 16. PRISE Entrée CC...
  • Seite 64: Remplacement Des Piles De La Télécommande

    MODE D‘EMPLOI TÉLÉCOMMANDE STANDBY TOUCHE CLOCK TOUCHE SLEEP TOUCHE MODE TOUCHE TOUCHE TOUCHE TOUCHE EQ TOUCHE VOLUME + / - 10. TOUCHES Numériques 11. TOUCHE MONO/ST. 12. TOUCHE SNOOZE 13. TOUCHE SCAN 14. TOUCHE ALARM 15. TOUCHE INFO 16. TOUCHE SELECT 17.
  • Seite 65: Portée De La Télécommande

    MODE D‘EMPLOI Gestion des piles » L‘utilisation inappropriée ou incorrecte des piles peut provoquer une corrosion ou une fuite des piles, ce qui peut provoquer un incendie, des blessures corporelles ou des dommages matériels. » Utilisez uniquement le type de pile indiqué dans ce manuel. »...
  • Seite 66: Connexion Réseau

    MODE D‘EMPLOI Connexion réseau Ce produit ne prend en charge que la connexion réseau sans fil pour l‘accès réseau et ne prend pas en charge la connexion LAN filaire. Réseau sans fil 1. Commencez par vérifier que les témoins de contrôle (LINK/ACT) de votre rou- teur s‘allument bien.
  • Seite 67 MODE D‘EMPLOI Format Date/Heure Réglage de l‘affichage 12 heures ou 24 heures 12/24 heures Mise à jour auto Choisissez comment vous voulez que l‘heure soit automatiquement mise à jour. Mise à jour à partir de DAB/ Mise à jour de FM/ Mise à...
  • Seite 68: Pour Commencer

    MODE D‘EMPLOI 7. Appuyez sur la touche VOLUME/SELECT/SNOOZE de l‘appareil ou sur la touche SELECT de la télécommande pour confirmer. Votre radio va maintenant se connecter à votre routeur, cela peut prendre quelques secondes. Connexion à l‘aide du mot de passe de votre réseau sans fil Si votre routeur n‘a pas de bouton WPS, il vous sera demandé...
  • Seite 69: Navigation Dans Le Menu

    MODE D‘EMPLOI » Lorsque l‘appareil est inactif pendant environ 15 minutes en mode radio Internet, Podcasts, DAB ou Bluetooth (avec l‘unité externe déconnec- ® tée), il passe automatiquement en mode standby. » Pour éteindre complètement l‘appareil, débranchez la fiche secteur de la prise de courant.
  • Seite 70 MODE D‘EMPLOI Réseau 1. En mode Paramètres système, appuyez sur les touches pour sélec- tionner Réseau puis appuyez sur la touche SELECT pour confirmer. 2. Appuyez sur les touches pour sélectionner l‘un des réglages sui- vants, puis appuyez sur la touche SELECT pour confirmer. Assistant réseau SSID - sélectionnez le réseau sans fil souhaité.
  • Seite 71 MODE D‘EMPLOI 1. Les chiffres de la date clignotent à l‘écran. 2. Appuyez sur les touches pour ajuster le jour puis appuyez sur la touche SELECT pour confirmer. 3. Répétez l‘étape (2) ci-dessus pour régler le mois/année/heure/minute. 4. Les réglages de la date et de l‘heure sont maintenant terminés. Pour les autres réglages sous Heure/Date, appuyez sur les touches pour sélectionner l‘une des options suivantes, puis appuyez sur la touche SELECT pour confirmer.
  • Seite 72: Réinitialisation D'usine

    MODE D‘EMPLOI Réinitialisation d‘usine Il se peut que vous deviez parfois réinitialiser votre appareil aux réglages d‘usine, en particulier lorsque vous avez déménagé. Si vous rencontrez des problèmes de réception, vous voudrez peut-être réinitialiser et réessayer. Si vous vous déplacez dans une autre partie du pays et que vous captez les stations DAB locales et na- tionales dans cette zone, il se peut que vos stations précédemment programmées ne soient plus disponibles.
  • Seite 73: Politique De Confidentialité

    MODE D‘EMPLOI Politique de confidentialité Pour voir la page Politique de confidentialité, appuyez sur MENU pour aller dans Paramètres système - Politique de confidentialité. Après la réinitialisation d‘usine, vous devez accepter à nouveau la Politique de confidentialité. Rétroéclairage 1. En mode Paramètres système, appuyez sur les touches pour sélec- tionner Rétroéclairage puis appuyez sur la touche SELECT pour confirmer.
  • Seite 74: Liste Des Stations

    MODE D‘EMPLOI Liste des stations En mode Radio Internet, appuyez et maintenez enfoncé la touche INFO/MENU de l‘appareil ou appuyez sur la touche MENU de la télécommande pour aller dans le menu. Appuyez sur les touches pour sélectionner [Liste des stations] et appuyez sur la touche SELECT pour confirmer.
  • Seite 75: Stations Préréglées

    MODE D‘EMPLOI Stations préréglées Les stations de radio Internet préréglées sont mé- morisées dans la radio et ne sont pas accessibles à partir d‘autres radios. 1. Pour mémoriser un préréglage, vous devez d‘abord écouter la station que vous souhaitez mémoriser. Appuyez sur la touche PRESET et maintenez-la enfoncée jusqu‘à...
  • Seite 76: Fonctionnement Dab

    MODE D‘EMPLOI Lorsque la radio est redémarrée, la dernière station écoutée est automatiquement sélectionnée. Pour revenir à la [Liste des podcasts], appuyez sur la touche BACK. Si c‘est la première fois que vous écoutez des Podcasts radio, la radio sera dans [Liste des podcasts].
  • Seite 77: Recherche Automatique

    MODE D‘EMPLOI Liste des stations 1. En mode DAB, appuyez sur la touche MENU pour aller dans le menu DAB. 2. Appuyez sur les touches pour sélectionner Liste des stations et ensuite appuyez sur la touche SELECT pour confirmer. 3. Une liste des stations DAB s‘affiche à l‘écran. Recherche automatique Appuyez sur la touche MENU, puis appuyez sur les touches pour sé-...
  • Seite 78 MODE D‘EMPLOI Type de programme Décrit le „style“ ou le „genre“ de l‘émission diffusée. Nom de l‘ensemble/fréquence Affiche le nom du multiplex qui contient la station que vous écoutez et la fré- quence. Un multiplex est un ensemble de stations de radio regroupées et trans- mises sur une seule fréquence.
  • Seite 79: Ordre Des Stations

    MODE D‘EMPLOI Ordre des stations Vous pouvez organiser l‘ordre d‘inscription des stations. 1. En mode DAB, appuyez sur la touche MENU puis sur les touches pour sélectionner Ordre des stations, appuyez sur SELECT pour confirmer. 2. Appuyez sur les touches pour sélectionner Alphanumérique / As- sembler / Ordre valide et appuyez sur la touche SELECT pour confirmer le réglage.
  • Seite 80: Réglage Audio

    MODE D‘EMPLOI Modes d‘affichage FM Chaque fois que vous appuyez sur la touche INFO/MENU de l‘appareil ou sur la touche INFO de la télécommande, l‘écran affiche les modes suivants : Texte radio - Type de programme - Fréquence - Date Texte radio RDS Il s‘agit d‘un message défilant contenant des informations sur le programme en cours.
  • Seite 81: Fonctionnement Bluetooth

    3. „DAB 650“ apparaîtra sur votre liste de périphériques Bluetooth . Sélection- ® nez „DAB 650“ et entrez „0000“ comme mot de passe si nécessaire. Une fois connecté, le logo Bluetooth à l‘écran cesse de clignoter. Votre appareil est ®...
  • Seite 82 MODE D‘EMPLOI NetRemote L‘appareil assure une fonctionnalité NetRemote par smartphone ou tablette dans iOS ou système Android. En téléchargeant l‘application assignée nommée UNDOK, vous pouvez voir tous les mo- des de Radio Internet, Podcasts, DAB, FM et Bluetooth . Recherchez UNDOK dans Google ®...
  • Seite 83: Réglage De L'alarme

    MODE D‘EMPLOI 6. Lorsque le compte à rebours de la minuterie de mise en veille atteint zéro, l‘appareil passe en mode veille. Pour désactiver la fonction sommeil pendant le compte à rebours, répétez les étapes 1 à 3 et sélectionnez SLEEP MODE OFF. RÉGLAGE DE L‘ALARME 1.
  • Seite 84: Nettoyage De L'appareil

    MODE D‘EMPLOI UTILISATION D‘ÉCOUTEURS Vous pouvez brancher vos écouteurs (non inclus) en les branchant dans la prise pour écouteurs à l‘arrière de l‘appareil. Baissez le volume avant de brancher les écouteurs. Augmentez lentement le volume avec les écouteurs allumés jusqu‘à ce que vous atteigniez le niveau désiré.
  • Seite 85: Radio Dab/Fm

    MODE D‘EMPLOI GÉNÉRAL Problème Solution Pas d'électricité. • Assurez-vous que la prise secteur est branchée. • Assurez-vous que vous avez bien sélectionné le mode Marche. Pas de son de l'appareil. • Veuillez essayer l‘une ou l‘autre des solutions ci-dessous : •...
  • Seite 86 MODE D‘EMPLOI INTERNETRADIO Problème Solution Pas de connexion. • Assurez-vous que le routeur Wi-Fi est branché et fonctionne. • Rebranchez la radio à votre routeur Wi-Fi. • Vérifiez que votre radio se trouve à moins de 5 m de votre routeur. Station de radio inaudible •...
  • Seite 87: Spécifications

    MODE D‘EMPLOI SPÉCIFICATIONS Modèle DAB650 513 Source d'alimentation Input: Wechelspannung 100–240V ~50/60Hz, 1A Output: Gleichspannung 9 V / 3,0 A Consommation 27 W d'énergie Puissance de sortie de 2 × 5W RMS l‘enceinte Environnement de 0 ~ 35 °C travail - Température Poids net ~ 1.800 g Dimensions de l‘unité...
  • Seite 88: Exclusion De Responsabilité

    Les caractéristiques et les spécifications sont sujettes à changement sans préavis. Déclaration de conformité simplifiée selon les directives RED Schwaiger GmbH déclare par la présente que le type d‘équipement radio décrit est conforme à la directive 2014/53/EU et aux autres directives applicables au pro- duit.
  • Seite 89: Manuale Istruzioni

    MANUALE ISTRUZIONI PRECAUZIONI DI SICUREZZA • Leggere attentamente tutte le istruzioni prima di utilizzare l‘apparecchio e con- servarle per riferimenti futuri. • Controllare che la tensione indicata sulla targhetta dei dati tecnici corrisponda alla tensione di rete. • L‘apparecchio deve essere collocato su una superficie piana e stabile e non deve essere sottoposto a vibrazioni.
  • Seite 90: Adattatore Di Rete

    MANUALE ISTRUZIONI Il punto esclamativo all‘interno di un triangolo equilatero avverte l‘utente della presenza di importanti istruzioni operative e di manutenzione (assi- stenza) nel manuale che accompagna l‘apparecchio. Adattatore di rete • Accertarsi che l‘apparecchio non sia appoggiato sul cavo dell‘adattatore di rete, poiché...
  • Seite 91 MANUALE ISTRUZIONI RICICLAGGIO Questo prodotto reca il simbolo di selezione selettiva dei Rifiuti di apparecchiature elettriche ed elettroniche (RAEE). Ciò significa che questo prodotto deve essere trattato in conformità alla direttiva europea 2012/19/UE per poter essere riciclato o smontato per ridurre al minimo l‘impatto ambientale. L‘utente ha la scelta di consegnare il proprio prodotto ad un‘organizzazione di riciclaggio competente o al rivenditore quando acquista una nuova apparecchiatura elettrica o elettronica.
  • Seite 92: Panoramica Del Prodotto

    MANUALE ISTRUZIONI PANORAMICA DEL PRODOTTO ALTOPARLANTI VOLUME/SELECT/SNOOZE TASTO STANDBY 10. TASTO SCAN TASTO PRESET 11. TASTO DISPLAY 12. TASTO TASTO BACK 13. ASTA ANTENNA SENSORE DEL TELECOMANDO 14. PRESA JACK AURICOLARE TASTO MODE 15. Porta di ricarica USB 5V TASTO INFO/MENU 16.
  • Seite 93: Sostituzione Della Batteria Del Telecomando

    MANUALE ISTRUZIONI TELECOMANDO TASTO STANDBY TASTO CLOCK TASTO SLEEP TASTO MODE TASTO TASTO TASTO TASTO EQ TASTO VOLUME + / - 10. TASTI numerici 11. TASTO MONO/ST. 12. TASTO SNOOZE 13. TASTO SCAN 14. TASTO ALARM 15. TASTO INFO 16. TASTO SELECT 17.
  • Seite 94: Gestione Delle Batterie

    MANUALE ISTRUZIONI Gestione delle batterie » L‘uso improprio o scorretto delle batterie può causare corrosione o per- dite, che potrebbero causare incendi, lesioni personali o danni materiali. » Utilizzare esclusivamente il tipo di batteria indicato nel presente ma- nuale. » Non smaltire le batterie usate come rifiuto domestico. Smaltire le batte- rie in conformità...
  • Seite 95: Collegamento Di Rete

    MANUALE ISTRUZIONI Ricarica dalla porta di ricarica USB È possibile caricare il dispositivo attraverso la presa USB di questa apparecchio con un cavo USB (non in dotazione). • La corrente massima di ricarica USB è di 1A. • Non sono garantiti tutti i dispositivi per la ricarica USB. Collegamento di rete Questo prodotto supporta solo la connessione di rete wireless per l‘accesso alla rete e non supporta la connessione LAN cablata.
  • Seite 96 MANUALE ISTRUZIONI Formato data e ora Impostazione del display a 12 ore o a 24 ore 12/24 ore Aggiornamento Scegliere come si desidera che l‘ora venga automatico aggiornata automaticamente. Aggiornamento da DAB/ Aggiornamento da FM/ Aggiornamento da rete/ Nessun aggiornamento Impostare il fuso orario Selezionare un fuso orario.
  • Seite 97: Come Iniziare

    MANUALE ISTRUZIONI Connessione utilizzando la password di rete wireless Se il tuo router non ha un pulsante WPS ti verrà richiesto di inserire la pas- sword della tua rete wireless, oppure puoi selezionare SKIP WPS che ti porta anche alla schermata della password. 8.
  • Seite 98: Navigazione Del Menu

    MANUALE ISTRUZIONI » Per spegnere completamente l‘apparecchio, rimuovere la spina di rete dalla presa principale. » Spegnere completamente l‘apparecchio per risparmiare energia quando non viene utilizzato. Navigazione del MENU 1. Tenere premuto il tasto INFO/MENU sull‘apparecchio o premere il tasto MENU sul telecomando per accedere al MENU.
  • Seite 99 MANUALE ISTRUZIONI La rete 1. Nella modalità Impostazioni di sistema, premere i tasti per selezio- nare Rete e premere il tasto SELECT per confermare. 2. Premere i tasti per selezionare una delle seguenti impostazioni, quindi premere il tasto SELECT per confermare. Assistente di rete SSID - selezionare la rete wireless desiderata.
  • Seite 100: Standby Inattivo

    MANUALE ISTRUZIONI 1. Le cifre della data lampeggiano sul display. 2. Premere i tasti per regolare il giorno, quindi premere il tasto SE- LECT per confermare. 3. Ripetere il passo (2) per impostare il mese / anno / anno / ora / minuto. 4.
  • Seite 101: Aggiornamento Software

    MANUALE ISTRUZIONI A volte potrebbe essere necessario ripristinare le impostazioni di fabbrica, spe- cialmente quando si è trasferita la casa. Se si verificano problemi di ricezione, è possibile reimpostare e riprovare. Se ci si sposta in un‘altra parte del paese e si raccolgono le stazioni DAB locali e nazionali in quella zona, i canali precedente- mente sintonizzati potrebbero non essere più...
  • Seite 102 MANUALE ISTRUZIONI Retroilluminazione 1. Nella modalità Impostazioni di sistema, premere i tasti per selezio- nare Retroilluminazione e quindi premere il tasto SELECT per confermare. 2. Per le altre impostazioni in Retroilluminazione, premere i tasti selezionare le seguenti opzioni, quindi premere il tasto SELECT per confermare. Timeout On / 10 sec / 20 sec / 20 sec / 30 sec / 45 sec / 60 sec / 90 sec / 120 sec /180 sec...
  • Seite 103 MANUALE ISTRUZIONI Elenco delle stazioni Nella modalità Radio Internet, tenere premuto il tasto INFO/MENU sull‘apparec- chio o il tasto MENU sul telecomando per accedere al menu. Premere i tasti per selezionare [Elenco delle stazioni] e premere il tasto SELECT per confermare. Quando si riavvia la radio Internet, vengono selezionate automaticamente le ulti- me stazioni ascoltate.
  • Seite 104: Stazioni Preimpostate

    MANUALE ISTRUZIONI Stazioni preimpostate Le stazioni radio Internet preimpostate sono me- morizzate nella radio e non sono accessibili da altre radio. 1. Per memorizzare una stazione preimpostata, è necessario prima ascoltare la stazione che si desidera salvare. Premere e tenere premuto il tasto PRESET finché...
  • Seite 105 MANUALE ISTRUZIONI PODCAST Per ascoltare i podcast la radio deve essere collegata a Internet. Provare a posi- zionare la radio il più vicino possibile al router per ottenere le migliori velocità di connessione. Premere MODE tasto sull‘apparecchio o sul telecomando, quindi premere i tasti dell‘apparecchio o premere sul teleco- mando per selezionare la modalità...
  • Seite 106: Scansione Automatica

    MANUALE ISTRUZIONI FUNZIONAMENTO DAB Premere il tasto MODE sull‘apparecchio o sul te- lecomando, premere i tasti sull‘apparecchio o premere sul telecomando per selezionare la modali- tà „Radio DAB“. Premere il tasto VOLUME/SE- LECT/SNOOZE sull‘apparecchio o SELECT sul telecomando per confermare. L‘apparecchio en- trerà...
  • Seite 107: Modalità Di Visualizzazione Dab

    MANUALE ISTRUZIONI MODALITÀ DI VISUALIZZAZIONE DAB Ogni volta che si preme il tasto INFO/MENU sull‘apparecchio o il tasto INFO sul telecomando, il display visualizza le seguenti modalità di visualizzazione: DLS - Tipo di programma - Ensemble/Frequenza - Errore di segnale/Forza- Bit rate/Codec/Canali - Data DLS (Dynamic Label Segment) Si tratta di un messaggio a scorrimento che fornisce informazioni in tempo reale,...
  • Seite 108 MANUALE ISTRUZIONI DRC (compressione della gamma dinamica) Se si ascolta musica ad alta gamma dinamica in un ambiente rumoroso, è possibile comprimere la gamma dinamica dell‘audio. 1. Nella modalità DAB, premere il tasto MENU e premere i tasti selezionare DRC, premere il tasto SELECT per confermare. 2.
  • Seite 109 MANUALE ISTRUZIONI Sintonizzazione manuale Per cercare manualmente le stazioni FM, premere ripetutamente i tasti fino a raggiungere la frequenza desiderata. » Con la radio FM, può essere necessario sintonizzare ogni stazione pre- mendo ripetutamente i tasti . Ad ogni pressione si regola la frequenza di 0,05 MHz.
  • Seite 110: Impostazione Audio

    2. Attivare il dispositivo Bluetooth e selezionare il modo di ricerca. ® apparirà „DAB 650“. Selezionare „DAB 3. Nell‘elenco dei dispositivi Bluetooth ® 650“ e inserire „0000“ per la password, se necessario. Una volta collegato, il logo Bluetooth sullo schermo smetterà...
  • Seite 111: Riproduzione Di Musica Via Bluetooth

    MANUALE ISTRUZIONI Riproduzione di musica via Bluetooth ® Potrebbe essere necessario regolare il volume della radio e del Blu • Premere il tasto /SCAN sull‘apparecchio o sul telecomando per ripro- durre/pausa la musica oppure • Premere i tasti sull‘apparecchio o sul telecomando per passare alla traccia precedente/successiva.
  • Seite 112: Impostazione Dell'allarme

    MANUALE ISTRUZIONI IMPOSTAZIONE DEL SLEEP Questa funzione consente di programmare l‘apparecchio per passare da solo alla modalità standby dopo un determinato periodo di tempo. 1. Premere il pulsante „SLEEP“ sul telecomando. Premendo ripetutamente il pul- sante Sleep sul Remote Commander, è possibile scegliere tra Sleep Off, Sleep Off, Sleep in 15, 30 o 45 minuti.
  • Seite 113 MANUALE ISTRUZIONI 3. Infine, selezionare „Salva“ e premere il tasto SELECT per salvare l‘impo- stazione dell‘allarme. Il display mostrerà Allarme Salvato. Quando l‘allarme è impostato, sul display viene visualizzata l‘icona dell‘allarme. 4. Per disattivare temporaneamente l‘allarme, premere il tasto VOLUME/SE- LECT/SNOOZE sull‘apparecchio o SNOOZE sul telecomando per attivare la funzione Snooze quando suona l‘allarme.
  • Seite 114: Manutenzione

    MANUALE ISTRUZIONI MANUTENZIONE Pulizia dell‘apparecchio Assicurarsi che l‘apparecchio sia completamente scollegato dalla presa di corrente prima della pulizia. • Per pulire l‘apparecchio, pulire l‘involucro con un panno leggermente umido e privo di lanugine. • Non utilizzare liquidi detergenti contenenti alcool, ammoniaca o abrasivi. •...
  • Seite 115: Radio Dab/Fm

    MANUALE ISTRUZIONI RADIO DAB/FM Problema Soluzione Scarsa ricezione radio. • Assicurarsi che l‘antenna DAB/FM sia completa- mente estesa. • Le interferenze elettriche in casa vostra posso- no causare una ricezione scadente. Allontanare l‘apparecchio (in particolare quelli con motori e trasformatori). La stazione desiderata •...
  • Seite 116: Specification

    MANUALE ISTRUZIONI SPECIFICATION Modello DAB650 513 Alimentazione elettrica Input: AC 100–240V ~50/60Hz, 1A Output: CC 9V 3.0A Consumo energetico 27 W Potenza di uscita degli 2 × 5W RMS altoparlanti Ambiente di lavoro - 0 ~ 35 °C Temperatura Peso netto ~ 1.800 g Dimensioni apparec- 300,6 x 158,6 x 115,6 mm...
  • Seite 117: Esclusione Di Responsabilità

    Dichiarazione di conformità semplificata secondo le direttive RED Con la presente la ditta Schwaiger GmbH dichiara che il tipo di impianto radio descritto è conforme alla direttiva 2014/53/UE e alle ulteriori direttive relative al prodotto. Il testo completo della dichiarazione di conformità UE è disponibile al seguente indirizzo internet: http://konform.schwaiger.de...
  • Seite 118: Medidas De Seguridad

    MANUAL DE INSTRUCCIONES MEDIDAS DE SEGURIDAD • Lea atentamente todas las instrucciones antes de utilizar la unidad y guárdelas para futuras consultas. • Compruebe que la tensión marcada en la placa de características coincide con la tensión de la red. •...
  • Seite 119: Adaptador De Red

    MANUAL DE INSTRUCCIONES ¡Cuidado! RIESGO DE DESCARGA ELÉCTRICA NO ABRIR El símbolo de relámpago con punta de flecha, dentro de un triángulo equi- látero, tiene por objeto alertar al usuario de la presencia de „tensión pe- ligrosa“ no aislada dentro de la carcasa de la unidad que puede ser de magnitud suficiente para constituir un riesgo de descarga eléctrica.
  • Seite 120 MANUAL DE INSTRUCCIONES RECICLAJE Este producto lleva el símbolo de clasificación selectiva de residuos de aparatos eléctricos y electrónicos (RAEE). Esto significa que este producto debe ser mani- pulado de acuerdo con la directiva europea 2012/19/EU para poder ser reciclado o desmantelado y minimizar su impacto en el medio ambiente.
  • Seite 121 MANUAL DE INSTRUCCIONES RESUMEN DE PRODUCTO ALTAVOCES BOTÓN VOLUMEN/SELECCIÓN REPETICIÓN BOTÓN STANDBY 10. BOTÓN SCAN BOTÓN PRESET 11. BOTÓN PANTALLA 12. BOTÓN BOTÓN BACK 13. BARRA DE ANTENA SENSOR DE MANDO A DISTANCIA 14. CONECTOR DE AURICULARES BOTÓN MODE 15. Puerto de carga USB 5V BOTÓN DE INFORMACIÓN/MENÚ...
  • Seite 122: Mando A Distancia

    MANUAL DE INSTRUCCIONES MANDO A DISTANCIA BOTÓN STANDBY BOTÓN CLOCK BOTÓN SLEEP BOTÓN MODE BOTÓN BOTÓN BOTÓN BOTÓN EQ BOTÓN VOLUMEN + / - 10. BOTONES de Número 11. BOTÓN MONO/ST. 12. BOTÓN SNOOZE 13. BOTÓN SCAN 14. BOTÓN ALARM 15.
  • Seite 123: Rango De Operación Del Mando A Distancia

    MANUAL DE INSTRUCCIONES Manejo de las pilas » El uso inadecuado o incorrecto de las pilas puede causar corrosión o fuga de las mismas, lo que podría causar lesiones personales o daños materiales. » Utilice únicamente el tipo de pila indicado en este manual. »...
  • Seite 124: Conexión De Red

    MANUAL DE INSTRUCCIONES Conexión de red Este producto sólo admite la conexión de red inalámbrica para el acceso a la red y no la conexión LAN por cable. Red inalámbrica 1. Compruebe en primer lugar si las luces de control (LINK/ACT) de su router se encienden.
  • Seite 125 Fecha/Hora Formato Configurar la visualización de 12 horas o 24 horas MANUAL DE INSTRUCCIONES de 12/24 horas Actualización Seleccione cómo desea que la hora se actualice automática automáticamente. Actualización de DAB/ Actualización de FM/ Actua- lización de la red/ Sin actualización Establecer zona horaria Seleccione una zona horaria.
  • Seite 126: Para Empezar

    MANUAL DE INSTRUCCIONES 8. Pulse los botones de la unidad o pulse en el mando a distancia para seleccionar cada letra/número de su con- traseña. A continuación, pulse el botón VOLUME/SELECT/ SNOOZE en la unidad o el botón ENTER en el mando a distancia para introducir la letra o el número seleccionado.
  • Seite 127: Navegación Por El Menú

    MANUAL DE INSTRUCCIONES Navegación por el menú 1. Pulse y mantenga pulsado el botón INFO/MENU de la unidad o pulse el botón MENU del mando a distancia para acceder al menú. 2. Pulse los botones de la unidad o pulse en el mando a distancia para seleccionar su elección.
  • Seite 128 MANUAL DE INSTRUCCIONES Asistente de red SSID - seleccione la red inalámbrica deseada. Reexplorar - Explorar en busca de redes disponibles. Configuración manual - seleccione la red inalámbrica con DHCP activado/desactivado. Configuración de Pulse el botón WPS del dispositivo de módem con el que PBC Wlan desea conectarse.
  • Seite 129: Restablecimiento De Los Valores De Fábrica

    MANUAL DE INSTRUCCIONES Actualización Actualización de DAB/FM/Red/Sin actualización automática Ajustar formato Formato 12 / 24 horas. Establecer zona Seleccione una zona horaria. (Sólo disponible cuando la horaria actualización automática desde la red está activada.) Ahorro de luz Seleccione el horario de verano. (Sólo disponible cuando diurna la actualización automática desde la red está...
  • Seite 130: Actualización De Software

    MANUAL DE INSTRUCCIONES Actualización de software 1. Durante el modo Configuración del sistema, pulse los botones para seleccionar Actualización de software y, a continuación, pulse el botón SELECT para confirmar. 2. Pulse los botones para seleccionar „Autocomprobar configuración“ o „Comprobar ahora“ y, a continuación, pulse el botón SELECT para confirmar. »...
  • Seite 131: Radio Por Internet

    MANUAL DE INSTRUCCIONES Radio por Internet Para escuchar la radio por Internet, su radio debe estar conectada a Internet. Intenta colocar tu ra- dio lo más cerca posible de tu router para obtener las mejores velocidades de conexión. Cuando se selecciona el modo de radio por Internet, la ra- dio se conecta con el portal de radio por Internet Frontier Silicon para descargar una lista de emiso-...
  • Seite 132 MANUAL DE INSTRUCCIONES Pulse el botón BACK en la unidad o el mando a distancia puede hacer retroceder un nivel de menú. Estaciones preestablecidas Las emisoras de radio por Internet preprograma- das se almacenan en la radio y no se puede acce- der a ellas desde otras radios.
  • Seite 133 MANUAL DE INSTRUCCIONES PODCASTS Para escuchar podcasts, su radio debe estar conectada a Internet. Intenta colocar tu radio lo más cerca posible de tu router para obtener las mejores velocidades de conexión. Pulse el botón MODE en la unidad o en el mando a distancia y, a continuación, pulse los botones en la unidad o pulse en el mando a distancia para seleccionar el modo „Podcasts“.
  • Seite 134: Sintonización Manual

    MANUAL DE INSTRUCCIONES FUNCIONAMIENTO DAB Pulse el botón MODE en la unidad o en el mando a distancia, pulse los botones en la unidad o pulse en el mando a distancia para seleccionar el modo „Radio DAB“. Pulse el botón VOLUME/SELECT/ SNOOZE en la unidad o el botón SELECT en el mando a distancia para confirmar.
  • Seite 135: Modos De Visualización Dab

    MANUAL DE INSTRUCCIONES MODOS DE VISUALIZACIÓN DAB Cada vez que pulse el botón INFO/MENU de la unidad o el botón INFO del mando a distancia, la pantalla mostrará los siguientes modos de visualización: DLS - Tipo de programa - Ensamble/Frecuencia - Error de señal/Fuerza - Velocidad de bits/Codec/Canales - Fecha DLS (Segmento de Etiqueta Dinámica) Este es un mensaje de desplazamiento que proporciona información en tiempo...
  • Seite 136 MANUAL DE INSTRUCCIONES DRC (compresión de rango dinámico) Si está escuchando música con un rango dinámico alto en un entorno ruidoso, es posible que desee comprimir el rango dinámico de audio. 1. Durante el modo DAB, pulse el botón MENU y pulse los botones para seleccionar DRC, pulse el botón SELECT para confirmar.
  • Seite 137 MANUAL DE INSTRUCCIONES Sintonización manual Para buscar emisoras de FM manualmente, pulse los botones repetida- mente hasta alcanzar la frecuencia deseada. » Con la radio FM, puede ser necesario sintonizar cada emisora con pre- cisión pulsando los botones repetidamente. Cada pulsación ajustará...
  • Seite 138: Ajuste Audio

    ® queda. 3. En la lista de dispositivos Bluetooth aparece „DAB 650“. Seleccione „DAB ® 650“ e introduzca la contraseña „0000“ si es necesario. Si la conexión se ha realizado correctamente, el logotipo de Bluetooth dejará...
  • Seite 139 MANUAL DE INSTRUCCIONES Reproducción de música vía Bluetooth ® Es posible que tenga que ajustar el volumen de su radio y de su dispositivo Blue- tooth ® • Pulse el botón /SCAN de la unidad o el botón del mando a distancia para reproducir/pausar música o •...
  • Seite 140 MANUAL DE INSTRUCCIONES AJUSTE DEL MODO DORMIR (SLEEP) Esta función le permite programar la unidad para que se ponga en modo de espera por sí sola después de un período de tiempo determinado. 1. Pulse el botón „SLEEP“ del mando a distancia. Al pulsar repetidamente el botón Sleep del mando a distancia, puede elegir entre Sleep Off, Sleep in 15, 30 o 45 minutos.
  • Seite 141: Mantenimiento

    MANUAL DE INSTRUCCIONES 3. Finalmente, seleccione „Guardar“ y pulse el botón SELECT para guardar el ajuste de la alarma. La pantalla mostrará Alarma guardada. Cuando se ajusta la alarma, el icono de alarma aparecerá en la pantalla. 4. Para apagar temporalmente la alarma, presione el botón VOLUME/SELECT/ SNOOZE en la unidad o el botón SNOOZE en el mando a distancia para acti- var la función Repetición cuando suene la alarma.
  • Seite 142 MANUAL DE INSTRUCCIONES GENERAL Problema Solución No hay energía. • Asegúrese de que el enchufe de la red esté co- nectado. • Asegúrese de seleccionar el modo Encendido. No hay sonido en la Por favor, pruebe cualquiera de las siguientes so- unidad.
  • Seite 143 MANUAL DE INSTRUCCIONES INTERNETRADIO Problema Solución No hay conexión. • Asegúrese de que el enrutador Wi-Fi esté enchu- fado y funcionando. • Vuelva a conectar la radio a su router Wi-Fi. • Compruebe que su radio está a menos de 5 m de su router.
  • Seite 144 MANUAL DE INSTRUCCIONES SPECIFICATION Modelo DAB650 513 Alimentación Entrada: AC 100-240V ~50/60Hz, 1A de corriente Salida: DC 9V 3.0A Consumo de energía 27 W Potencia de salida 2 × 5W RMS del altavoz Entorno de trabajo - 0 ~ 35 °C Temperatura Peso Neto ~ 1.800 g...
  • Seite 145: Exención De Responsabilidad

    Directivas RED La empresa Schwaiger GmbH declara que el tipo de equipo radioeléctrico descrito cumple la directiva 2014/53/UE, así como el resto de las directivas aplicables a este producto. El texto completo de la Declaración de conformidad UE se encuen- tra disponible en la siguiente dirección de Internet: http://konform.schwaiger.de...
  • Seite 146: Información Del Fabricante

    MANUAL DE INSTRUCCIONES Información del fabricante Estimado cliente: En caso de que necesite asesoramiento técnico y su distribuidor especializado no pueda ayudarle, le rogamos que se ponga en contacto con nuestro servicio técnico. Horario de oficina (Asistencia técnica en alemán) De lunes a viernes: 8:00-17:00 horas HOTLINE +49 (09101) 702-299...
  • Seite 147 SERVICEKARTE Abwicklungsformular für defekte Geräte. Absender Bitte Blockschrift in GROSSBUCHSTABEN Service-Adresse: Name Schwaiger GmbH Würzburger Straße 17 90579 Langenzenn Vorname Service-Hotline: Straße +49 9101 702-299 Internet & Email: PLZ und Ort www.schwaiger.de info@schwaiger.de Telefon mit Vorwahl Model: DAB650 513 Unterschrift des Käufers...
  • Seite 148 DAB 650 Scannen Sie diesen QR-Code, dann gelangen Sie direkt zum Produkt. Weitere Informationen zum Produkt finden Sie im Internet auf www.schwaiger.de Weitere Sprachen der Bedienungsanleitung finden Sie unter http://www.schwaiger.de/de/ service-support/bedienungsanleitung- produktsoftware/downloadbereich.html Further languages of the operating instructions can be found under http://www.schwaiger.de/de/service-...

Inhaltsverzeichnis