Herunterladen Inhalt Inhalt Diese Seite drucken

Werbung

Verfügbare Sprachen
  • DE

Verfügbare Sprachen

  • DEUTSCH, seite 19
Owner's Manual
ManualideiProdotti
InstrukcjaObsługi
Bedienungsanleitung
Manual do Proprietário
用户手册
Mode d'emploi
Manual de Usuario
使用說明書

Werbung

Inhaltsverzeichnis
loading

Inhaltszusammenfassung für Maxspect RECURVE R6-060

  • Seite 1 Owner’s Manual Bedienungsanleitung Mode d’emploi ManualideiProdotti Manual do Proprietário Manual de Usuario InstrukcjaObsługi 用户手册 使用說明書...
  • Seite 3 Thank you for purchasing this product. For optimum performance and safety, please read these instructions carefully. English User Memo: Date of purchase: Dealer name: Dealer address: Dealer website: Dealer email: Dealer phone no.: Please visit us on facebook or twitter! https://www.facebook.com/Maxspect http://twitter.com/maxspectled...
  • Seite 4: Package Content

    Package Content Please check the content in the package. English R6-060 R6-090 R6-120 Power Supply Unit Stands Screws...
  • Seite 5 Precautions Before using this Maxspect™ Recurve LED Lighting System please read these operating instructions carefully. Take special care to follow the safety English suggestions listed below. Afterwards keep this manual handy for future reference. Before using the Maxspect Recurve LED Lighting System ™...
  • Seite 6: Installation

    Installation Mounting the Recurve LED Lighting System Before connecting the Recurve to the power supply, first mount the system by using the English provided stand. Tank-top mounting. Pendant Mounting (hanging Kits sold separately).
  • Seite 7 Operating Instructions Built-in Controller The Recurve can be controlled directly with the built-in controller. The built-in controller English integrated in the Recurve features an OLED monitor and a control dial, from which user can setup all the functions for the fixture. Standard or Master/Slave Mode Supporse there are 2 or more units of Recurve fixtures, user can connect them together through the Master/Slave mode to control them simultanousely - all Slave fixtures will follow...
  • Seite 8: Basic Operations

    Operating Instructions Basic Operations Follow the instructions below to operate and program the Recurve LED fixture. English The Recurve turns on automatically when power is connected, and turns off when power is cut. When power is resumed, the Recurve will restore to the previous saved setting automatically, whether it was last set at Manual or Automatic Mode, and the intensity level of all the LED channels.
  • Seite 9: Manual Mode

    Operating Instructions Manual Mode  Press the control dial to enter the setting. English  Press the control dial again to switch between the channels.  Rotate the control dial to set the brightness for each LED channel.  Press and hold the control dial for 3s to save the setting and exit the page.
  • Seite 10 Operating Instructions Understanding Time Points English There are a total of 24 Time Points. You can program different luminous output intensity at each Time Point to control the photoperiod and brightness of the system. Take Preset P1 as an example, it is a setting for SPS dominated tank. The photoperiod starts at 08:00 where the system increases light gradually, peaks at 10:00 and lasts 10hrs to 20:00 before the system gradually decreases light until it is turned off at 22:00, with moon light turns on.
  • Seite 11 Operating Instructions Programming Photoperiod English Time point # Time LED Channel Intensity Modify  Press the control dial to switch between the parameters.  Rotate the control dial to set the parameter.  Press and hold the control dial for 3s to turn to the next page.
  • Seite 12: Selecting Preset

    Operating Instructions Selecting Preset English  Rotate the control dial to switch between the presets.  Press the control dial to turn to the next page. Apply  Rotate the control dial to select “Apply”.  Press the control dial to save the setting. Preview ...
  • Seite 13: Maintenance Instructions

    Maintenance Instructions System Setup System Setup features a set of functions allowing user to do perform maintenance on the English fixture. To enter the System Setup page, first turn off the fixture, then press and hold the control dial while turning the fixture back on. Keep on holding the control dial until the system setup page is shown on OLED monitor.
  • Seite 14 Maintenance Instructions 2. Restore This function allows the user to restore the firmware to its original factory version. After finish English restoring the firmware, the fixture will restart automatically and the firmware version number will be shown.  Rotate the control dial to select “Restore”. ...
  • Seite 15 Maintenance Instructions 6. Standard or Master/Slave Mode This function allows the user to choose between the Standard stand-alone operation mode, English or Master/Slave mode where multiple units of Recurve fixtures can be connected together. Once connected, all Slave fixtures will follow the settings programmed on the Master fixture, saving time and effort on setting up multiple fixtures.
  • Seite 16: Specifications

    Tutorial Video For additional information regarding installation or operation of our products, please visit our Official YouTube Channel using the following QR Code. Specifications For latest specifications on LED layout, types and color spectrum, please visit our website at: www.maxspect.com...
  • Seite 17: Limited Warranty

    The warranty, disclaimer, and remedies set forth above are exclusive and replace all others, oral or written, expressed or implied. At no time will any Maxspect (HongKong) Limited dealers, agents, or employees be authorized to make any modifications, extension, or addition to this warranty.
  • Seite 18 Preset Preset 1 Preset 2 English Preset 3 Preset 4...
  • Seite 19 Dank fü r den Kauf dieses Produkts. Fü r eine optimale Leistung und Sicherheit, lesen Sie bitte diese Anleitung sorgfä ltig. Nutzer-Memo: Deutsch Kaufdatum Hä ndler: Hä ndleradresse: Hä ndlerwebsite: Hä ndler-E-Mail: Hä ndlertelefon Bitte besuchen Sie uns auf Facebook oder Twitter! https://www.facebook.com/Maxspect http://twitter.com/maxspectled...
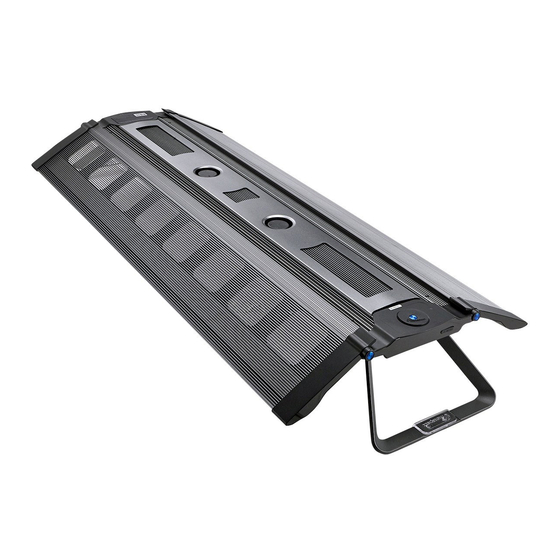
  • Seite 20 Packungsinhalt Bitte ü berprü fen Sie den Lieferumfang auf Vollstä ndigkeit. R6-060 R6-090 R6-120 Deutsch Netzteil Aufsetzsystem Handschrauben...
  • Seite 21: Sicherheitshinweise

    Sicherheitshinweise Vor der ersten Inbetriebnahme des Maxspect™ LED-Beleuchtungssystems Recurve sollten Sie diese Bedienungsanleitung sorgfä ltig lesen. Bitte beachten Sie die folgenden Sicherheitshinweise mit groß er Sorgfalt. Bewahren Sie diese Anleitung auch zum spä teren Nachschlagen auf. Deutsch Vor der Benutzung des Maxspect™ Recurve LED-Beleuchtungssystems Falls vorhanden, entfernen Sie vor der Benutzung alle Schutzfolien.
  • Seite 22: Installation

    Installation Montieren des Recurve LED-Beleuchtungssystems Bevor Sie die LED-Module mit dem Steuergerä t verbinden, montieren Sie zunä chst das System mit Hilfe des Aufsetzsystems. Aquariumaustellung Deutsch Deckenbefestigung (Seilset optional erhä ltlich)
  • Seite 23: Eingebauter Controller

    Bedienungsanleitung Eingebauter Controller Die Recurve kann mit dem integrierten Controller gesteuert werden. Sie hat einen OLED- Display und ein Einstellrad mit denen der Benutzer alle Funktionen der Recurve sofort einstellen kann. Deutsch Standard- oder Master / Slave-Modus Ab 2 oder mehr Recurve Einheiten, kann der Benutzer die Leuchten ü ber den Master / Slave- Modus miteinander verbinden und gleichzeitig programmieren.
  • Seite 24 Bedienungsanleitung Benutzung Befolgen Sie die nachstehenden Anweisungen um die Maxspect Recurve in Betrieb zu nehmen. Sobald Die Recurve an das Stromnetz angeschlossen wird schaltet sie sich automatisch ein, und schaltet sich aus, wenn sie vom Stromnetz getrennt wird Deutsch Wenn die Stromversorgung wieder eingeschaltet wird, kehrt die Recurve auf die frü heren automatisch gespeicherten Einstellungen wieder zurü...
  • Seite 25: Manueller Modus

    Bedienungsanleitung Manueller Modus  Drü cken Sie den Drehregler um zur Einstellung zu gelangen  Drü cken Sie erneut den Drehregler, um zwischen den Kanä len zu wä hlen.  Drehen Sie den Drehregler um die Helligkeit fü r jeden LED-Kanal einzustellen.
  • Seite 26: Zeitpunkte Verstehen

    Bedienungsanleitung  Das Einstellrad drü cken um zwischen Stunde und Minute zu wechseln.  Drehen Sie das Einstellrad um die Zeit einzustellen.  Den Drehregler 3 Sek. lang gedrü ckt halten um die Einstellung speichern und zu verlassen. Zeitpunkte verstehen Deutsch Es gibt insgesamt 24 Zeitpunkte.
  • Seite 27: Photoperiode Programmierung

    Bedienungsanleitung Photoperiode Programmierung Zeitpunkt # Uhrzeit Deutsch LED-Kanal Intensitä t Ä nderung  Das Einstellrad drü cken um zwischen den Einstellungen zu wechseln.  Drehen Sie das Einstellrad um die Einstellungen festzulegen.  Das Einstellrad 3s lang gedrü ckt halten um zur nä chsten Seite zu gelangen.
  • Seite 28: Voreinstellungen Auswä Hlen

    Bedienungsanleitung Voreinstellungen auswä hlen  Drehen Sie das Einstellrad um zwischen den Voreinstellungen auszuwä hlen.  Drü cken Sie das Einstellrad um zur nä chsten Seite zu Deutsch wechseln. Bestä tigen  Drehen Sie das Einstellrad um "Apply" auszuwä hlen. ...
  • Seite 29: Systemeinrichtung

    Wartungshinweise Systemeinrichtung Das Systemeinrichtungsmenu verfü gt ü ber eine Reihe von Funktionen, die es dem Benutzer ermö glichen, die Wartung des Gerä tes durchzufü hren. Um das Systemeinrichtungsmenu aufzurufen, schalten Sie zuerst die Leuchte aus und drü cken Sie dann auf das Einstellrad, wä hrend Sie das Gerä t wieder einschalten. Halten Sie das Deutsch Einstellrad so lange gedrü...
  • Seite 30 Wartungshinweise 2. Wiederherstellen Mit dieser Funktion kann der Benutzer die Firmware auf die Werkseinstellung wieder zurü ckstellen. Nach Wiederherstellung der Firmware wird das Gerä t automatisch neu gestartet und die Firmware-Versionsnummer wird angezeigt.  Drehen Sie das Einstellrad, um “Restore” auzuwählen. Deutsch ...
  • Seite 31 Wartungshinweise 6. Standard- oder Master / Slave-Modus Diese Funktion ermö glicht es dem Benutzer, zwischen dem Standard-Betriebsmodus oder dem Master / Slave-Modus zu wä hlen, bei dem mehrere Recurve-Einheiten miteinander verbunden werden. Sobald sie angeschlossen sind, folgen alle Slave-Leuchten den Einstellungen die auf der Deutsch Master-Leuchte programmiert werden, was Zeit und Mü...
  • Seite 32: Wartung Der Leuchte

    Tutorial Video Fü r weitere Informationen zur Installation und zum Betrieb unserer Produkte besuchen Sie bitte unseren offiziellen YouTube Kanal mit folgendem QR Code. Hinweis: Fü r neusten technischen Daten, LED-Layout, LED-Typen und Farbspektrum besuchen Sie bitte unsere Internetseite unter www.maxspect.com.
  • Seite 33: Garantie

    Mä ngel in der Ausfü hrung fü r einen Zeitraum von 12 Monaten ab dem Kaufdatum. Wenn ein Mangel wä hrend der Garantiezeit vorliegt, wird Maxspect Ltd das Produkt kostenlos nach eigenem Ermessen entweder reparieren (mit neu- oder Austauschteilen) oder das Produkt ersetzen (durch ein neues oder ein Austauschgerä...
  • Seite 34 Preset Preset 1 Preset 2 Deutsch Preset 3 Preset 4...
  • Seite 35 Date d’achat : Nom du revendeur : Franç ais Adresse du revendeur : Site internet du revendeur : E-mail du revendeur : N° de té lé phone du revendeur : Vous pouvez nous rejoindre sur facebook ou twitter ! https://www.facebook.com/Maxspect http://twitter.com/maxspectled...
  • Seite 36: Contenu De L'emballage

    Contenu de l’emballage Merci de vé rifier le contenu de votre emballage. R6-060 R6-090 R6-120 Franç ais Alimentation Support pour aquarium Vis manuelles...
  • Seite 37: Précautions D'utilisation

    Précautions d’utilisation Avant toute utilisation du système d’éclairage LED Recurve Maxspect™, veuillez lire attentivement ce manuel d’utilisation. Soyez particulièrement attentifs aux consignes de sé curité qui suivent. Gardez soigneusement ce manuel pour toute future utilisation. Avant d’utiliser le système d’éclairage LED Recurve Maxspect ™...
  • Seite 38 Installation Fixation du Système d’Eclairage LED Recurve Avant de connecter le module LED à l’alimentation, assemblez tout d’abord le système en utilisant le support fourni. Support pour pose sur aquarium Franç ais Fixation plafond (kit de suspension en option)
  • Seite 39: Instructions D'utilisation

    Instructions d’utilisation Contrô leur inté gré La Recurve peut ê tre contrô lé e directement grâ ce au contrô leur inté gré . Celui-ci dispose d'un afficheur OLED et d'une molette de ré glage à partir desquels l'utilisateur peut configurer toutes les fonctions de la Recurve.
  • Seite 40 Instructions d’utilisation Opé rations de base Suivez les instructions suivantes pour utiliser et la programmer le module LED Recurve. Le module LED s'allume automatiquement lorsque l'alimentation est connecté e, et s'é teint lorsque l'alimentation est coupé e. Lorsque l'alimentation est ré tablie, le module Led revient automatiquement à la sauvegarde pré...
  • Seite 41: Mode Manuel

    Instructions d’utilisation Mode manuel  Appuyer sur la molette de commande pour entrer dans le menu de ré glage.  Appuyer à nouveau sur la molette de commande pour choisir entre les canaux.  Tourner la molette de commande pour ré gler la luminosité de chaque canal LED.
  • Seite 42 Instructions d’utilisation  Appuyer sur la molette de commande pour basculer entre les heures et les minutes.  Tourner la molette pour ré gler l'heure.  Appuyer et maintenir la touche de commande pendant 3 secondes pour sauvegarder le ré glage et quitter le menu de ré...
  • Seite 43 Instructions d’utilisation Programmation de la photopé riode Point temps # Heure Canal LED Intensité Franç ais Modifier  Appuyer sur la molette de commande pour basculer entre les paramè tres.  Tourner la molette de commande pour ré gler les paramè...
  • Seite 44 Instructions d’utilisation Sé lection du pré ré glage  Tourner la molette de commande pour basculer entre les pré ré glages.  Appuyer sur la molette de commande pour passer au menu suivant. Confirmer Franç ais  Tourner la molette de commande pour sé lectionner “Apply”.
  • Seite 45: Instructions De Maintenance

    Instructions de maintenance Configuration du systè me La configuration du systè me comporte un ensemble de fonctions permettant à l'utilisateur de ré aliser une maintenance sur la rampe. Pour accé der au menu de configuration du systè me, é teindre d'abord l'appareil, puis appuyer et maintenir la molette de commande tout en allumant l'appareil.
  • Seite 46 Instructions de maintenance 2. Restaurer Cette fonction permet à l'utilisateur de restaurer le firmware au ré glage d'usine. Aprè s avoir terminé la restauration du firmware, la rampe redé marre automatiquement et la version du firmware sera affiché e.  Tourner la molette de commande pour sé lectionner “Restore”.
  • Seite 47 Instructions de maintenance 6. Mode standard ou maî tre / esclave Cette fonction permet à l'utilisateur de choisir entre le mode de fonctionnement standard ou le mode maî tre /esclave quand plusieurs unité s Recurves sont connecté es ensemble. Une fois connecté es, toutes les rampes esclaves suivront les ré glages programmé s sur la Recurve maî...
  • Seite 48: Information Importante

    Pour plus d'informations sur l'installation et l'utilisation de nos produits, visitez notre chaî ne officielle YouTube en utilisant le code QR suivant. Remarque: Pour les derniè res spé cifications sur la disposition, du type et du spectre de couleurs des LED, veuillez-vous rendre sur notre site Web à www.maxspect.com.
  • Seite 49 12 mois à compter de la date d’achat. Si un défaut est révélé au cours de la période de garantie, Maxspect Ltd., à sa convenance, ré parera (avec des piè ces neuves ou de rechanges) ou remplacera (par une unité...
  • Seite 50 Preset Preset 1 Preset 2 Franç ais Preset 3 Preset 4...
  • Seite 51 Per ottimizzare prestazioni e sicurezza, vi preghiamo di leggere attentamente le istruzioni Utente memo: Data di acquisto: Rivenditore: Indirizzo del rivenditore: Italiano Sito web del rivenditore: E-mail del rivenditore: Telefono del rivenditore: Puoi seguirci su facebook e twitter! https://www.facebook.com/Maxspect http://twitter.com/maxspectled...
  • Seite 52 Contenuto Scatola Per favore verifica il contenuto della scatola: R6-060 R6-090 R6-120 Alimentatore Supporti bordo vasca Viti in Italiano...
  • Seite 53: Funzionamento

    Precauzioni Prima di utilizzare il sistema d’illuminazione a LED Maxspect ™ Recurve hiamo di leggere attentamente le istruzioni. Far particolare attenzione e seguire i suggerimenti di sicurezza elencati di seguito. Successivamente tenere questo manuale a portata di mano per riferimento futuri Prima di utilizzare il sistema d’illuminazione a LED Maxspect...
  • Seite 54: Installazione

    Installazione Montaggio del sistema d’illuminazione a LED Recurve Prima di collegare i moduli LED all’alimentazione montare completamente il sistema utilizzando il supporto fornito. Montaggio a bordo vasca Montaggio in sospensione (kit di aggancio venduto separatamente) Italiano...
  • Seite 55: Istruzioni Per L'uso

    Istruzioni Per L’Uso Controller incorporato La Recurve può essere controllata direttamente dal controller incorporato. Il controller integrato dispone di un display OLED e di una manopola di controllo che permettono all'utente di settare tutte le impostazioni della plafoniera. Italiano Modalità Standard o Master/Slave Quando abbiamo a che fare con 2 o più...
  • Seite 56: Operazioni Di Base

    Istruzioni Per L’Uso Operazioni di base Seguire le istruzioni riportate di seguito per accendere e programmare il modulo a LED Recurve. Il modulo a LED si accende automaticamente non appena alimentato. Quando l'alimentazione viene a mancare e poi ripristinata, il modulo a LED riprende le impostazioni precedenti il black-out.
  • Seite 57: Modalità Manuale

    Istruzioni Per L’Uso Modalità Manuale  Premi la manopola di controllo per accedere alle impostazioni.  Premi la manopola di controllo di nuovo per passare tra i canali.  Ruota la manopola di controllo per impostare la luminosità su ciascun canale LED. ...
  • Seite 58 Istruzioni Per L’Uso Significato dei Punti Tempo Ci sono in totale 24 Punti Tempo. Puoi programmare un'intensità luminosa diversa su ogni Punto Tempo per controllare il fotoperiodo e la luminosità del sistema. Prendi come esempio il Preset 1 che è settato per vasche con prevalenza di SPS. Il fotoperiodo inizia alle 8:00, il sistema aumenta la quantità...
  • Seite 59 Istruzioni Per L’Uso Programmazione del fotoperiodo Punto Tempo # Tempo Canale LED Intensità Modifica  Premi la manopola di controllo per passare tra i parametri. Italiano  Ruota la manopola di controllo per impostare i parametri.  Premi e tieni premuta la manopola di controllo per 3 secondi per passare alla pagina successiva.
  • Seite 60: Configurazione Del Sistema

    Istruzioni Per L’Uso Seleziona Preset  Ruota la manopola di controllo per passare tra i Preset.  Premi la manopola di controllo per passare alla pagina successiva. Applica  Ruota la manopola di controlla e seleziona "Apply".  Premi la manopola di controllo per salvare le impostazioni. Italiano Anteprima ...
  • Seite 61: Istruzioni Di Manutenzione

    Istruzioni di manutenzione Sulla schermata "System Setup" appaiono 7 funzioni: 1. Firmware 2. Restore 3. Reset 4. Test Mode 5. Model Number 6. Standard or Master/Slave mode 7. Exit Italiano 1. Firmware Questa funzione permette all'utente di aggiornare il firmware. ...
  • Seite 62 Istruzioni di manutenzione 2. Restore Questa funzione permette all'utente di ritornare alla versione del firmware originale (di fabbrica). Una volta completata l'operazione la plafoniera ripartirà automaticamente e verrà visualizzato il nr della versione del firmware.  Ruota la manopola di controllo e seleziona "Restore". ...
  • Seite 63 Istruzioni di manutenzione 6. Standard or Master/Slave Mode Questa funzione consente all'utente di scegliere tra la modalità di funzionamento autonomo Standard e la modalità Master/Slave ossia quando più unità di Recurve devono essere connesse tra di loro. Una volta stabilita la connessione, tutte le unità Slave seguiranno le stesse impostazioni programmate sull'unità...
  • Seite 64 Per ulteriori informazioni sull'installazione o sul funzionamento dei nostri prodotti, visita il nostro canale YouTube ufficiale utilizzando il seguente codice QR. Nota: Per aggiornamenti relativi alla configurazione dei LED, tipi e colori dello spettro, siete pregati di consultare il nostro sito web www.maxspect.com.
  • Seite 65: Termini Di Garanzia

    Termini di garanzia Maxspect Ltd. garantisce tutti i Sistemi di Illuminazione a LED Maxspect ™ Recurve per i difetti di fabbricazione, per un periodo di 12 mesi dalla data di acquisto. Se un difetto di produzione si presenta durante il periodo di garanzia, Maxspect Ltd. a sua discrezione, riparerà (usando componenti nuovi o ricostruiti) o sostituirà...
  • Seite 66 Impostazioni preimpostate Preset 1 Preset 2 Preset 3 Preset 4 Italiano...
  • Seite 67 Para um melhor desempenho e seguranç a, por favor leia cuidadosamente estas instruç õ es. User Memo: Data da Compra: Nome Loja: Endereç o Loja: Website Loja: Email Loja: Portuguê s Telefone Loja: Por favor, visite-nos no Facebook ou Twitter! https://www.facebook.com/Maxspect http://twitter.com/maxspectled...
  • Seite 68: Conteú Do Da Embalagem

    Conteú do da Embalagem Por favor, analise o conteú do da embalagem. R6-060 R6-090 R6-120 Fonte de Energia Suporte Parafusos Portuguê s...
  • Seite 69 Precauç õ es Antes de usar seu Sistema de Iluminaç ã o LED Maxspect™ Recurve por favor leia este manual de instruç õ es cuidadosamente. Tenha cuidado e siga corretamente todas as instruç õ es descritas. Mantenha sempre ao alcance este manual para eventual consulta.
  • Seite 70 Instalaç ã o Montagem do sistema Recurve LED Lighting System Antes de ligar o mó dulo de LED com a fonte de alimentaç ã o, monte o sistema, usando o(s) suporte(s) fornecido. Montagem sobre o aquá rio. Montagem com pendante (kit vendido separadamente). Portuguê...
  • Seite 71: Instruç Õ Es De Funcionamento

    Instruç õ es de funcionamento Controlador integrado A Recurve pode ser controlada diretamente com o controlador integrado. O controlador possui um monitor OLED e um seletor de controle, a partir do qual o usuá rio pode configurar todas as funç õ es para o dispositivo. Padrã...
  • Seite 72 Instruç õ es de funcionamento Operaç õ es bá sicas Siga as instruç õ es abaixo para operar e programar o mó dulo de LED Recurve. O mó dulo de LED liga-se automaticamente quando a alimentaç ã o é conectada, e, desliga quando a energia é...
  • Seite 73: Modo Manual

    Instruç õ es de funcionamento Modo Manual  Pressione o botã o de controle para entrar no ajuste.  Pressione o botã o de controle novamente para alternar entre os canais.  Gire o dial de controle para definir o brilho de cada canal de LED.
  • Seite 74 Instruç õ es de funcionamento  Pressione o botã o de controle para alternar entre hora e minuto.  Gire o dial para ajustar a hora.  Pressione e mantenha pressionado o botã o de controle durante 3 segundos para guardar a definiç ã o e sair da pá gina. Compreendendo o Time Point Há...
  • Seite 75 Instruç õ es de funcionamento Programando Fotoperí odo Time point # Horá rio Canal de LED Intensidade Modificar  Pressione o botã o de controle para alternar entre os parâ metros.  Gire o dial de controle para ajustar o parâ metro. ...
  • Seite 76 Instruç õ es de funcionamento Selecionar Preset  Gire o dial de controle para alternar entre as predefiniç õ es.  Pressione o botã o de controle para voltar para a pró xima pá gina. Aplicar  Gire o dial de controle para selecionar “Apply”. ...
  • Seite 77 Instruç õ es de Manutenç ã o Configuraç ã o do Sistema A Configuraç ã o do Sistema possui um conjunto de funç õ es que permitem ao usuá rio executar a manutenç ã o no dispositivo. Para entrar na pá gina de Configuraç ã o do Sistema, primeiro desligue o dispositivo elé trico e, em seguida, pressione e mantenha pressionado o botã...
  • Seite 78 Instruç õ es de Manutenç ã o 2. Restore Esta funç ã o permite ao usuá rio restaurar o firmware para sua versã o original de fá brica. Apó s concluir a restauraç ã o do firmware, o dispositivo será reiniciado automaticamente e o nú mero da versã...
  • Seite 79 Instruç õ es de Manutenç ã o 6. Standard or Master/Slave Mode Esta funç ã o permite que o usuá rio escolha entre o modo de operaç ã o Standard stand-alone, ou Master/Slave onde vá rias unidades de dispositivos Recurve podem ser conectadas em conjunto.
  • Seite 80: Informaç Ã O Importante

    Para obter informaç õ es adicionais sobre a instalaç ã o ou operaç ã o dos nossos produtos, visite o nosso canal oficial do YouTube usando o seguinte QR Code. ATENÇ Ã O: Para especificaç õ es mais recentes dos LEDs, tipos e espectro de cores, por favor, visite nosso website em www.maxspect.com...
  • Seite 81 ISENÇ Ã O DE DANOS E CONSEQÜ Ê NCIAS: Você e qualquer outro usuá rio dos produtos Maxspect Ltd. nã o terá direito a quaisquer danos acidentais, incluindo, sem limitaç ã o, perda de uso da unidade, inconveniê ncia, danos a bens pessoais, telefonemas, perda de renda ou lucros.
  • Seite 82: Configuraç Õ Es Predefinidas

    Configuraç õ es predefinidas Preset 1 Preset 2 Preset 3 Preset 4 Portuguê s...
  • Seite 83 Para un rendimiento y seguridad ó ptimos, lea las instrucciones cuidadosamente. Notas del Usuario: Fecha de Compra: Nombre Comerciante: Su Direcció n: Su Web : Su Mail: Su telé fono: Españ ol Por favor visí tenos en facebook o twitter! https://www.facebook.com/Maxspect http://twitter.com/maxspectled...
  • Seite 84: Contenido Del Paquete

    Contenido del Paquete Por favor revise el contenido en el paquete. R6-060 R6-090 R6-120 Fuente de Alimentació n Soportes Tornillos Españ ol...
  • Seite 85 Precauciones Antes de usar Maxspect™ Recurve LED Lighting System lea atentamente estas instrucciones de funcionamiento. Siga con especial cuidado las sugerencias de seguridad que se detallan a continuació n. Luego, tenga este manual a mano para futuras referencias. Antes de usar Maxspect RecurveLED Lighting System ™...
  • Seite 86 Instalació n Montando Recurve LED Lighting System Antes de conectar la Recurve a la fuente de alimentació n, primero monte el sistema utilizando el soporte provisto. Montaje sobre el tanque. Montaje pendular (Kit para colgar se vende a parte). Españ ol...
  • Seite 87: Instrucciones De Funcionamiento

    Instrucciones de Funcionamiento Controlador Incorporado La Recurve se puede controlar directamente con el controlador incorporado. El controlador integrado en la Recurve cuenta con un monitor OLED y un dial de control, desde donde el usuario puede configurar todas las funciones del dispositivo. Modo está...
  • Seite 88: Operaciones Bá Sicas

    Instrucciones de Funcionamiento Operaciones Bá sicas Siga las instrucciones a continuació n para operar y programar el dispositivo LED Recurve. La Recurve se enciende automá ticamente cuando se conecta a la corriente, y se apaga cuando se corta la energí a. Cuando se reanude la alimentació...
  • Seite 89 Instrucciones de Funcionamiento Modo Manual  Presione el dial de control para introducir la configuració n.  Presione el dial de control nuevamente para cambiar entre los canales.  Gire el dial de control para configurar el brillo de cada canal de LED.
  • Seite 90 Instrucciones de Funcionamiento Comprender los Puntos de Tiempo (TP) Hay un total de 24 Puntos de Tiempo. Puede programar diferentes intensidades de salida luminosa en cada punto de tiempo para controlar el fotoperiodo y el brillo del sistema. Tome Preset P1 como ejemplo, es una configuració n para tanque SPS dominado. El fotoperiodo comienza a las 08:00, donde el sistema aumenta la luz gradualmente, alcanza su má...
  • Seite 91 Instrucciones de Funcionamiento Programació n Fotoperiodo Punto de Tiempo # Hora Canal LED Intensidad Modificar  Presione el dial de control para cambiar entre los pará metros.  Gire el dial de control para establecer el pará metro.  Mantenga presionado el dial de control durante 3 segundos para pasar a la pá...
  • Seite 92 Instrucciones de Funcionamiento Seleccionar Preset  Gire el dial de control para cambiar entre los preajustes.  Presione el dial de control para pasar a la pá gina siguiente. Aplicar  Gire el dial de control para seleccionar "Aplicar".  Presione el dial de control para guardar la configuració n. Preview ...
  • Seite 93: Instrucciones De Mantenimiento

    Instrucciones de Mantenimiento Configuració n del sistema La configuració n del sistema presenta un conjunto de funciones que permiten al usuario realizar tareas de mantenimiento en el dispositivo. Para ingresar a la pá gina de configuració n del sistema, primero apague el dispositivo, luego presione y sostenga el dial de control mientras vuelve a encender el dispositivo.
  • Seite 94 Instrucciones de Mantenimiento 9. Restaurar Esta function permite al usuario restaurar el firmware a su version original de fá brica. Despué s de finalizar la instalació n del firmware, el dispositivo se reiniciará automá ticamente y se mostrará en nú mero de versió n del firmware. ...
  • Seite 95 Instrucciones de Mantenimiento 13. Modo Está ndar o Maestro/Esclavo Esta funció n le permite al usuario elegir entre el modo de funcionamiento independiente está ndar o el modo maestro / esclavo, en el que se pueden conectar varias unidades de dispositivos Recurve juntas.
  • Seite 96: Especificaciones

    YouTube con el siguiente có digo QR. Españ ol Especificaciones Para obtener las ú ltimas especificaciones sobre el diseñ o de LED, los tipos y el espectro de color, visite nuestro sitio web en: www.maxspect.com...
  • Seite 97: Garantí A Limitada

    Reverse de Maxspect ™ contra defectos de fabricación por un período de 12 meses a partir de la fecha de compra. Si existe un defecto durante el perí odo de garantí a, Maxspect (HongKong) Limited, a su elecció n, reparará (utilizando piezas nuevas o refabricadas) o reemplazará...
  • Seite 98 Preset Preset 1 Preset 2 Preset 3 Preset 4 Españ ol...
  • Seite 99 Dziekujemy i gratulujemy za zakup naszego produktu. Prosimy o uwazne przeczytanie ponizszych instrukcji w celu uzyskania optymalnej wydajnosci i bezpieczenstwa. User Memo: Data zakupu: Sprzedawca: Adres sprzedawcy: Strona web sprzedawcy: E-mail sprzedawcy: Telefon sprzedawcy: Odwiedz nas na Facebook i Twitter! Polski https://www.facebook.com/Maxspect http://twitter.com/maxspectled...
  • Seite 100: Zawartość Opakowania

    Zawartość opakowania Proszę sprawdzić zawartość opakowania. Lampa LED R6-060 R6-090 R6-120 Zasilacz Stojak Śruby Polski...
  • Seite 101: Środki Ostrożności

    Środki ostrożności Prosze o uwazne przeczytanie ponizszych instrukcji obslugi przed uzyciem zestawu oswietleniowego LED Maxspect™ Recurve. Prosze zwrò cic szczegò lna uwage na zawarte ponizej instrukcje. Prosimy o przechowanie podrecznika do wykorzystania w przyszlosci. Przed uzyciem ledowego systemu oswietleniowego Maxspect ™...
  • Seite 102 Instalacja Montaz ledowego systemu oswietleniowego Recurve Przed podlaczeniem oswietlenia Recurve do sieci elektrycznej przeprowadzic calkowity montaz struktury przy uzyciu stojaka. Stelaż na akwarium Linki do zawieszenia Polski...
  • Seite 103 Instrukcje obslugi Wbudowany kontroler Recurve może być sterowany bezpośrednio dzięki wbudowanemu kontrolerowi. Wbudowany kontroler posiada wyświetlacz OLED i pokrętło nastawiania, przy użyciu którego użytkownik może ustawiać i regulować wszystkie funkcje lampy. Tryb Standardowy lub Master/Slave Zakładając że posiadamy 2 lub więcej jednostek Recurve, użytkownik może połączyć je razem dzięki trybowi Master/Slave by móc kontrolować...
  • Seite 104 Instrukcje obslugi Obsluga podstawowa Prosimy postepowac wg ponizszych instrukcji w celu wlaczenia i oprogramowania modulu Recurve. Modul Recurve wlacza sie automatycznie po podlaczeniu do sieci zasilania i wylacza po odcieciu od pradu. W przypadku odciecia modulu od pradu i ponownego podlaczenia do zasilania wprowadzone wczesniej ustawienia przywracane sa automatycznie.
  • Seite 105: Tryb Manualny

    Instrukcje obslugi Tryb Manualny  rzyciśnij pokrętło nastawne by wejść w ustawienia.  Naciśnij pokrętło nastawne jeszcze raz by przełączać kanały.  Obracaj pokrętło nastawne by dostosować jasność poszczególnych kanałów LED.  Naciśnij i przytrzymaj pokrętło nastawne przez 3 sekundy by zapisać...
  • Seite 106 Instrukcje obslugi Wyjaśnienie Punktów Czasowych (Time Points) Lampa posiada łącznie 24 Punkty Czasowe. Można programować intensywność świecenia w każdym Punkcie Czasowym by kontrolować fotoperiod i jasność lampy. Weźmy Preset P1 jako przykład, jest to ustawienie dla zbiornika z przewagą SPS. Fotoperiod rozpoczyna się...
  • Seite 107 Instrukcje obslugi Programowanie Fotoperiodu Punkt Czasowy # Czas Kanał LED Intensywność Modyfikuj  Naciśnij pokrętło nastawne by przełączać pomiędzy parametrami.  Obracaj pokrętło nastawne by ustawić parametry.  Naciśnij i przytrzymaj pokrętło nastawne przez 3 sekundy by przejść do następnej strony. Zastosuj ...
  • Seite 108 Instrukcje obslugi Wybó r Presetu  Obracaj pokrętło nastawne by przeskakiwać pomiędzy presetami.  Naciśnij pokrętło nastawne by przejść do następnej strony. Zastosuj  Obracając pokrętło nastawne wybierz “Apply”.  Naciśnij pokrętło nastawne by zapisać ustawienia. Podgląd  Obracając pokrętło nastawne wybierz “Preview”. ...
  • Seite 109: Ustawienia Systemowe

    Instrukcje Konserwacja Ustawienia Systemowe Ustawienia Systemowe zawierają zestaw funkcji pozwalających użytkownikowi przeprowadzić konserwacje lampy. By wejść w stronę Ustawień Systemowych, najpierw wyłącz lampę, następnie naciśnij i przytrzymaj pokrętło nastawne jednocześnie włączając lampę ponownie. Przytrzymuj pokrętło nastawne aż strona Ustawień Systemowych wyświetli się na ekranie OLED. W Ustawieniach Systemowych jest 7 opcji.
  • Seite 110 Instrukcje Konserwacja 2. Przywracanie Ta funkcja pozwala użytkownikowi przywrócić oryginalne firmware lampy. Po przywróceniu firmware do oryginalnego stanu, lampa zostanie uruchomiona ponownie a numer firmware zostanie wyświetlony.  Obróć pokrętło nastawne i wybierz “Restore”.  Naciśnij pokrętło nastawne by przywrócić firmware. 3.
  • Seite 111 Instrukcje Konserwacja 6. Tryb Standardowy lub Master/Slave Ta funkcja pozwala użytkownikowi wybrać pomiędzy trybem Standardowym w któ rym lampa działa samodzielnie lub Master/Slave gdzie wiele lamp Recurve może być połączonych razem. Podczas połączenia wszystkie lampy Slave będą używać programu ustawionego na lampie Master co pozwala zaoszczędzić...
  • Seite 112 For additional information regarding installation or operation of our products, please visit our Official YouTube Channel using the following QR Code. Polski Uwaga: Prosimy odwiedzać strone www.maxspect.com w celu zapoznania sie z ewentualnymi aktualizacjami konfiguracji dido Led, kolorow widma, itp...
  • Seite 113 Ledowe systemy oświetleniowe Maxspect™ Recurve pokryte są 12 miesieczną gwarancją, ktò ra obejmuje wady produkcji. Jeżeli wada produkcji pojawi sie w okresie gwarancji, Maxspect Ltd. zastrzega sobie prawo naprawy (przy użyciu zarówno części nowych jak i regenerowanych) bądź wymiany (na produkt nowy bądź...
  • Seite 114 fabryczne ustawienia Preset 1 Preset 2 Preset 3 Preset 4 Polski...
  • Seite 115 亲爱的客户, 多谢您选购我司商品。 为确保您的安全及使用本产品时得到最佳的效果,请详细阅读此使用手册。 用户资料: 购买日期: 经销商名称: 经销商地址: 经销商网页: 经销商电邮: 经销商电话: 简中...
  • Seite 116 包裝内容 请检查包装内物件是否齐全。 R6-060 R6-090 R6-120 电源 支架 螺丝 简中...
  • Seite 117 注意事项 请在操作前,仔细阅读本操作说明,并特别注意遵照下列安全建议。 请保留本说明书以便日後查阅。 安装及使用 Maxspect™ Recurve LED 灯具前,请注意: 移除灯具外包装袋及灯具上的保护膜。 2. 开启灯具时请切勿用肉眼直视灯珠,否则可能会对眼睛造成伤害。 安全提示: 电源 — 禁止破坏两极插头或接地型插头的安全用途。两极插头有两个接触片,其中一个 比较宽。接地型插头有两个接触片和一个接地插脚。两极插头的较宽接触片或接地型插头 的接地插脚能够确保使用者的安全。如果提供的插头与您的插座不匹配,请联系电工更换 插座。 电源线保护 — 布置电源线时,确保电源线不被踩踏、挤压或阻挡。手湿时,切勿触碰插 头或电源线。插入或拔出电源插头时,应始终紧握插头。 安装 — 本设备只能安装于室内,并且使用由生产厂家提供及指定的附件,安装架与悬挂 套件。 操作提示: 使用本设备时应始终遵照使用手册的操作说明。 本设备的安装位置应远离热源,例如暖炉,也不能暴露于过度高温的环境,如阳光、火源 之类。 为降低火灾或雷击的危险,切勿把本设备暴露于淋雨、潮湿、滴水或溅水的环境中。 本设备应安装或放置在不影响正常通风的位置上使用。 本设备应远离产生强磁场的设备或装置。 本设备只能使用干布清洁。 简中...
  • Seite 118 安装指南 安装 Recurve LED 灯具 将灯具接通电源前,请使用所提供的支架将灯具安装妥当。 支架安装 吊装(吊装组件須另售) 简中...
  • Seite 119 操作指南 集成控制器 灯具内置集成控制器。集成控制器由一块 OLED 屏幕和一个旋钮组成,用户可通过它控制灯具 的所有功能。 独立、主/从灯模式 假设有两台或以上的灯具, 用户可通过主/从灯模式连接所有灯具, 所有从灯会同步运行主灯设 定的功能,节省用户设置多台灯具的时间。 苹果或安卓移动设备 当使用 ICV6(需另购)无线连接灯具时,用户可利用苹果或安卓移动设备通过 Syna-G 系统控 制灯具。 简中...
  • Seite 120 操作指南 基本操作 请依照以下操作说明控制 Recurve LED 灯具。 当灯具接通电源后,将自动运行对上一次灯具断电前的模式,包括所设置的时间,定义 的程序,亮度值等。 温控散热风扇 灯具内置温控散热系统。当灯体温度超过 45° C/113° F 时散热风扇开始运转,低于 40° C/104° F 时停止工作。 当散热风扇失效时,灯具可能会由于过热(超过 70° C/158° F)而进入故障保护状态,此时所有 LED 灯组会立刻关闭。而当灯体温度低于 60° C/140° F 时,灯具会自动退出故障保护状态,同 时所有 LED 灯组恢复运作。 切换自动与手动操作模式 灯具内置两种操作模式:自动和手动操作模式。用户可通过灯具上的旋钮在两种模式之间来回 切换。  在自动或手动模式主界面按住旋钮 3 秒可切换至另一个操 作模式。 简中...
  • Seite 121 操作指南 手动操作模式  按动旋钮进入设置界面。  再次按动旋钮在 LED 灯组通道间切换。  转动旋钮设置 LED 灯组亮度。  按住旋钮 3 秒保存设定和退出设置界面。 自动操作模式  按动旋钮进入设置界面。  转动旋钮切换选项。  按住旋钮 3 秒保存设定并退出设置界面。 自动操作模式内有三个选项供用户设定: 系统时钟:将系统时间设定为用户当地时间。 光照周期:用于设定每个 LED 灯组在一天当中不同时间点的亮度值。 预设选项:内置 4 组预设选项供用户选择。(请参考 112 页) 预设 1:针对硬骨珊瑚为主的鱼缸。 预设 2:针对硬骨珊瑚和软骨珊瑚混合的鱼缸。 预设 3:针对软骨珊瑚和软体生物混合的鱼缸。 预设...
  • Seite 122 操作指南 认识时间点 系统可设置最多 24 个时间点。用户可通打开或关闭每个时间点,为每个时间点设置时间值,并 为每个 LED 灯组设置特定的亮度,以达到控制系统的光照亮度和光照周期。 以预设 1 为例,它是一组针对以硬骨珊瑚为主的设定。它的光照周期从 08:00 点开始,LED 灯 组开始逐渐变亮,在 10:00 点达到最大亮度并一直维持到 20:00 点,然后 LED 灯组亮度开始下 降,直到 22:00 点 LED 灯组转换到夜光效果。 TP01 TP02 TP03 TP04 TP05 TP06 TP07 TP08 08:00 09:00 10:00 20:00 20:30 21:00 21:30 22:00 通道...
  • Seite 123 操作指南 设置光照周期 时间点 时间点序号 LED 灯组 亮度 设置  按动旋钮在选项之间来回切换。  转动旋钮设置参数。  按住旋钮 3 秒切换至下一页面。 保存  转动旋钮选择"Apply"。  按动旋钮保存设置。  按住旋钮 3 秒返回主界面。 预览  转动旋钮选择"Preview"。  按动旋钮开始快速预览功能,整个过程历时 3 分钟。  按住旋钮 3 秒返回主界面。 修改  转动旋钮选择"Modify"。  按动旋钮重新设置参数,具体操作参考“设置” 。 简中...
  • Seite 124 操作指南 选择预设选项  转动旋钮在预设选项之间来回切换。  按动旋钮切换至下一页面。 保存  转动旋钮选择"Apply"。  按动旋钮保存设置。 预览  转动旋钮选择"Preview"。  按动旋钮开始快速预览功能,整个预览历时 3 分钟。  按住旋钮 3 秒返回主界面。 退出  转动旋钮选择"Exit"。  按动旋钮返回主界面。 简中...
  • Seite 125 维护指南 系统设定 系统设定包含一组基础功能供用户维护灯具使用。 要进入系统设定界面,首先断开灯具电源,按住旋钮,然后接通灯具电源,直到屏幕显示系统 设定界面便可松开旋钮。 系统设定包含 7 项功能: 1. 固件更新 2. 固件恢复 3. 恢复出厂设置 4. 系统测试 5. 型号选择 6. 独立、主/从灯模式 7. 退出 1. 固件更新 此功能用于更新系统固件。  转动旋钮选择"Firmware"。  按动旋钮开始更新固件。  当系统检测不到 SD card 或正确的固件文件时,屏幕会相 应提示"NO SD Card"或"Wrong File"。 简中  正常更新时屏幕会显示更新进度。 ...
  • Seite 126 维护指南 2. 固件恢复 此功能用于恢复出厂固件。当成功恢复后,系统会自动重启,版本号会显示在启动界面中,恢 复出厂固件不会影响用户设定。  转动旋钮选择"Restore"。  按动旋钮开始恢复固件。 3. 恢复出厂设置 此功能用于恢复出厂设置。成功恢复后,系统会自动重启。  转动旋钮选择"Reset"。  按动旋钮开始恢复出厂设定。 4. 系统测试 此功能用于系统检测。用户应在经销商或售后服务人员的指导或授意下执行系统检测操作。 5. 型号选择 此功能用于设置灯具型号,并且当灯具和 Syna-G 系统连接时,作为灯具名称使用。正常情况 下,用户不应更改此项设定。 简中...
  • Seite 127 维护指南 6. 独立、主/从模式 此功能可用于设置灯具为独立工作模式,或当用户拥有多台灯具时,设置为主/从工作模式来让 它们同步运作。 连接后,所有从灯会同步运行主灯的设定,以节省用户设置多台灯具的时间。 默认选项"Standard"表示灯具工作在独立运作模式。 当灯具设定为主灯时,需要在 01 至 10 间选择一个通道,并且从灯也需要设置为相同的通道。 如果在近距离内有多个主/从灯组,不同主/从灯组必须分配不同通道以避免相互干扰。  转动旋钮选择"Standard"。  按动旋钮进入设置界面。  转动旋钮选择主/从模式。  然后按动旋钮进入通道选择选项,转动旋钮选择通道。  按住旋钮 3 秒保存设定。 7. 退出  转动旋钮选择"Exit"。  按动旋钮重启灯具。 简中...
  • Seite 128 重要信息 灯具维护 用户必须定期维护灯具,内容包括但不限于以下步骤:  为保持灯具的最佳性能,用户每星期应最少对灯具清洁一次,用微湿的抹布清除亚克力 透镜上的盐巴或污垢,否则可能会严重影响灯光的输出。  定期及适当地清洁散热风尚可显著延长其使用寿命。散热风扇属于损耗品,依照对其维 护的频率而定,用户应该在 24-36 个月内更换新的散热风扇。  用户应定期清除铝合金灯体上的盐巴或污垢,否则可能会影响灯体的散热性能。 提示:如不依照以上的方法对产品进行定期的维护以至造成不必要的损坏可能会丧失产品的保 修。 操作视频 扫描二维码可登录迈光 Youku 主页观看详细的产品操作视频。 提示: 关于产品规格等详细信息,请浏览 Maxspect 官方网站:www.maxspect.com 简中...
  • Seite 129 产品保修 Recurve LED 照明系统产品自购买之日起 12 个月内若有质量问题, 所有迈光品牌 (Maxspect) 可享有 Maxspect 公司的保修服务。若在保修其内出现质量问题,Maxspect 公司将免费维修或 更换配件。 若产品由于误用,被改装,发生事故,处理不当,或使用不当而受到损坏,或未经授权自行维 修的,则不在保修范围之内。不在保修范围的情况包括但不限于,使用改装灯泡和修改电路等 被视为误用或滥用而损坏产品的行为。 间接及附带损害免费声明: Maxspect 对您或其他使用者的间接或附带损害不承担责任。间接或附带损害包括但不限于,使 用产品造成的损失或不便,对个人财产造成的损失,如电话,收入损失或盈利损失。本质保书 赋予您合法权利,在不同的地区您还可能享有其它权利。 除上面明确提出的内容外,Maxspect 公司对产品的质量,性能,适销性或特别用途的适用性均 没有作出明示或暗示的担保或陈述。因此,本产品“按现状”提供,您作为购买者承担有关此 产品的质量和性能的全部风险。 在任何情况下,Maxspect 公司均不对因本产品或其文件的缺陷而引起的直接的、间接的、特别 的、附带的或结果性的损害承担责任。 上述质保书,声明和故障排除方法是唯一版本,没有其它口头的或书面的,明示的或暗示的内 容。在任何时候,Maxspect 公司的经销商,代理商或雇员都无权对此质保书进行更改、扩展或 补充。 由于某些地区不允许此类附带性或结果性损害的免责或有限责任,上述限制可能不适用于您。 简中...
  • Seite 130 预设数据 预设 1 预设 2 预设 3 预设 4 简中...
  • Seite 131 親愛的客戶, 多謝您選購我司商品。 為確保您的安全及使用本產品時得到最佳的效果,請詳細閱讀此使用說明書。 用戶資料: 購買日期: 經銷商名稱: 經銷商地址: 經銷商網頁: 經銷商電郵: 經銷商電話: 繁中...
  • Seite 132 包裝內容 請檢查包裝內物件是否齊全。 R6-060 R6-090 R6-120 電源 支架 螺絲 繁中...
  • Seite 133 注意事項 請在操作前,仔細閱讀本操作說明,並特別注意遵照下列安全建議。 請保留本說明書以便日後查閱。 安裝及使用 Maxspect™ Recurve LED 燈具前,請注意: 移除燈具外包裝袋及燈具上的保護膜。 2. 開啟燈具時請切勿用肉眼直視燈珠,否則可能會對眼睛造成傷害。 安全提示 電源 — 禁止破壞兩極插頭或接地型插頭的安全用途。兩極插頭有兩個接觸片,其中一個 比較寬。接地型插頭有兩個接觸片和一個接地插腳。兩極插頭的較寬接觸片或接地型插頭 的接地插腳能夠確保使用者的安全。如果提供的插頭與您的插座不匹配,請聯系電工更換 插座。 電源線保護 — 布置電源線時,確保電源線不被踩踏、擠壓或阻擋。手濕時,切勿觸碰插 頭或電源線。插入或拔出電源插頭時,應始終緊握插頭。 安裝 — 本設備只能安裝於室內,並且使用由生產廠家提供及指定的附件,安裝架與懸掛 套件。 操作提示 使用本設備時應始終遵照使用手冊的操作說明。 本設備的安裝位置應遠離熱源,例如暖爐,也不能暴露於過度高溫的環境,如陽光、火源 之類。 為降低火災或雷擊的危險,切勿把本設備暴露於淋雨、潮濕、滴水或濺水的環境中。 本設備應安裝或放置在不影響正常通風的位置上使用。 本設備應遠離產生強磁場的設備或裝置。 本設備只能使用乾布清潔。 繁中...
  • Seite 134 安裝指南 安裝 Recurve LED 燈具 將燈具接通電源前,請使用所提供的支架將燈具安裝妥當。 1. 支架安装 2. 吊裝(吊裝組件須另購) 繁中...
  • Seite 135 操作指南 集成控制器 燈具內置集成控制器。集成控制器由一塊 OLED 屏幕和一個旋鈕組成,用戶可通過它控制燈具 的所有功能。 獨立、主/從燈模式 假設有兩台或以上的燈具, 用戶可通過主/從燈模式連接所有燈具, 所有從燈會同步運行主燈設 定的功能,節省用戶設置多臺燈具的時間。 蘋果或安卓移動設備 當使用 ICV6(需另購)無線連接燈具時,用戶可利用蘋果或安卓移動設備通過 Syna-G 系統控 制燈具。 繁中...
  • Seite 136 操作指南 基本操作 請依照以下操作說明控制 Recurve LED 灯具。 當燈具接通電源後,將自動運行上一次燈具斷電前的模式,包括所設置的時間,定義的 程序,亮度值等。 溫控散熱風扇 燈具內置溫控散熱系統。當燈體溫度超過 45° C/113° F 時散熱風扇開始運轉,低於 40° C/104° F 時停止工作。 當散熱風扇失效時,燈具可能會由於過熱(超過 70° C/158° F)而進入故障保護狀態,此時所有 LED 燈組會立即關閉。而當燈體溫度低於 60° C/140° F 時,燈具會自動退出故障保護狀態,同時 所有 LED 燈組恢復運作。 切換自動與手動操作模式 燈具內置兩種操作模式:自動和手動操作模式。用戶可通過燈具上的旋鈕在兩種模式間來回切 換。  在自動或手動模式主界面按住旋鈕 3 秒切換至另一操作模 式。 繁中...
  • Seite 137 操作指南 手動操作模式  按動旋鈕進入設置界面。  再次按動旋鈕在 LED 燈組通道間切換。  轉動旋鈕設置 LED 燈組亮度。  按住旋鈕 3 秒保存設定和退出設置界面。 自動操作模式  按動旋鈕進入設置界面。  轉動旋鈕切換選項。  按住旋鈕 3 秒保存設定並退出設置界面。 自動操作模式內有三個選項供用戶設定: 系統時鐘:將系統時間設定為用戶當地時間。 光照週期:用於設定每個 LED 燈組在一天當中不同時間點的亮度值。 預設選項:內置 4 組預設選項供用戶選擇。(參考 128 頁) 預設 1:針對硬骨珊瑚為主的魚缸。 預設 2:針對硬骨珊瑚和軟骨珊瑚混合的魚缸。 預設 3:針對軟骨珊瑚和軟體生物混合的魚缸。 預設...
  • Seite 138 操作指南 認識時間點 系統可設置最多 24 個時間點。用戶可通過打開或關閉每個時間點,為每個時間點設置時間值, 並為每個 LED 燈組設置特定的亮度,以達到控制系統的光照亮度和光照週期。 以預設 1 為例,它是一組針對以硬骨珊瑚為主的設定。它的光照週期從 08:00 點開始,LED 燈 組開始逐漸變亮,在 10:00 點達到最大亮度並一直維持到 20:00 點,然後 LED 燈組亮度開始下 降,直到 22:00 點 LED 燈組轉換到夜光效果。 TP01 TP02 TP03 TP04 TP05 TP06 TP07 TP08 08:00 09:00 10:00 20:00 20:30 21:00 21:30 22:00 通道...
  • Seite 139 操作指南 設置光照週期 時間點序號 時間點 LED 燈組 亮度 設置  按動旋鈕在選項之間來回切換。  轉動旋鈕設置參數。  按住旋鈕 3 秒切換至下一頁面。 保存  轉動旋鈕選擇“Apply”。  按動旋鈕保存設置。  按住旋鈕 3 秒返回主界面。 預覽  轉動旋鈕選擇“Preview”。  按動旋鈕開始快速預覽功能,整個過程歷時 3 分鐘。  按住旋鈕 3 秒返回主界面。 修改  轉動旋鈕選擇“Modify”。  按動旋鈕重新設置選項,具體操作參考“設置” 。 繁中...
  • Seite 140 操作指南 選擇預設選項  轉動旋鈕在預設選項之間來回切換。  按動旋鈕切換至下一頁面。 保存  轉動旋鈕選擇“Apply”。  按動旋鈕保存設置。 預覽  轉動旋鈕選擇“Preview”。  按動旋鈕開始快速預覽功能,整個過程歷時 3 分鐘。  按住旋鈕 3 秒返回主界面。 退出  轉動旋鈕選擇“Exit”。  按動旋鈕返回主界面。 繁中...
  • Seite 141 維護指南 系統設定 系統設定包含一組基礎功能供用戶維護燈具使用。 要進入系統設定界面,首先斷開燈具電源,按住旋鈕,然後接通燈具電源,直到屏幕顯示系統 設定界面便可鬆開旋鈕。 系統設定包含 7 項功能: 1. 固件更新 2. 固件恢复 3. 恢復出廠設置 4. 系統測試 5. 型號選擇 6. 獨立、主/從模式 7. 退出 1. 固件更新 此功能用於更新系統固件。  轉動旋鈕選擇“Firmware”。  按動旋鈕開始更新固件。  當系統檢測不到 SD Card 或正確的固件文件時,屏幕會相 應提示“NO SD Card”或“Wrong File”。  正常更新時屏幕會顯示更新進度。 ...
  • Seite 142 維護指南 2. 固件恢復 此功能用於恢復出廠固件。當成功恢復後,系統會自動重啟,版本號會顯示在啟動界面中,恢 復出廠固件不會影響用戶設定。  轉動旋鈕選擇“Restore” 。  按動旋鈕開始恢復固件。 3. 恢復出廠設置 此功能用於恢復出廠設置。成功恢復後,系統會自動重啟。  轉動旋鈕選擇“Reset”。  按動旋鈕開始恢復出廠設定。 4. 系統測試 此功能用於系統檢測。用戶應在經銷商或售後服務人員的指導或授意下執行系統檢測操作。 5. 型號選擇 此功能用於設置燈具型號,並且當燈具和 Syna-G 系統連接時,作為燈具名稱使用。正常情況 下,用戶不應更改此項設定。 繁中...
  • Seite 143 維護指南 6. 獨立、主/從模式 此功能可用於設置燈具為獨立工作模式,或當用戶擁有多臺灯具时,設置為主/從工作模式來讓 它們同步運作。 連接後,所有從燈會同步運行主燈的設定,以節省用戶設置多臺燈具的時間。 默認選項“Standard”表示燈具工作在獨立運作模式。 當燈具設定為主燈時,需要在 01 至 10 間選擇一個通道,並且從燈也需要設置為相同的通道。 如果在近距離內有多個主/從燈組,不同主/從燈組必須分配不同通道以避免相互干擾。  轉動旋鈕選擇"Standard"。  按動旋鈕進入設置界面。  轉動旋鈕選擇主/從模式。  然後按動旋鈕進入通道選擇選項,轉動旋鈕選擇通道。  按住旋鈕 3 秒保存設定。 7. 退出  轉動旋鈕選擇"Exit"。  按動旋鈕重啟燈具。 繁中...
  • Seite 144 重要信息 燈具維護 用戶必須定期維護燈具,內容包括但不限於以下步驟:  為保持燈具的最佳性能,用戶每星期應最少對燈具清潔一次,用微濕的抹布清除亞克力 透鏡上的鹽巴或污垢,否則可能會嚴重影響燈光的輸出。  定期及適當地清潔散熱風扇可顯著延長其使用壽命。散熱風扇屬於損耗品,依據對其維 護的頻率而定,用戶應該在 24-36 個月內更換新的散熱風扇。  用戶應定期清除鋁合金燈體上的鹽巴或污垢,否則可能會影響燈體的散熱性能。 提示:如不依照以上的方法對產品進行定期的維護以至造成不必要的損壞可能會喪失產品的保 修。 操作視頻 掃描二維碼可登錄邁光 Youtube 主頁觀看詳細的產品操作視頻。 提示: 有關產品規格等詳細信息,請瀏覽 Maxspect 官方網站:www.maxspect.com 繁中...
  • Seite 145 產品保修 所有邁光品牌(Maxspect)的 Recurve LED 照明系統產品自購買之日起 12 個月內若有質量問 題,可享有 Maxspect 公司的保修服務。若在保修其內出現質量問題,Maxspect 公司將免費維 修或更換配件。 若產品由於誤用,被改裝,發生事故,處理不當,或使用不當而受到損壞,或未經授權自行維 修的,則不在保修範圍之內。不在保修範圍的情況包括但不限於,使用改裝燈泡和修改電路等 被視為誤用或濫用而損壞產品的行為。 間接及附帶損害免費聲明: Maxspect 對您或其他使用者的間接或附帶損害不承擔責任。間接或附帶損害包括但不限於,使 用產品造成的損失或不便,對個人財產造成的損失,如電話,收入損失或盈利損失。本質保書 賦予您合法權利,在不同的地區您還可能享有其它權利。 除上面明確提出的內容外,Maxspect 公司對產品的質量,性能,適銷性或特別用途的適用性均 沒有作出明示或暗示的擔保或陳述。因此,本產品“按現狀”提供,您作為購買者承擔有關此 產品的質量和性能的全部風險。 在任何情況下,Maxspect 公司均不對因本產品或其文件的缺陷而引起的直接的、間接的、特別 的、附帶的或結果性的損害承擔責任。 上述質保書,聲明和故障排除方法是唯一版本,沒有其它口頭的或書面的,明示的或暗示的內 容。在任何時候,Maxspect 公司的經銷商,代理商或雇員都無權對此質保書進行更改、擴展或 補充。 由於某些地區不允許此類附帶性或結果性損害的免責或有限責任,上述限制可能不適用於您。 繁中...
  • Seite 146 預設數據 預設 1 預設 2 預設 3 預設 4 繁中...
  • Seite 148 NOTE: Products, packaging, features and specifications are subject to change. All screen images are simulated. © 2009-2018 Maxspect Limited. Reproduction in whole or in part without written permission is prohibited. All rights reserved. Maxspect is trademarkof Maxspect Limited. Maxspect™ Recurve Owner’s Manual Version 2.0...

Diese Anleitung auch für:

Recurve r6-090Recurve r6-120Recurve r6-060Recurve

Inhaltsverzeichnis