Herunterladen Diese Seite drucken

Werbung

Verfügbare Sprachen
  • DE

Verfügbare Sprachen

  • DEUTSCH, seite 17
Tout changement ou modification non-expressément approuvé(e) par la partie responsable de la conformité pourrait mettre un terme au droit de
l'utilisateur à utiliser l'équipement. Cet équipement a été testé et a été reconnu conforme aux limites de la classe B des appareils numériques, en ap-
plication de la section 15 des règlements de la FCC. Ces limites visent à fournir une protection raisonnable contre les interférences nuisibles lorsque
l'équipement fonctionne dans une résidence. Cet équipement génère, utilise et peut émettre des fréquences radios et, s'il n'est pas installé conformé-
ment au manuel d'instruction, il pourrait provoquer des interférences nuisibles aux communications radios. Cependant, il n'est pas possible de garantir
qu'aucune interférence ne sera jamais émise.
Si cet équipement peut causer des interférences nuisibles à la réception de la radio ou de la télévision, ce qui peut être déterminé en mettant
l'équipement sur ON et OFF, l'utilisateur est invité à essayer de corriger les interférences par l'une ou l'ensemble des mesures suivantes :
- Réorienter ou déplacer l'antenne de réception.
- Augmenter la séparation entre l'équipement et le récepteur.
- Raccorder l'équipement à une sortie sur un circuit différent de celui sur lequel le récepteur est raccordé.
- Consulter le vendeur ou un technicien qualifié en radio/TV.
Cet équipement est conforme à la section 15 des règlements de la FCC. Son fonctionnement est soumis aux deux conditions suivantes : (1) cet équipe-
ment ne doit pas provoquer d'interférences nuisibles et (2) cet appareil doit tolérer toute interférence reçue, y compris les interférences qui pourraient
provoquer des problèmes de fonctionnement.
Changes or modifications not expressly approved by the party responsible for compliance could void the user's authority to operate the equipment.
This equipment has been tested and found to comply with the limits for a Class B digital device, pursuant to Part 15 of the FCC Rules. These limits are
designed to provide reasonable protection against harmful interference in a residential installation. This equipment generates, uses and can radiate
radio frequency energy and, if not installed and used in accordance with the instructions, may cause harmful interference to radio communications.
However, there is no guarantee that interference will not occur in a particular installation.
If this equipment does cause harmful interference to radio or television reception, which can be determined by turning the equipment off and on, the
user is encouraged to try to correct the interference by one or more of the following measures:
- Reorient or relocate the receiving antenna.
- Increase the separation between the equipment and receiver.
- Connect the equipment into an outlet on a circuit different from that to which the receiver is connected.
- Consult the dealer or an experienced radio/TV technician for help.
This device complies with Part 15 of the FCC Rules. Operation is subject to the following two conditions: (1) this device may not cause harmful interfer-
ence, and (2) this device must accept any interference received, including interference that may cause undesired operation.
www.bewell-connect.com

Werbung

loading

Inhaltszusammenfassung für VISIOMED Bewell Connect+

  • Seite 1 Tout changement ou modification non-expressément approuvé(e) par la partie responsable de la conformité pourrait mettre un terme au droit de l’utilisateur à utiliser l’équipement. Cet équipement a été testé et a été reconnu conforme aux limites de la classe B des appareils numériques, en ap- plication de la section 15 des règlements de la FCC.
  • Seite 2 QUICK STEP GUIDE V I S I O M E D G r o u p S A 7 5 1 1 6 PA R I S - F r a n c e contact@visiomed-lab.com www.visiomed-lab.com Customers Service 0892 350 366...
  • Seite 3: Contenu De La Boîte

    CONTENU DE LA BOÎTE - 1 caméra MyiVision - 1 transformateur électrique - 1 antenne WiFi - 1 système d’accroche - 1 câble réseau par ventouse - 2 coques interchangeables (blanc et noir) INSTALLER Branchez le câble fourni entre votre box internet et la caméra. Vissez l’antenne WiFi sur la caméra.
  • Seite 4 TÉLÉCHARGER Téléchargez et lancez l’app BewellConnect® MyiVision sur votre smartphone ou votre tablette. Activez le Wifi sur votre smartphone ou tablette.
  • Seite 5: Ajouter Une Caméra

    AJOUTER UNE CAMÉRA 2 possibilités pour ajouter une caméra : • Ajout de la caméra par QR code : Scannez le QR code de l’étiquette (en-dessous de la caméra) ou entrez le numéro de code manuellement • Ajout de la caméra avec la fonction de détection automa- tique : Il se peut que votre smartphone/tablette détecte la caméra.
  • Seite 6 CONFIGURER Donnez un nom à votre caméra, et laissez le nom d’utilisateur (“Maman”) et le mot de passe (“123456”) par défaut. Vous pourrez ensuite les modifier dans les paramètres.
  • Seite 7 CONFIGURER WIFI Si vous souhaitez utiliser votre caméra via le réseau WIFI choisissez “Oui”. Entrez son mot de passe. Si vous souhaitez continuer d’utiliser votre caméra avec le câble Ethernet, appuyez sur “Non” et ignorez la prochaine étape.
  • Seite 8 DÉBRANCHER Débranchez le câble réseau et cliquez sur “Suivant”. Attendez que la caméra redémarre. I O Alarm AUDIO...
  • Seite 9 REGARDER Votre caméra est prête !
  • Seite 10 CONTENT - 1 MyiVision Camera - 1 electrical transformer - 1 WiFi antenna - 1 hanging system by suction cup - 1 network cable - 2 exchangeable shells (white and black) INSTALL Connect network cable from camera to modem. Screw the WiFi antenna on the camera. Connect power adapter to the camera.
  • Seite 11 DOWNLOAD Download and launch BewellConnect® MyiVision app on your smartphone or tablet. Turn on the Wifi on your smartphone or tablet.
  • Seite 12 ADD A CAMERA 2 possibilities to add a camera : • Add the camera with QR code : Scan the QR code (below the camera) or enter the code number manually • Add the camera with the automatic detection function : Your smartphone/tablet may detect your camera.
  • Seite 13 SET UP Name your camera, and leave the default user name (“Maman”) and the default password (“123456”). You will be able to change them after in the settings.
  • Seite 14: Wifi Set Up

    WIFI SET UP If you wish to use your camera via WIFI select “Yes”. Enter its password. If you wish to continue using your camera with the Ethernet cable, press ”No” and ignore the next step.
  • Seite 15 UNPLUG Unplug network cable and click on “Next”. Wait for the camera to re-start. I O Alarm AUDIO...
  • Seite 16 WATCH You camera is ready !
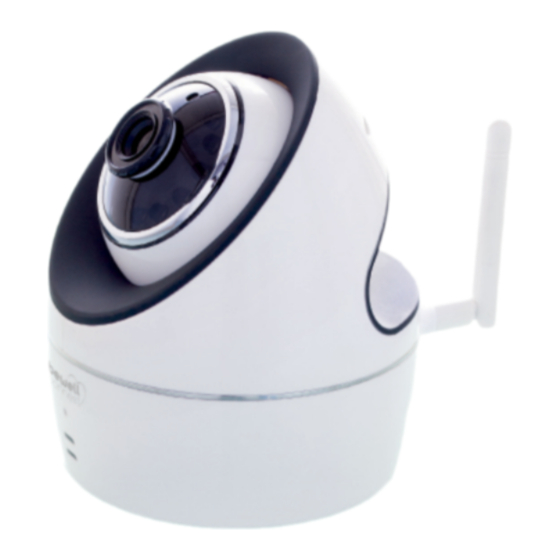
  • Seite 17 PACKUNGSINHALT - 1 Kamera MyiVision - 1 Transformator - 1 Wi-Fi-Antenne - 1 Befestigungssystem per Saugnäpfen - 1 Netzkabel - 2 austauschbare Schalen (weiß und schwarz) AUFBAU Verbinden Sie mithilfe des mitgelieferten Kabels die Kamera mit Ihrem Internet-Modem. Schrauben Sie die Wi-Fi-Antenne auf der Kamera fest. Schließen Sie die Kamera an das Stromnetz an.
  • Seite 18 DOWNLOAD Laden Sie die App BewellConnect® MyiVision auf Ihr Smartphone oder Tablet herunter und starten Sie die App. Aktivieren Sie Wi-Fi auf Ihrem Smartphone oder Tablet.
  • Seite 19: Kamera Hinzufügen

    KAMERA HINZUFÜGEN Sie haben 2 Möglichkeiten, um eine Kamera hinzuzufügen : • Hinzufügen der Kamera per QR-Code : Scannen Sie den QR-Code des Etiketts (unter der Kamera) oder geben Sie die Nummer des Codes per Hand ein • Hinzufügen der Kamera mit der automatischen Suchfunktion : Es ist möglich, dass Ihr Smartphone/Tablet die Kamera von selbst erkennt.
  • Seite 20 KONFIGURIEREN Geben Sie Ihrer Kamera einen Namen und behalten Sie Standard-Benutzernamen (“Maman”) und -passwort (“123456”). Sie können beide später in den Einstellungen verändern.
  • Seite 21 WI-FI KONFIGURIEREN Wenn Sie Ihre Kamera über das Wi-Fi-Netz benutzen möchten, klicken Sie auf „Yes“. Geben Sie das Passwort für die Verbindung ein. Wenn Sie Ihre Kamera weiter mit dem Ethernetkabel benutzen möchten, drücken Sie auf „No“ und ignorieren Sie den nachfolgenden Schritt.
  • Seite 22 AUSSTECKEN Ziehen Sie das Netzkabel und drücken Sie auf „Next“. Warten Sie, bis sich die Kamera wieder einschaltet. I O Alarm AUDIO...
  • Seite 23 ANSEHEN Ihre Kamera ist einsatzbereit !
  • Seite 24: Contenido De La Caja

    CONTENIDO DE LA CAJA - 1 cámara MyiVision - 1 transformador eléctrico - 1 antena Wi-Fi - 1 sistema de agarre por ventosa - 1 cable red - 2 carcasas intercambiables (blanca y negra) INSTALAR Coloque el cable suministrado entre su rúter y la cámara. Enrosque la antena WI-FI en la cámara.
  • Seite 25 DESCARGAR Descargue e inicie la app BewellConnect® MyiVision en su smartphone o su tableta. Active la Wi-Fi en su smartphone o tableta.
  • Seite 26 AÑADIR UNA CÁMARA 2 posibilidades para añadir una cámara : • Añadido de la cámara mediante código QR: Escanee el código QR de la etiqueta (debajo de la cámara) o introduzca manualmente el número de código • Añadido de la cámara con la función de detección automática: Es posible que su smartphone/tableta detecte la cámara.
  • Seite 27 CONFIGURAR Dele un nombre a su cámara, y deje el nombre de usuario (“Maman”) y la contraseña (“123456”) por defecto. Más tarde, podrá configurarlos en los parámetros.
  • Seite 28 CONFIGURAR WI-FI Si desea utilizar su cámara a través de la red inalámbrica WI-FI, seleccione “Yes”. Introduzca su contraseña Si desea seguir utilizando su cámara con el cable Ethernet, pulse “No” e ignore la siguiente etapa.
  • Seite 29 DESCONECTAR Desconecte el cable de red y haga clic en “Next”. Espere a que la cámara vuelva a encenderse. I O Alarm AUDIO...
  • Seite 30 MIRAR ¡ Su cámara está lista !
  • Seite 31: Contenuto Della Scatola

    CONTENUTO DELLA SCATOLA - 1 videocamera MyiVision - 1 trasformatore elettrico - 1 antenna Wi-Fi - 1 sistema di aggancio con ventosa - 1 cavo di rete - 2 cover intercambiabili (bianca e nera) INSTALLARE Attaccare il cavo in dotazione tra la connessione Internet e la videocamera.
  • Seite 32 SCARICARE Scaricare e lanciare l’app BewellConnect® MyiVision sul tuo smartphone o tablet. Attivare il Wi-Fi sullo smartphone o tablet.
  • Seite 33 AGGIUNGERE LA VIDEOCAMERA Per aggiungere la videocamera ci sono 2 possibilità : • Aggiunta con codice QR: Scansionare il codice QR dell’etichetta (posta sotto la videocamera) o immettere il numero di codice manualmente • Aggiunta della videocamera con la funzione di individuazione automatica: Se il tuo smartphone/tablet individua la videocamera, cliccare sulla videocamera individuata.
  • Seite 34 CONFIGURARE Dare un nome alla videocamera, e lasciare il nome utente (“Mamma”) e la password (“123456”) di default. Poi potrete modificare i dati nei parametri.
  • Seite 35 CONFIGURARE IL WIFI Se desideri utilizzare la videocamera tramite la rete Wi-Fi, scegli “Yes”. Immettere la password. Se desideri continuare ad usare la videocamera con il cavo Ethernet, premi su “No” e ignora la fase successiva.
  • Seite 36 STACCARE Staccare il cavo di rete e cliccare su “Next”. Attendere il riavvio della videocamera. I O Alarm AUDIO...
  • Seite 37 GUARDARE La tua videocamera è pronta !
  • Seite 38: Inhoud Van De Doos

    INHOUD VAN DE DOOS - 1 MyiVision camera - 1 elektrische transformator - 1 wifi-antenne - 1 hechtsysteem door zuigkracht - 1 netwerkkabel - 2 verwisselbare covers (wit en zwart) INSTALLEREN Sluit de meegeleverde kabel aan op uw internet box en de camera.
  • Seite 39 DOWNLOADEN Download en lanceer de BewellConnect® MyiVision app op uw smartphone of tablet. Schakel de wifi in op uw smartphone of tablet.
  • Seite 40 EEN CAMERA TOEVOEGEN 2 manieren om een camera toe te voegen : • Camera toevoegen via QR-code: Scan de QR-code van het label (onder de camera) of voer handmatig het code- nummer in • De camera toeveogen met de automatische detectiefunctie : Het is mogelijk dat uw smartphone/tablet de camera detect- eert.
  • Seite 41 CONFIGUREREN Geef een naam aan uw camera, en laat de gebruikers- naam (“Maman”) en het wachtwoord (“123456”) ongewijzigd. U kunt ze later wijzigen in de instellingen.
  • Seite 42 WIFI CONFIGUREREN Als u uw camera wilt gebruiken via het wifi-netwerk, kies “Yes”. Voer het wachtwoord in. Als u uw camera wilt blijven gebruiken met de Ethernet- kabel, druk op “Nee” en sla de volgende stap over...
  • Seite 43 LOSKOPPELEN Koppel de netwerkkabel los en klik op “Next. ” Wacht tot de camera opnieuw opstart. I O Alarm AUDIO...
  • Seite 44 KIJK Uw camera is klaar !
  • Seite 45: Conteúdo Da Embalagem

    CONTEÚDO DA EMBALAGEM - 1 câmara MyiVision - 1 transformador - 1 antena WiFi - 1 sistema de fixação por ventosa - 1 cabo de rede - 2 capas intercambiáveis (branca e preta) INSTALAÇÃO Conecte o cabo fornecido ao router da Internet e à câmara. Fixe a antena WiFi na câmara.
  • Seite 46 TRANSFERÊNCIA Transfira e inicie a app BewellConnect® MyiVision no seu smartphone ou tablet. Ative a ligação WiFi no smartphone ou tablet.
  • Seite 47 ADICIONAR UMA CÂMARA 2 possibilidades para adicionar uma câmara : • Adicione a câmara através do código QR: Leia o código da etiqueta QR (debaixo da câmara) ou digite o número do código manualmente. • Adicione a câmara usando a função de deteção automática: É...
  • Seite 48 CONFIGURAR Atribua um nome à câmara e mantenha o nome de utilizador (“Maman”) e a palavra-passe (“123456”) predefinidos. Estas definições podem ser modificadas posteriormente nos parâmetros de configuração.
  • Seite 49 CONFIGURAR A LIGAÇÃO WIFI Selecione a opção “Yes” se pretender utilizar a câmara através da rede WiFi. Digite a sua palavra-passe. Se pretender continuar a utilizar a câmara com o cabo Ethernet, prima “No” e ignore a etapa seguinte.
  • Seite 50 DESLIGAR Desconecte o cabo de rede e clique em “Next”. Aguarde até que a câmara se reinicie. I O Alarm AUDIO...
  • Seite 51 ATENÇÃO A sua câmara está pronta !
  • Seite 52 ‫محتوى العلبة‬ ‫ل كهربا� ئ‬ ّ ‫- 1 محو‬ noisiViyM ‫- 1 كام� ي ا‬ ‫ي‬ ‫- 1 هوا� ئ ي واي فاي‬ ‫- 1 نظام تعليق باستعمال كوب الشفط‬ )‫- 2 أغطية يمكن تغي� ي هما (أبيض وأسود‬ ‫- 1 سلك شبكة‬ ‫ال�...
  • Seite 53 ‫التحميل‬ .‫ عىل الهاتف الذك ي أو اللوح الرقمي‬appBewellMyiVision ‫تحميل واطالق تطبيق‬ .‫تشغيل الواي فاي عىل الهاتف الذك ي أو اللوح الرقمي‬...
  • Seite 54 ‫إضافة كام� ي ا‬ :‫هناك إمكانيتان ال إ ضافة كام� ي ا‬ ‫ عىل البطاقة (فوق الكام� ي ا) أو إدخال‬QR ‫: يجب مسح كود‬QR ‫• إضافة كام� ي ا باستعمال كود‬ ‫رقم الكود يدويا‬ ‫• إضافة الكام� ي ا باستعمال وظيفة الكشف اال آ ل ي : يمكن أن يكشف الهاتف الذك ي /اللوح الرقمي عن‬ .‫الكام�...
  • Seite 55 ‫ضبط ال إ عدادات‬ .‫) وكلمة الرس ّ (65432) كما هي‬Maman( ‫يجب إعطاء اسم للكام� ي ا وترك اسم المستخدم‬ .‫يمكنكم بعد ذلك تغي� ي ها � ف ي اال إ عدادات‬...
  • Seite 56 ‫ضبط إعدادات الواي فاي‬ .‫) وكلمة الرس ّ (65432) كما هي‬Maman( ‫يجب إعطاء اسم للكام� ي ا وترك اسم المستخدم‬ .‫يمكنكم بعد ذلك تغي� ي ها � ف ي اال إ عدادات‬ ‫إذا كنتم تريدون استعمال الكام� ي ا مع سلك اي� ث نت، اضغطوا عىل “ال” وتجاهلوا الخطوة‬ .‫التالية‬...
  • Seite 57 ‫ضبط ال إ عدادات‬ .‫) وكلمة الرس ّ (65432) كما هي‬Maman( ‫يجب إعطاء اسم للكام� ي ا وترك اسم المستخدم‬ .‫يمكنكم بعد ذلك تغي� ي ها � ف ي اال إ عدادات‬ I O Alarm AUDIO...
  • Seite 58 ‫المشاهدة‬ !‫إن ّ جهاز الكام� ي ا الخاص بكم جاهز‬...