CPS COLOR Corob D50 Bedienerhandbuch
Inhaltsverzeichnis
Verfügbare Sprachen
Verfügbare Sprachen
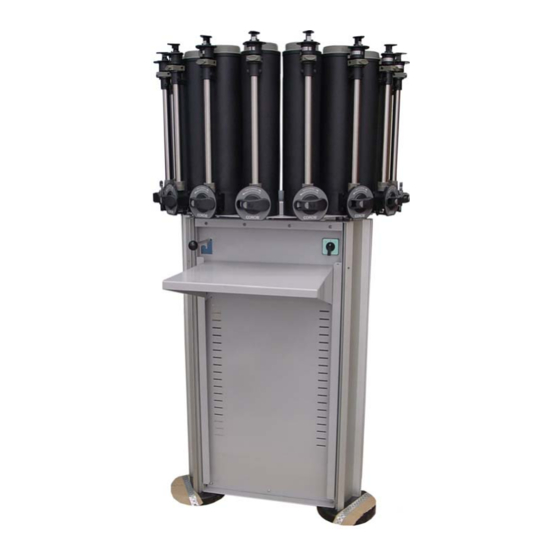
COROB™ D50
Version 1.0 - R0 (October 2006)
Document Code: DU006C0100X5701
Manual Dispenser
Machine à teinter
manuelle
Ручной дозатор
Dispensatore
Manuale
Dosificador Manual
Manuelle
Abtönmaschine
Χειροκίνητος
Διανεμητής
Ръчен дозатор
Manuální
dávkovač
Dozatorul Manual
Ruèni dispenzer
USER'S MANUAL
MANUEL
D'UTILISATION
РУКОВОДСТВО ПО
ЭКСПЛУАТАЦИИ
MANUALE D'USO
Versione ridotta
MANUAL DEL USUARIO
Versión resumida
BEDIENERHANDBUCH
Gekürzte Ausgabe
ΕΓΧΕΙΡΙΔΙΟ ΧΡΗΣΤΗ
Περιληπτική έκδοση
РЪКОВОДСТВО ЗА
ЕКСПЛОАТАЦИЯ
Съкратена версия
UŽIVATELSKÁ
PŘÍRUČKA
Stručná verze
MANUALUL
UTILIZATORULUI
Versiunea prescurtată
UPUTSTVO ZA
UPOTREBU
Skraæena verzija
ENGLISH
FRENCH
FRANÇAIS
RUSSIAN
РУССКИЙ
ITALIAN
ITALIANO
SPANISH
ESPAÑOL
GERMAN
DEUTSCH
GREEK
ΕΛΛΗΝΙΚH
BULGARIAN БЪЛГАРСКИ
CZECH
ČESKY
ROMANIAN
ROMÂNĂ
SERBIAN
SRPSKI
Kapitel
Inhaltsverzeichnis

Inhaltszusammenfassung für CPS COLOR Corob D50
- Seite 1 COROB™ D50 Version 1.0 - R0 (October 2006) Document Code: DU006C0100X5701 Manual Dispenser USER'S MANUAL ENGLISH Machine à teinter MANUEL FRENCH FRANÇAIS manuelle D’UTILISATION РУКОВОДСТВО ПО Ручной дозатор RUSSIAN РУССКИЙ ЭКСПЛУАТАЦИИ Dispensatore MANUALE D’USO ITALIAN ITALIANO Manuale Versione ridotta MANUAL DEL USUARIO Dosificador Manual SPANISH ESPAÑOL...
- Seite 12 Figure 3-4 COROB™ D50...
- Seite 30 BLANK PAGE COROB™ D50...
- Seite 41 Figure 3-4...
- Seite 68 Рис. 3-4 COROB™ D50...
- Seite 76 Колпачок № 9 Резьбовые штифты № 11 Рис. 7-1 Рис. 7-2 COROB™ D50...
- Seite 86 COROB™ D50...
- Seite 95 Deckblech Deckblech Kurbelwelle Kurbelwelle Verschraubungsset für Behältermontage KONTAKT CPS Color Equipment S.p.A. Via Agricoltura 103 • 41038 San Felice s/P • Modena • Italy Phone: + 39-0535-6633 • Fax: + 39-0535-663400 DEUTSCH - GERMAN Version 1.0 - R0 (Oktober 2006)
-
Seite 96: Anweisungen Zur Montage
ANWEISUNGEN ZUR MONTAGE Schritt 1 - Vorbereitung Die Maschine auspacken und darauf achten, die Maschine nicht zu beschädigen. Die Maschine am Arbeitsort aufstellen. Folgende Versorgungsspannungen sind verfügbar: 110V oder 220V. Sicherstellen, dass die Versorgungsspannung des Stromnetzes derjenigen Ihrer erworbenen Maschine entspricht. Die jeweilige Versorgungsspannung ist auf dem Typenschild der Maschine wiedergegeben. -
Seite 97: Vorbereitung Und Dosierung
Den Nylonblock (37) der Einheit montieren, indem der Bolzen in die entsprechend vorgesehenen Bohrungen eingeführt wird. Die Nylonblöcke bei gleichzeitigem Festhalten der Einheit in die Buchsen gleiten lassen. Die Einheit ist montiert, sobald die Nylonblöcke ganz in die Buchsen der Fronttafel eingeführt sind. Der Gebindeträger anheben, bis er sich in eine der entsprechend vorgesehenen Buchsen der Fronttafel einfügt. -
Seite 98: Anweisungen Zur Wartung
Den Ventilhebel im Uhrzeigersinn um 90° Grad drehen und in die Sperrposition bzw. die Dosierstellung bringen. Sicherstellen, dass die Dose unter der Dosierdüse positioniert ist. 10) Den Kolbengriff absenken, damit der Farbstoff abgegeben werden kann. Sicherstellen, dass der Griff gänzlich abgesenkt ist. - Seite 119 Il presente modulo, compilato in ogni sua parte, deve essere inviato a CPS Color Equipment S.p.A. entro 15 giorni dall'installazione. Ce formulaire, rempli dans toutes ses parties, doit être envoyé à la Sté. CPS Color Equipment S.p.A. dans 15 jours de la date d’installation.
- Seite 120 Il presente modulo, compilato in ogni sua parte, deve essere inviato a CPS Color Equipment S.p.A. entro 15 giorni dall'installazione. Ce formulaire, rempli dans toutes ses parties, doit être envoyé à la Sté. CPS Color Equipment S.p.A. dans 15 jours de la date d’installation.