GSD 10FT-3 Montageanleitung
Trampoline with safety net
Quicklinks
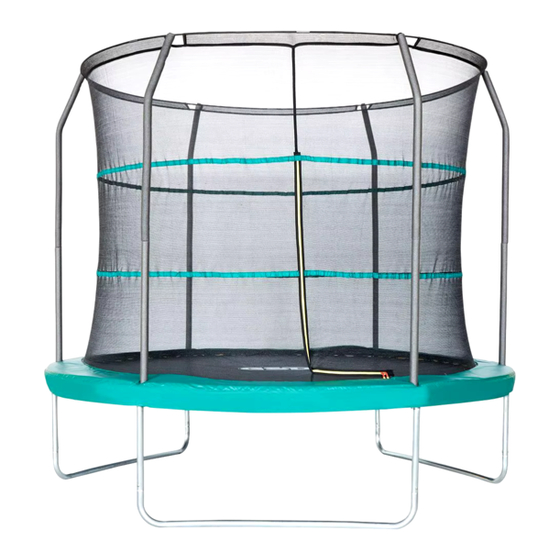
10FT Trampoline with Safety Net
Max User Weight:100kg
Model:GSD10FT-3
Smyths Toys item number : 182655
Smyths Toys HQ UC / Smyths Toys EU HQ UC
Lyrr Building 1, Mervue Business Park, Galway, Ireland, H91K4HV
Lymedale Business Park, Newcastle under Lyme, UK, ST5 9QH.
Please retain this information.
Conserver ces informations.
Bitte diese Informationen aufbewahren.
Bewaar deze informatie.
Conservar esta información.

Inhaltszusammenfassung für GSD 10FT-3
- Seite 1 10FT Trampoline with Safety Net Max User Weight:100kg Model:GSD10FT-3 Smyths Toys item number : 182655 Smyths Toys HQ UC / Smyths Toys EU HQ UC Lyrr Building 1, Mervue Business Park, Galway, Ireland, H91K4HV Lymedale Business Park, Newcastle under Lyme, UK, ST5 9QH. Please retain this information.
- Seite 2 Parts List (Trampoline & net)
- Seite 3 ASSEMBLY INSTRUCTIONS Connect both ends of the Top Rail by attaching to the T-Section (Part 3).Secure parts screwing.Once you have created 3 groups, place them on a safe and flat floor as shown. Connectez les deux extrémités du Top Rail en vous attachant à la section T (partie 3).
- Seite 4 ASSEMBLY INSTRUCTIONS Use the Screw (Part 7/8/9) with a screwdriver to secure the Leg Extension to the U Shaped Leg.Place the U-Shaped Legs (Part 5) on top of the extensions .The Frame of the trampoline should look like the illustration shown in Figure A Utilisez la vis (Partie 7/8/9) avec un tournevis pour fixer l'extension de jambe à...
- Seite 5 ASSEMBLY INSTRUCTIONS Place the Jumping Mat (Part 1) in the middle of the frame and unfold it completely. Put 1 spring beside each T-section.In order to insert the spring properly, hook the curved end to the V-ring of the jumping Mat.
- Seite 6 ASSEMBLY INSTRUCTIONS Please add the springs in order as per the below images. Do not insert the springs at random. Veuillez ajouter les ressorts dans l'ordre selon les images ci-dessous. N'insérez pas les ressorts au hasard Bitte fügen Sie die Federn in der Reihenfolge wie auf den folgenden Bildern hinzu. Setzen Sie die Federn nicht zufällig ein Por favor, agregue los muelles en orden según las siguientes imágenes.
- Seite 7 ASSEMBLY INSTRUCTIONS Position the enclosure poles as shown above. Use bolt (Part7/8/9) to fix connectors T -B. Disposez les montants du filet de protection comme ci-dessus. Fixer les connecteurs T- B avec les boulons(partie7/8/9) Positionieren Sie die Gehäusestangen wie oben gezeigt. Verwenden Sie Schraube (Teil7/8/9), um Die Anschlüsse T -B zu fixieren.
- Seite 8 ASSEMBLY INSTRUCTIONS Unfold the Frame Pad (Part 2) and place it on top of theTop Rail and springs. The skirt of the Frame Pad must cover the Top Rails completely to avoid injury. Dépliez le Frame Pad (Partie 2) et placez-le au-dessus du Top Rail et des ressorts. La jupe du frame Pad doit couvrir complètement les rails supérieurs pour éviter les blessures.
- Seite 9 ASSEMBLY INSTRUCTIONS Insert and assemble the different pieces in the upper part of the netting . Please follor the assembling steps and make sure that the zipper is properly placed outside. Insérer et assembler les différentes pièces dans la partie supérieure du filet. S'il vous plaît follor les étapes d'assemblage et assurez-vous que la fermeture éclair est correctement placé...
- Seite 10 ASSEMBLY INSTRUCTIONS Snap and click all Enclosure Pole caps to the Curved Enclosure Pole. The button must be pushed down, and you will hear a click once successfully attached. Cliquez et cliquez sur toutes les casquettes de pôle d'enceinte pour atteindre le pôle d'enceinte courbé.
- Seite 11 ASSEMBLY INSTRUCTIONS Connect the Straight Enclosure Poles and Curved Enclosure Poles using the Snap and Click mechanism. Button must be pushed down, and you will hear a click once successfully attached.You will have 6 completed Enclosure Poles. Connectez les pôles d'enceinte droite et les pôles d'enceinte courbés à l'aide du mécanisme Snap et Click.
- Seite 12 ASSEMBLY INSTRUCTIONS To keep the net attached to the Jumping Mat, fasten the hooks at the V-Ring as shown.Continue to do this until all hooks on the enclosure are attached in this way.Find all the bottom connecting straps of the trampoline frame pad and secure them by tying them in a not on to the top rails to avoid moving or shuffling when jumping on the trampoline.
- Seite 13 Warning! Max 100 kg. Only for domestic and outdoor use. The trampoline shall be assembled by an adult In accordance with the assembly instructions and thereafter checked before the first use. Only one user. Collision hazard. Always dose the net opening before jumping.
-
Seite 18: Instandhaltung
INSTANDHALTUNG...