Inhaltsverzeichnis
Werbung
Verfügbare Sprachen
Verfügbare Sprachen
Quicklinks
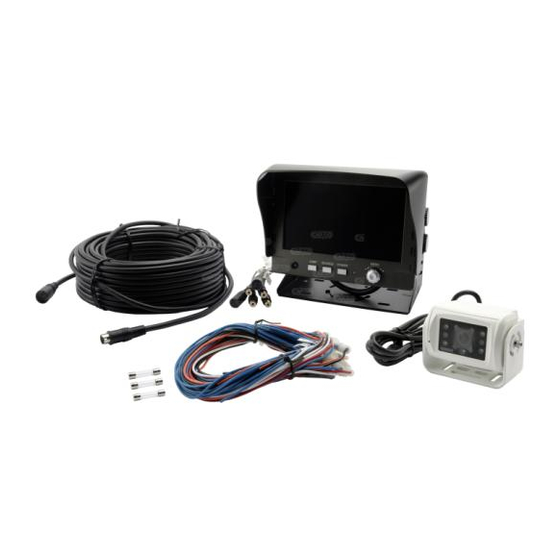
SUPER 7" 4+1 REAR VIEW CAMERA AND MULTIMEDIA KIT
SUPER 7" 4+1 Rückfahr-Kamera mit Multimedia Satz
SYSTÈME D'OBSERVATION 7" 4+1 ET KIT MULTIMEDIA
SUPER 7" 4+1 REAR VIEW CAMERA AND MULTIMEDIA KIT
SUPER 7" 4+1 BAKKAMERA OG MULTIMEDIESÆT
SYSTEM OBSERWACJI PRZESTRZENI Z TYŁU POJAZDU
USER MANUAL, page 2
BEDIENUNGSANLEITUNG, page 17
MANUEL D'UTILISATION, page 32
MANUALE D'USO, page 47
BETJENINGSVEJLEDNING, side 63
INSTRUKCJA OBSŁUGI, side 78
1
160775
Vedpak 98_Version 6_12.2017
Werbung
Kapitel
Inhaltsverzeichnis

Verwandte Anleitungen für hc-cargo 160775


Inhaltszusammenfassung für hc-cargo 160775
- Seite 1 160775 SUPER 7" 4+1 REAR VIEW CAMERA AND MULTIMEDIA KIT SUPER 7” 4+1 Rückfahr-Kamera mit Multimedia Satz SYSTÈME D’OBSERVATION 7” 4+1 ET KIT MULTIMEDIA SUPER 7” 4+1 REAR VIEW CAMERA AND MULTIMEDIA KIT SUPER 7” 4+1 BAKKAMERA OG MULTIMEDIESÆT SYSTEM OBSERWACJI PRZESTRZENI Z TYŁU POJAZDU...
-
Seite 2: Inhaltsverzeichnis
160775 CONTENT: Features ............... 3 Installation of monitor ............3 Signal cable description ............. 3 Control cable description ........... 4 Front panel control ............5 OSD menu - Screen menu ........... 6 Display ................. 7 Mirror function ..............8 Camera ................. 8 Factory default settings ............. -
Seite 3: Features
160775 FEATURES: Advanced OSD Menu for easy use Supports up to 4 CCD Camera inputs (6 pin Mini DIN). Extra RCA input for multimedia (VCD, DVD, Game device). Provide 2 Video / 1 Audio signal output. Support Single / Dual / Triple / Quad Screen (Cam out) Signal Trigger for Rear / Left / Right / AV. -
Seite 4: Control Cable Description
160775 160775 CONTROLCABLE DESCRIPTION: CONTROLCABLE DESCRIPTION: Cable configuration Cable configuration Don’t connect the red wire Don’t connect the red wire (power wire) of this product (power wire) of this product directly to the battery. Connect directly to the battery. the red wire of this product... -
Seite 5: Front Panel Control
160775 FRONT PANEL CONTROL: POWER: Press the POWER button to activate the monitor or to keep the monitor under stand by mode. SOURCE: Press this button to select image sequence CAM ACAM BCAM CCAM R CAM A+B CAM C+R ... -
Seite 6: Osd Menu - Screen Menu
160775 OSD MENU: DISPLAY OSD DISPLAY CAMERA RECALL EXIT Press the MENU button to enter the OSD Menu. Turn the MENU button left or right to select the setting you wish to proceed. The colour of the content will turn yellow to identify your selection. -
Seite 7: Display
160775 Saturation Provide adjustment for the light intensity level of TFT display. Setting value from 0 ~ 100. Default value is 50. Provide adjustment for the lightness and colorfulness level of TFT display. Setting value from 0 ~ 100. Default value is 50. -
Seite 8: Mirror Function
160775 OSD Lock This function provides protection when an unauthorized person tries to access the OSD settings. JUMP and Source key press simultaneously for over 5 seconds to unlock. Default value is OFF. Users must turn on LCD in order to run unlock process. All function buttons are still working during OSD Menu lock up period. - Seite 9 160775 Dir Image The screen image setting of this panel during left / right turn: TRIPLE: When you are making a right turn or left turn, the screen of panel will display triple images for left hand side, right hand side and rear view when you are making a right turn or left turn.
-
Seite 10: Factory Default Settings
160775 Jump By pressing this button, the driver will be able to obtain the image selected under this setting. QUAD Obtain image from all camera input in quad picture while pressing the JUMP button and press again to return the default screen. -
Seite 11: Installation Of Camera
160775 160775 INSTALLATION FOR COLOUR CAMERA INSTALLATION FOR COLOUR CAMERA INSTALLATION CAUTION INSTALLATION CAUTION With standard mounting bracket and fasteners included in With standard mounting bracket and fasteners included in 1. Adjust the camera angle so that the rear bumper or the the package, the camera can be mounted firmly 1. -
Seite 12: Setting Of Distance Gauges
160775 160775 160775 VEHICLE INSTALLATION: VEHICLE INSTALLATION: VEHICLE INSTALLATION: Install camera R (for rear view). Install camera R (for rear view). Install camera R (for rear view). Use a measuring tool to mark out the distance behind the vehicle. Use a measuring tool to mark out the distance behind the vehicle. -
Seite 13: Monitor Specifications
160775 MONITOR SPECIFICATIONS: Screen size 7" (Diagonal) 16:9. Active area 154.08 x 86.58 mm. Pixel configuration 0.107 x 0.370. Resolution 2400 x 480. Viewing angle 60°. Power source DC 9.6 V. ~ DC 32 V. Contrast ratio 500:1. Brightness 400 cd/cm². Input Interface Composite connector RCA. - Seite 14 160775 160775 Camera Mirror (M) / Normal (N) adjustment Camera Mirror (M) / Normal (N) adjustment For mirror function - For mirror function - Turn arrow to M. Turn arrow to M. For normal function - For normal function - Turn arrow to N.
-
Seite 15: Camera Specifications
160775 CAMERA SPECIFICATIONS Pick-up Device ..........1/3" interline transfer CCD Total Pixels ............NTSC:537(H) x 505(V) PAL:537(H) x 597(V) Effective Pixels ..........NTSC:510(H) x 492(V) PAL:500(H) x 582(V) Resolution .............W/ 420 TV lines Sync, System ..........Internal Scanning System ..........2:1 Interlace S/N Ratio ............More than 45dB (AGC OFF) Electronic Shutter ...........Auto Electronic Shutter 1/60 (1/50) ˜... -
Seite 16: Accessories
20 mtr. 160663 Trailer cable Kit. W/ 3.5 mtr. coiled cable. 160603 Connection cable from 6 PIN MINI DIN to RCA. Switch w/ location and function light. Symbolplates for HC-CARGO 180206 and 180207. ON/OFF. Green. 181462 12 V. Red. 180206... -
Seite 17: Packungsinhalt
160775 INHALT: Besonderheiten ........... 18 Einbau des Monitors ..........18 Signalkabelbeschreibung ........18 Kontrollkabelbeschreibung ........19 Schalter und Bedienung ......... 20 OSD-Menü - Anzeige ..........21 Anzeige ............. 21 Spiegelfunktion ............ 23 Kamera .............. 23 Werkseinstellungen ..........26 Kamera - Ausgang ..........24 OSD - Anzeige verlassen ......... -
Seite 18: Besonderheiten
160775 160775 BESONDERHEITEN: besonderheiten: Erweitertes OSD-Menü für einfache Bedienung Erweitertes OSD-Menü für einfache Bedienung Unterstützt bis zu 4 CCD Kameraeingänge (6 pin Mini DIN). Unterstützt bis zu 4 CCD Kameraeingänge (6 pin Mini DIN). Extra RCA-Eingang für Multimedia (VCD, DVD, Spielekonsole). -
Seite 19: Kontrollkabelbeschreibung
160775 160775 ANSCHLUSSKABELBELEGUNG: anschlusskabelbelegung: Kabelkonfiguration Kabelkonfiguration Schließen Sie das rote Kabel Schließen Sie das rote Kabel (Spannungsversorgung) der (Spannungsversorgung) der Kontrolleinheit nicht direkt Kontrolleinheit nicht direkt an die Fahrzeugbatterie an die Fahrzeugbatterie an. Schließen Sie das rote an. Schließen Sie das rote... -
Seite 20: Schalter Und Bedienung
160775 BILDSCHIRMBEDIENUNG: POWER: POWER Schalter zum aktivieren des Monitors oder in den Stand-By Modus zu schalten. SOURCE: Source Schalter zum Auswählen der Bildsequenz CAM A+B g CAM C+R g CAM ACAM BCAM CCAM R CAM A+B CAM C+R CAM A+RCAM R+BCAM A+CCAM C+B CAM R/AB CAM R+ABCAM A……... -
Seite 21: Osd-Menü - Anzeige
160775 OSD MENU: DISPLAY OSD DISPLAY CAMERA RECALL EXIT Drücken Sie den MENÜ-Schalter um das OSD Menu aufzurufen. Drehen Sie den MENÜ-Schalter links oder rechts um die Einstellungen auszuwählen die Sie benötigen. Um das Identifizieren einfacher zu gestalten, wird der jeweilige Menü-Punkt mit einem gelben Streifen hinterlegt. - Seite 22 160775 Saturation (Sättigung) Ermöglicht Anpassung der Lichtintensität des TFT-Displays. Der voreingestellte Wert ist 50. Der einstellbare Wert geht von 0-100. Hue (Farbtonabweichung): Ermöglicht Anpassung der Farbtöne des TFT-Displays. Der voreingestellte Wert ist 50. Der einstellbare Wert geht von 0-100. (Nur bei NTSC-System verfügbar.) Sharpness (Kantenschärfe)
-
Seite 23: Spiegelfunktion
160775 OSD Sperre Diese Funktion schützt vor einem nicht authorisierten Zugriff auf die OSD-Einstellungen. JUMP und Source Knöpfe gleichzeitig für länger als 5 Sekunden drücken, um die Sperre aufzuheben. Standardeinstellung ist OFF. Das LCD muss eingeschaltet sein, um die Sperre aufzuheben. Alle Funktionsknöpfe funktionieren, wenn das OSD Menü gesperrt ist. -
Seite 24: Kamera - Ausgang
160775 Richtungsbild Einstellung des beim Abbiegen gezeigten Bildes: TRIPLE: Beim Recht- oder Linksabbiegen zeigt der Bildschirm ein dreifaches Bild – linke Seite, rechte Seite und hinten. DUAL: Bei richtiger Verkabelund zwigt der Bildschirm ein doppeltes Bild - Sowohl beim Rechts- wie beim Linksabbiegen werden linke und rechte Seite gezeigt. - Seite 25 160775 Jump Indem Sie diesen Schalter drücken, wird der Treiber im Stande sein, das unter dieser Einstellung ausgewählte Bild zu erhalten. Grundeinstellung: CAM QUAD. QUAD Indem Sie den ”JUMP” Schalter drücken, erhalten Sie im CAM QUAD-Modus alle Bilder in der Vierer-Anzeige auf dem Bildschirm, nach nochmaligem Schalten kehren Sie in die Grundeinstellung zurück.
-
Seite 26: Werkseinstellungen
160775 160775 INSTALLATION FOR COLOUR CAMERA INSTALLATION DER FARBKAMERA: Mit dem Standard Befestigungshalter und dem im Paket beigelegten Zubehörsatz kann die Kamera fest an der erforderlichen Position des Fahrzeugs befestigt werden. INSTALLATION CAUTION With standard mounting bracket and fasteners included in 1. -
Seite 27: Einstellung Der Entfernungsanzeige
160775 160775 160775 VEHICLE INSTALLATION: FAHRZEUGINSTALLATION: VEHICLE INSTALLATION: 1. Installation der Kamera R (Für Rückwärtige Ansicht) Install camera R (for rear view). Install camera R (for rear view). Use a measuring tool to mark out the distance behind the vehicle. -
Seite 28: Monitoreigenschaften
160775 MONITOREIGENSCHAFTEN: Bildschirmgröße 7" (Diagonal) 16:9. Aktive Umgebung 154.08 x 86.58 mm. Pixel-Konfiguration 0.107 x 0.370. Auflösung 2400 x 480. Betrachtungswinkel 60°. Spannungsbereich DC 9.6 V. ~ DC 32 V. Kontrastverhältnis 500:1. Helligkeit 400 cd/cm². Eingangsschnittstelle Gemischte Steckverbinder RCA. Eingangssignal 1 Vpp. - Seite 29 160775 160775 Kamera Spiegel (M) / Normal (N) Einstellung Camera Mirror (M) / Normal (N) adjustment For mirror function - Für Spiegelfunktion - Turn arrow to M. Pfeil drehen auf M. For normal function - Für normale Funktion - Pfeil drehen auf N.
-
Seite 30: Kameraspezifikationen
160775 KAMERASPEZIFIKATIONEN Bildsensor ............1/3" interline transfer CCD Bildpunkte ............NTSC:537(H) x 505(V) PAL:537(H) x 597(V) Sichtbare Bildpunkte ........NTSC:510(H) x 492(V) PAL:500(H) x 582(V) Auflösung .............W/ 420 TV lines Synchronisation ..........Intern Abtastsystem ..........2:1 Verhältnis .............Mehr als 45dB (AGC AUS) Verschluss Kontrolle ........Auto Electronic Shutter 1/60 (1/50) ˜ 1/100,000 sec. -
Seite 31: Zubehör
160775 ZUBEHÖR: 160610 Kamera, A.D. 30 mm. L. 70 mm. Weitsichtwinkel 130° diagonal. 160796 Kamera mit Infrarot LED’s für Nachtsicht. Weitsichtwinkel, 112° horizontal, 91° vertikal, 156° diagonal. 160790 Kamera, A.D. 30 mm. L. 65 mm. Weitsichtwinkel 130° diagonal. 170942 Magnetsockel in Metallausführung für Kamera. -
Seite 32: Contenu De La Boîte
160775 CONTENU: Caractéristiques ............. 33 Installation de l’écran ............33 Description du câble de signal ..........33 Description du câble de contrôle ........34 Control du tableau de bord..........35 Menu OSD, Screen menu ........... 36 Affichage ..............37 Fonction miroir .............. 38 Camera ................ -
Seite 33: Caractéristiques
160775 160775 CARACTERISTIQUES: CARACTERISTIQUES: Menu OSD avancé pour la facilité d'utilisation Menu OSD avancé pour la facilité d'utilisation Possible jusqu’à 4 entrées de caméra de CCD (6PIN MINI DIN). Possible jusqu’à 4 entrées de caméra de CCD (6PIN MINI DIN). -
Seite 34: Description Du Câble De Contrôle
160775 160775 DESCRIPTION DES CÂBLES DE CONTRÔLE: dEsCriPTiON dEs CÂblEs dE CONTrÔlE: Configuration câble Configuration câble Ne branchez pas le fil Ne branchez pas le fil rouge rouge directement sur la directement sur la batterie batterie mais sur le plus mais sur le plus après contact... -
Seite 35: Control Du Tableau De Bord
160775 COMMANDE DES TOUCHES DE L’ÉCRAN: POWER: Appuyer sur le Bouton POWER pour activer le moniteur et le laisser sur tension. SOURCE: Appuyer sur ce bouton pour sélectionner des séquences d’images de la caméra CAM ACAM BCAM CCAM R CAM A+B CAM C+R ... -
Seite 36: Menu Osd, Screen Menu
160775 MENU OSD: DISPLAY OSD DISPLAY CAMERA RECALL EXIT Appuyez sur le bouton de menu pour écrire le menu d’OSD. Tournez le bouton de MENU gauche ou droit pour choisir la fonction que vous souhaitez voir. La couleur du contenu sera jaune pour identifier votre choix. -
Seite 37: Affichage
160775 Saturation Réglage de l’intensité lumineuse de l’afficheur TFT. Réglage de la valeur de 0 ~ 100. Valeur par défaut à 50. Réglage de luminosité et saturation de l’afficheur TFT. Réglage de la valeur de 0 ~ 100. Valeur par défaut à 50. (disponible uniquement sur les systèmes NTSC). Sharpness Réglage du contraste des contours (netteté) de l’afficheur TFT. Valeur de réglage de 0 à 100. La valeur par défaut est de 50. -
Seite 38: Fonction Miroir
160775 OSD Lock Cette fonction est une protection lorsqu’une personne non autorisée essaie d’accéder aux réglages OSD. Pour déverrouiller, appuyer simultanément sur les touches JUMP et Source pendant plus de 5 secondes. La valeur par défaut est de ”OFF”. Pour la procédure de déverrouillage, l’utilisateur doit allumer l’écran LCD. Tous les boutons de fonction continue de fonctionner pendant le verrouillage de menu OSD. - Seite 39 160775 Image de direction [Dir image] Réglage d'image de l'écran de cette fenêtre pendant un changement de direction à gauche / droite : TRIPLE : lorsque vous effectuez un changement de direction à gauche ou à droite, l'écran du panneau affiche 3 images pour les vues gauches, droite et arrière. DUAL : Avec un câblage correct, l'écran affiche une image double constituée des vues arrière et droite lorsque vous effectuez un changement de direction à droite. Si vous tournez à gauche, l'écran affiche une image double constituée des vues arrière et gauche. SINGLE : L'écran n'affiche que l'image correspondant aux changement de direction. L'écran affiche uniquement la vue gauche si vous tournez à gauche et la vue droite si vous tournez à droite. La valeur par défaut est "SINGLE ».
-
Seite 40: Réglage Par Défaut
160775 Jump En appuyant sur ce bouton, le conducteur pourra obtenir l’image choisit. Par Défaut: CAME SEQ. QUAD Obtenez les images de tous les caméras connectés soit 4 images, en appuyant sur le bouton JUMP et appuyer encore une fois pour retourner en image normale. -
Seite 41: Installation De La Caméra
160775 160775 INSTALLATION DE LA CAMERA COULEUR: INSTALLATION FOR COLOUR CAMERA INSTALLATION Le support et les attaches standard étant inclus dans le paquet la caméra peut être montée fermement INSTALLATION CAUTION à la position exigée du véhicule. With standard mounting bracket and fasteners included in 1. -
Seite 42: Réglage Des Mesures De Distance
160775 160775 INSTALLATION SUR LE VEHICULE: VEHICLE INSTALLATION: Installer la CAMERA R (pour la vue arrière). Install camera R (for rear view). Utilisez un outil de mesure pour marquer à l’extérieur la distance derrière le véhicule. Use a measuring tool to mark out the distance behind the vehicle. -
Seite 43: Spécifications De L'écran
160775 SPECIFICATIONS DE L’ECRAN: Taille de l’écran 7" (Diagonal) 16:9. Secteur actif 154.08 x 86.58 mm. Configuration Pixel 0.107 x 0.370. Résolution 2400 x 480. Angle de vue 60°. Alimentation DC 9.6 V. ~ DC 32 V. Ratio contraste 500:1. Luminosité 400 cd/cm². - Seite 44 160775 160775 (M) Camera Miroir / Ajustement Normal (N) Camera Mirror (M) / Normal (N) adjustment Pour fonction mirior For mirror function - Turn arrow to M. Tourner la fléche sur le M. For normal function - Pour fonction normale - Turn arrow to N.
-
Seite 45: Spécifications De La Caméra
160775 SPECIFICATIONS DE LA CAMERA Appareil Pick-up..........1/3" interline transfer CCD Total Pixels ...........NTSC:537(H) x 505(V) PAL:537(H) x 597(V) Effective Pixels ..........NTSC:510(H) x 492(V) PAL:500(H) x 582(V) Resolution ............W/ 420 TV lines Sync, System ..........Internal System Scannage ..........2:1 Interlace S/N Ratio ............More than 45dB (AGC OFF) Obturateur Électronique ........Obturateur électronique auto 1/60 (1/50) ˜... -
Seite 46: Accessoires
160775 ACCESSOIRES: 160610 Caméra, D.E. 30 mm. L. 70 mm. Large angle de vue, 130° en diagonal. 160796 Camera avec LED infrarouge pour vision de nuit. Large angle de vue, 112° à l’horizontal, 91° à la vertical, 156° en diagonal. -
Seite 47: Contenuto Confezione
160775 INDICE: Caratteristiche ............... 48 Installazione monitor ............48 Descrizione cavi segnale ........... 48 Descrizione cavi controllo ..........49 Pannello frontale controllo ..........50 OSD (On Sceen Display) menu, Screen menu ......51 Display ................. 52 Funzione specchio ............53 Telecamera .............. -
Seite 48: Caratteristiche
160775 160775 CARATTERISTICHE: Menu OSD avanzato per un facile utilizzo Supporta più di 3 CCD (Charge Coupled Device) ingressi telecamera (6 pin Mini DIN). CARATTERISTICHE: Ingresso multimediale extra RCA (VCD, DVD, Videogiochi). Menu OSD avanzato per un facile utilizzo Uscite 2/Video, 1/Audio. -
Seite 49: Descrizione Cavi Controllo
160775 160775 DESCRIZIONE CAVI CONTROLLO: DESCRIZIONE CAVI CONTROLLO: Cable configuration Cable configuration Non collegare il cavo Non collegare il cavo rosso rosso (alimentazione) (alimentazione) direttamente direttamente alla batteria alla batteria ma all’interruttore ma all’interruttore sotto sotto chiave (ACC). chiave (ACC). -
Seite 50: Panello Di Controllo
160775 PANELLO DI CONTROLLO: POWER: Spingere il pulsante POWER per accendere il monitor o mantenerlo in modalità STAND BY. SOURCE: Premere il pulsante per selezionare la sequenza immagini CAM ACAM BCAM CCAM R CAM A+B CAM C+R CAM A+RCAM R+BCAM A+CCAM C+B CAM R/AB ... -
Seite 51: Osd (On Sceen Display) Menu, Screen Menu
160775 MENU OSD: DISPLAY OSD DISPLAY CAMERA RECALL EXIT 1. Premere il selettore MENU per entrare nel MENU OSD. 2. Ruotare il selettore MENU a destra o sinistra per selezionare la voce interessata, la quale cambierà colore diventando gialla. 3. Premere nuovamente il selettore MENU, la voce selezionata cambierà di colore da giallo a rosso e si entra nel programma. -
Seite 52: Display
160775 Saturation Consente di regolare il livello di intensità luminosa del display TFT. Regolazione da 0 a 100. standard 50. Consente di regolare il livello di luminosità e colore del display TFT. Regolazione da 0 a 100. standard 50. (Disponibile solo con sistemi NTSC.) Sharpness Consente di regolare il livello di contrasto (acutanza) del display TFT. -
Seite 53: Funzione Specchio
160775 OSD Lock Questa funzione garantisce la protezione quando una persona non autorizzata cerca di accedere alle impostazioni OSD: Premere simultaneamente i tasti JUMP e Source per più di 5 secondi per sbloccare. Il valore predefinito è OFF. L’utente deve accendere il display LCD per eseguire la procedura di sblocco. Tutti i pulsanti funzione sono ancora funzionanti durante il periodo di blocco Menu OSD. - Seite 54 160775 Immagine Dir L'impostazione dell'immagine a schermo durante la svolta a sinistra o a destra. TRIPLE: Durante la svolta a destra o a sinistra, lo schermo del pannello visualizza un'immagine tripla per il lato sinistro, quello destro e quello posteriore.
-
Seite 55: Impostazioni Di Fabbrica
160775 Jump Premendo questo pulsante, l’autista è in grado di ottenere una sequenza di immagini. Standard: CAM QUAD. QUAD Immagini da tutte le telecamere in QUAD, mentre premendo JUMP due volte torna all’impostazione standard. SEQ. Corrisponde all’impostazione SEQ. Timer Step” per saltare di canale per sequenza temporale. -
Seite 56: Uscita Osd
160775 Information Questo menu contiene le funzioni Recall e Exit. Recall Usare questa funzione per ripristinare le impostazioni Standard di fabbrica. Exit Usare questa funzione per uscire dall’ OSD menu. Nota: La versione firmware viene visualizzata nell’ultima colonna. Vedpak 98_Version 6_12.2017... -
Seite 57: Installazione Telecamera
160775 160775 INSTALLAZIONE TELECAMERA A COLORI: INSTALLATION FOR COLOUR CAMERA INSTALLATION CAUTION With standard mounting bracket and fasteners included in INSTALLAZIONE TELECAMERA A COLORI 1. Adjust the camera angle so that the rear bumper or the the package, the camera can be mounted firmly Con il supporto e i fissaggi in dotazione, la telecamera può... -
Seite 58: Calibratura Distanza Retro
160775 160775 VEHICLE INSTALLATION: INSTALLAZIONE SUL VEICOLO: Installare la telecamera R (per visione posteriore). Install camera R (for rear view). Usare uno strumento di misura per segnale a terra le distanze dal veicolo (1-2-3 mtr.). Use a measuring tool to mark out the distance behind the vehicle. -
Seite 59: Specifiche Monitor
160775 SPECIFICHE MONITOR: Misura schermo 7" (diagonale) 16:9. Area Attiva 154.08 x 86.58 mm. Pixel 0.107 x 0.370. Risoluzione 2400 x 480. Angolo visivo 60°. Alimentazione DC 9.6 V - DC 32 V. Rapporto contrasto 500:1. Luminosità 400 cd/cmq. Interfaccia Ingresso Connettori misti RCA. - Seite 60 160775 160775 Impostazione Telecamera Normale (N) / Specchio (M) Camera Mirror (M) / Normal (N) adjustment Per la funzione Specchio - For mirror function - ruotare la Freccia su M. Turn arrow to M. Per la funzione Normale - For normal function - ruotare la funzione su N Turn arrow to N.
-
Seite 61: Specifiche Telecamera
160775 SPECIFICHE TELECAMERA Sistema Pick-Up ........Trasferimento intralinee CCD 1/3" Pixels totali ..........NTSC:537(H) x 505(V) PAL:537(H) x 597(V) Pixels effettivi ......... NTSC:510(H) x 492(V) PAL:500(H) x 582(V) Risoluzione ..........Con 420 TV linee Sinc. Sistema ........... Interno Sistema scansione ........Interfaccia 2:1 S/N Proporzione ........ -
Seite 62: Accessori
160775 ACCESSORI: 160610 Telecamera D.E. 30 mm. L. 65 mm. Visione grandangolo, 130° diagonale. 160796 Telecamera con LED’s infrarossi per visione notturna. Visione grandangolo, 112° orizzontale, 91° verticale, 156° diagonale. 160790 Telecamera D.E. 30 mm. L. 65 mm. Visione grandangolo, 130° diagonale. - Seite 63 160775 INDHOLD: Oversigt over funktioner ............ 64 Installation af monitor ............64 Beskrivelse af signalkabler ..........64 Beskrivelse af kontrolkabler ..........65 Beskrivelse af frontpanel............ 66 Skærmmenu ..............67 Indstilling af display ............68 Valg af spejlfunktion ............69 Valg af kamera ..............69 Valg af fabriksindstilling .............
- Seite 64 160775 160775 OVERSIGT OVER FUNKTIONER: OVERSIGT OVER FUNKTIONER: Tilslutningsmuligheder: Tilslutningsmuligheder: 4 kameraer (6 pin Mini DIN stik). 4 kameraer (6 pin Mini DIN stik). 1 kamera eller GPS, DVD, Spil i RCA stik. 1 kamera eller GPS, DVD, Spil i RCA stik.
-
Seite 65: Funktion
160775 160775 KONTROLKABLER: KONTROLKABLER: Fordeling af ledere i multistikket Fordeling af ledere i multistikket Undgå at tilslutte den Undgå at tilslutte den røde røde ledning direkte til ledning direkte til batteriet, batteriet, det kan i værste det kan i værste fald være fald være anledning til... -
Seite 66: Front Panel
160775 FRONTPANEL: POWER: Tryk på POWER-knappen for at aktivere monitoren eller sætte den på Stand-by. SOURCE: Tryk på source knappen for at vælge billedkombinationer i denne rækkefølge: CAM ACAM BCAM CCAM R CAM A+B CAM C+R CAM A+RCAM R+BCAM A+CCAM C+B CAM R/AB ... - Seite 67 160775 SKÆRMMENU: DISPLAY OSD DISPLAY CAMERA RECALL EXIT Tryk på Menu-knappen for at aktivere skærm-menuen. Drej Menu-knappen mod højre eller venstre for at vælge Menu-punkt. Farven på det valgte punkt skifter til gul for at indikere valget. Tryk igen på menu-knappen hvorefter den gule farve dækker værdien.
- Seite 68 160775 Saturation Indstilling af farvemætning Indstillingsområde 0 ~ 100. Standard: 50. Justering af farvenuancer mellem lyse og mørke områder. Indstillingsområde 0 ~ 100. Standard: 50. (Det punkt kan kun justeres i forbindelse med et NTSC kamera) Sharpness Justering af billedskarpheden.
- Seite 69 160775 OSD Lock Denne funktion forhindrer at uvedkomne kan ændre på indstillingen af skærmen. Når OSD Lock er aktiveret kan den deaktiveres ved samtidig at trykke på JUMP- og SOURCE knappen i min. 5 sekunder. Standardindstilling: OFF Return Returner til hovedmenuen CAMERA Menu Denne menu omfatter bl.a.
- Seite 70 160775 Dir Image Valgmuligheder: single, dual og triple Ved indstilling ”single” vises billedet fra det kamera hvis triggerkabel er aktiveret. Ved indstilling ”dual” vises en kombination af billedet fra kamera R og et sidekamera A/B Ved indstilling ”triple” vises en kombination af billeder fra kamera R / A/ B...
- Seite 71 160775 Jump Ved hjælp af denne indstilling kan man vælge hvilken billedkombination man ønsker at se når man bruger Jump knappen. Standard indstilling er CAM QUAD CAM QUAD Viser alle 4 kameraer i et 4-delt billede. SEQ. Afhængig af indstilling af ” SEQ Time step” vises billederne fra alle kameraer I følgende rækkefølgeA/B/C/R...
- Seite 72 160775 160775 INSTALLATION AF KAMERA INSTALLATION FOR COLOUR CAMERA INSTALLATION CAUTION With standard mounting bracket and fasteners included in INSTALLATION 1. Adjust the camera angle so that the rear bumper or the the package, the camera can be mounted firmly...
- Seite 73 160775 160775 INDSTILLING AF BAKKAMERA: VEHICLE INSTALLATION: Install camera R (for rear view). Ved aktivering at triggerkablet til bakkameraet vises billedet altid i 4:3 format for at få det rigtige størrelsesforhold. Use a measuring tool to mark out the distance behind the vehicle.
- Seite 74 160775 MONITOR SPECIFIKATIONER: Format 7” (Diagonal) 16:9. Skærmstørrelse 154.08 x 86.58 mm. Opløsning (pixels) 0.107 x 0.370. Opløsning (tv linier) 2400 x 480. Synsvinkel 60°. Spænding DC 9.6 V. ~ DC 32 V. Kontrast 500:1. Lysstyrke 400 cd/cm². Input Interface Composite stik: RCA.
- Seite 75 160775 160775 Indstilling af spejl (M) / Normal (N) funktion Camera Mirror (M) / Normal (N) adjustment Drej pilen til M for at For mirror function - aktivere spejlfunktion Turn arrow to M. For normal function - Drej pilen til N for at Turn arrow to N.
- Seite 76 160775 KAMERA SPECIFIKATIONER Pick-up Device ..........1/3" interline transfer CCD Total Pixels ............NTSC:537(H) x 505(V) PAL:537(H) x 597(V) Effective Pixels ..........NTSC:510(H) x 492(V) PAL:500(H) x 582(V) Resolution .............W/ 420 TV lines Sync, System ..........Internal Scanning System ..........2:1 Interlace S/N Ratio ............More than 45dB (AGC OFF) Electronic Shutter ...........Auto Electronic Shutter 1/60 (1/50) ˜...
-
Seite 77: Ekstraudstyr
160775 EKSTRAUDSTYR: 160610 Kamera, udv. Dia. 30 mm. L. 70 mm. 160796 Vidvinkel 130° diagonal. Kamera med infrarød belysning og lyd. Vidvinkel 112° horisontal, 91° vertikal, 156° diagonal. 160790 Kamera, udv. Dia. 21 mm. L. 40 mm. Vidvinkel , 170° diagonal. - Seite 78 160775 SPIS TREŚCI: Charakterystyka urządzenia ..........79 Podłączenie monitora ............79 Opis kabla sygnałowego ............. 79 Opis wiązki zasilającej ............80 Panel kontrolny ............... 81 Menu OSD, Menu SCREEN ............ 82 Menu DISPLAY ..............83 Menu CAMERA, Mirror ............84 Jump ................86 Instalacja kamery ............87 Instalacja w pojeździe ............
-
Seite 79: Oversigt Over Funktioner
160775 160775 OVERSIGT OVER FUNKTIONER: Tilslutningsmuligheder: CHARAKTERYSTYKA URZĄDZENIA: 4 kameraer (6 pin Mini DIN stik). Zaawansowane Menu OSD łatwe w użyciu 1 kamera eller GPS, DVD, Spil i RCA stik. Obsługuje do 4 niezależnych kamer (6-pinowe złącze typu Mini DIN). Udgange: 2 stk. Video + 1 Audio. Dodatkowe wejście RCA dla multimediów (VCD, DVD, konsola do gier). Triggerkabler til bakkamera / venstre / højre / AV. -
Seite 80: Opis Wiązki Zasilającej
160775 160775 OPIS WIĄZKI ZASILAJĄCEJ: OPIS WIĄZKI ZASILAJĄCEJ: Konfiguracja wiązki: Konfiguracja wiązki: Pomarańczowy Nie podłączaj czerwonego Pomarańczowy Nie podłączaj czerwonego przewodu (zasilanie) przewodu (zasilanie) bezpośrednio do bezpośrednio do akumulatora pojazdu. akumulatora pojazdu. Czarny Czarny Podłącz czerwony przewód Podłącz czerwony przewód do terminala ACC w stacyjce. do terminala ACC w Inne podłączenie urządzenia... -
Seite 81: Panel Kontrolny
160775 PANEL KONTROLNY: POWER: Naciśnięcie przycisku POWER spowoduje włączenie monitora lub jego przejście w stan czuwania. SOURCE: Naciskanie przycisku powoduje zmianę źródła wyświetlanych obrazów wg następującej kolejności CAM ACAM BCAM CCAM R CAM A+B CAM C+R CAM A+RCAM R+BCAM A+CCAM C+B CAM R/AB CAM R+ABCAM A…… Jeżeli zaciągnięty jest hamulec ręczny, wtedy naciskanie przycisku powoduje zmianę źródła wyświetlanych obrazów wg następującej kolejności AVCAM A+BCAM C+RCAM A+RCAM R+BCAM A+C CAM C+BCAM R/ABCAM R+ABCAM ACAM BCAM C CAM R AV…….. -
Seite 82: Menu Osd, Menu Screen
160775 MENU OSD: DISPLAY OSD DISPLAY CAMERA RECALL EXIT 1. Naciśnij przycisk MENU, aby włączyć menu OSD. 2. Obracając pokrętłem MENU w lewo lub prawo wybierz odpowiednią opcję menu. Aktywna opcja menu jest podświetlona na żółto. 3. Przytrzymaj naciśnięty przycisk MENU do momentu aż kolor podświetlenia zmieni się z żółtego na czerwony i będzie można zmieniać ustawienia systemowe. Obracając pokrętłem MENU w lewo lub prawo wybierz odpowiednią wartość. Menu SCREEN To menu zawiera różne ustawienia dla wyświetlacza LCD TFT. Brightness: Zapewnia dostrojenie jasności obrazu na wyświetlaczu TFT. Zakres wartości od 0 do 100. Wartość domyślna 50. Contrast: Zapewnia dostrojenie kontrastu pomiędzy jasnymi i ciemnymi obszarami na wyświetlaczu TFT. Zakres wartości od 0 do 100. Wartość domyślna 50. Vedpak 98_Version 6_12.2017... -
Seite 83: Menu Display
160775 Saturation Zapewnia regulację poziomu intensywności światła wyświetlacza TFT. Zakres wartości od 0 do 100. Wartość domyślna 50. Zapewnia regulację poziomu jasności i czystości koloru wyświetlacza TFT. Zakres wartości od 0 do 100. Wartość domyślna 50. (Dostępne tylko w systemie NTSC.) Sharpness Zapewnia regulację poziomu kontrastu krawędzi (ostrości zarysów obrazu) wyświetlacza TFT. Zakres wartości od 0 do 100. Wartość domyślna 50. Return Powraca do ekranu wyboru menu OSD. DISPLAY Menu To menu zawiera identyfikację na ekranie oraz opcję aktywacji wskaźnika odległości. Auto Day&Night Wybierz “ON”, aby aktywować funkcję auto day & night lub “OFF”, aby ją dezaktywować. Wartość domyślna to "OFF". Display: Wybierz “ON”, aby wyświetlać na ekranie źródło aktualnie wyświetlanego obrazu lub “OFF”, aby ukryć te informację. Wartość domyślna “ON”. Distance Gauge: Wybierz “ON” aby pokazać pomiar odległości do przeszkody podczas manewru cofania lub “OFF”, aby wyłączyć pomiar odległości. Wartość domyślna “ON”. Vedpak 98_Version 6_12.2017... -
Seite 84: Menu Camera, Mirror
160775 OSD Lock Ta funkcja zabezpiecza przed nieautoryzowanym dostępem do ustawień OSD. Aby odblokować, przytrzymaj jednocześnie przez ponad 5 sekund przyciski JUMP i Source. Wartość domyślna to ”OFF”. Użytkownik musi włączyć LCD, aby uruchomić proces odblokowania. Wszystkie przyciski funkcyjne podczas blokady menu OSD działają. Return Powraca do ekranu wyboru menu OSD. CAMERA Menu To menu zawiera ustawienia kamery i funkcji JUMP. MIRROR: Wybierz “ON” aby aktywować funkcję lusterka wstecznego dla poszczególnych kamer lub “OFF” dla normalnej pracy kamery. Poniżej znajdują się wartości domyślne. CAM A ”OFF” CAM B ”OFF”... - Seite 85 160775 Dir Image Ustawienie obrazu na tym panelu podczas skrętu w lewo / prawo: POTRÓJNE: Podczas skręcania w prawo lub w lewo, ekran panelu wyświetli potrójne obrazki dla strony lewej, prawej oraz widoku z tyłu. PODWÓJNE: Przy prawidłowym okablowaniu, ekran wyświetli podwójny obraz dla widoku z tyłu oraz skrętu w prawo (przy skręcaniu w prawo). Przy prawidłowym okablowaniu, ekran wyświetli podwójny obraz dla widoku z tyłu oraz skrętu w lewo. POJEDYNCZY: Ekran pokazuje jedynie obrazek kierunku skrętu. Ekran pokaże jedynie widok z lewej strony przy skręcaniu w lewo, a z prawej strony, przy skręcaniu w prawo. Wartość domyślna to POJEDYNCZE. Konfiguracja podglądu z tyłu: Ustawienie obrazu na tym panelu podczas cofania: R: Ekran wyświetli jedynie pojedynczy obraz z kamery R. R+A: Ekran wyświetli podwójny obraz z kamery R i A. R+B: Ekran wyświetli podwójny obraz z kamery R i B. R/AB Ekran wyświetli potrójny obraz z kamery R ` A ` B. CA M R CA M A...
-
Seite 86: Jump
160775 Jump Naciskając przycisk JUMP, kierowca będzie mógł uzyskać obraz zaprogramowany w tym miejscu. Domyślna wartość: CAM QUAD. QUAD Wyświetlenie obrazu z wszystkich podłączonych kamer jednocześnie (ekran podzielony na 4), a po ponownym naciśnięciu przycisku “JUMP” powrót do ekranu domyślnego. SEQ. Zgodnie z ustawieniem "SEQ. Timer Step" przejść do kanału za pomocą sekwencji czasowej. CAM A Wyświetlenie obrazu z kamery A, a po ponownym naciśnięciu przycisku “JUMP” powrót do ekranu domyślnego. CAM B Wyświetlenie obrazu z kamery B, a po ponownym naciśnięciu przycisku “JUMP” powrót do ekranu domyślnego. CAM C Wyświetlenie obrazu z kamery C, a po ponownym naciśnięciu przycisku “JUMP” powrót do ekranu domyślnego. CAM R Wyświetlenie obrazu z kamery R, a po ponownym naciśnięciu przycisku “JUMP” powrót do ekranu domyślnego. CAM A+B Wyświetlenie jednocześnie obrazu z kamer A i B (ekran podzielony na 2), a po ponownym naciśnięciu przycisku “JUMP” powrót do ekranu domyślnego. CAM C+R Wyświetlenie jednocześnie obrazu z kamer C i R (ekran podzielony na 2), a po ponownym naciśnięciu przycisku “JUMP” powrót do ekranu domyślnego. CAM A+R Wyświetlenie jednocześnie obrazu z kamer A i R (ekran podzielony na 2), a po ponownym naciśnięciu przycisku “JUMP” powrót do ekranu domyślnego. -
Seite 87: Instalacja Kamery
160775 160775 INSTALACJA KAMERY INSTALLATION FOR COLOUR CAMERA INSTALLATION CAUTION INSTALACJA UWAGI With standard mounting bracket and fasteners included in Przy pomocy elementów mocujących dołączonych do 1. Ustaw kąt widzenia kamery w ten sposób, aby tylny 1. Adjust the camera angle so that the rear bumper or the the package, the camera can be mounted firmly zestawu kamera może być... -
Seite 88: Vehicle Installation
160775 160775 160775 VEHICLE INSTALLATION: INSTALACJA W POJEŹDZIE: VEHICLE INSTALLATION: Kamera Czerwony Żółty Zielony Install camera R (for rear view). 1. Zamontuj kamerę R (do obserwacji przestrzeni za pojazdem). Install camera R (for rear view). 2. Użyj miarki do oznaczenia odległości za pojazdem. Use a measuring tool to mark out the distance behind the vehicle. -
Seite 89: Dane Techniczne Monitora
160775 DANE TECHNICZNE MONITORA: Rozmiar ekranu Przekątna 7", format obrazu 16:9 Obszar aktywny 154.08 x 86.58 mm Konfiguracja piksela 0.107 x 0.370 Rozdzielczość 2400 x 480 Kąt widzenia 60° Zasilanie DC 9.6 V ~ DC 32 V Kontrast 500:1 Jasność 400 cd/cm2 Złącze wejściowe Typ złącza Sygnał wejściowy 1 Vpp Impedancja 75 Ω Kamera Typ złącza 6-pinowe mini DIN Sygnał wejściowy video... - Seite 90 160775 160775 Camera Mirror (M) / Normal (N) adjustment Ustawianie trybu pracy kamery normalny (N) / lusterko (M) Funkcja lusterka - For mirror function - Ustaw strzałkę na M. Turn arrow to M. For normal function - Normalna praca - Turn arrow to N.
-
Seite 91: Dane Techniczne Kamery
160775 DANE TECHNICZNE KAMERY: Przetwornik obrazu ..........1/3" liniowy transfer CCD Ogólna liczba pikseli..........NTSC: 537 (wys.) x 505 (szer.) PAL: 537 (wys.) x 597 (szer.) Liczba pikseli efektywnych ........NTSC: 510 (wys.) x 492 (szer.) PAL: 500 (wys.) x 582 (szer.) Rozdzielczość... -
Seite 92: Akcesoria
160775 AKCESORIA: 160610 Kamera: śred. zewn. 30 mm, dług. 70 mm. Szeroki kąt widzenia, 130° po przekątnej. 160796 Kamera z diodami podczerwieni. Szeroki kąt widzenia: 112° w poziomie, 91° w pionie i 156° po przekątnej. 160790 Kamera: śred. zewn. 21 mm, dług. 40 mm. Szeroki kąt widzenia, 170° po przekątnej. 170942 Metalowe podstawki magnetyczne do kamer. Przedłużacze przewodu kamery: 160672 6 mtr. 160613 10 mtr. 160612 15 mtr. 160611 20 mtr. 160663 Zestaw kabli przyczepy. Z 3.5-metrowym spiralnym kablem.