ETI MINI RAYTEMP Bedienungsanleitung
Infrared thermometer
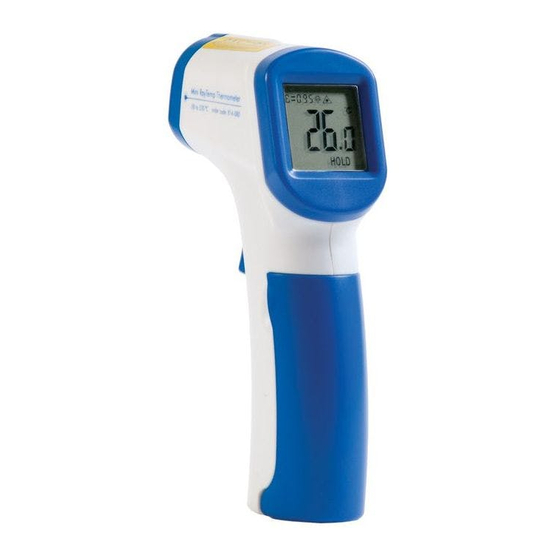
MINI RAYTEMP
®
Infrared Thermometer
Operating Instructions
Product code:
814-080
INSTRUMENT OPERATION - Insert and connect the battery provided into the battery compartment, this
compartment is located in the handle. To use, aim the Mini RayTemp Infrared thermometer at the target
and press the trigger to measure the surface temperature, 'SCAN' will be shown on the display, then the
trigger is released 'HOLD' is shown and the reading is held for 10 seconds, after which the thermometer
will shut down. Please note: Holding the trigger down for a long period of time could affect the reading
shown in the display.
MEASUREMENT ZONE/TARGET DISTANCE - The measurement zone is proportional to the distance the
infrared thermometer is away from the target. The Mini RayTemp is equipped with a 12:1 lens. If the target
is 60 cm (24") away, the measurement zone will be 5 cm (2") across.
EMISSIVITY - The Mini RayTemp has a fixed emissivity of 0.95. Please note: non-contact infrared
thermometers are not recommended for use in measuring shiny or polished metals.
LASER POINTER - The laser pointer function cannot be turned off. The centre of the measurement zone
is 16 mm (approximately ¾") below the laser dot with the instrument held in a vertical position. For safety,
the laser pointer will only activate when the trigger button is pressed. The laser module is a Class 2 device
that has a maximum power output of less than 1 mW at a wavelength of 630 to 670 nm. Prolonged,
continuous exposure such as staring at the beam can be harmful and should be avoided. DO NOT look
into the beam of any optical instrument.
UNDER RANGE/OVER RANGE - If the measured temperature goes below or above the range of the
instrument, 'Lo' or 'Hi' will be displayed. When the measured temperature returns within the range of the
instrument, readings will automatically be displayed.
°C/°F - Open the battery compartment to reveal the °C/°F switch. Slide the switch to select °C or °F.
Please note: the instrument default is °C.
BATTERIES - The low battery icon indicates that the battery needs replacing as soon as possible. The
instrument will continue to function but, to maintain accuracy, a new battery is required. Replace with
one 9V PP3 battery.
CARE - The sensor lens is the most delicate part of the Mini RayTemp. Do not insert any foreign bodies
into the sensor aperture as this will cause damage to this lens. Do not submerge any part of the unit. The
instrument should be stored at room temperature between 10 and 40 °C.
EMC/RFI - Instrument performance may be affected if operated within a high frequency radio field, such
as near a mobile phone, or if subjected to an electrostatic shock.
GUARANTEE - This instrument carries a one-year guarantee against defects in either components or
workmanship. During this period, products that prove to be defective will, at the discretion of ETI, be
either repaired or replaced without charge. This guarantee does not apply to sensors/probes, where a
six-month period is offered. The product guarantee does not cover damage caused by fair wear and
tear, abnormal storage conditions, incorrect use, accidental misuse, abuse, neglect, misapplication or
modification. Full details of liability are available within ETI's Terms & Conditions of Sale at etiltd.com/
Supplied by
terms. In line with our policy of continuous development, we reserve the right to amend our product
specification without prior notice.
Electronic Temperature Instruments Ltd
Worthing · West Sussex · BN14 8HQ
01903 202151 · sales@etiltd.com · etiltd.com
814-080/01.10.18

Verwandte Anleitungen für ETI MINI RAYTEMP


Inhaltszusammenfassung für ETI MINI RAYTEMP
- Seite 1 9V PP3 battery. CARE - The sensor lens is the most delicate part of the Mini RayTemp. Do not insert any foreign bodies into the sensor aperture as this will cause damage to this lens. Do not submerge any part of the unit. The instrument should be stored at room temperature between 10 and 40 °C.
- Seite 2 ES - FUNCIONAMIENTO DEL INSTRUMENTO - Inserte y conecte la pila provista en el compartimento de la batería, situado en el mango. Para usar el termómetro Mini RayTemp Infrared, diríjalo al objetivo deseado y pulse el disparador para medir la temperatura de la superficie; se mostrará en la pantalla 'SCAN'.
- Seite 3 L’instrument continuera à fonctionner mais, pour assurer la précision, une nouvelle pile est nécessaire. CUIDADO - A lente do sensor é a peça mais delicada do Mini RayTemp. Não introduza nenhum corpo Remplacer la pile usagée par une pile neuve PP3 9V.
- Seite 4 Gegenstände in die Sensoröffnung ein, da dadurch die Linse beschädigt wird. Tauchen Sie keinen Teil des Geräts in Wasser. Das Thermometer sollte bei Zimmertemperatur zwischen 10 und 40 °C CURA - La lente del sensore è la parte più delicata del Mini RayTemp. Non inserire nessun corpo aufbewahrt werden.