Inhaltsverzeichnis
Werbung
Verfügbare Sprachen
Verfügbare Sprachen
Werbung
Inhaltsverzeichnis

Verwandte Anleitungen für Yealink SIP-T22P


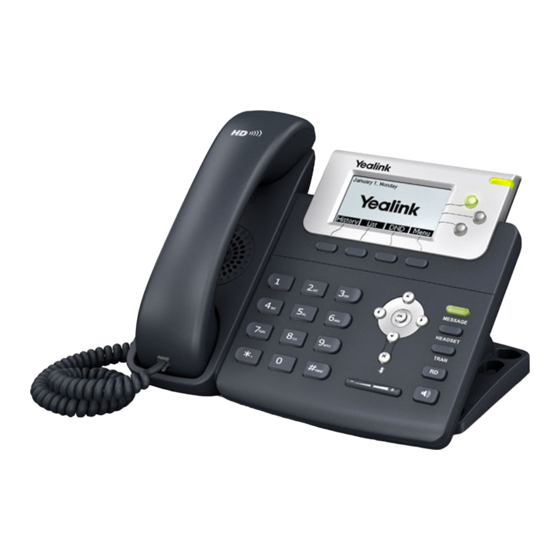
Inhaltszusammenfassung für Yealink SIP-T22P
- Seite 1 Enterprise IP Phone SIP-T22P & SIP-T22 Quick Start Guide (V70.1)...
- Seite 3 Table of Contents English..........1 Deutsch..........7 Español..........13 Italiano..........19 Français..........25...
-
Seite 5: Packaging Contents
Packaging Contents The following items are included in your package. If you find anything missing, contact your system administrator. Ethernet Cable Handset Cord Quick Start Guide IP Phone Handset Stand Power Adapter (optional) Assembling the Phone 1. Attach the stand, as shown below: Desk Mount Method Wall Mount Method 2. - Seite 6 3. Connect the network and power, as shown below: You have two options for network and power connections. Your system administrator will advise you on which one to use. a. AC Power Option Power Adapter (DC 5V) PC Connection (Optional) b.
- Seite 7 Configuring your Phone Configuring via web user interface Accessing the web user interface: 1. Press the OK key when the phone is idle to get the IP address of the phone. 2. Open the web browser of your computer, enter the IP address into the address bar (e.g., "http://192.168.0.10"...
-
Seite 8: Answering A Call
Basic Call Features Placing a Call Using the handset: 1. Pick up the handset. 2. Enter the number, and then press the Send soft key. Using the speakerphone: 1. With the handset on-hook, press 2. Enter the number, and then press the Send soft key. Using the headset: 1. -
Seite 9: Speed Dial
If there is more than one call on hold, press to select the desired call, and then press the Resume soft key. Call Transfer You can transfer a call in the following ways: Blind Transfer 1. Press or the Tran soft key during an active call. The call is placed on hold. 2. -
Seite 10: Call History
Voice Message The Message Waiting Indicator on the idle screen indicates that you have new voice messages waiting. The Message key LED lights up. To listen to voice mail messages: 1. Press or the Connect soft key. 2. Follow the voice prompts to listen to your voice messages. Customizing Your Phone Call History 1. -
Seite 11: Installation Des Telefons
Lieferumfang Folgendes Zubehör ist im Lieferumfang enthalten. Sollte etwas fehlen, wenden Sie sich bitte an Ihren Systemadministrator. Ethernet-Kabel Erste Schritte Hörerkabel IP-Telefon Ständer Hörer Netzadapter (optionales) Installation des Telefons 1. Befestigen Sie den Ständer gemäß der nachfolgenden Abbildung: Tischmontage Wandmontage 2. - Seite 12 3. Nehmen Sie die Anschlüsse ans Netzwerk und Stromnetz wie folgt vor: Es gibt zwei Methoden für den Anschluss des Netzwerks und Stromnetzes. Ihr Systemadministrator wird Sie darüber beraten, welche Methode für Sie geeignet ist. a. Netzanschluss (AC) Netzadapter (DC 5V) PC-Verbindung (optional) b.
-
Seite 13: Konfiguration Über Die Weboberfläche
Konfiguration Ihres Telefons Konfiguration über die Weboberfläche Zugriff auf die Weboberfläche: 1. Drücken Sie im Ruhezustand des Telefons die Taste OK , um die IP-Adresse Ihres Telefons anzeigen zu lassen. 2. Öffnen Sie an Ihrem Computer den Internet Browser und geben Sie die IP-Adresse in die Adressleiste ein (z.B. -
Seite 14: Allgemeine Anruffunktionen
Allgemeine Anruffunktionen Anrufe tätigen Mit dem Hörer: 1. Nehmen Sie den Hörer ab. 2. Geben Sie die Nummer ein und drücken Sie die Funktionstaste Anrufen. Mit der Freisprecheinrichtung: 1. Drücken Sie bei aufgelegtem Hörer die Taste 2. Geben Sie die Nummer ein und drücken Sie die Funktionstaste Anrufen. Mit Headset: 1. -
Seite 15: Konferenzschaltung
Anrufe weiterleiten Anrufe lassen sich wie folgt weiterleiten: Direkte Weiterleitung 1. Drücken Sie während eines laufenden Gesprächs die Taste oder Vermitt.. Der Anruf wird in der Warteschleife geparkt. 2. Geben Sie die Nummer ein, an die der Anruf weitergeleitet werden soll. 3. -
Seite 16: Benutzerdefinierte Einstellungen Des Telefons
Sprachnachricht Die Anzeigelampe für wartende Nachrichten im inaktiven Display weist darauf hin, dass eine neue Sprachnachricht eingegangen ist. Die LED-Anzeige der Nachrichten-Taste leuchtet auf. Sprachnachrichten anhören: 1. Drücken Sie die Taste oder Öffnen. 2. Folgen Sie den Ansagen, um die Nachricht abzuspielen. Benutzerdefinierte Einstellungen des Telefons Anrufliste 1. -
Seite 17: Contenido Del Embalaje
Contenido del embalaje En el embalaje se incluyen los artículos siguientes. Si detecta que falta algo, contactese con el administrador de su sistema. Cable Ethernet Cable del auricular Guía de inicio rápido Teléfono IP Auricular Base Adaptador de alimentación (opcionales) é... -
Seite 18: Puesta En Funcionamiento
ó ó 3. Conecte la red y la alimentaci n, como se muestra a continuaci Tiene dos opciones para las conexiones de la red y de la alimentación. El administrador de su sistema le recomendará cuál usar. a. Option Alimentation secteur Adaptador de alimentación (5 VCC) -
Seite 19: Configuración Del Teléfono
Configuración del teléfono ó é Configuraci n de la interfaz de usuario a trav s de la Web Acceso a la interfaz de usuario en la Web: 1. Pulse la tecla OK cuando el teléfono esté en reposo para obtener su dirección IP . 2. - Seite 20 Funcionalidades básicas de llamadas Para hacer una llamada ó Utilizaci n del auricular: 1. Levante el auricular. 2. Introduzca el número y a continuación pulse la tecla de función Enviar. ó Utilizaci n del altavoz: 1. Con el auricular colgado, pulse 2.
-
Seite 21: Marcaci Ó N Rápida
Transferencias de llamadas Puede transferir una llamada de las formas siguientes: Transferencia ciega 1. Durante una llamada activa, pulse o la tecla de función Transferir. La llamada se pone en espera. 2. Introduzca el número al que quiere transferir la llamada. 3. - Seite 22 Mensaje de voz El Indicador de Mensaje en Espera en la pantalla en reposo indica que tiene nuevos mensajes de voz sin escuchar. El LED de la tecla Message se ilumina. Para escuchar los mensajes del correo de voz: 1. Pulse o la tecla de función Conectar.
-
Seite 23: Contenuto Della Confezione
Contenuto della Confezione La confezione contiene i seguenti elementi. Se dovesse mancare qualcosa, contatti l'amministratore di sistema. Cavo Ethernet Filo della Cornetta Guida di avvio rapido Telefono IP Cornetta Supporto Alimentatore (opzionali) Montaggio del Telefono 1. Agganciare il supporto come nell'immagine: Modalità... - Seite 24 3. Collegare alla rete e alla corrente, come nell'immagine: Esistono due opzioni per i collegamenti alla rete e alla corrente. L'amministratore di sistema le consiglierà quale utilizzare. a. Opzione Corrente AC Alimentatore (DC 5V) Connessione PC (Facoltativa) b. Opzione PoE (Power over Ethernet) PoE Porta/Interruttore compatibile IEEE 802.3af Connessione PC (Facoltativa)
-
Seite 25: Configurazione Del Telefono
Configurazione del Telefono Configurazione tramite interfaccia utente sul web Accesso all'interfaccia utente sul web: 1. Premere il tasto OK quando il telefono è inattivo per ottenere il suo indirizzo IP . 2. Aprire il browser del web del proprio computer, inserire l'indirizzo IP nella barra degli indirizzi (es.: "http://192.168.0.10"... - Seite 26 Caratteristiche Chiamata di Base Effettuare una Chiamata Con la cornetta: 1. Sollevare la cornetta. 2. Inserire il numero e premere il tasto funzione Invia. Con il vivavoce: 1. Con la cornetta agganciata premere 2. Inserire il numero e premere il tasto funzione Invia. Con il set cuffie: 1.
- Seite 27 Trasferimento di Chiamata Il trasferimento di chiamata può essere eseguito nei seguenti modi: Trasferimento cieco 1. Premere o il tasto funzione Trasferisci durante una chiamata attiva. La chiamata viene messa in attesa. 2. Inserire il numero a cui la si desidera trasferire. 3.
- Seite 28 Messaggio Vocale L'icona di Messaggio in Attesa sullo schermo inattivo segnala la presenza di nuovi messaggi vocali in attesa. Il LED del tasto Messaggio è acceso. Per ascoltare i messaggi vocali: 1. Premere o il tasto funzione Chiama. 2. Seguire i comandi vocali per ascoltare i propri messaggi. Personalizzare il Telefono Registro Chiamate 1.
-
Seite 29: Contenu De La Boîte
Contenu de la boîte Les articles suivants sont inclus dans la boîte. Si un article est manquant, contactez votre administrateur de système. Cordon du combiné Câble Ethernet Guide de démarrage rapide Téléphone IP Pied Combiné Adaptateur secteur (en option) Montage du téléphone é... - Seite 30 é é 3. Raccordez le r seau et l'alimentation, comme montr ci-dessous: Vous avez deux options pour les raccordements du réseau et de l'alimentation. Votre administrateur de système vous indiquera lequel utiliser. a. Option Alimentation secteur Adaptateur secteur (DC 5V) Connexion PC (facultative) b.
- Seite 31 Configuration de votre téléphone Configuration via l'interface utilisateur web é à l’interface utilisateur web : 1. Appuyez sur la touche OK lorsque le téléphone est inactif pour obtenir l'adresse IP du téléphone. 2. Ouvrez le navigateur de votre ordinateur, saisissez l'adresse IP dans la barre d'adresse (ex.
-
Seite 32: Fonctions D'appel De Base
Fonctions d'appel de base Passer un appel Utiliser le combiné: 1. Décrocher le combiné. 2. Saisissez le numéro, puis appuyez sur la touche de fonction Appel. Utiliser le haut-parleur: 1. Avec le combiné raccroché, appuyez sur 2. Saisissez le numéro, puis appuyez sur la touche de fonction Appel. Utiliser le casque: 1. - Seite 33 Transfert d'appel Vous pouvez transférer un appel d'une des façons suivantes: Transfert en aveugle 1. Appuyez sur ou sur la touche de fonction Transférer pendant un appel actif. L'appel est placé en attente. 2. Saisissez le numéro que vous voulez transférer. 3.
-
Seite 34: Message Vocal
Message vocal L'indicateur de Message en attente sur l'écran inactif signifie que vous avez des nouveaux messages vocaux en attente. La LED de la touche Message s'allume. Pour écouter les messages vocaux: 1. Appuyez sur ou sur la touche de fonction Connecté. 2.