Blaupunkt DG2-Pro Schnellstartanleitung
2g gsm dongle
DG2-Pro
2G GSM Dongle
Follow instruction in this document to setup and use the accessory.
For further setting and operation detail, please visit Blaupunkt
website
service.blaupunkt-security.com
manual.
Use Case of the DG2-Pro GSM backup:
If the GSM dongle is installed and there is an Internet breakout (e.g.
an intruder disconnect the router or cut off the complete energy of
the home) the Q-Pro Hub with its internal back up battery and this
GSM dongle will send a push notification to alert each user of the
Internet failure. With the DG2 GSM dongle the Q-Pro Alarm System
can also alert the user for any event while the router is offline.
Additionally the user will be able to connect to the panel via the app
or web interface for basic management as Arm or Disarm.
Note: The GSM dongle does not provide GSM backup for the video
camera IPC-S1. For image verification while the network is offline
EN | GSM Dongle
we recommend the use of PIR with cameras (e.g. IRC-S2 or IRC-
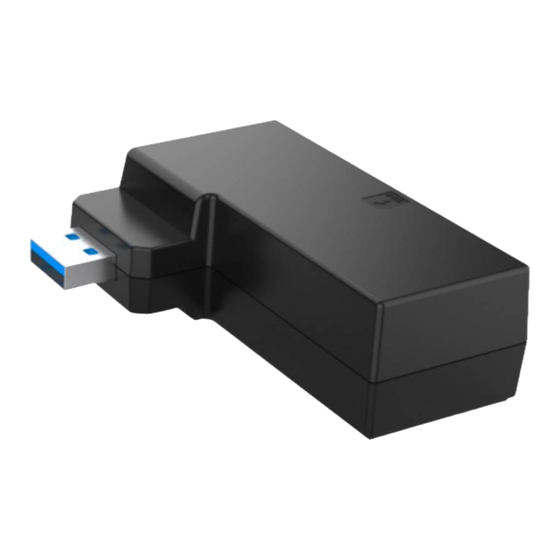
1. USB
P4).
2. Micro SIM Card
compartment
The DG2-Pro works under 2G network and offers backup for alarm
3. Blue LED (inside casing)
notifications and standard App overview. We recommend to use this
backup option in areas where there is no 4G communication. We do
DE | Funk-
not recommend to use the DG2-Pro as standalone communication
method, it is meant to be backup only.
DE | GSM Dongle
1. USB
Getting Started
2. Micro-SIM-
1. Search for a telecom provider with good signal strength on the
Kartensteckplatz
installation location.
3. Blaue LED (im Gehäuse)
2. Acquire a Micro SIM size card from your selected Telecom
Provider. The Micro SIM Card needs to have mobile internet data
IT | GSM Dongle
available, there is no need for SMS or mobile airtime. The amount of
1. USB
internet data needed will change depending its usage, for backup
2. Slot Micro SIM Card
usage 100Mb is enough.
3. LED Blu (Interno)
3. Ask the telecom provider to disable the PIN code from the Micro
SIM Card. Alternative insert the Micro SIM card on your smartphone
and disable the PIN code.
Installation
1. Power OFF the Q-Pro HUB by switching the Q-Pro HUB battery
switch to OFF and unplugging the AC adaptor.
2. Insert the Micro SIM Card into the Micro SIM Card Compartment
located at the side of the GSM Dongle. . (Refer to the picture
point 2).
3. Install the GSM Dongle into the USB port located at the back of
the Q-Pro Hub.
4. Power ON the Q-Pro HUB by switching the Q-Pro HUB battery
switch to ON and plugin in the AC adaptor.
5. The dongle's Blue LED will light up.
6. After the installation wait for a couple of minutes until the GSM
dongle receives signal properly.
•
If the GSM dongle or the SIM Card are removed the Q-Pro
will light up the failure LED and send a notification via the
Ethernet cable. To install the Micro SIM card or the dongle
back power OFF the panel first.
•
If the installation of the Micro SIM card or GSM dongle is
done while the panel is powered ON they won't be detected
properly and GSM system won't work.
Access Point Name (APN) configuration
1. Go to the Web Interface
login to your Q-Pro Hub. Go to Settings → Panel→ Panel →
GSM
2. For some telecom providers the Q-Pro Hub would fill-up the APN
settings automatically. Check that the APN settings are filled
up. If there are refer to step 5, if not refer to step 3.
3. Click "Overridden by HPS" checkbox and set up the APN
settings manually. Ask your telecom provider for your APN
settings: "APN name", "username" and "password".
4. Click submit to save the changes.
5. At the "RSSI" field check that the GSM signal strength signal is 6
or above. If the signal is below 6 try another location for the
Q-Pro or test with other telecom provider.
•
If GSM signal is not detected: APN settings might be
outdated. Please refer to step 3.
Select the desired communication method:
1. Go to the Web Interface go to Settings → Panel→ Panel →
Internet Communication
2. Select "Ethernet & GSM" to work via the router as your main
communication method and GSM only as backup in case router
doesn't work.
Frequency: GPRS 900/1800 MHz
EN
to download the complete
https://eu.bphomeconnect.com/BP/
and
Blaupunkt Competence Center Security
Follow the instruction in this document to setup and use the accessory.
Security Brand Pro GmbH
Mondstrasse 2-4
For further setting and operation details, please visit the Blaupunkt website
85622 Feldkirchen, Germany
service.blaupunkt-security.com
E-Mail: contact@blaupunkt-sc.com
www.blaupunkt.com/service
DE
Befolgen Sie die Anweisungen in dieser Schnellstartanleitung, um das
Zubehör einzurichten und zu nutzen. Weitere Informationen zu den
Einstellungen und zum Betrieb finden Sie auf der Blaupunkt-Website
service.blaupunkt-security.com, um das vollständige Handbuch
herunterzuladen.
Anwendungsbereich des DG2-Pro:
Wenn
der
GSM-Dongle
installiert
ist
und
Internetverbindung vorliegt (z. B. ein Eindringling trennt den Router oder
schaltet die gesamte Stromversorgung der Wohnung ab), sendet der Q-Pro
Hub dank seiner internen Backup-Batterie und dem GSM-Dongle eine
Push-Benachrichtigung, um jeden Benutzer über den Internetfehler zu
informieren. Mit dem DG2-Pro GSM-Dongle kann das Q-Pro Alarm System
den Benutzer auch über Ereignisse informieren, wenn der Router offline ist.
Darüber hinaus kann der Benutzer über die App oder das Webinterface
eine Verbindung zum Panel herstellen, um die grundlegenden Funktionen
wie das Scharf oder Unscharf schalten der Alarmanlage zu steuern.
Hinweis: Der GSM-Dongle bietet keine Backup-Sicherung für die IPC-S1
Videokamera. Zur Bildverifizierung bei offline geschaltetem Netzwerk
empfehlen wir die Verwendung von Bewegungsmeldern mit Kameras (z. B.
IRC-S2 oder IRC-P4).
Der DG2-Pro arbeitet mit einem 2G-Netzwerk und kann als Backup für
Alarmbenachrichtigungen und die Standard-App-Übersicht verwendet
werden. Wir empfehlen diese Sicherungsoption in Bereichen zu
verwenden, in denen keine 4G-Kommunikation besteht. Es wird nicht
empfohlen, den DG2-Pro als eigenständige Kommunikationsmethode zu
verwenden. Er ist nur als Backup gedacht.
Erste Schritte
1. Suchen Sie nach einem Telekommunikationsanbieter mit guter
Signalstärke am Installationsort.
2. Erwerben Sie eine Micro-SIM-Karte von Ihrem ausgewählten
Telekommunikationsanbieter. Für die Micro-SIM-Karte müssen mobile
Internetdaten verfügbar sein. SMS oder Mobilfunk sind nicht erforderlich.
Die benötigte Menge an Internetdaten ändert sich je nach Nutzung. Für
die Backup-Nutzung reichen 100 MB.
3. Wir bitten Sie den Telekommunikationsanbieter, den PIN-Code Ihrer
Micro-SIM-Karte zu deaktivieren. Alternativ legen Sie die Micro-SIM-Karte
in Ihr Smartphone ein und deaktivieren den PIN-Code.
Installation
1. Schalten Sie den Q-ProHub aus, indem Sie den Q-ProHub-
Batterieschalter auf OFF stellen und den Netzadapter abziehen.
2. Legen Sie die Micro-SIM-Karte in das Micro-SIM-Kartenfach an der
Seite des GSM-Dongles ein. (Siehe Bildpunkt 2).
3. Stecken Sie den GSM-Dongle in den USB-Anschluss an der Rückseite
des Q-ProHub.
4. Schalten Sie den Q-ProHub ein, indem Sie den Q-ProHub-
Batterieschalter auf ON stellen und das Netzteil einstecken.
5. Die blaue LED des Dongle leuchtet auf.
6. Warten Sie nach der Installation einige Minuten, bis der GSM-Dongle
das Signal ordnungsgemäß empfängt.
•
Wenn der GSM-Dongle oder die SIM-Karte entfernt werden,
leuchtet die Fehler-LED des Q-ProHub auf und sendet eine
Benachrichtigung über das Ethernet-Kabel. Um die Micro-SIM-
Karte oder den Dongle einzustecken, schalten Sie zuerst das
Panel aus.
•
Wenn die Micro-SIM-Karte oder der GSM-Dongle eingesteckt
werden, während das Panel eingeschaltet ist, werden sie nicht
richtig erkannt und das GSM-System funktioniert nicht.
Konfiguration des (APN) Zugangspunkts
1. Rufen Sie das Web Portal
https://eu.bphomeconnect.com/BP/
melden Sie sich bei Ihrem Q-ProHub an. Gehen Sie zu Einstellungen →
Panel → Panel → GSM
2. Bei einigen Telekommunikationsanbietern füllt der Q-Pro Hub die APN-
Einstellungen automatisch auf. Stellen Sie sicher, dass die APN-
Einstellungen gefüllt sind. Wenn dies der Fall ist, beziehen Sie sich auf
Schritt 5, falls nicht, beziehen Sie sich auf Schritt 3.
3. Klicken Sie auf das Kontrollkästchen "Von HPS überschrieben" und
richten Sie die APN-Einstellungen manuell ein. Fragen Sie Ihren
Telekommunikationsanbieter nach Ihren APN-Einstellungen: "APN-Name",
"Benutzername" und "Passwort".
4. Klicken Sie auf Senden, um die Änderungen zu speichern.
5. Überprüfen Sie im Feld "RSSI", ob die GSM-Signalstärke 6 oder höher
ist. Wenn das Signal unter 6 liegt, versuchen Sie es an einem anderen Ort
für
den
Q-ProHub
oder
testen
Sie
es
Telekommunikationsanbieter.
•
Wenn kein GSM-Signal erkannt wird: Sind die APN-Einstellungen
möglicherweise veraltet. Bitte beziehen Sie sich in diesem fall auf
Schritt 3.
Wählen Sie die gewünschte Kommunikationsmethode:
1. Gehen Sie zum Web Portal und gehen Sie zu Einstellungen → Panel
→ Panel → Internetkommunikation
2. Wählen Sie „Ethernet & GSM" um den Router als
Hauptkommunikationsmethode zu nutzen, und GSM nur als
Backup, falls der Router nicht funktioniert.
Frequenz:
GPRS 900/1800 MHz
to download the complete manual.
Seguire le istruzioni contenute in questo documento per impostare e
utilizzare l'accessorio. Per ulteriori dettagli su impostazioni e
operazioni, visitare il sito Web Blaupunkt
security.com
per scaricare il manuale completo
Usa caso del backup GSM DG2-Pro:
ein
Fehler
in
der
Se il dongle GSM è installato e vi è un'interruzione di Internet (ad
esempio un intruso disconnette il router o viene staccata l'energia
elettrica di casa), la centrale Q-Pro con la batteria di backup interna e
il dongle GSM, invierà una notifica push per avvisare ogni utente
dell'errore di Internet. Con il dongle GSM DG2, il sistema di allarme,
può anche avvisare l'utente di qualsiasi evento mentre il router è
offline. Inoltre l'utente sarà in grado di connettersi al pannello tramite
l'app o l'interfaccia web per la gestione di base come Armare o
Disarmare
Nota: il dongle GSM non fornisce il backup GSM per la videocamera
IPC-S1. Per la verifica dell'immagine mentre la rete è offline,
raccomandiamo l'uso del PIR con la fotocamera (ad esempio IRC-S2
o IRC-P4).
DG2-Pro funziona con la rete 2G e offre backup per notifiche di allarmi
e panoramica delle app standard. Si consiglia di utilizzare questa
opzione di backup in aree in cui non vi è alcuna comunicazione 4G.
Non è consigliabile utilizzare il DG2-Pro come metodo di
comunicazione stand-alone ma solo come backup.
Per Iniziare
1. Rivolgersi ad un utenza telefonica che abbia un buon segnale nella
zona d'installazione
2. Acquistare una Micro SIM dal gestore selezionato. La Micro SIM
Card deve disporre di dati Internet mobili disponibili, non sono
necessari SMS. La quantità di dati Internet necessari cambierà a
seconda dell'utilizzo, per l'utilizzo di backup 100 MB è sufficiente.
3. Chiedere al gestore di servizio, di disabilitare il codice PIN dalla
Micro SIM Card. In alternativa, inserire la scheda Micro SIM
sullo smartphone e disabilitare il codice PIN.
Installazione
1. Spegnere la centrale Q-Pro spostando l'interruttore della batteria
su OFF e scollegando l'adattatore AC
2. Inserire la Micro SIM Card nello slot situato sul lato del Dongle
GSM. (Fare riferimento al punto 2 dell'immagine).
3. Installare il dongle GSM nella porta USB situata sul retro della
centrale
4. Accendere la centrale tramite l'interruttore della batteria e
inserendo l'alimentatore
5. Il LED blu del dongle si illuminerà.
6. Dopo l'installazione, attendere un paio di minuti finché il dongle
GSM non riceve correttamente il segnale.
•
Se il dongle GSM o la scheda SIM vengono rimossi, la centrale
accenderà il LED di errore e invierà una notifica tramite il cavo LAN.
Per installare la scheda Micro SIM o il dongle, spegnere prima il
pannello.
•
Se l'installazione della scheda Micro SIM o del dongle GSM viene
eseguita mentre il pannello è acceso, non verranno rilevato
correttamente e il sistema GSM non funzionerà.
Configurazione Access Point Name (APN)
1. Vai all'interfaccia Web
al tuo account nel pannello del Q-Pro. Vai a Impostazioni
→
→
Pannello
Pannello
2. Per alcuni provider di telefonia mobile,la centrale Q-Pro potrebbe
auf und
riempire automaticamente le impostazioni APN. Verifica che le
impostazioni APN siano complete.
3. Fare clic sulla casella di controllo "Sostituito da HPS" e configurare
manualmente le impostazioni APN. Chiedere al proprio operatore
telefonico le impostazioni APN: "Nome APN", "nome utente" e
"password".
4. Fare clic su Invia per salvare le modifiche.
5. Nel campo "RSSI" verificare che il segnale di intensità del segnale
GSM sia 6 o superiore. Se il segnale è inferiore a 6, provare un'altra
posizione del pannello o testare con un altro operatore telefonico.
•
Se il segnale GSM non viene rilevato: le impostazioni APN
potrebbero essere obsolete. Si prega di fare riferimento al
passaggio 3
mit
einem
anderen
1. Andare all'interfaccia Web su
→
Impostazioni
Pannello
2. Selezionare "Ethernet e GSM" per utilizzare il router come metodo
di comunicazione principale e GSM solo come backup nel caso in cui
il router non funzioni.
Frequenze:
GPRS 900/1800 MHz
IT
service.blaupunkt-
https://eu.bphomeconnect.com/BP/
e accedi
→
GSM
→
→
Pannello
Comunicazione Internet
Inhaltsverzeichnis

Inhaltszusammenfassung für Blaupunkt DG2-Pro
- Seite 1 Note: The GSM dongle does not provide GSM backup for the video empfehlen wir die Verwendung von Bewegungsmeldern mit Kameras (z. B. DG2-Pro funziona con la rete 2G e offre backup per notifiche di allarmi IRC-S2 oder IRC-P4). camera IPC-S1. For image verification while the network is offline e panoramica delle app standard.
- Seite 2 Uwaga: Klucz sprzętowy GSM nie zapewnia kopii zapasowej GSM dla El DG2-Pro funciona con la red 2G y sirve como sistema de respaldo para kamery IPC-S1. W celu weryfikacji obrazu, gdy sieć jest w trybie offline, (esim.
- Seite 3 équipés de caméras (par exemple, IRC-S2 ou IRC-P4). Micro SIM 3. LED bleue Le DG2-Pro fonctionne sur un réseau 2G et offre une prise en charge des (à l'intérieur du boîtier) notifications d’alarmes ainsi qu’un fonctionnement basique des applications. Nous vous recommandons d'utiliser cette option de sauvegarde dans les zones où...
-
Seite 4: Technical Specifications
33dBm Declaration of conformity: Hereby Security Brand Pro GmbH declares that the radio equipment type "DG2-Pro" complies with the directive 2014/53 / EU. The full text of the EU Declaration of Conformity is available at the following Internet address: www.blaupunkt.com/service Dispose: Old appliances must not be disposed of with normal household waste. - Seite 5 Déclaration de conformité: La société Security Brand Pro GmbH déclare par la présente que le type d‘installation radio «DG2-Pro» est conforme à la directive 2014/53/UE. Le texte complet de la déclaration de conformité UE est disponible à l’adresse Internet suivante : www.blaupunkt.com/service...
-
Seite 6: Środki Ostrożności
Declaración de conformidad: Por la presente, Security Brand Pro GmbH declara que el tipo de equipo de radio "DG2-Pro" cumple con la directiva 2014/53 / EU. El texto completo de la Declaración de conformidad de la UE está disponible en la siguiente dirección de Internet: www.blaupunkt.com/service... -
Seite 7: Voorzorgsmaatregelen
500mA 900/1800Mhz 33dBm Conformiteitsverklaring: Hierbij verklaart Security Brand Pro GmbH dat de radioapparatuur van het type "DG2-Pro" voldoet aan de richtlijn 2014/53 / EU. De volledige tekst van de EU-conformiteitsverklaring is beschikbaar op het volgende internetadres: www.blaupunkt.com/service Gooi: Oude apparaten mogen niet met het normale huisvuil worden weggegooid. In overeenstemming met Richtlijn 2012/19 / EU moet het apparaat aan het einde van zijn levensduur op de juiste manier worden verwijderd.