ELRO 1705759 Kurzanleitung
Quicklinks
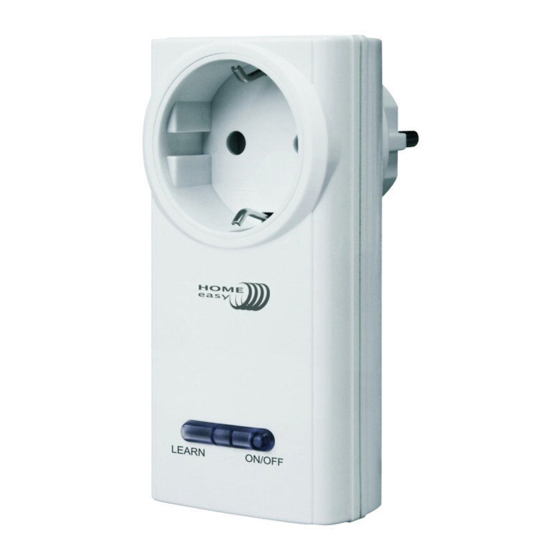
Plug-in switch
Schaltsteckdose
Plug-in schakelaar
lnterrupteur enfichable
Wylctcznik wtyczkowy
lnterruptor de enchufe
2 sec
6sec
CI)
Preparation for use
a lnsert the receiver (HE877 (A)) to the wall outlet.
(I]
Linking your transmitter to a receiver
a The red LED should be continuously burning. This happens once the
receiver is inserted to the wall outlet.
b Press and hold the LEARN button for two seconds and then release it.
c During this operation the LED starts to blink. Your receiver is now
switched in the linklng mode. Attention: the LED should blink only after
lf
releasing.
the LED starts blinking during pressing then there will be no
linking.
Linking your transmitter to a receiver. Follow the manual of your
transmitter. Attention: it is possibfe to link a receiver to multiple transmitters,
six memory positions are available.
(TI
Making the receiver ready
a Connect a desired device to the receiver and make sure the desired
device is switched on. The receiver is now ready for use.
ffi
Dlsconnectlng all links
a The red LED should be burning continuously (see step 2a).
b Press and hold the LEARN button for six seconds. During this
operation the LED starts to blink (see 2c).
c Briefly press on the LEARN button. The LED will turn off and then on
again, all links are undone.
Disconnecting from the mains: remove the receiver from the wa/1 out/et.
l
CI)
Benutzung vorbereiten
a Stecken Sie den Empfänger (HE877 (A)) in die Steckdose.
(I]
Pairing des Senders mit einem Empfänger
a Die rote LED leuchtet, wenn Sie den Empfänger in die Steckdose
stecken.
b Halten Sie die ÜBERNAME-Taste für zwei Sekunden gedrückt.
c Während dieser Zeit blinkt die LED. Ihr Empfänger befindet sich nun
im Pairingmodus. Achtung: Die LED blinkt erst, nachdem Sie die Taste
losgelassen haben. Blinkt die LED, während Sie die Taste noch gedrückt
halten, dann ist ein Pairing nicht möglich.
Pairing des Senders mit einem Empfänger. Folgen Sie den Anleitungen für
den Sender. Achtung: Pairing eines Empfängers mit mehreren Sendern ist
möglich, es stehen sechs Speicherstellen zur Verfügung.
(TI
Empfänger vorbereiten
a Schließen Sie das gewünschte Gerät am Empfänger an und schalten
Sie es ein. Der Empfänger Ist betriebsbereit.
m
Pairlng löschen (alle)
a Die rote LED leuchtet (siehe Schritt 2a).
b Halten Sie die ÜBERNAME-Taste für sechs Sekunden gedrückt.
Während dieser Zeit blinkt die LED (siehe 2c).
c Drücken Sie kurz die ÜBERNAME-Taste. Die LED erlischt und leuchtet
dann wieder, alle Verbindungen sind gelöscht.
Abtrennen vom Netz: Ziehen Sie den Empfänger aus der Steckdose.
CI)
Voorbereiding voor gebruik
a Plaats de ontvanger (HE877 (A)) in het stopcontact.
(I]
Uw ontvanger aan een zender koppelen
a De rode LED moet constant branden. Dit gebeurt zodra de ontvanger
in het stopcontact is geplaatst.
b Druk twee seconden op de LEARN knop en laat deze vervolgens los.
c Bij deze handeling gaat de LED knipperen. Uw ontvanger bevindt zieh
nu in de koppelmodus. let op: de LED mag pas knipperen na het
los/aten. Als de LED gaat knipperen tijdens indrukken dan wordt er niet
gekoppe/d.
Koppel uw zender aan de ontvanger. VoJg hiervoor de handleiding van uw
zender. Let op: het is mogeJijk om een ontvanger aan meerdere zenders te
koppeJen, zes geheugenplaatsen zijn beschikbaar.
(TI
De ontvanger gereed maken
a Sluit een gewenst apparaat aan op de ontvanger en zorg ervoor dat
het gewenste apparaat aan staat. De ontvanger 1s nu gereed voor
m
gebrulk.
Alle koppelingen ongedaan maken
a De rode LED moet constant branden (zie stap 2a).
b Druk zes seconden op de LEARN knop. Bij deze handeling gaat de LED
knipperen (zie 2c).
c Druk kort op de LEARN knop. De LED dooft en gaat vervolgens weer
aan, alle koppelingen zijn ongedaan gemaakt.
Spanningsvrij maken: neem de ontvanger uit de contactdoos.
Specifications:
AC lnputVoltage: 220V-240V, 50/60Hz.
Maximum distance (meters): 50.
Maximum power (Watts): 3500W.
Operating temperature: -10-50 .
CI)
Preparatlon avant utlllsatlon
a Branchez le recepteur (HE877 (A)) sur la prise murale.
(I]
Liaison de votre emetteur
a La LED rouge doit etre allumee en continu. Cela se produit des que le
recepteur est branche sur la prise murale.
b Maintenez enfonce le bouton d'apprentissage pendant deux
secondes puis relächez-le.
c Pendant cette operation, la LED commence a clignoter. Votre
recepteur est desormais en mode de liaison. Attention : Ja LED ne doit
clfgnoter qu'apres reldchement du bouton. Si la LED commence a
cfignoter pendant l'appui, alors il n'y aura pas de clignotement.
Uaison de votre emetteur a un recepteur. Consultez Je manuel de votre
emetteur. Attention : il est possib/e de lier un recepteur Cl plusieurs emetteurs,
six positions sont memorisables.
Preparation du recepteur
a Connectez un appareil voulu au recepteur et verifier que cet appareil
est active. Le recepteur est maintenant pret
m
Dlssoclatlon de tous les llens
a La LED rouge doit @tre allumee en continu (voir l'etape 2a).
b Maintenez enfonce le bouton d'apprentlssage pendant six secondes.
Pendant cette operation, la LED commence a clignoter (voir l'
2c).
c Appuyez brievement sur le bouton d'apprentissage. La LED s'eteindra
puis se rallumera, tous les liens sont dissocies.
Debranchez f'appareif du secteur : debranchez le recepteur de lo prise
murale.
=IPLt=
CI)
Przygotowanie do uzytkowania
a Odbiornik (HE877 (A)) wloiyc do gniazda sciennego.
(I]
Kojarzenie nadajnika z odbiomikiem
a Czerwona dioda LED powinna SwieciC Switatem ci"-gtym. Dzieje si� tak
od chwili wtoienia nadajnika do gniazda Sciennego.
b Nacisn�c i przytrzymac przycisk LEARN przez dwie sekundy, po czym
zwolniC.
c Podczas tej operacji dloda LED zacznle blyskac. Odblornlk pracuje
teraz z tryble kojarzenia. Uwaga: dloda LED powlnna zaczqc blyskac
dopiero po zwoJnieniu przycisku. Jefä dioda LED zacznie blyskat
naciskania przycisku, nawiqzanie lqcznoSci nie b,:dzie mialo miejsca.
Kojarzenie nadajnika z odbiornikiem. Prosimy postepowat zgodnie z
zaleceniami dolqczonymi do nadajnika. Uwaga: istnieje moiliwoSC
skojarzenia odbiornika z kilkoma nadajnikami, dostepnych jest szeSC
pozycji pami,:ci.
(TI
Przygotowanle odbiornika
a PodtqczyC i:qdane urzctdzenie do odbiornika i upewniC si�, i:e to
urz�dzenie jest wlqczone. Odbiornik jest jui gotowy do uiytkowania.
m
Anulowanie wszystkich pohiczen
a Czerwona dioda LED powinna SwieciC Switatem ciqgtym (patrz
ilustracja 2a).
b Nacisn"-C i przytrzymaC przycisk LEARN przez szeSC sekund. Podczas
tej operacji dioda LED zacznie btyskaC (patrz ilustracja 2c).
c Na kr6tko nacisn�<' przycisk LEARN. Dioda LED zgasnie, po czym
ponownie si� wtqczy. Wszystkie potc1.czenia zostajq w ten spos6b
anulowane
Ddlqczanie urzqdzenia od ir6dla zasi/ania: wyjqc odbiornik
Sciennego.
E
CI)
Preparaci6n para el uso
a lntroduzca el receptor (HE877 (A)) en el enchufe de la pared.
Conectar el transmisor a un receptor
a La luz LED roja debe permanecer encendida continuamente. Esto
ocurre cuando en receptor se introduce en el enchufe de la pared.
b Mantenga pulsado el bot6n de APRENDIZAJE (LEARN) durante dos
segundos y despues su€:ltelo.
c
Durante esta operaci6n la
que el receptor esta conectado en la modalidad de enlace. Atenci6n: Ja
luz LED debe parpadear solo despues de soltar el bot6n. Si la luz LED
comienza a parpadear cuando todavia esta puJsando eJ bot6n, no se
habrd producido Ja conexi6n.
Conectar el transmisor a un receptor. Siga las instrucciones de/ manual de/
transmisor. Atenci6n: es posible conectar un receptor con varios rransmisores,
ya que dispone de seis posiciones de memoria.
Hacer que el receptor este llsto
a Conecte el dispositive deseado al receptor y asegUrese de que este
encendido. EI receptor estar� ahora listo para ser utilizado.
m
Desconectar todas las conexiones
a La luz LED roja debera permanecer encendida continuamente (vea el
paso 2a).
b Mantenga pulsado el bot6n de APRENDIZAJE (LEARN) durante seis
segundos. Durante esta operaci6n la luz LED comenzara a parpadear
(vea 2c).
c Pulse brevemente el bot6n de APRENDIZAJE (LEARN). La luz LED se
apagara y se volvera a encender, se habran cancelado todas las
conexiones.
Desconectar de la toma de corriente: extraiga eJ receptor de/ enchufe de la
pared.
CE+R&TTE
APPROVED
433.92MHz.
Art.Nr. 1705759
a
un recepteur
a
l'emploi.
e
tape
w
trakcie
z
gniazda
luz
LED comenzara a parpadear. Esto indica

Verwandte Anleitungen für ELRO 1705759

Inhaltszusammenfassung für ELRO 1705759
- Seite 1 Maximum power (Watts): 3500W. lnterrupteur enfichable Operating temperature: -10-50 . Wylctcznik wtyczkowy lnterruptor de enchufe Art.Nr. 1705759 Preparation for use Preparatlon avant utlllsatlon a Branchez le recepteur (HE877 (A)) sur la prise murale. a lnsert the receiver (HE877 (A)) to the wall outlet.