Herunterladen Inhalt Inhalt Diese Seite drucken

Werbung

Verfügbare Sprachen
  • DE

Verfügbare Sprachen

  • DEUTSCH, seite 15
ZyXEL G-360
802.11g Wireless PCI Adapter
Quick Start Guide
Version 2.1
4/2005

Werbung

Inhaltsverzeichnis
loading

Inhaltszusammenfassung für ZyXEL G-360

  • Seite 1 ZyXEL G-360 802.11g Wireless PCI Adapter Quick Start Guide Version 2.1 4/2005...
  • Seite 2: Inhaltsverzeichnis

    Contents ENGLISH......................1 DEUTSCH ....................13 ESPAÑOL..................... 27 FRANÇAIS ....................41 ITALIANO..................... 55 繁體中文 ....................... 69 РУССКИЙ..................... 81...
  • Seite 3: English

    Procedure to View a Product’s Certification(s) 1. Go to www.zyxel.com 2. Select your product from the drop-down list box on the ZyXEL home page to go to that product's page. 3. Select the certification you wish to view from this page.
  • Seite 4: Hardware Installation

    3. Ground yourself by wearing an anti-static wrist strap or touching a metal object. Remove the computer cover and the ZyXEL G-360 from its packaging. 4. Insert the ZyXEL G-360 into an available PCI slot. Make sure the ZyXEL G- 360’s contacts are fully seated in the PCI slot.
  • Seite 5: Windows 2000

    6. Click Finish and restart the computer when prompted. Windows Me 1. Windows automatically detects the ZyXEL G-360. Select Specify the location of the driver (Advanced), then click Next. 2. Insert the Installation CD into your CD-ROM drive. Select Search for the best drive for your device then select only Removable Media (Floppy, CD-ROM …) and click Next.
  • Seite 6: Windows Xp

    6. Click Finish to complete the driver installation. Windows XP 1. Windows automatically detects the ZyXEL G-360. Select Install from a list or specific location (Advanced), then click Next. 2. Insert the Installation CD into your CD-ROM drive. Select Search for the best drive in these locations then select only Search removable media.
  • Seite 7 Click Next to accept the default file location or click Browse to select an alternate folder. Click Finish to restart the computer. After you insert the ZyXEL G-360 and install the driver and ZyXEL Utility, an icon appears in the system tray.
  • Seite 8: Led Display

    ENGLISH If the ZyXEL Utility icon displays, the ZyXEL G-360 is installed properly. Refer to the User’s Guide to configure the ZyXEL G-360. 5 LED Display PWR LED LINK LED The following table describes the LEDs on the ZyXEL G-360.
  • Seite 9 You must enable OTIST on both the AP and wireless client before you start transferring settings. We use the Prestige 334WT and the ZyXEL G-360 screens in this guide as an example. Screens may vary slightly for your ZyXEL devices.
  • Seite 10: Wireless Client

    WEP key or a WPA-PSK key and you also selected this check box, then the key you manually configured is used. 7.2 Wireless Client Start the ZyXEL Utility and click the Adapter tab. Select the OTIST check box, enter the same Setup Key as your AP’s and click Save.
  • Seite 11 ENGLISH 7.3 Starting OTIST You must click Start in the AP OTIST web configurator screen and in the wireless client(s) Adapter screen all within three minutes (at the time of writing). You can start OTIST in the wireless clients and AP in any order but they must all be within range and have OTIST enabled.
  • Seite 12 In the wireless client, you see this screen if it can't find an OTIST- enabled AP (with the same Setup key). Click OK to go back to the ZyXEL Utility main screen. If there is more than one OTIST-enabled AP within range, you see a...
  • Seite 13 8 Notes on OTIST 1. If you enabled OTIST in the wireless client, you see this screen each time you start the ZyXEL Utility. Click Yes for it to search for an OTIST- enabled AP. 2. If an OTIST-enabled wireless client loses its wireless connection for more than ten seconds, it will search for an OTIST-enabled AP for up to one minute.
  • Seite 14 ENGLISH 9 Troubleshooting PROBLEM CORRECTIVE ACTION Windows Make sure the ZyXEL G-360 is inserted into the computer PCI slot does not auto- properly and then restart your computer. Check the LEDs on the detect the ZyXEL G-360. ZyXEL G-360. Perform a hardware scan by clicking Start, Settings, Control Panel and double-clicking Add/Remove Hardware.
  • Seite 15: Deutsch

    Vorgehen zum Begutachten der Zertifikate eines Produkts 1. Gehe zu www.zyxel.com 2. Wählen Sie Ihr Produkt aus der Dropdownliste auf der ZyXEL Homepage aus, um die Seite des entsprechenden Produkts aufzurufen. 3. Wählen Sie die Zertifizierung aus, die Sie von dieser Seite aus aufrufen möchten.
  • Seite 16: Hardware Installieren

    DEUTSCH 2 Hardware installieren Folgen Sie den nachstehenden Schritten, um den ZyXEL G-360 in Ihrem Computer zu installieren. 1. Speichern Sie Ihre Arbeit und schließen Sie alle Programme. 2. Schalten Sie den Computer und die Peripheriegeräte (wie z.B. Drucker) aus.
  • Seite 17 DEUTSCH Windows 98 SE 1. Sobald Windows die ZyXEL G-360 automatisch erkennt, klicken Sie auf Weiter. 2. Klicken Sie auf Nach dem besten Treiber für das Gerät suchen. (empfohlen), und klicken Sie auf Weiter. 3. Legen Sie die Installations-CD in Ihr CD-ROM-Laufwerk ein. Wählen Sie Geben Sie eine Position an und klicken dann auf Durchsuchen, um den Driver-Ordner auf der CD ausfindig zu machen.
  • Seite 18: Windows 2000

    DEUTSCH Windows 2000 1. Sobald Windows die ZyXEL G-360 automatisch erkennt, klicken Sie auf Weiter. 2. Legen Sie die Installations-CD in Ihr CD-ROM-Laufwerk ein. Wählen Sie Nach einem passenden Treiber für das Gerät suchen (empfohlen), und klicken Sie auf Weiter.
  • Seite 19: Installation Des Zyxel-Hilfsprogramms Für Eine Drahtlose Kommunikation

    DEUTSCH 4. Klicken Sie auf Beenden. Daraufhin erscheint ein Begrüßungsbildschirm. 4 Installation des ZyXEL-Hilfsprogramms für eine drahtlose Kommunikation Die Installation ist für alle Windows-Versionen sehr ähnlich. Falls nicht gesondert erwähnt, beziehen sich die folgenden Bildschirme auf Windows 2000. Nachdem der Treiber erfolgreich installiert wurde, legen Sie bitte noch einmal die CD in das CD-ROM-Laufwerk Ihres Computers ein.
  • Seite 20 Durchsuchen, um einen anderen Ordner auszuwählen. Klicken Sie auf Fertigstellen, um den Computer neu zu starten. Nachdem Sie den ZyXEL G-360 eingesteckt haben und den Treiber und das ZyXEL G-360-Hilfsprogramm installiert haben, erscheint ein Symbol in der Taskleiste. Wenn das ZyXEL Utility Symbol angezeigt wird, ist die ZyXEL G-360 ordnungsgemäß...
  • Seite 21: Einführung Von Otist

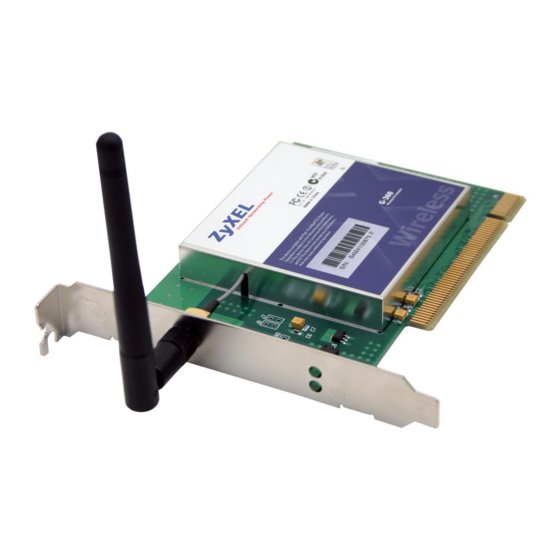
    DEUTSCH LED-Display PWR LED LINK LED Die folgende Übersicht beschreibt die LEDs der ZyXEL G-360. FARBE STATUS BESCHREIBUNG Grün Die ZyXEL G-360 ist mit Strom versorgt. Die ZyXEL G-360 ist nicht mit Strom versorgt. LINK Grün Blinkend Die ZyXEL G-360 empfängt oder sendet Daten.
  • Seite 22: Otist Aktivieren

    Vor dem Übertragen der Einstellungen müssen Sie OTIST sowohl beim AP als auch beim drahtlosen Client aktivieren. In dieser Bedienungsanleitung verwenden wir die Benutzeroberflächen des Prestige 334WT und ZyXEL G-360 als Beispiel. Es ist möglich, dass die Benutzeroberflächen bei Ihren ZyXEL-Geräten leicht abweichen. Der AP und die drahtlosen Klient(en) MÜSSEN denselben Schlüssel einrichten verwenden.
  • Seite 23 Schlüssel verwendet, den Sie manuell konfiguriert haben. 7.2 Drahtloser Client Starten Sie das ZyXEL-Programm und klicken Sie auf die Registerkarte Adapter. Wählen Sie die Option OTIST, geben Sie denselben Schlüssel einrichten ein, den auch der AP hat und klicken Sie auf Save (Speichern).
  • Seite 24: Starten Von Otist

    DEUTSCH 8 Starten von OTIST Klicken Sie innerhalb von drei Minuten (beim Schreiben) im OTIST-Web-Konfigurator des AP und im Fenster Adapter des/der drahtlosen Clients auf Start. Sie können in den drahtlosen Clients und im AP in einer beliebigen Reihenfolge OTIST starten, sie müssen sich jedoch alle innerhalb der Reichweite befinden, und OTIST muss aktiviert sein.
  • Seite 25 Im drahtlosen Client erscheint dieses Fenster, wenn er keinen AP findet, bei dem OTIST aktiviert ist (und der denselben Schlüssel einrichtenl hat). Klicken Sie auf OK, um zum Hauptfenster des ZyXEL-Programms zurückzukehren. Wenn sich im Übertragungsbereich mehr als ein AP befindet, bei dem OTIST aktiviert ist, werden Sie in einem Fenster dazu aufgefordert, den AP auszuwählen, von dem die Einstellungen geladen werden sollen.
  • Seite 26 DEUTSCH 1. Wenn Sie im drahtlosen Client OTIST aktiviert haben, erscheint dieses Fenster bei jedem Start des Programms. Klicken Sie auf Yes (Ja), damit es nach einem AP sucht, bei dem OTIST aktiviert ist. 2. Wenn ein drahtloser Client, bei dem OTIST aktiviert ist, die drahtlose Verbindung länger als 10 Sekunden verliert, sucht er bis zu eine Minute lang nach einem AP, bei dem OTIST aktiviert ist.
  • Seite 27: Störungsbeseitigung

    Vergewissern Sie sich, dass die ZyXEL G-360 ordnungsgemäß in entdeckt die den PCI-Steckplatzes des Computers eingeschoben ist und starten ZyXEL G-360 Sie den Computer neu. Überprüfen Sie die LEDs der ZyXEL G-360. nicht Führen Sie eine Hardwaresuche durch, indem Sie auf automatisch.
  • Seite 29: Español

    1. Vaya a www.zyxel.com. 2. Seleccione el producto que desea en el cuadro de lista desplegable que se encuentra en la página principal de ZyXEL para obtener acceso a la página de dicho producto. 3. Seleccione la certificación que desea ver en esta página.
  • Seite 30: Instalación Del Hardware

    5. Asegure el adaptador al chasis con un tornillo de soporte. 6. Acople la antena incluida al ZyXEL G-360. La antena debería estar en posición perpendicular al suelo. 7. Vuelva a poner la tapa de la computadora y enciéndala.
  • Seite 31: Windows Me

    Siguiente. 6. Haga clic en Terminar y reinicie el equipo cuando se le solicite. Windows Me 1. Windows detecta automáticamente ZyXEL G-360. Seleccione Especificar ubicación del controlador (Avanzado), a continuación, haga clic en Siguiente. 2. Introduzca el CD de instalación en la unidad CD-ROM. Seleccione Buscar la mejor unidad para su dispositivo, a continuación, seleccione sólo...
  • Seite 32: Windows 2000

    ESPAÑOL Windows 2000 1. Cuando Windows detecta automáticamente el ZyXEL G-360, haga clic en Siguiente. 2. Introduzca el CD de instalación en la unidad CD-ROM. Seleccione Buscar un controlador apropiado para mi dispositivo (recomendado) y haga clic en Siguiente. 3. Seleccione Unidad de CD-ROM y haga clic en Siguiente.
  • Seite 33 ESPAÑOL 4 Instalación de la utilidad ZyXEL Wireless LAN Los procedimientos de instalación son similares para todas las versiones admitidas de Windows. Todas las imágenes mostradas corresponden a Windows 2000, si no se especifica lo contrario. Una vez instalado el controlador correctamente, vuelva a insertar el CD de soporte en la unidad de CD-ROM de su equipo.
  • Seite 34 Haga clic en Terminar para reiniciar el equipo. Tras insertar el dispositivo ZyXEL G-360 e instalar el controlador y la utilidad ZyXEL, aparecerá un icono en la bandeja del sistema. Si aparece el icono de la Utilidad ZyXEL, la ZyXEL G-360 se instala convenientemente.
  • Seite 35 ESPAÑOL La tabla siguiente describe los indicadores LED existentes en la ZyXEL G-360. COLOR ESTADO DESCRIPCIÓN Verde Encendido El dispositivo ZyXEL G-360 está conectado a la alimentación. Apagado El dispositivo ZyXEL G-360 no está conectado a la alimentación. LINK Verde Parpadeando La ZyXEL G-360 está...
  • Seite 36 ESPAÑOL Usamos las pantallas del Prestige 334WT y del G-360 en esta guía como ejemplo. Las pantallas pueden variar ligeramente según los dispositivos ZyXEL. El PA y el/los cliente(s) inalámbrico(s) DEBEN usar la misma Setup key (Clave de configuración). 7.1 PA Puede activar OTIST utilizando el botón Reset (Reiniciar) del configurador de web.
  • Seite 37 ESPAÑOL 7.2 Cliente inalámbrico Inicie la utilidad ZyXEL y haga clic en la ficha Adapter (Adaptador). Seleccione la casilla de verificación OTIST, introduzca la misma Setup Key (Clave de configuración) que en su PA y haga clic en Save (Guardar).
  • Seite 38 ESPAÑOL 8 Iniciar OTIST Debe hacer clic en Start (Iniciar) en la pantalla del configurador de web OTIST del PA y en la pantalla Adapter (Adaptador) del cliente(s) inalámbrico(s), todo en tres minutos (en el momento de la escritura). Puede iniciar OTIST en los clientes inalámbricos y el PA en cualquier orden, pero todos deben estar dentro del alcance y tener OTIST activado.
  • Seite 39 OTIST activado (con la misma Setup key (Clave de configuración)). Haga clic en OK (Aceptar) para regresar a la pantalla principal de la utilidad ZyXEL. Si hay más de un PA con OTIST activado dentro del alcance, verá una pantalla pidiéndole que seleccione un PA desde el que obtener la configuración.
  • Seite 40 ESPAÑOL 1. Si ha activado OTIST en el cliente inalámbrico, verá esta pantalla cada vez que inicie la utilidad. Haga clic en Yes (Sí) para que busque un PA con OTIST activado. 2. Si un cliente inalámbrico con OTIST activado pierde su conexión inalámbrica durante más de diez segundos, buscará...
  • Seite 41: Solución De Problemas

    Adaptadores de red. (Los pasos podrían variar dependiendo de la versión de Windows). Instale la ZyXEL G-360 en otro equipo. Si el error persiste, es posible que tenga problemas de hardware. En este caso, debería ponerse en contacto con su proveedor local.
  • Seite 43: Français

    Il se peut que les utilisateurs de Windows 98 SE aient besoin du CD Windows 98 SE Si vous avez installé le logiciel Funk Odyssey Client sur l'ordinateur, désinstallez-le (supprimez-le). Installation de l'équipement Veuillez suivre la procédure ci-dessous pour installer la ZyXEL G-360 dans votre ordinateur.
  • Seite 44: Installation Du Pilote

    Démontez le capot de l'ordinateur et sortez la ZyXEL G-360 de son paquet. 4. Insérez le ZyXEL G-360 dans un slot PCI disponible. Assurez vous que les contacts de le ZyXEL G-360 soient entièrement posés dans le slot.
  • Seite 45: Windows 2000

    Suivant. 3. Lorsque l’Assistant Ajout de nouveau matériel trouve le pilote, cliquez sur Suivant. 4. Cliquez sur Terminer et redémarrez l’ordinateur lorsque vous y êtes invite. Windows 2000 1. Lorsque Windows détecte automatiquement la ZyXEL G-360, cliquez sur Suivant.
  • Seite 46: Windows Xp

    5. Cliquez sur Terminer pour terminer l’installation du pilote. Windows XP 1. Windows détecte automatiquement la ZyXEL G-360. Sélectionnez Installer à partir d'une liste d'emplacements spécifiques (Avancé), puis cliquez sur Suivant`. 2. Insérez le CD d'installation dans votre lecteur de CD-ROM. Sélectionnez Rechercher la meilleure unité...
  • Seite 47 FRANÇAIS Après avoir installé le pilote avec succès, re-placez le CD de soutien dans le lecteur de CD-ROM de votre ordinateur. Le CD s'exécute automatiquement. Sinon, recherchez et double-cliquez sur setup.exe. Sélectionnez votre langue et cliquez sur OK. Cliquez sur Installer l’utilitatire pour lancer l'installation.
  • Seite 48: Témoins Led

    ZyXEL G-360 a été installée correctement. Veuillez vous reporter au Guide de l'utilisateur pour configurer la ZyXEL G- 360. Témoins LED PWR LED LINK LED Le tableau suivant décrit les témoins LED qui se trouvent sur la ZyXEL G-360. COULEUR ETAT DESCRIPTION Vert Allumé...
  • Seite 49 Vous devez activer OTIST à la fois sur l'AP et le client avant de commencer à transférer les paramètres. Nous utilisons les écrans du Prestige 334WT et du ZyXEL G-360 comme exemple dans ce guide. Les écrans peuvent légèrement varier selon vos matériels ZyXEL.
  • Seite 50 FRANÇAIS L'AP et le(s) client(s) sans fil DOIVENT utiliser la même Setup key (Clé de configuration). 7.1 AP Vous pouvez activer OTIST à l'aide du bouton Reset (Réinitialiser) ou du configurateur web. Si vous utilisez le bouton Reset (Réinitialiser), la Setup key (Clé...
  • Seite 51 FRANÇAIS 7.2 Client sans fil Démarrez l'utilitaire de ZyXEL et cliquez sur l'onglet Adapter (Adaptateur). Sélectionnez la case à cocher OTIST, entrez la même Setup Key (Clé de configuration) que pour votre AP et cliquez sur Save (Enregistrer).
  • Seite 52 FRANÇAIS Démarrer OTIST Vous devez cliquer sur Start (Démarrer) dans l'écran du configurateur web OTIST de l'AP et dans l'écran Adapter (Adaptateur) du (des) client(s) sans fil le tout en l'espace de trois minutes (au moment de la rédaction). Vous pouvez démarrer OTIST dans les clients sans fil et l'AP dans n'importe quel ordre mais ils doivent tous se trouver à...
  • Seite 53 Dans le client sans fil, cet écran apparaît s'il ne trouve pas d'APavec la fonction OTIST activée (avec la même Setup key (Clé de configuration)). Cliquez sur OK pour retourner à l'écran principal de l'utilitaire du ZyXEL. S'il y a plus d'un AP à portée avec la fonction OTIST activée, vous verrez apparaître un écran vous invitant à...
  • Seite 54 FRANÇAIS Si vous activez OTIST dans le client sans fil, vous verrez cet écran chaque fois que vous démarrerez l'utilitaire. Cliquez sur Yes (Oui) pour qu'il recherche un AP avec la fonctoin OTIST activée. Si un client sans fil avec la fonction OTIST activée perd sa connexion sans fil pendant plus de dix secondes, il recherchera un AP avec la fonction OTIST activée pendant une minute au maximum.
  • Seite 55 Démarrer, Paramètres, Panneau de configuration, Système, Equipement, puis cliquez sur Gestionnaire de périphériques. Vérifiez l'état de la ZyXEL G-360 sous Carte réseau. (Il est possible que la procédure varie en fonction de votre version de Windows). Installez ZyXEL G-360 dans un autre ordinateur. Si l'erreur persiste, il se peut que vous ayez un problème avec l'équipement.
  • Seite 57: Italiano

    Procedura per visualizzare la certificazione di un prodotto 1. Andare alla pagina www.zyxel.com 2. Nel sito ZyXEL, selezionare il proprio prodotto dall’elenco a discesa per andare alla pagina di quel prodotto. 3. Da questa pagina selezionare la certificazione che si vuole vedere.
  • Seite 58: Installazione Del Driver

    7. Riposizionare la copertura del computer ed accenderlo. 3 Installazione del driver Per installare il driver ZyXEL G-360 seguire le istruzioni relative alla propria versione di Windows. Windows 98 SE 1. Quando Windows rileva automaticamente ZyXEL G-360, fare clic su Avanti.
  • Seite 59 Avanti. 4. Fare clic su Fine e riavviare il computer quando richiesto. Windows 2000 1. Quando Windows rileva automaticamente ZyXEL G-360, fare clic su Avanti. 2. Inserire il CD di installazione nel lettore di CD-ROM. Selezionare Ricerca del driver più...
  • Seite 60: Windows Xp

    6. Fare clic cu Fine per completare l’installazione del driver. Windows XP 1. Windows rileva automaticamente ZyXEL G-360. Selezionare Installa da un elenco o specificare un percorso (Avanzate), fare clic su Avanti. 2. Inserire il CD di installazione nel lettore di CD-ROM. Selezionare Ricerca del driver più...
  • Seite 61 ITALIANO Selezionare la lingua e fare clic su OK. Fare clic su Installa Utilità per avviare l’installazione. Verrà visualizzata una schermata di benvenuto. Premere Avanti. Premere Avanti per accettare la posizione predefinita del file, oppure premere Sfoglia per scegliere un'altra cartella. Premere Fine per riavviare il computer.
  • Seite 62: Display A Led

    ITALIANO Dopo aver installato ZyXEL G-360, il driver e l’utilità ZyXEL, nell’area di notifica apparirà un’icona. Se viene visualizzata l'icona dell'Utility ZyXEL, la ZyXEL G-360 è stata installata in modo appropriato. Perla configurazione della ZyXEL G-360 fare riferimento alla Guida dell'utente ZyXEL.
  • Seite 63: Access Point (Ap)

    A titolo esemplificativo, in questo documento saranno utilizzare le schermate relative a Prestige 334WT e a ZyXEL G-360. Le schermate possono variare leggermente rispetto ai dispositivi ZyXEL in proprio possesso. L'AP e i client wireless DEVONO utilizzare la stessa Setup key (Impostazione chiave).
  • Seite 64 ITALIANO chiave) predefinita (01234567) o precedentemente salvata (tramite lo strumento di configurazione Web). Tenere premuto il pulsante Reset per uno o due secondi. Se si tiene premuto il pulsante Reset troppo a lungo, il dispositivo viene reimpostato alla configurazione predefinita di fabbrica! Nello strumento di configurazione Web, aprire la schermata principale Wireless LAN (LAN wireless) e selezionare OTIST.
  • Seite 65 ITALIANO 7.2 Client wireless Avviare il programma di utilità di ZyXEL e fare clic sulla scheda Adapter (Adattatore). Selezionare la casella di controllo OTIST, immettere la stessa Setup Key (Impostazione chiave) dell'AP e fare clic su Save (Salva). 8 Avvio di OTIST...
  • Seite 66 è completo. Sul client wireless si vedrà questa schermata se non viene trovato un AP con la funzione OTIST attivata (con la stessa Setup key(Impostazione chiave)). Fare clic su OK per tornare alla schermata principale del programma di utilità ZyXEL.
  • Seite 67 ITALIANO Se vi è più di un AP con la funzione OTIST attivata all'interno del campo, sarà visualizzata una schermata che richiede di selezionare da quale AP scaricare le impostazioni. 9 Note su OTIST 1. Se si è attivato OTIST sul client wireless, si vedrà questa schermata ogni volta che si avvia il programma di utilità.
  • Seite 68: Risoluzione Dei Problemi

    Effettuare una scansione dell'hardware facendo clic su Start, G-360. Impostazioni, Pannello di controllo e facendo doppio clic su Aggiungi/Rimuovi hardware (le fasi possono variare a seconda della versione di Windows). Seguire le istruzioni fornite a schermo per cercare la ZyXEL G-360 e installare il driver.
  • Seite 69 Start, Impostazioni, Pannello di controllo, Sistema, Hardware, poi fare clic su Gestione periferiche. Verificare lo stato della ZyXEL G-360 in corrispondenza di Adattatore di rete (le fasi possono variare a seconda della versione di Windows). Installare la ZyXEL G-360 in un altro computer. Se l'errore persiste, potrebbe esserci un problema hardware.
  • Seite 71: 繁體中文

    繁體中文 低功率電波輻射性電機管理辦法 經型式認證合格之低功率射頻電機,非經許可,公司、商號或使用者均不得擅 自變更頻率、加大功率或變更原設計之特性及功能。 低功率射頻電機之使用不得影響飛航安全及干擾合法通信;經發現有干擾現象 時,應立即停用;並改善至無干擾時方得繼續使用。 前項合法通信,指依電信法規定作業之無線電信。低功率射頻電機須忍受合法 通信或工業、科學及醫療用電波輻射信電機設備之干擾。 檢視產品認證的程序 1. 請到 ZyXEL 網站 www.zyxel.com。 2. 請在 ZyXEL 首頁的產品頁面上,透過下拉式選單選取產品名字。 3. 從這個頁面上選擇你想查閱的產品認證。 1 設備安裝需求 在安裝之前,請確認您的電腦符合下列的需求: • CPU Pentium II 300MHz 或以上規格 • 至少 6 MB 可用的硬碟空間 • 至少 32 MB RAM (建議 64MB) •...
  • Seite 72 請依照以下步驟將 ZyXEL G-360 安裝至您的電腦上。 1. 儲存你的工作文件以及關閉所有的程式。 2. 關閉電腦及其週邊設備(例如印表機) ,然後從電源插座拔掉電源線。 3. 手腕套上靜電環或是身體接觸金屬物品以使自己接地;打開電腦外殼, 並將 ZyXEL G-360 從包裝盒裡取出。 4. 將 ZyXEL G-360 插入到一個可用的 PCI 插槽。確認 ZyXEL G-360 與 PCI 插槽完全密合。 5. 使用檔板的螺絲將 ZyXEL G-360 鎖緊在電腦的機殼上。 6. 在 ZyXEL G-360 裝上內盒所附的天線。建議天線的方向與地面垂直成 90 度角。 7. 裝上電腦外殼並接上電源,之後打開電腦電源。...
  • Seite 73 繁體中文 Windows 98 SE 1. 當 Windows 自動偵到 ZyXEL G-360,按下一步。 2. 選擇 搜尋適當的裝置驅動程式檔案 (建議選項). 按下一步。 3. 放置安裝光碟在你的 CD-ROM 。請選擇指定位置 並按一下瀏覽 來尋 找 CD 中的驅動程式。請按下一步。 4. 當提示插入 Windows 98 SE 光碟時,按 OK 然後指定 Windows 98 SE 安裝檔案位置,按確定。 5. 當尋找新增硬體精靈 搜尋到驅動程式時,按下一步。 6. 按完成 然後重新啟動電腦。...
  • Seite 74 2. 插入安裝光碟到光碟機。選擇搜尋適當的裝置驅動程式檔案 (建議選 項),按下一步。 3. 選擇光碟機 然後按下一步。 4. 當尋找新硬體精靈找到驅動程式時,按下一步。 5. 假如警告的視窗提示出現, 按確定繼續。 6. 按完成來完成驅動程式安裝。 Windows XP 1. Windows 自動偵測到 ZyXEL G-360。選擇從清單或特定位置安裝(進 階),然後按下一步。 2. 插入安裝光碟片到 CD-ROM。選擇在這些位置中搜尋最好的驅動程式 然後再選擇搜尋可卸除式媒體 (軟碟, CD-ROM …) 按下一步。 3. 假如警告的視窗提示出現,按下一步。 4. 按完成來完成驅動程式安裝。 4 安裝 ZyXEL 無線區域網路設定工具 下列的安裝程序與所有的 Windows 版本相似,將會以 Windows 2000 的視窗來...
  • Seite 75 繁體中文 選擇您要安裝的語言。 選擇並執行安裝使用者介 面。 出現歡迎視窗,按下一步。 按下一步接受預設的安裝路徑或 按瀏覽選擇其他目錄。 按結束完成安裝程序。...
  • Seite 76 繁體中文 插上 ZyXEL G-360 並安裝好驅動程式及 ZyXEL 工具,右邊的圖示會 出現在電腦下方的系統列上。 假設上述圖示正常出現,表示ZyXEL G-360正確安裝完成。 參照ZyXEL使用手冊來設定您的G-360。 5 LED 燈號顯示 PWR LED LINK LED ZyXEL G-360 的 LED 顯示燈號說明: 顏色 狀態 狀態描述 ZyXEL G-360 正在接收訊號。 綠色 恆亮 ZyXEL G-360 無電源輸入。 無燈號 LINK ZyXEL G-360 正在接收或傳送資料。 綠色...
  • Seite 77 OTIST (One-Touch 智慧型安全性技術) 讓您將 AP 的 SSID 及 WEP 或 WPA- PSK 安全性設定,轉移到支援 OTIST 且在傳輸範圍內的無線用戶端。如果您 尚未手動設定 WPA-PSK 金鑰,還可以選擇讓 OTIST 產生。 7 啟用 OTIST 在開始轉移設前,您必先在 AP 及無線用戶端上啟用 OTIST。 本手冊中,我們使用 Prestige 334WT 及 ZyXEL G-360 畫面做為範例。畫面可 能和您的 ZyXEL 裝置略有不同。 AP 及無線用戶端必須使用相同的設定金鑰。 7.1 AP 您可以使用 Reset (重設)按鈕或網路組態設定程式啟用 OTIST。如果您使用...
  • Seite 78 在網路組態設定程式中,前往 Wireless LAN (無線 LAN)主畫面,然後選取 OTIST。若要變更 Setup key (設定金鑰),請輸入零至八個可列印的字元。若 要讓 OTIST 自動產生 WPA-PSK 金鑰,請選取 Yes (是) 核取方塊。如果您已 手動設定 WEP 金鑰或 WPA-PSK 金鑰,且已選取此核取方塊,則會使用手動 設定金鑰。 7.2 無線用戶端 啟動 ZyXEL 公用程式,然後按一下 Adapter (卡片設定)標籤。選取 OTIST 核 取方塊,輸入和您的 AP 相同的 Setup Key (設定金鑰),然後按一下 Save (儲 存)。...
  • Seite 79 繁體中文 8 啟動 OTIST 您必須在三分鐘內(此文件完成時),按一下 AP OTIST 網路組 態設定程式畫面、以及無線用戶端 Adapter (卡片設定) 畫面上的 Start (啟動)。您能以任何順序啟動無線用戶端及 AP 的 OTIST,但 二者必須皆在範圍內,且已啟用 OTIST。 在 AP 上會蹦現網路組態設定程式畫面,為您顯示轉移的安全性設 定。在檢視設定後,按一下 OK (確定)。...
  • Seite 80 繁體中文 2. 轉移 OTIST 設定時會出現此畫面。轉移完成時會關閉畫面。 在無線用戶端上,您會看見找不到(具相同設定金鑰) 已啟用 OTIST 的 AP 的此畫面。按一下 OK (確定),回到 ZyXEL 公用程式主畫面。 如果範圍內有超過一個以上已啟用 OTIST 的 AP,畫面會要求您選取 一個 AP 以取得設定值。 9 OTIST 注意事項 1. 如果您已啟用無線用戶端的 OTIST,每次啟動公用程式時都會看到此 畫面。按一下 Yes (是),讓其搜尋啟用 OTIST 的 AP。...
  • Seite 81 繁體中文 2. 如果啟用 OTIST 的無線用戶端無線連線斷線 10 秒以上,則將會搜尋 已啟用 OTIST 的 AP 至多一分鐘。(如果您已手動讓無線用戶端搜尋已 啟用 OTIST 的 AP,則不會逾時;按一下 OTIST 進行畫面中的 Cancel (取消) 以停止搜尋。) 3. 當無線用戶端找到已啟用 OTIST 的 AP 時,您仍必須按一下 AP OTIST 網路組態設定程式畫面中的 Start (啟動),或按住 Reset (重設) 按鈕(一至兩秒),讓 AP 轉移設定值。 4. 如果您在使用 OTIST 後變更 AP 的 SSID 或金鑰,則必須再次執行 OTIST,或手動輸入無線用戶端。...
  • Seite 82 繁體中文 10 問題排除 問題 問題排除 Windows 未自 確認 ZyXEL G-360 已正確的插在 PCI 插槽,然後重新啟動您的電 腦。檢查 ZyXEL G-360 上的 LED 燈號。 動偵測到 ZyXEL G- 執行新增硬體的作業,可以按開始, 設定, 控制台然後雙擊新增/移除 360。 硬體。(步驟可能依 Windows 的版本有所不同)。依照畫面上的指示尋 找 ZyXEL G-360 並安裝驅動程式。 檢查可能的硬體衝突,在 Windows 中,按開始, 設定, 控制台, 系統, 硬體然後按裝置管理員。在網路介面卡檢查 ZyXEL G-360 的狀態。...
  • Seite 83: Русский

    Процедура просмотра сертификатов изделий 1. Зайдите на сайт www.zyxel.com 2. Выберите нужное изделие из раскрывающегося списка на домашней странице корпорации ZyXEL и перейдите на страницу, посвященную этому изделию. 3. Выберите на этой странице нужный сертификат для просмотра. 1 Требования по установке...
  • Seite 84 дотронувшись до металлической части корпуса компьютера. Снимите крышку компьютера и достаньте ZyXEL G-360 из упаковки. 4. Вставьте ZyXEL G-360 в свободный PCI-слот. Убедитесь, что контакты ZyXEL G-360 вошли в слот полностью. 5. Закрепите ZyXEL G-360 в компьютере при помощи винта кронштейна.
  • Seite 85: Установка Драйверов

    Для установки драйвера ZyXEL G выполните следующие действия для соответствующей версии Windows. Windows 98 SE 1. После того как Windows автоматически обнаружит ZyXEL G-360, щелкните Next (Далее). 2. Выберите Search for the best driver for your device (Recommended). (Искать наиболее подходящий драйвер (рекомендуется)) и щелкните...
  • Seite 86: Windows 2000

    4. Щелкните Finish (Готово) и после появления соответствующего сообщения перезагрузите компьютер. Windows 2000 1. После того как Windows автоматически обнаружит ZyXEL G-360, щелкните Next (Далее). 2. Вставьте установочный диск в привод CD-ROM. Выберите Search for a suitable driver for my device (recommended) (Найти наиболее...
  • Seite 87 подпись не найдена), щелкните Yes, чтобы продолжить установку. 6. Щелкните Finish (Готово), чтобы завершить установку драйвера. Windows XP 1. Windows автоматически обнаруживает ZyXEL G-360. Выберите Install from a list or specific location (Advanced) (Установить из списка или указать расположение (для опытных пользователей)) и щелкните Next (Далее).
  • Seite 88 РУССКИЙ 2. Выберите язык и щелкните 3. Щелкните Install Utility (Установить утилиту), чтобы начать установку. 4. На экране появится окно приветствия. Щелкните Next. 5. Щелкните Next (Далее), если Вы хотите использовать каталог по умолчанию, или Browse (Обзор), если Вы хотите выбрать другой каталог.
  • Seite 89 РУССКИЙ После установки ZyXEL G-360 в слот и инсталляции драйвера и утилиты ZyXEL, на системной панели появится значок. Появление значка утилиты ZyXEL означает, что установка ZyXEL G-360 проведена успешно. Информацию о конфигурировании ZyXEL G-360 см. в Руководстве пользователя. 5 Светодиодная сигнализация...
  • Seite 90 Зеленый Мигает ZyXEL G-360 принимает или передает данные. Не ZyXEL G-360 не принимает и не передает горит данные. 6 Введение в OTIST Клиенты беспроводной сети должны иметь тот же идентификатор SSID и те же параметры безопасности, что и точка доступа (ТД) или беспроводной...
  • Seite 91 РУССКИЙ В качестве примеров в данном руководстве использованы снимки с экранов Prestige 334WT и ZyXEL G-360. В зависимости от используемых Вами устройств ZyXEL экраны могут немного отличаться. Точка доступа и беспроводной(-ые) клиент(-ы) ДОЛЖНЫ использовать один и тот же Установочный ключ...
  • Seite 92 РУССКИЙ 7.2 Беспроводной клиент Запустите утилиту ZyXEL и перейдите на вкладку Adapter (Адаптер). Поставьте флажок OTIST, введите тот же Установочный ключ (Setup Key), который использует точка доступа, и нажмите Save (Сохранить).
  • Seite 93 РУССКИЙ 8 Запуск OTIST Вы должны нажать на кнопки Start в окне OTIST Web- конфигуратора точки доступа и на вкладке Adapter беспроводного(-ых) клиента(-ов) в течение трех минут (во время записи). Запускать OTIST в беспроводных клиентах и точке доступа можно в любом порядке, но все они должны...
  • Seite 94 В беспроводном клиенте Вы видите это окно, если клиент не может найти точку доступа, поддерживающую OTIST (с тем же Установочным ключом). Щелкните OK, чтобы перейти обратно к главному окну утилиты ZyXEL. Если в зоне доступа находятся несколько точек доступа, поддерживающих...
  • Seite 95 РУССКИЙ 9 Замечания относительно OTIST 1. Если Вы включили поддержку OTIST в беспроводном клиенте, Вы будете видеть это окно каждый раз, когда Вы запустите утилиту. Щелкните Yes, чтобы начать поиск точки доступа, поддерживающей OTIST. 2. Если беспроводной клиент, поддерживающий OTIST, теряет беспроводную...
  • Seite 96: Устранение Неисправностей

    (Настройки), Control Panel (Панель управления) и дважды щелкните Add/Remove Hardware (Установка оборудования). (Порядок действий может быть разным в зависимости от версии Windows). Следуйте инструкциям на экране для поиска ZyXEL G-360 и установки драйвера. Проверьте возможные конфликты устройств. В системе Windows щелкните Start (Пуск), Settings (Настройки), Control Panel (Панель...
  • Seite 97 РУССКИЙ ПРОБЛЕМА СПОСОБ УСТРАНЕНИЯ Установите ZyXEL G-360 в другой компьютер. Если проблема не исчезла, возможно, имеет место аппаратная неисправность. В этом случае следует связаться с продавцом. C ertifica tions . F or more informa tion a bout your devices Decla ra tion of C onformity (DO C ) plea s e refer to www. z yxel. com...

Inhaltsverzeichnis