Keter Midi Lounge Shed Montageanleitung
Inhaltsverzeichnis
Quicklinks
Assembly instructions • InstructIons de montage • montAgeAnleitung • InstruccIones de ensamble
instruções de montAgem • montagehandleIdIng • instruzioni per il montAggio
• the versatIle outdoor storage unIt
• unIté de rangement pour l'extérIeur multI-usages
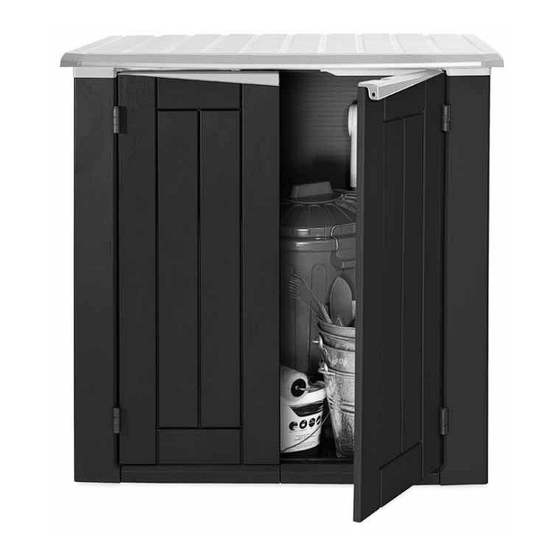
• dIe praktIsche aufbewahrungsbox für Ihren garten
• la versátIl unIdad de almacenamIento para exterIores.
• de veelzIjdIge opslageenheId voor buItenshuIs
• unItà dI conservazIone multIuso da esterno
• a unIdade de armazenamento exterIor versátIl.
If there are mIssIng or broken parts, please do not return the product to the store
s'Il Y a des pIÈces manQuantes ou cassées, ne retournez pas le produIt au magasIn
bItte brIngen sIe Ihr produkt nIcht gleIch zum laden zurück, falls teIle fehlen oder defekt sInd.
bitte loggen sie in unsere website ein oder wenden sie sich an unseren kundenservice.
sI hubIera alguna parte faltante o daÑada, no devuelva el producto a la tIenda
Inicie sesión en nuestro sitio en Internet o contáctese con nuestro servicio de atención al cliente
In geval van ontbrekende of gebroken onderdelen nIet het product naar de wInkel retourneren.
In caso dI partI mancantI o danneggIate, evItare dI restItuIre Il prodotto al negozIo.
se houver peças em falta ou partIdas, não devolva o produto à loja.
us:
17190644 / 17186703
please log onto our website, or contact customer service
veuillez visiter notre site Internet, ou contacter notre service clientèle
ga naar onze website of neem contact op met de klantenservice.
accedere al nostro sito o contattare il servizio clienti.
entre na nossa página de Internet ou contacte o serviço de clientes.
www.keter.com
1-88-374-4262
canada:
other european countries:
1-800-661-6721
uk:
0121-5060008
31-1612-28301
Inhaltsverzeichnis

Verwandte Anleitungen für Keter Midi Lounge Shed


Inhaltszusammenfassung für Keter Midi Lounge Shed
- Seite 1 In caso dI partI mancantI o danneggIate, evItare dI restItuIre Il prodotto al negozIo. accedere al nostro sito o contattare il servizio clienti. se houver peças em falta ou partIdas, não devolva o produto à loja. entre na nossa página de Internet ou contacte o serviço de clientes. www.keter.com 1-88-374-4262 canada: 1-800-661-6721...
-
Seite 2: Inhaltsverzeichnis
ASSEMBLY PARTS | PIÈCES À ASSEMBLER | MONTAGETEILE | PIEZAS DE ENSAMBLE | SSMF x 1 SFCL x 1 SFCR x 1 MONTAGESTUKKEN | PARTI DA MONTARE | PEÇAS DE MONTAGEM CAUTION | AVERTISSEMENT | WICHTIG | ADVERTENCIA | WAARSCHUWING | ATTENZIONE | ATENÇÃO Place shed on leveled surface | Some parts have metal edges | Please be careful when handling components | Always wear work gloves | Placez la remise sur une surface platte. -
Seite 3: Ssl X 1
SCW6 x 4 SFL x 1 SCW6 CLICK SSL x 1 SFL x 1 CLICK CLICK... -
Seite 4: Ssc X 1
SSC x 1 SCW6 x 2 CLICK CLICK SCW6 SCW4 x 2 SSB x 1 SCW4... -
Seite 5: Sshl X 1
SD x 2 SCW6 x 8 SH2 x 4 SCW5 x 11 SCW5 SD x 2 SSHL x 1 SSHR x 1 CLICK CLICK SSHL SCW6 SCW6 SSHR CLICK CLICK... -
Seite 6: Sh1 X 4
OPTION | OPCIóN | OPTIE | OPZION | OPÇãOE SH1 x 4 SCW6 x 8 Secure shed to floor | Fixer l’abri au sol | Asegure el cobertizo al piso | Schup- CLICK pen am Boden befestigen | Fissare il capanno al terreno | Bevestig schuurtje aan de grond | Fixe o abrigo ao solo not included | non inclus | nicht... - Seite 7 GARANZIA LIMITATA DI 2 ANNI L’ottima reputazione di cui gode Keter per i suoi prodotti è il risultato di una dedizione e di un impegno costante verso la qualità, il design e In case of fire, do not attempt to extinguish any burning polypropylene with water | En cas d’incendie, ne pas tenter l’innovazione.
-
Seite 8: Manutenzione E Sicurezza
• Consulte a las autoridades locales si se requiere algún permiso para instalar el cobertizo. • Verifique el cobertizo periódicamente para corroborar que esté estable y que el suelo esté nivelado. • Se recomienda especialmente afirmar el cobertizo a un objeto inmóvil o al suelo, haciendo perforaciones en el piso, en los lugares previamente marcados, e insertando los tornillos apropiados en el suelo (tamaño: 1,9’’-3’’.