MAC Audio Receiver MMC 400 Bedienungsanleitung
Inhaltsverzeichnis
Verfügbare Sprachen
Verfügbare Sprachen
Quicklinks
Inhaltsverzeichnis

Inhaltszusammenfassung für MAC Audio Receiver MMC 400
- Seite 1 MMC 400 BEDIENUNGSANLEITUNG/GARANTIEURKUNDE OWNER’S MANUAL/WARRANTY DOCUMENT...
- Seite 2 The Bluetooth ® word mark and logos are registered trademarks owned by Bluetooth SIG, Inc. and any use of such marks by Voxx Electronics GmbH is under license. Other trademarks and trade names are those of their respective owners. Bitte führen Sie das Gerät am Ende seiner Lebensdauer den zur Verfügung stehenden Rückgabe- und Sammelsystemen zu.
-
Seite 4: Sicherheitshinweise
Sehr geehrter Kunde, vielen Dank, dass Sie sich für das Mac Audio MMC 400 entschieden haben. Bitte lesen Sie unsere folgenden Hinweise vor Inbetriebnahme des MMC 400 genau durch. SICHERHEITSHINWEISE • Bitte die Bedienungsanleitung vor Inbetriebnahme sorgfältig durchlesen und aufbewahren. -
Seite 5: Konformitätserklärung
• Wenn das Gerät heruntergefallen ist und das Gehäuse beschädigt ist. • Wenn das Gerät nicht richtig funktioniert, obwohl man alle Hinweise in der Bedienungsanleitung beachtet hat. Es dürfen nur nachträgliche Änderungen vorgenommen werden, die vom Hersteller genehmigt sind. Es dürfen zur Reparatur nur Originalersatzteile verwendet werden. Nach einer Reparatur sollte das Gerät auf Sicherheit überprüft werden, um eine ordnungsgemäße und sichere Funktion sicherzustellen. - Seite 6 FERNBEDIENUNG TIMER ME U INTRO INFO MMC 400 ON/STBY: Schaltet das Gerät ein, wenn es sich im Standby-Modus befindet. Umgekehrt kann das Gerät vom Power-Betrieb auf Standby geschaltet werden. CLOCK: Wenn sich das Gerät im Standby-Betrieb befindet, kann durch längeren Druck die Uhrzeit eingestellt werden.
- Seite 7 EJECT: Öffnet oder schließt die CD-Schublade. SLEEP/TIMER: Automatische Abschaltung einstellen. Alarmzeit. ALARMEINSTELLUNG: Vor Einstellung des Alarms muss zunächst die Uhr eingestellt werden. Halten Sie im Standby-Modus 2 Sekunden lang die TIMER-Taste gedrückt. Die Stundenanzeige blinkt. Stellen Sie die Stunden mit den Tasten ein, und drücken Sie zur Bestätigung die TIMER-Taste.
- Seite 8 USB-Betrieb: Programmierung der Wiedergabereihenfolge bei nicht laufender USB-Wiedergabe: • Drücken Sie die PROG-Taste. • Wählen Sie mit den Tasten SKIP FORWARD bzw. SKIP BACK den gewünschten Titel aus. Mit den Tasten FOLDER+ bzw. FOLDER- können Sie auch Titel aus anderen Ordnern der Wiedergabeliste hinzufügen.
- Seite 9 INTRO/INFO FM-Betrieb: Wechselt zwischen Empfangsfrequenz/Programm Service (Sendername)/PTY (Program Type), Radiotext und CT (Clock Time), sofern der Sender diese Funktionen unterstützt bzw. der Radioempfang ausreichend ist. DAB: aktuelle Senderinformationen durchschalten. Anspiel-Funktion AN/AUS. USB: Anspiel-Funktion AN/AUS. 10 -/TUNE –: FM-Betrieb: Kurzer Druck: Die Empfangsfrequenz wird schrittweise verringert. Langer Druck: Startet den Sendersuchlauf Richtung niedrigerer Frequenzen.
-
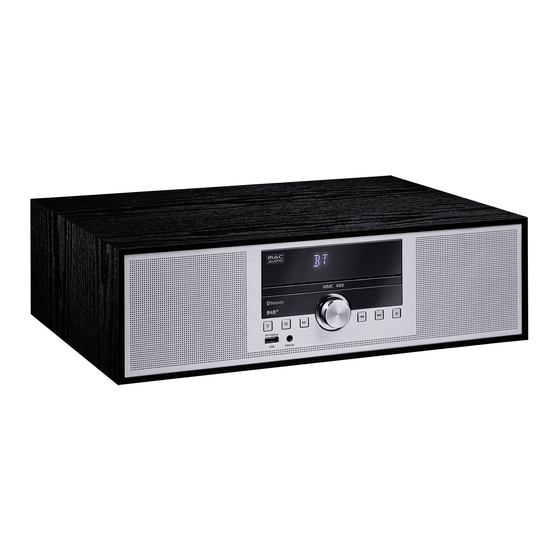
Seite 10: Bedienungselemente - Frontpanel
BEDIENUNGSELEMENTE - FRONTPANEL FERNBEDIENUNGS-EMPFÄNGER 2/3 DISPLAY SCREEN / ANZEIGE Zeigt Ihnen Ihre vorgenommenen Einstellungen an. CD-SCHUBLADE: Legen Sie die CD mit der Beschriftung nach oben in diese Schublade. ON/STBY: Schaltet das Gerät ein, wenn es sich im Standby-Modus befindet. Umgekehrt kann das Gerät vom Power-Betrieb auf Standby geschaltet werden. -
Seite 11: Rückseite Des Gerätes
LINE IN: Zum Anschluss einer Audioquelle mit einem 3,5 mm Stereo-Klinkenstecker (MP3- Player o. ä.). PLAY/PAUSE: Startet bzw. unterbricht die Wiedergabe einer CD. VOLUME: Stellt die Lautstärke ein. Die Lautstärke wird dabei im Display (12) angezeigt. (VOL 00 – VOL 32/max). 11, 12 SKIP USB und CD-Betrieb:... -
Seite 12: Installation
INSTALLATION ANTENNE Schließen Sie für optimalen Radioempfang die mitgelieferte 75 Ohm-FM/DAB-Antenne an den ANTENNEN-Eingang auf der Rückseite des Geräts an, und rollen Sie das Kabel voll aus. ZUSÄTZLICHE AUDIOGERÄTE Zusätzliche Audiogeräte werden vor der Inbetriebnahme des MMC 400 an die entsprechende Buchse angeschlossen. - Seite 13 FUNKTIONEN DES MMC 400 DISPLAY-HELLIGKEIT: Drücken Sie im Betriebs- oder Standby-Modus wiederholt die DIMMER-Taste, um die gewünscht Display-Helligkeit zu wählen. Sie können zwischen drei Helligkeitsstufen wählen - dunkel, mittel und hell. DAB / DAB+ TUNERBETRIEB Das Gerät kann in Ihrer Region verfügbare DAB und DAB+ Radiosender empfangen. BT: Aktiviert die Eingangsquelle Bluetooth.
-
Seite 14: Manuelles Auswählen Und Speichern Von Sendern
MANUELLES AUSWÄHLEN UND SPEICHERN VON SENDERN • Hinweis: Bevor Sie Sender manuell einstellen, informieren Sie sich über die Kanäle und Frequenzen der in Ihrer Region verfügbaren DAB / DAB+ Sender. • Schalten Sie das Gerät ein. • Drücken Sie wiederholt die SOURCE-Taste auf der Fernbedienung oder die Taste Gerät, um den DAB-Modus zu wählen. -
Seite 15: Funktionen Des Cd-Spielers
FUNKTIONEN DES CD-SPIELERS CD abspielen • Öffnen Sie mit der EJECT-Taste die CD-Schublade. • Legen Sie eine CD in die Schublade (Beschriftung nach oben). • Schließen Sie die Schublade mit EJECT. • Drücken Sie PLAY, um das erste Stück zu hören. •... -
Seite 16: Rds (Radio Data System)-Funktionen Des Tuners
RDS (RADIO DATA SYSTEM)-FUNKTIONEN DES TUNERS RDS ist ein System, mit dem Informationen über UKW-Sendungen zusammen mit dem Signal des Senders ausgestrahlt werden. Der MMC 400 kann diese Informationen (über den Sender, die Sendung usw.) im Display anzeigen. Die RDS-Funktionen können über die INFO-Taste der Fernbedienung (14) eingestellt werden. -
Seite 17: Technische Daten
TECHNISCHE DATEN Phone Connectivity Wireless Bluetooth® 2.1 mit EDR (Enhanced Data Rate) Betriebsfrequenz: 2402-2480 MHz Maximale ausgestrahlte Leistung gemäß EN 62479: 3,86 dBm CD-Player Abspielbare Formate: CD/CD-R/CD-RW/MP3 UKW-Tuner/DAB+ Tuner FM RDS PLL Tuner (87,5 – 108 MHz) 30 Programm-Speicherplätze DAB+ Tuner (174,928 - 239,200 MHz) 30 Programm-Speicherplätze UKW/DAB-Wurfantenne (75 Ohm) Lautsprecher... - Seite 34 • Folgeschäden an fremden Geräten • Kostenerstattung bei Schadensbehebung durch Dritte ohne unser vorheriges Einverständnis. • Batterien und Akkus. Congratulations! You have made a wise selection in becoming the owner of a MAC AUDIO product. We grant a 2-years warranty for this product.
- Seite 35 Garantiekarte Warranty Card Typ/Type Serien-Nr./Serial-No. Name und Anschrift des Händlers/Stempel Name and address of the dealer/stamp Käufer/Customer Name/Name Straße/Street PLZ, Ort/City Land/Country Kaufdatum /buying date Nur gültig in Verbindung mit Ihrer Kaufquittung! No warranty without receipt!